Utilizing the "Compared At" Feature In Products
In competitive online retail, showcasing deals effectively can make all the difference. The “Compare At” feature is an excellent tool for displaying discounts, allowing you to show both the original and discounted prices side-by-side.
How To Utilize The “Compared At” Feature
Implementing the “Compared At” option is straightforward. Follow these steps to start showcasing your discounts effectively:
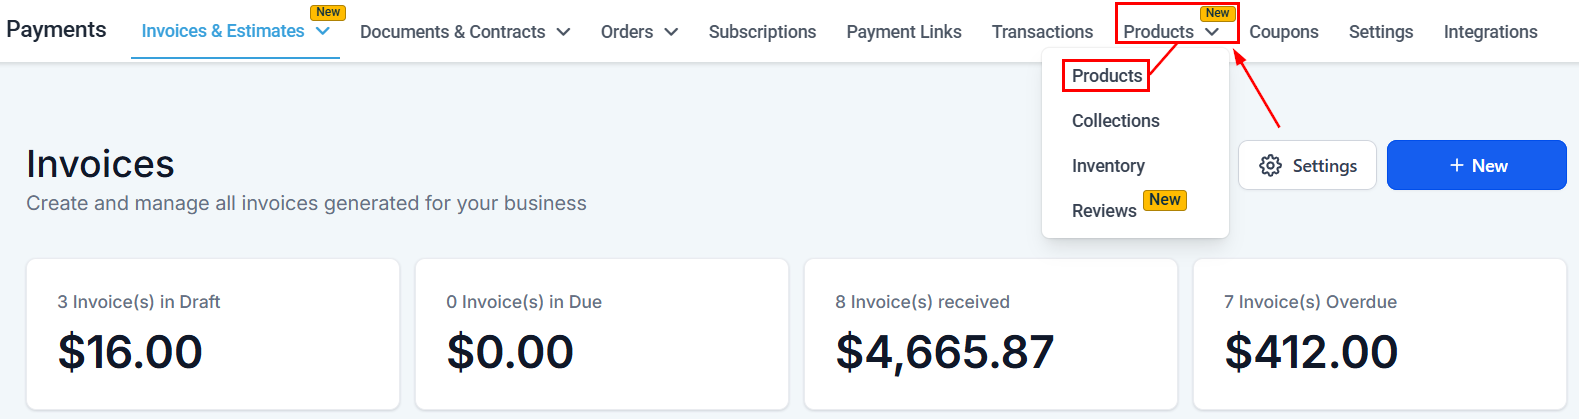
To get started, go to the Payments Section. You will find this in the left navigation panel of your CRM. Once there, hover on the Products dropdown and click on Products.
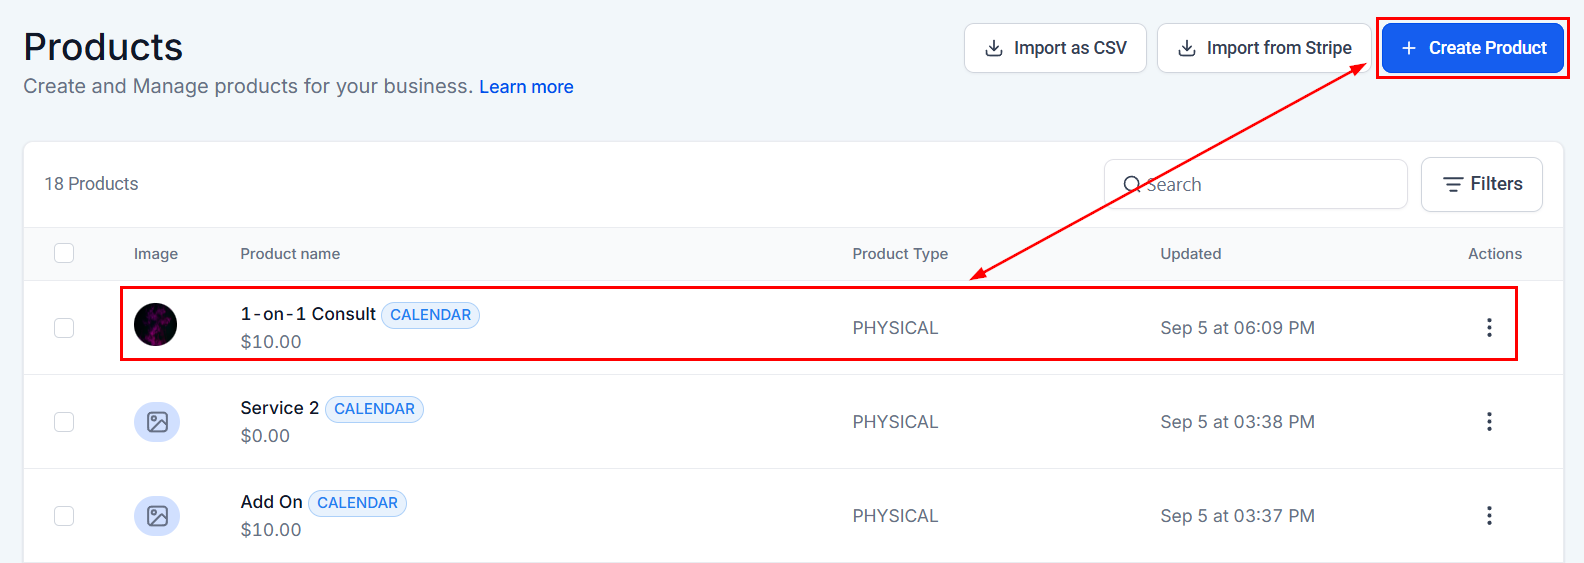
Click “+ Create Product” to start from zero or edit one of your already existing products if needed.
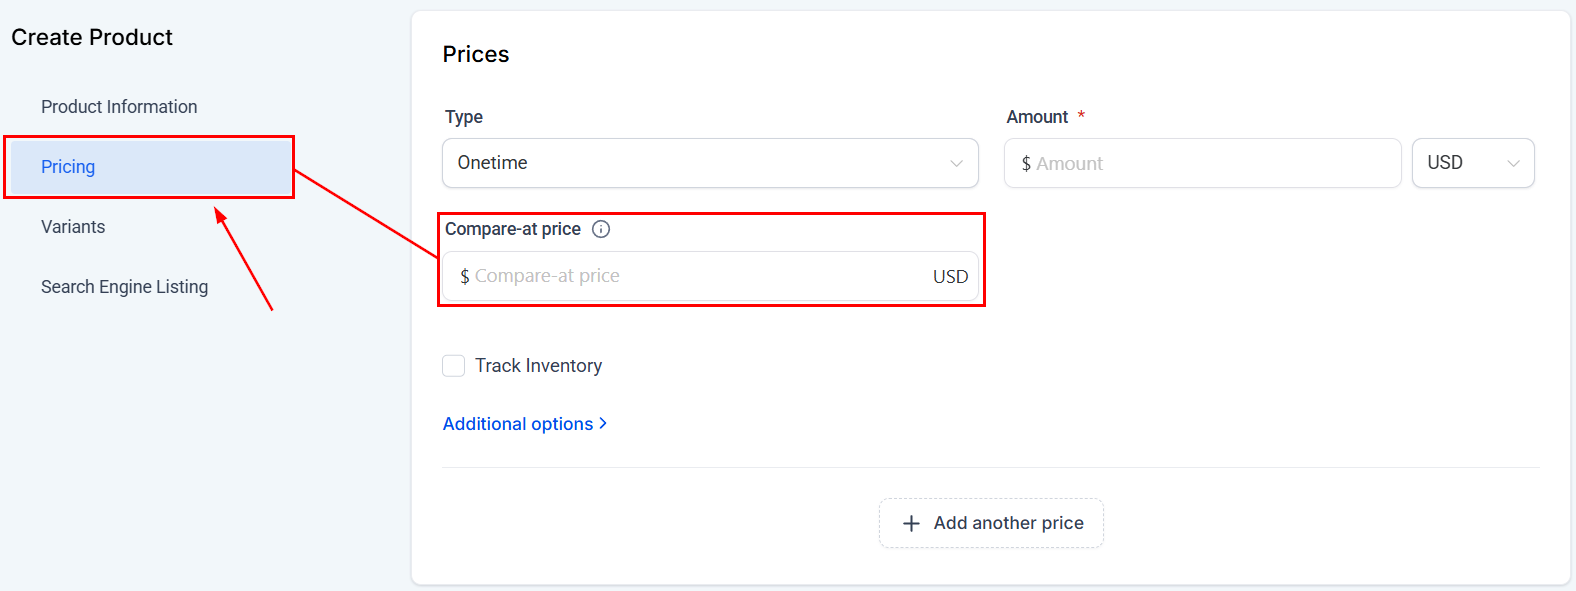
To set the Compare-At Price in the Create Product page, click on Pricing. Here, you can enter the original price under Compare-At Price. Ensure this is higher than your sale price to display a clear discount.
For Products With Variants
If your product has variants, the information you’ve entered will be automatically applied.
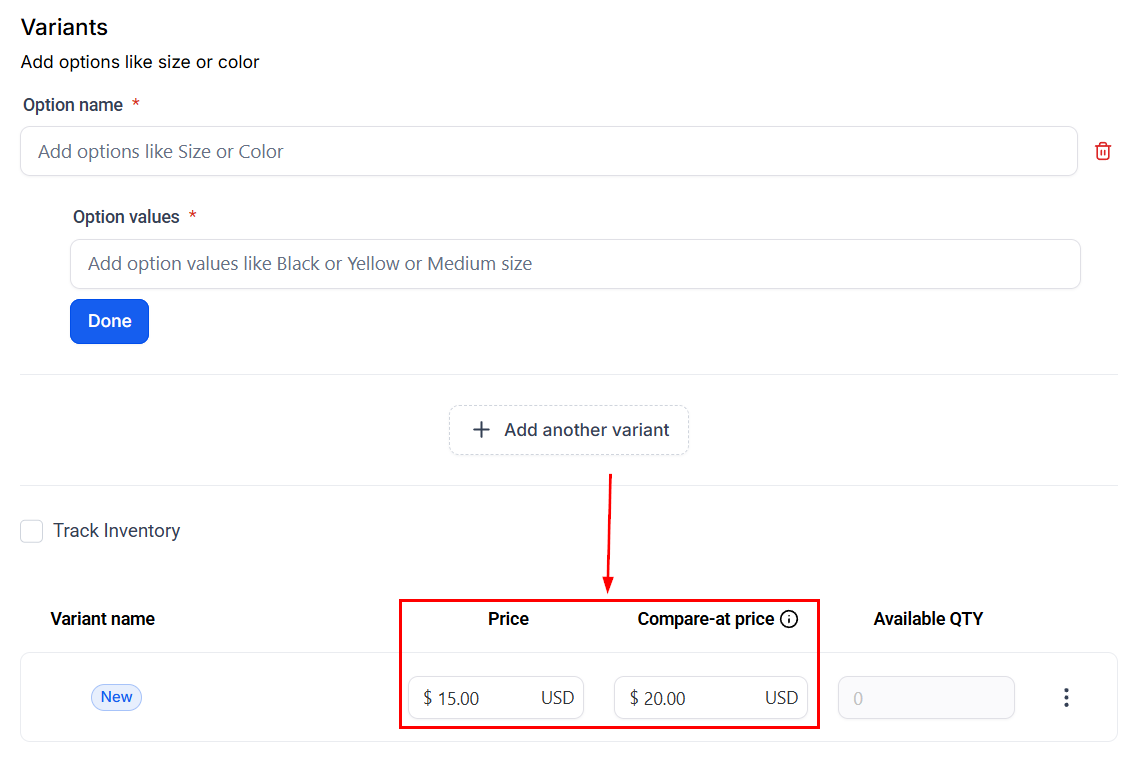
However, upon adding your variants, you can manage the Compare-at Price individually.
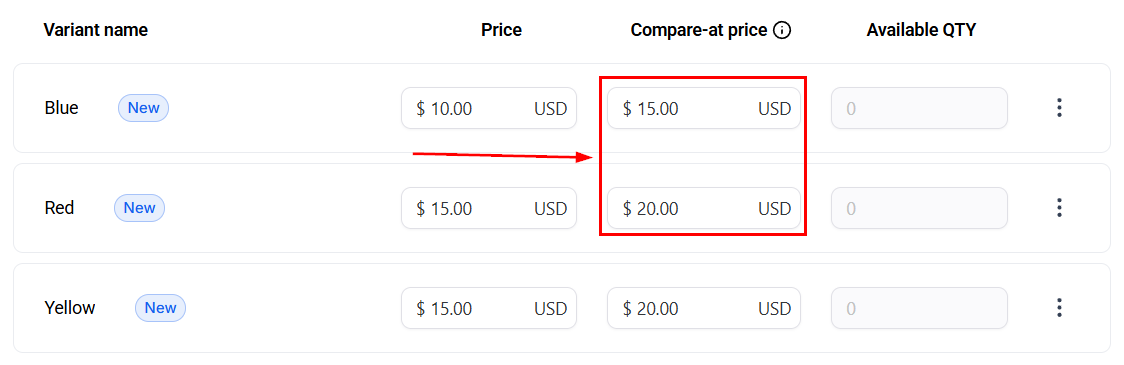
Make sure to click Save once you’ve set your prices. This simple adjustment adds value to your listings by clearly highlighting the savings. Helping you highlight competitive pricing, showcase savings, and encourage customer purchases.
Practical Examples and Use Cases
To better understand how the “Compared At” feature can be utilized, consider the following scenarios:
- Seasonal Promotions: Show the original price beside the sale price during special seasons to attract attention to seasonal discounts.
- Inventory Clear-Outs: Move older stock more efficiently by emphasizing price reductions, helping you clear space and boost sales of older products.
Using the “Compare At” feature is a great way to showcase value and make discounts more visible. It’s easy to set up and automatically updates for each product you add, saving you time while improving transparency. This helps your sales stand out and attract customers looking for great deals.
Troubleshooting Tips and FAQs
Q: What if the compare-at price is not higher than the selling price?
- A: The system will prompt you to adjust the prices accordingly, as the compare-at price must always be higher to effectively showcase the discount.
Q: Can I use the “Compared At” feature for all my products?
- A: Yes, this feature is available for all products within your e-commerce platform on your CRM.
Not a Funnelbud customer yet?
Try our all-in-one CRM for sales and marketing — free for 7 days, no commitment.