Creating Your Chat Widget
You may already know the benefits of having a Chat Widget. It allows you to connect with your customers easily, reduces the churn they might feel on your website, and generates more leads. So, let us help you create one that fits your brand and satisfies your needs.
Creating a New Chat Widget
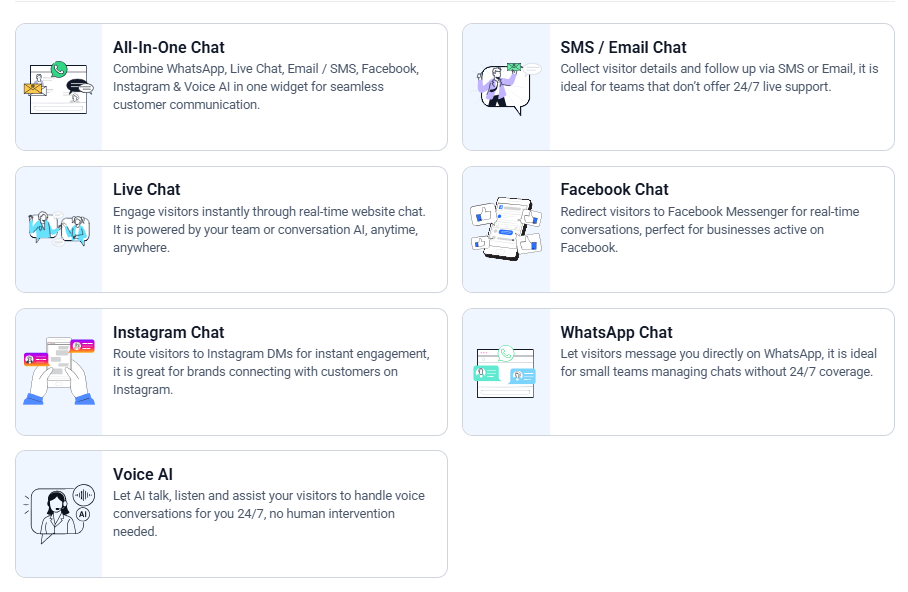
Inside the Chat Widget tab within the Sites section, click the +New button. This will prompt you to select between the Chat widget types: All-In-One, SMS/Email Chats, Live Chat, Facebook, Instagram, WhatsApp, and Voice AI. By default, a SMS/Email chat widget will be added to your list, but you can add as many as you see fit.
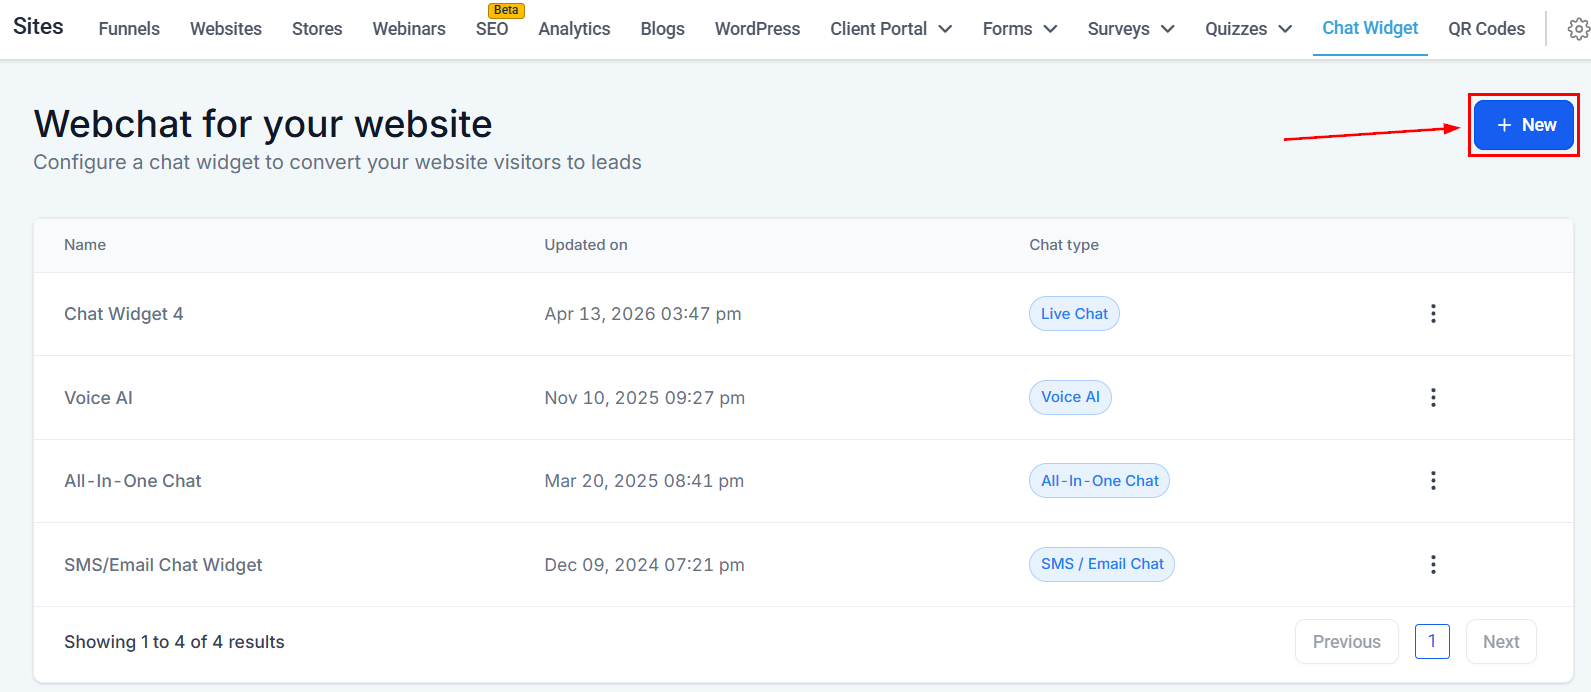
Once you’ve selected the type, you can start personalizing it.
Customizing the Chat Widget
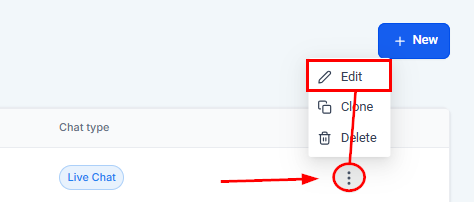
You can make the Chat Widget your own and align it better with your brand by customizing it. When creating a new widget, you’ll be taken to the customization options directly, or if you want to modify a previous widget, click on the three dots (:) icon and select Edit.
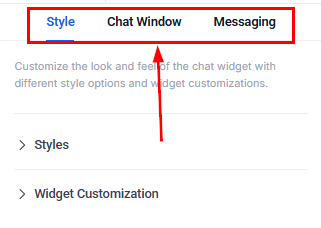
The customization aspect is divided into three tabs Style, Chat Window, and Messaging.
Style
This controls the initial look of the Widget. Here, you can change the colors, image, position, and more aspects related to the widget’s appearance.
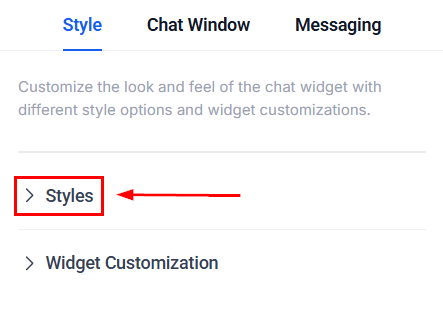
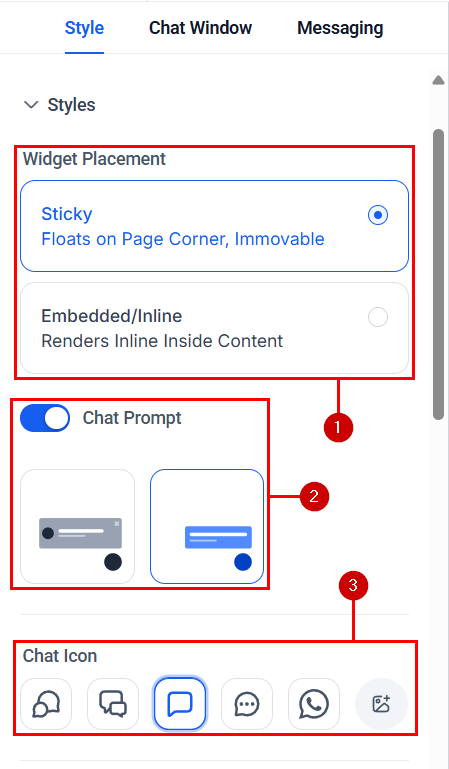
The options will be:
- Widget Placement: Select how you want the widget to be placed inside your page.
- Chat Prompt: Enabling this option will display a greeting message.
- Chat Icon: This corner icon will show in your chat bubble.
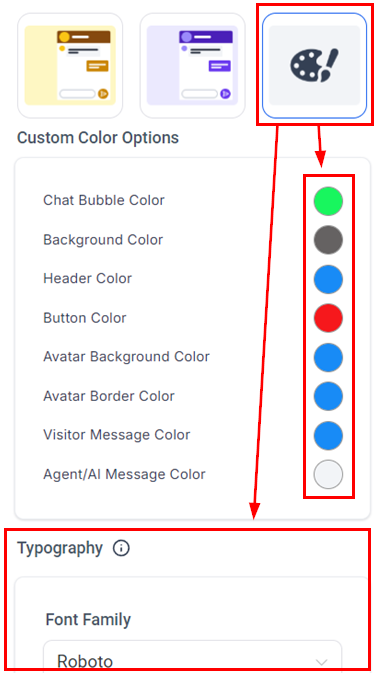
By clicking on the gray paint palette icon, you can customize the colors and typography for each element of the chat widget.
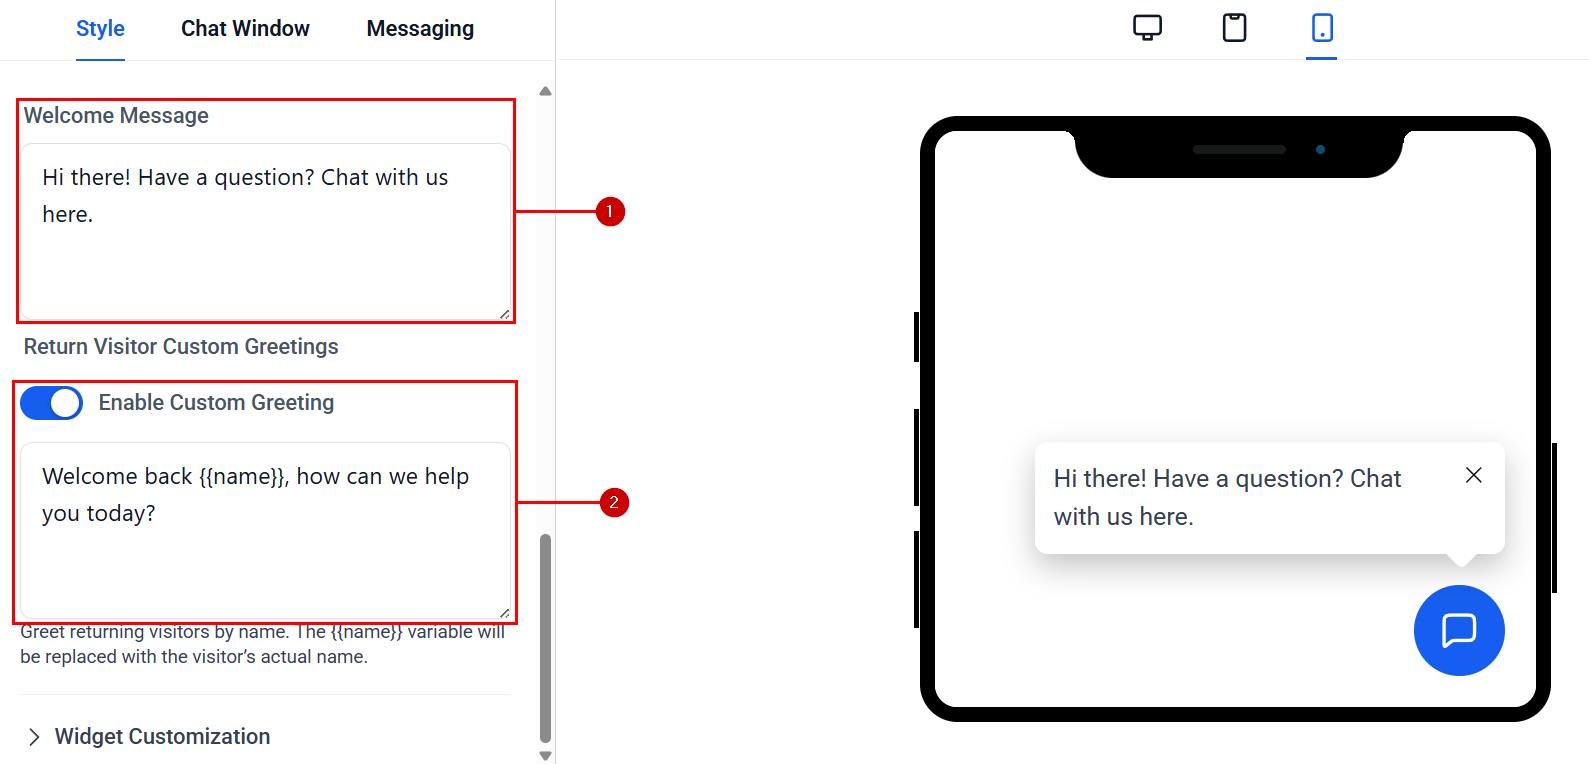
- Welcome Message: This will be the message displayed by the chat bubble, prompting customers to start a conversation.
- Return Visitor Custom Greetings: If this option is enabled, the chat widget will use the saved cookies from previous sections to personalize the message.
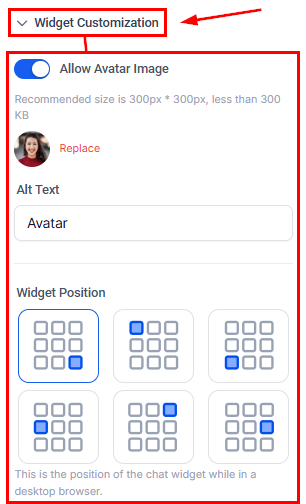
If you would like to display an avatar image, you can replace the default picture with your own and choose where the widget should appear on a desktop browser.
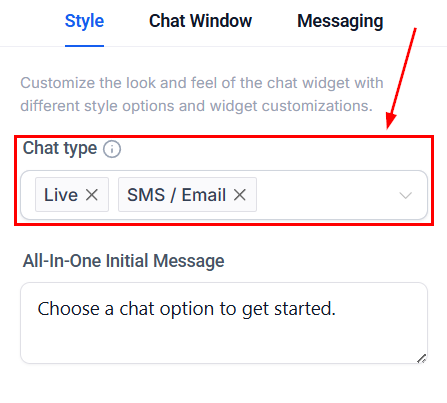
For All-In-One Chat widgets, you must select the available channels and starting message in this section.
Chat Window
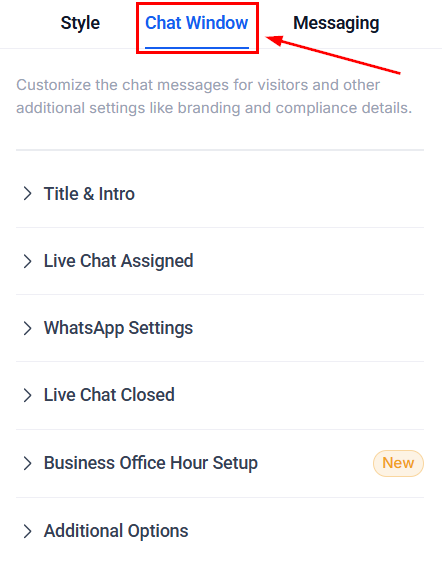
The Chat Window settings affect the user experience within the chat widget. You can customize the title, intro message, and contact form fields, such as name and phone. Additionally, you can enable or disable features like call-to-action redirects and agency branding.
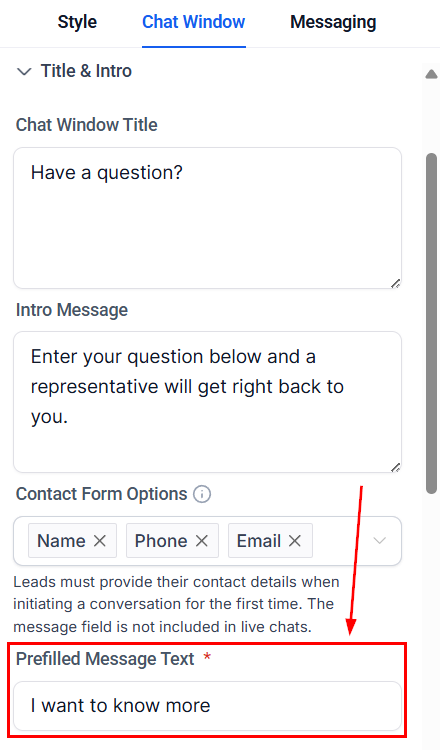
You can edit the Prefilled Message Text for all your chat widgets, except live chat, to give customers an easy way to start interacting. If your Contact Form already has a message field, the pre-defined field is optional, but still available.
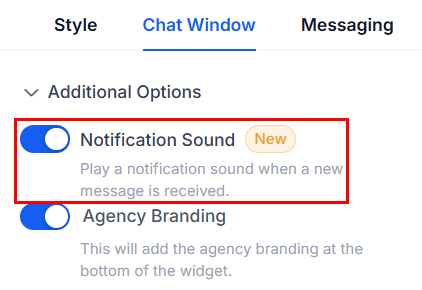
In the Additional Options, enable the Notification Sound option so customers can hear a chime when your team sends a new message.
When enabled, sound notifications play for all key live chat, business hours, system greeting, and form-related messages—including intros, acknowledgements, after-hours notices, contact prompts, and redirects.
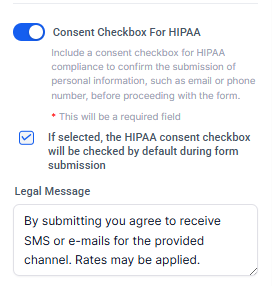
This section also allows you to activate the consent checkbox for HIPAA compliance and input a legal consent message.
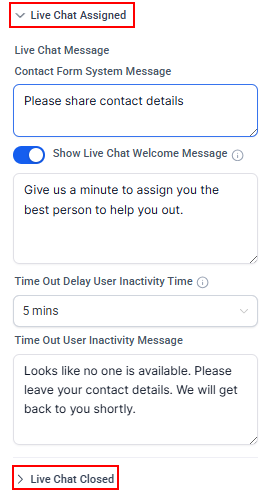
For Live Chat, you can customize messages for when a chat is assigned or closed.
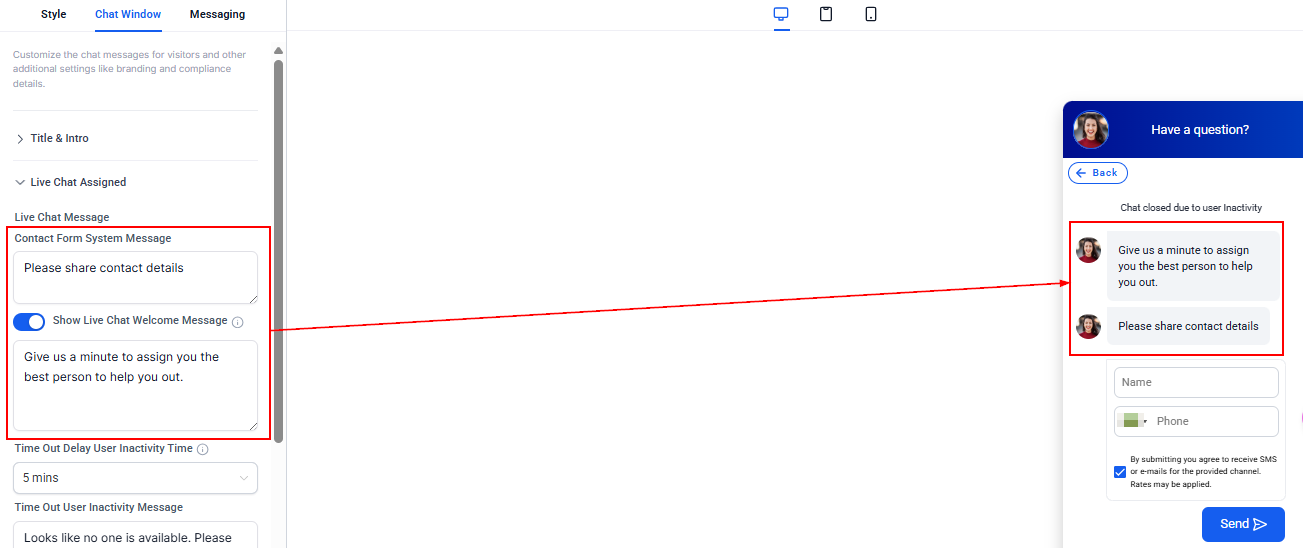
Under the Live Chat Assigned section, you can set the welcome message, inactivity timeout period, and the message shown when the user is inactive.
In the Live Chat Closed section, you can configure the inactivity duration and the message displayed when the chat is closed due to inactivity.
Remember to preview the chat window to see where your changes are being applied.
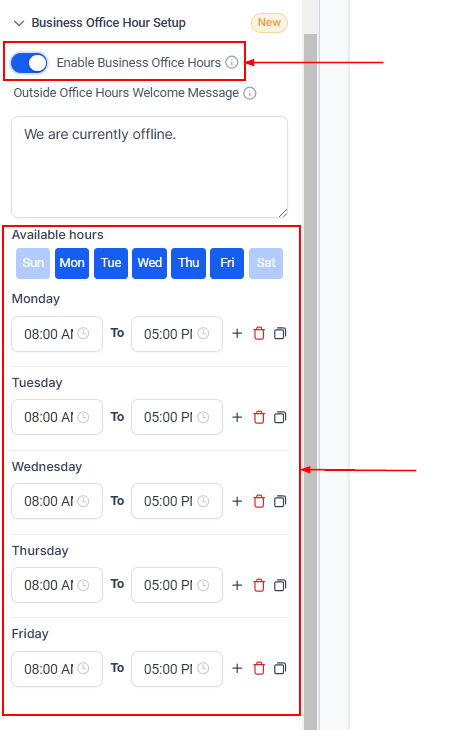
Add your business office hours to live chat by enabling business office hours and adding your business’s available hours.
Messaging
Here you can change the chat widget’s language and the message it sends to acknowledge and finish a chat.
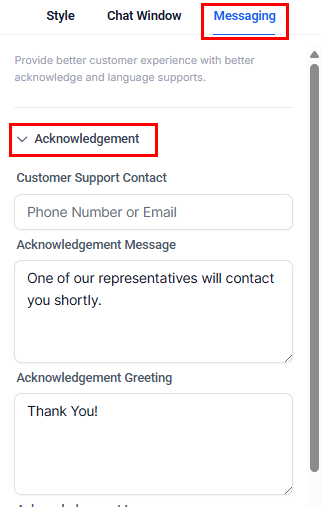
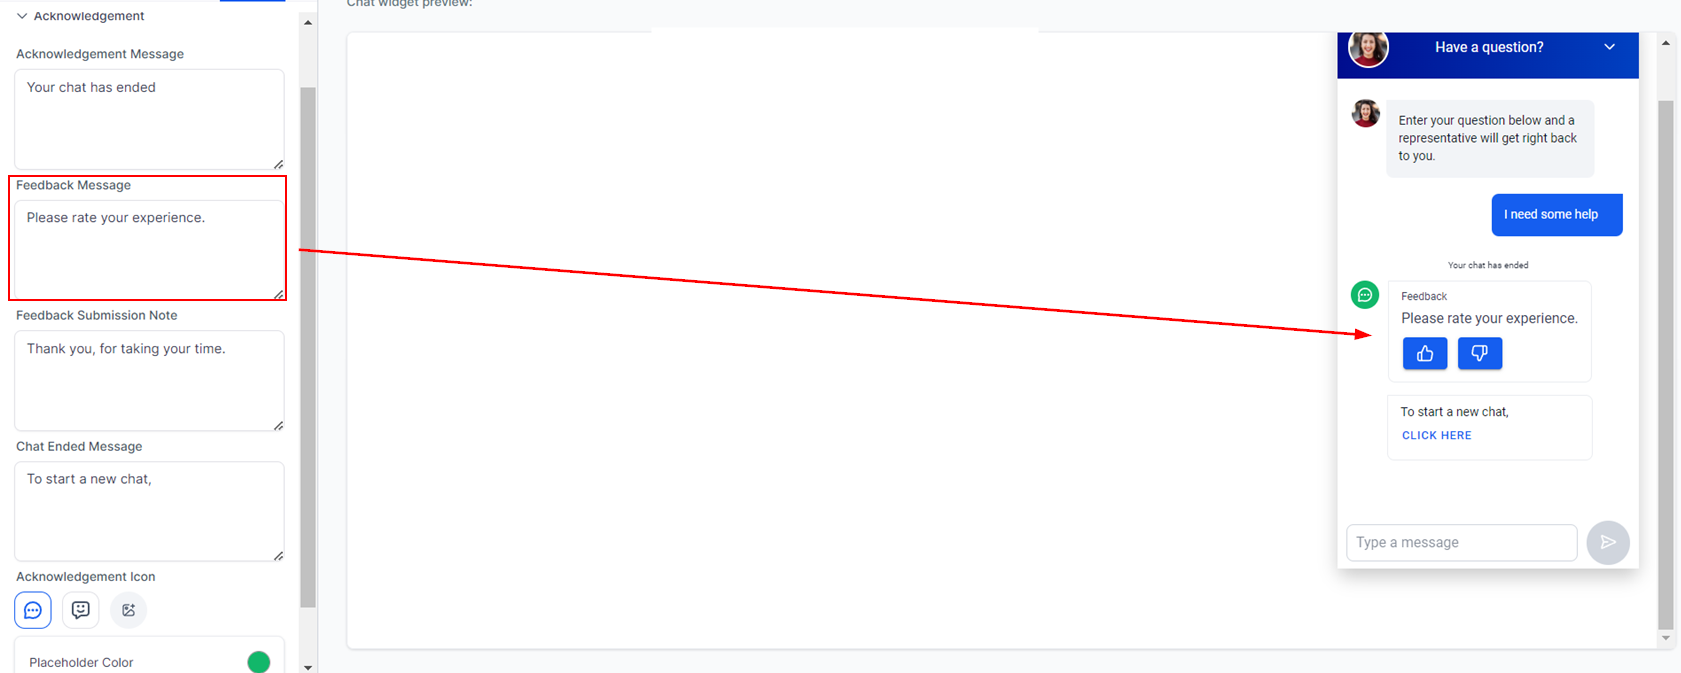
The messages to modify depend on the type of Chat Widget you selected before. With the Live Chat option, you can edit more messages, such as the Feedback-related ones.
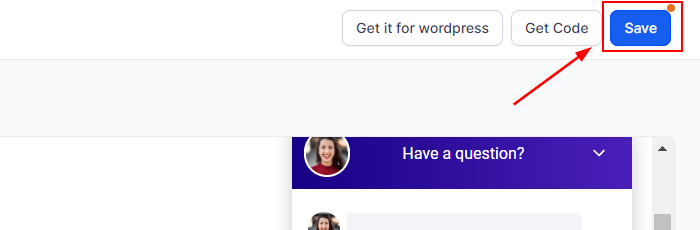
Make sure to click Save once you’re satisfied with the Chat Widget. If you had installed the Chat Widget on a website previously, clicking on Save will implement the changes in the Live version as well.
And there you have it! Now you can create and customize your Chat Widget to embody your brand to the max, keep the customer interactions rolling, and ensure no opportunity is missed. Explore the other articles in this section to learn more about chat widgets.
Not a Funnelbud customer yet?
Try our all-in-one CRM for sales and marketing — free for 7 days, no commitment.