How to Create a Meta Sales Objective Campaign for Conversion
The Sales objective in Meta Ads is designed to drive conversions on both your website and messaging apps. This feature empowers you to optimize your ad campaigns by choosing the most effective conversion location on your website or via Facebook Messenger, Instagram Direct, or WhatsApp. In this guide, we’ll walk you through setting up your Sales objective campaign, provide answers to frequently asked questions, and offer troubleshooting tips to ensure your campaigns deliver results.
Best Practices for Maximizing Sales
Before we begin, here are some tips to bear in mind so you can maximize your campaign outcomes:
- Use high-quality creatives to boost engagement.
- Retarget visitors or engaged users to drive conversions.
- Optimize your campaign for mobile as most Meta Ads traffic comes from mobile devices.
- Test and iterate to continuously improve campaign performance.
How to Set Up a Sales Objective Campaign
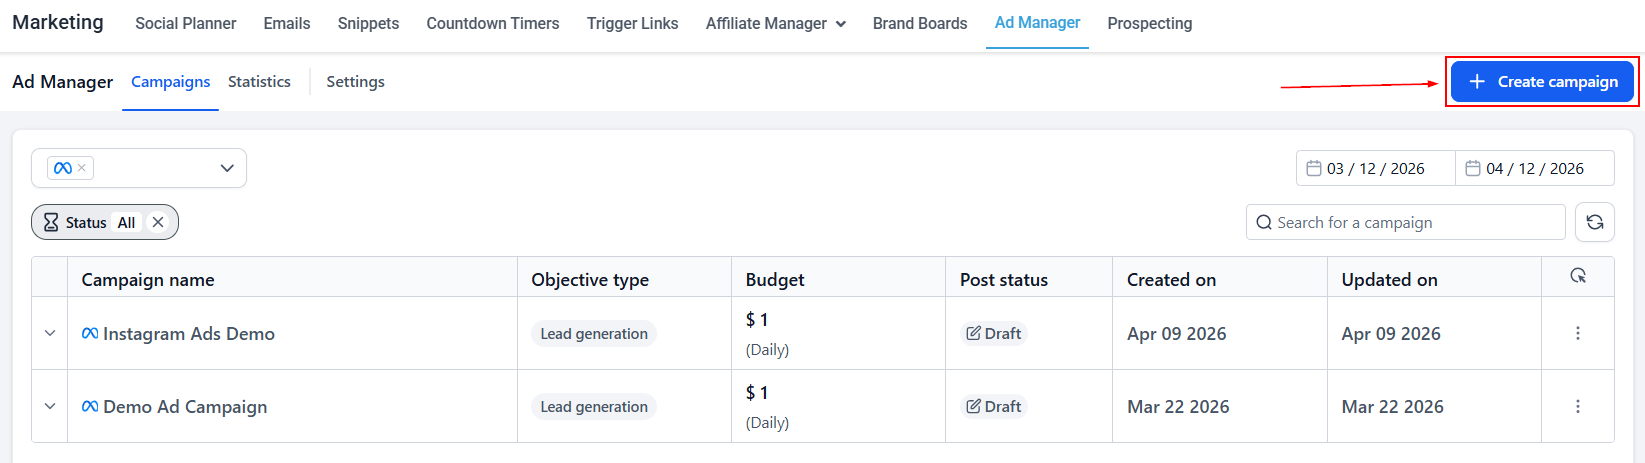
Begin by heading to your account’s Marketing > Ad Manager section and clicking the “+ Create Campaign” button to initiate the process.
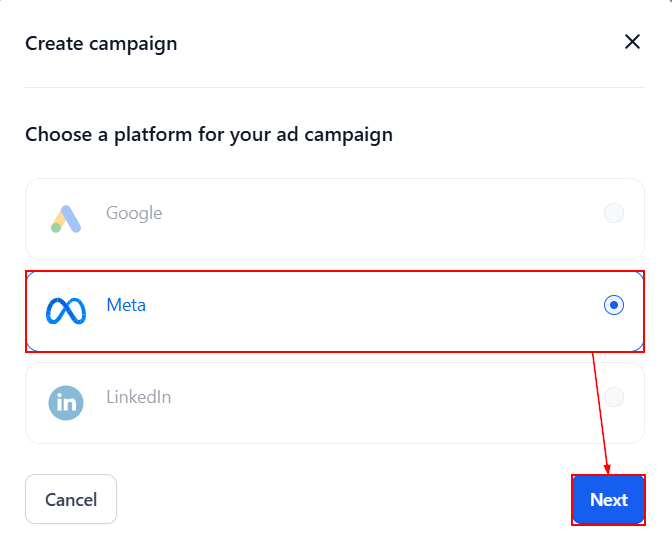
Next, select the Meta Campaign option.
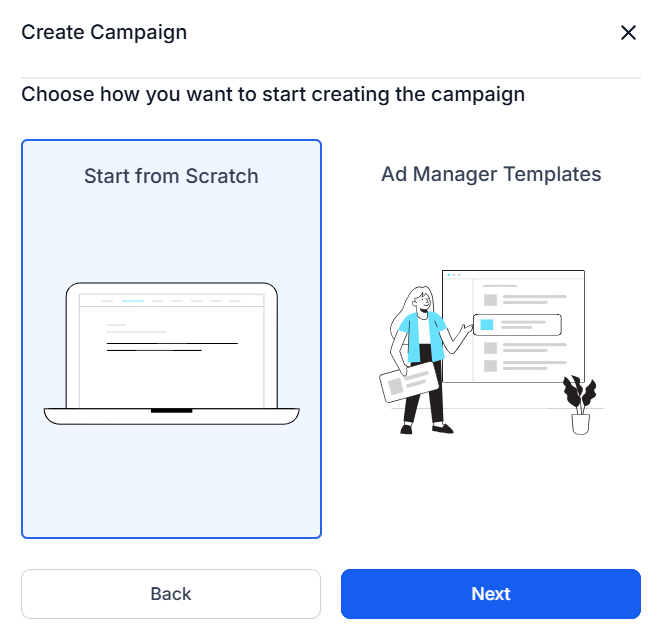
Select whether you want to create the campaign from scratch or use an existing template, then proceed by clicking “Next”.
Campaign Level Setup
Name
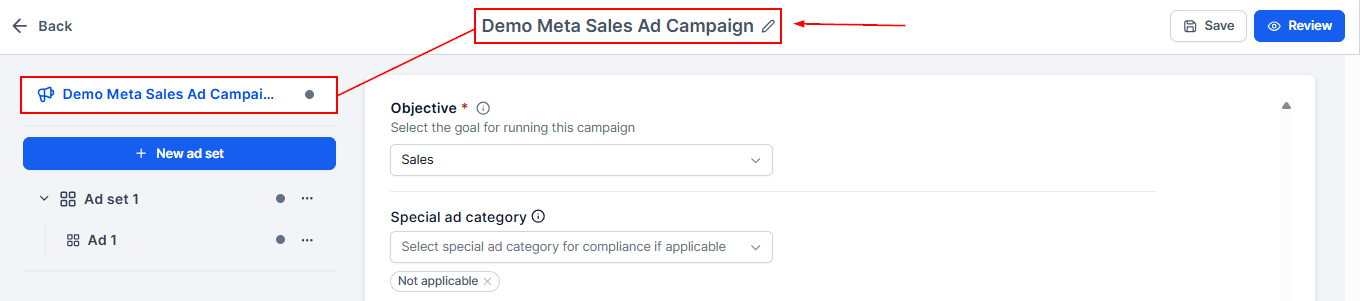
Begin by assigning a unique and descriptive name for your campaign.
Select the Ad Objective
Next, choose “Sales” as your campaign objective.
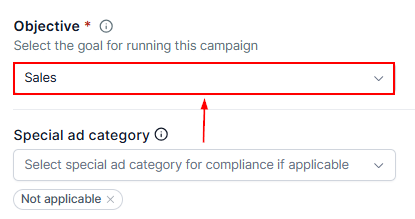
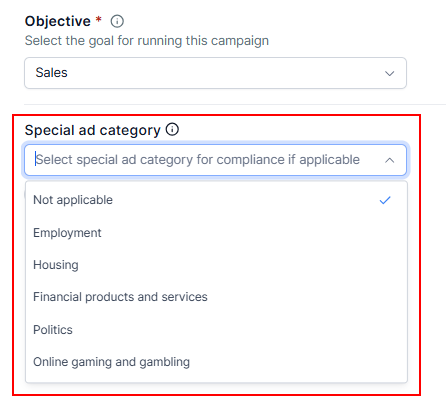
Add categories if applicable.
📌 Note: Special considerations apply for campaigns related to employment, housing, credit, politics, and online gaming or gambling.
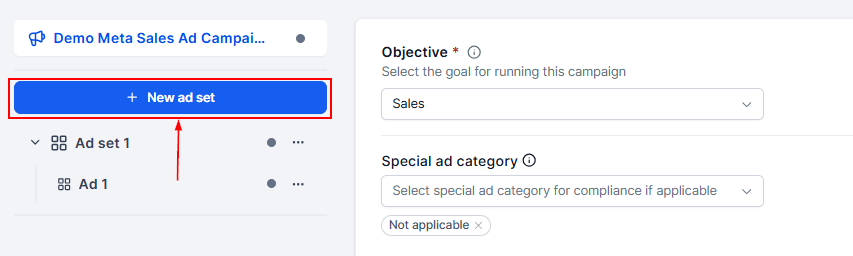
Click the “+New ad set” button to create up to 10 ad sets.
📌Note: The system generates one by default.
Ad Set Level Setup
Ad Set Name
Enter a unique name to easily identify the ad set.
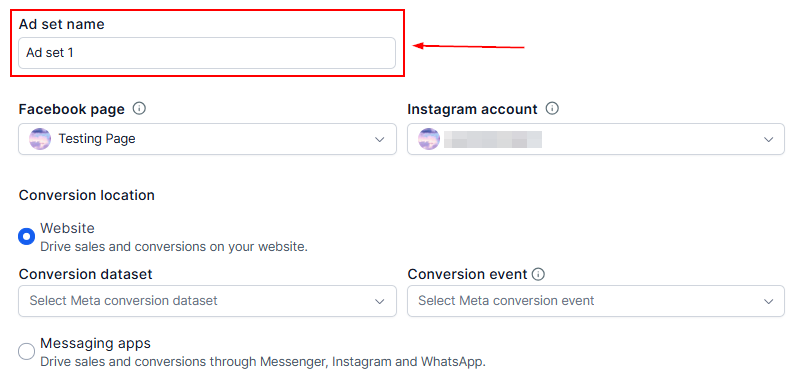
Choose a Facebook Page & Instagram Account
Select your business’s Facebook page and associated Instagram account (if applicable).
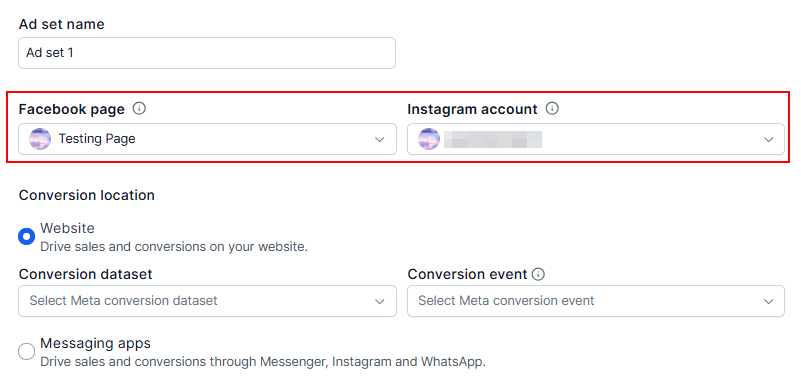
You will then be prompted to select a Conversion Location.
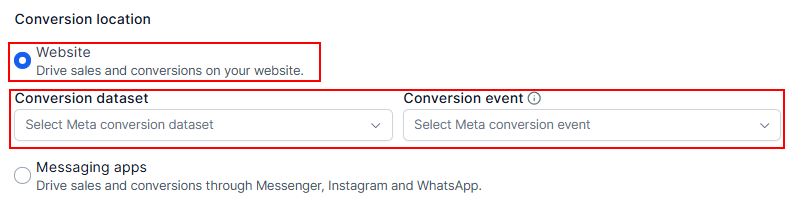
Choosing “Website” allows you to track purchases, sign-ups, or other actions, while the “Messaging Apps” (Messenger, Instagram Direct, or WhatsApp) option encourages direct interactions.
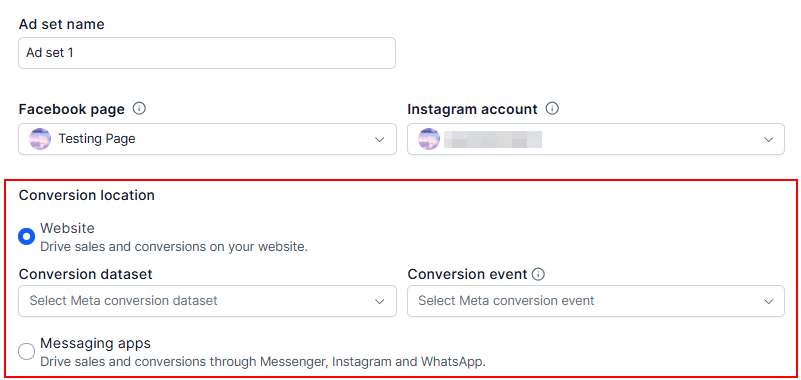
Set Up Conversion Tracking
If you have chosen the website option, ensure the Meta Pixel is installed, and select your conversion event (e.g., Purchase, Add to Cart).
Otherwise, choose your app(s) and set up automated responses to guide users to conversion.
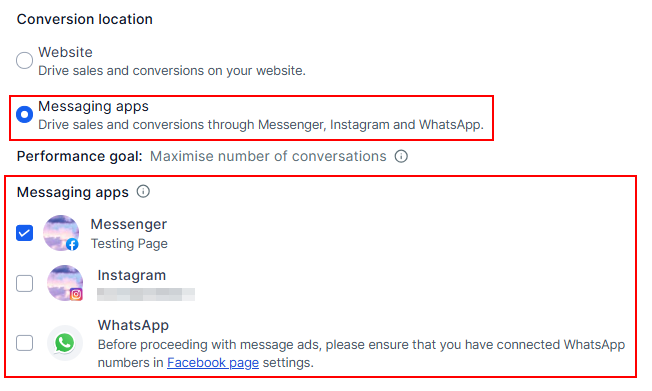
📌Note: Instagram messaging won’t be eligible for direct ads without a connected Instagram account.
Placements
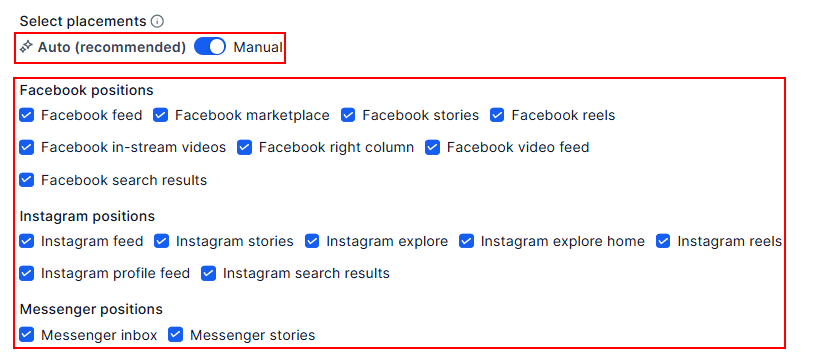
Placements determine where your ads will appear. You can opt for automatic placements, which maximize results across default placements based on your budget, or manual placements, where you select the specific locations for your ads, ensuring brand safety and optimization. In the manual placement section, you will see all available placements.
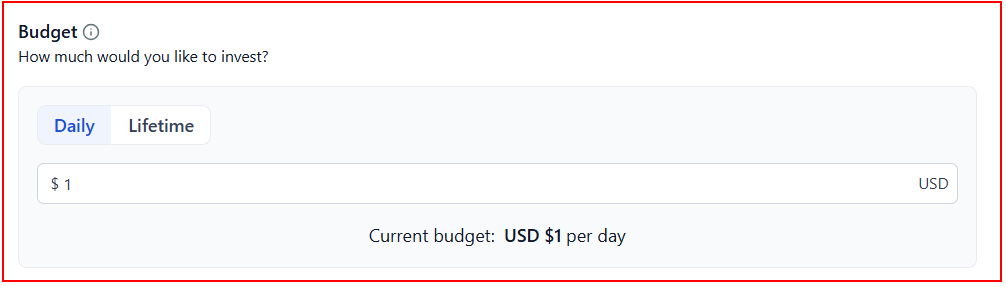
Budget
Specify the average amount you wish to spend on this ad campaign by choosing either a daily or lifetime budget. The charges will be billed to the card associated with your Meta Ad account.
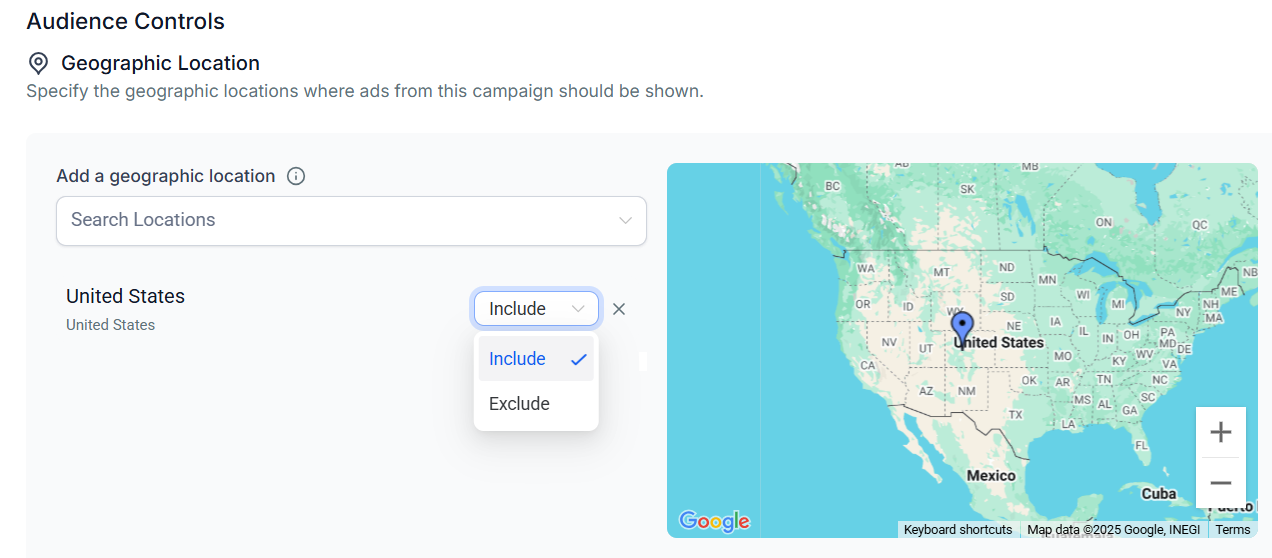
Geography
Tailor your campaign to specific locations or exclude certain areas within a country or state. Selecting a broader geographic area for your ads can enhance campaign performance. For instance, targeting an entire country rather than multiple specific cities can help optimize your reach and results.
📌Note: Ads targeting restricted regions (Australia–Financial Services, Taiwan–Universal, Singapore–Universal, or Worldwide, including these regions) are blocked by Meta.
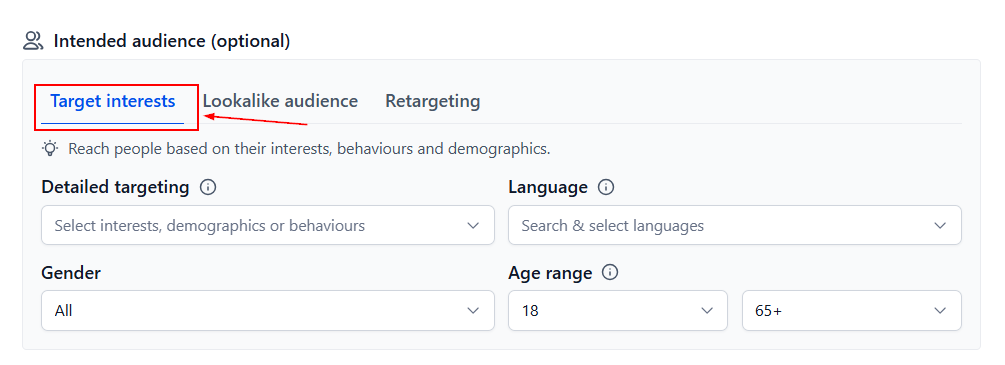
Optional Settings
Further refine your campaign with specific options for interest, gender, language, and age group within the Target Interests section.
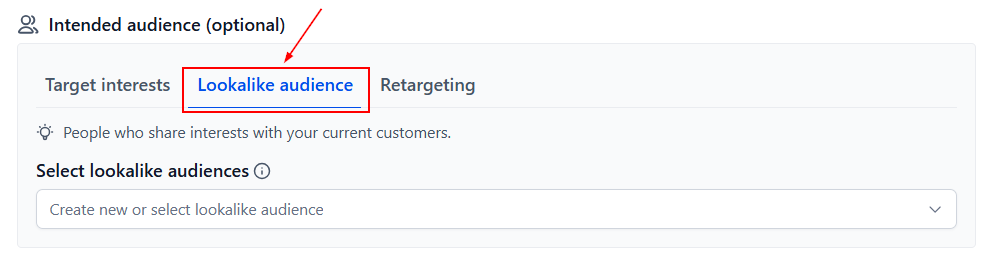
Furthermore, select up to 15 lookalike audiences from the dropdown to be used in a campaign as the target audience.
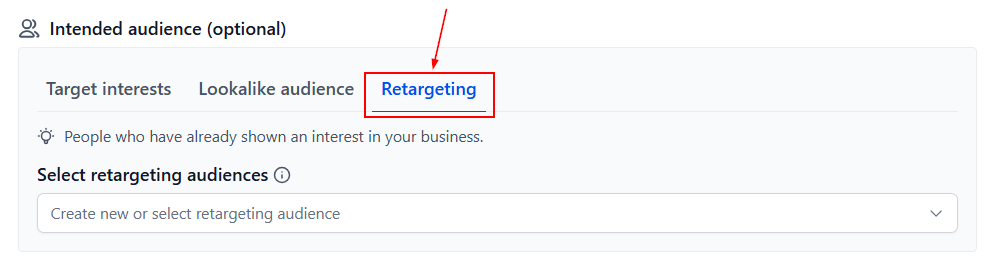
Otherwise, you can select up to 15 retargeting audiences from the Retargeting dropdown to be used in a campaign as the target audience.
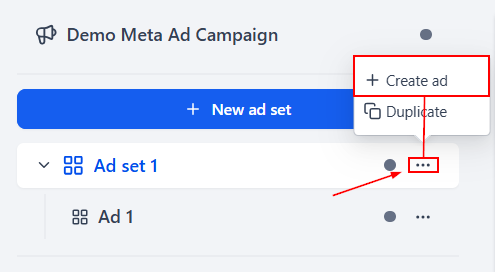
Click the three dots associated with the ad set to create up to 10 ads.
📌Note: The system generates one by default.
Ad Level Setup
Assign a descriptive name for your ad in the Ad Name field.
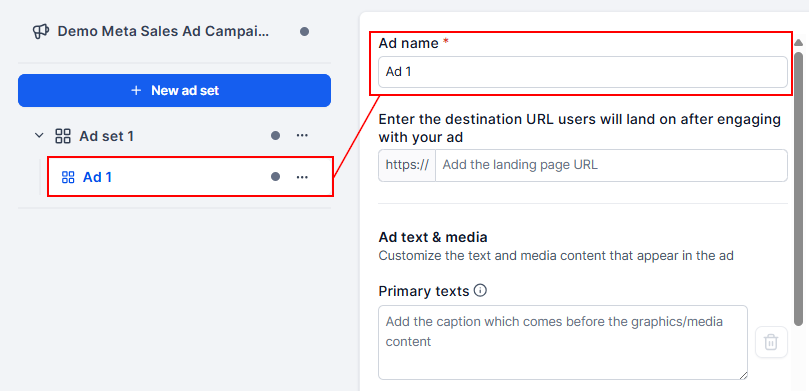
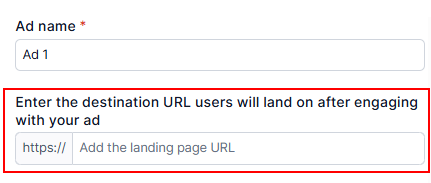
If you chose the Website conversion location in the Ad set level, enter the destination URL in the field provided.
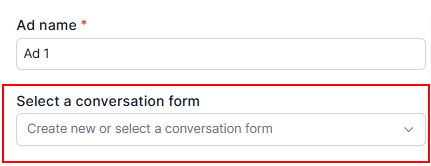
Otherwise, select a conversation form to be used with your messaging apps.
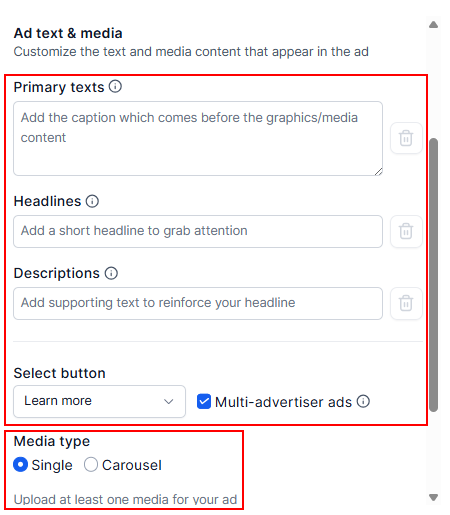
After completing the steps above, select an ad format (Single Image/Video or Carousel) and upload creative assets, including a compelling Call-to-Action (CTA).
Review & Publish
After completing each section of your campaign setup, proceed to the Review and Publish section to review all your settings. Ensure everything aligns with your goals, and when you’re confident that everything is in place, click Publish to launch your campaign.
Once your campaign is live, monitor your conversions through Meta Pixel and evaluate performance in Ad Manager. Use the insights gathered to refine and optimize your campaign by adjusting your budget, creatives, or audience targeting as needed.
By following these steps and leveraging the Sales objective effectively, you’ll be well-equipped to drive conversions and scale your business successfully.
Frequently Asked Questions
Q: How do I track conversions on my website?
- Install Meta Pixel to track events like purchases or add-to-cart actions.
Q: Can I use both Website and Messaging Apps in one campaign?
- No, you must choose one conversion location per campaign.
Q: Do I need extra code for Messaging Apps?
- No, but ensure messaging apps are set up correctly to track interactions.
Troubleshooting Tips
Website Conversions Not Tracking
- Ensure Meta Pixel is installed correctly and firing on the right pages. Use the Pixel Helper tool to verify.
Messaging App Conversions Not Tracking
- Confirm messaging apps are set up and linked to your business account.
Campaign Not Delivering
- Adjust your budget, refine your audience targeting, or test new creatives.
Low Conversion Rates
- Optimize your landing page, refine targeting, and refresh ad creatives.
Not a Funnelbud customer yet?
Try our all-in-one CRM for sales and marketing — free for 7 days, no commitment.