How to Integrate Razorpay
Integrating Razorpay offers a seamless solution for managing payments and enhancing your customer relationship management (CRM) capabilities. This integration allows businesses to process transactions efficiently, streamline payment workflows, and improve overall financial management.
In this article, we will explore the benefits of integrating Razorpay, provide a step-by-step guide on completing the integration, and address frequently asked questions and troubleshooting tips.
Benefits of Integrating Razorpay
- Streamlined Payment Processing: Razorpay’s integration with the CRM facilitates smooth and secure payment transactions directly within the platform, reducing the need for manual processing.
- Enhanced CRM Capabilities: By integrating Razorpay, you can automatically sync payment data with your CRM, allowing for better tracking of customer interactions and financial transactions.
- Improved Financial Management: Access to comprehensive payment reports and analytics helps make informed financial decisions and monitor payment trends.
- Convenient Customer Experience: Customers benefit from a seamless payment experience with various payment options, including credit/debit cards, net banking, and digital wallets.
- Automated Workflows: Automate invoicing and payment reminders, reducing administrative tasks and ensuring timely follow-ups.
How to Integrate Razorpay
Set Up Your Razorpay Account
- Create a Razorpay Account: If you do not already have a Razorpay account, visit the Razorpay website and sign up for an account.
- Obtain API Keys: Once your account is set up, log in to the Razorpay Dashboard. Navigate to Settings -> API Keys to generate and retrieve your API Key and API Secret. These credentials are required for the integration.
Configure Razorpay in the CRM
- Access Payment Settings: To begin the setup process, navigate to the Payments > Integrations tab from your account dashboard.
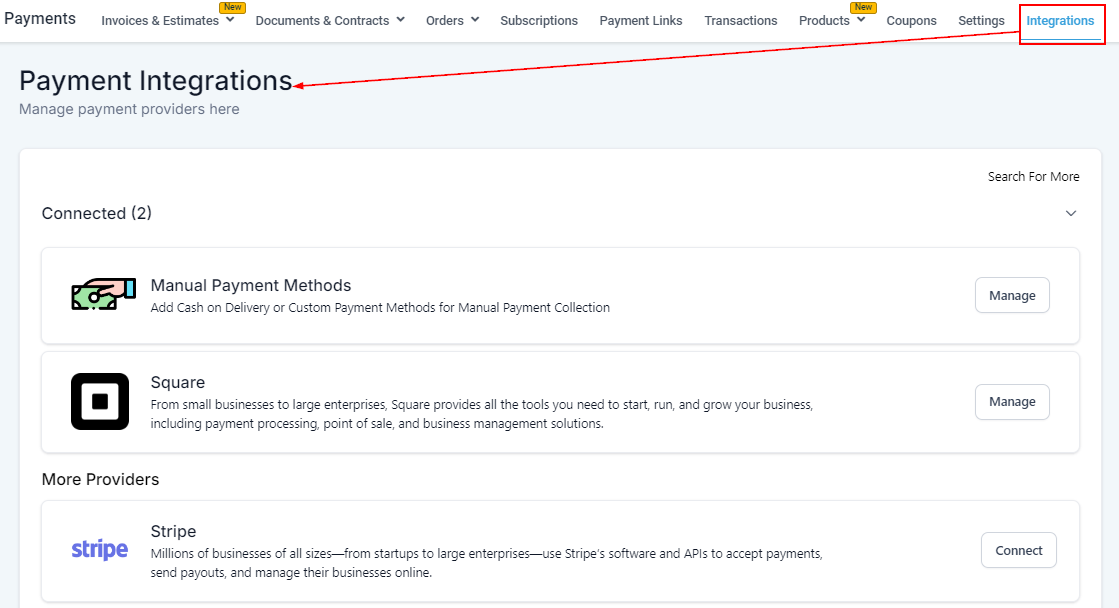
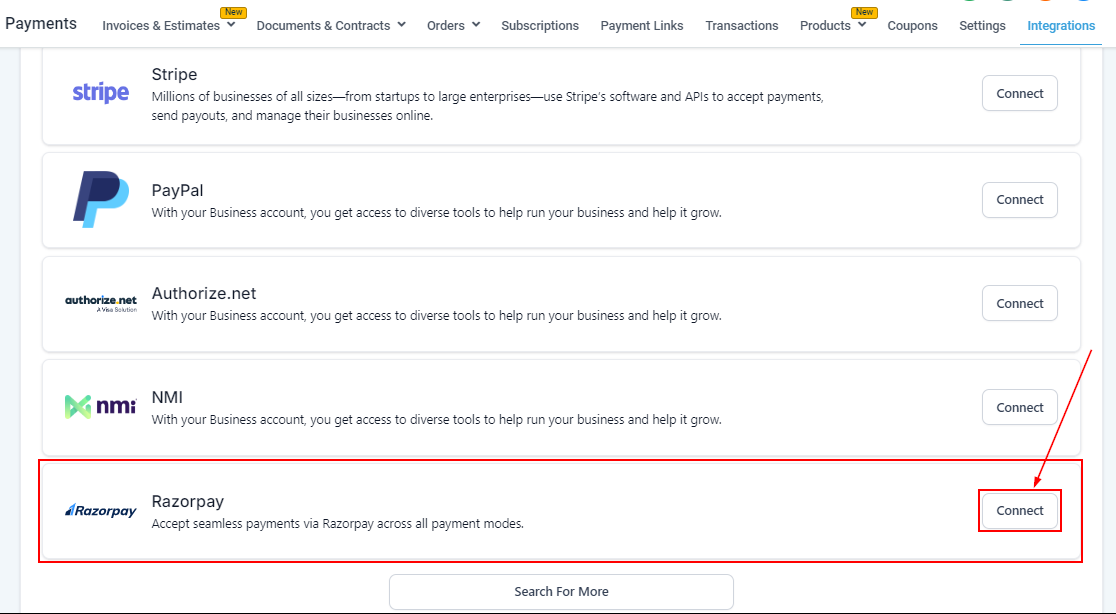
Scroll down and choose Razorpay from the list of available payment gateways.
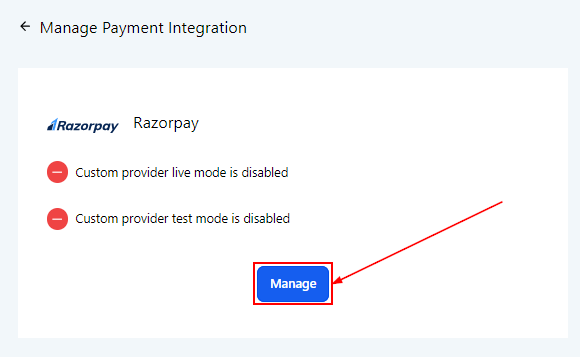
This action will open a panel allowing you to view and Manage the integration.
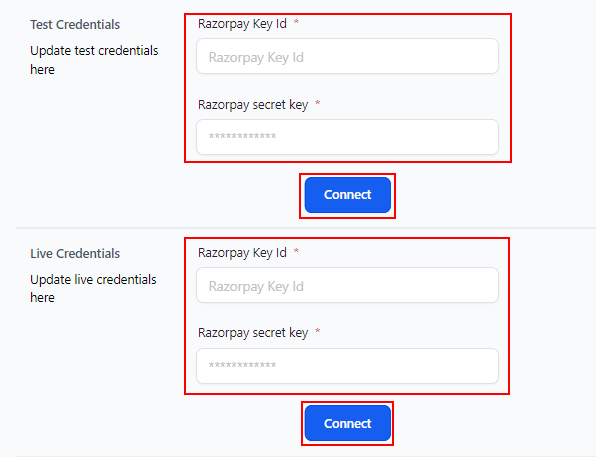
Enter the API Key and API Secret obtained from your Razorpay account into the respective fields, then Click Connect to complete the integration process. The CRM will now be connected to your Razorpay account, allowing you to process payments directly within the platform.
Test the Integration
To ensure that the integration is working correctly, create a test payment scenario. Verify that the transaction is processed successfully and that payment details are accurately reflected in both your CRM and Razorpay dashboards.
Frequently Asked Questions
Q: What payment methods does Razorpay support?
- Razorpay supports various payment methods, including credit/debit cards, net banking, UPI, and digital wallets.
Q: How do I handle payment disputes or refunds?
- Payment disputes and refunds should be managed through the Razorpay dashboard.
Troubleshooting Tips
Integration Issues:
- If you encounter issues with the integration, double-check that you have entered the correct API Key and API Secret from Razorpay. Ensure that there are no typos or incorrect characters.
Payment Processing Errors:
- Verify that your Razorpay account is active and properly configured. Check for any account-related issues that may affect payment processing.
Not a Funnelbud customer yet?
Try our all-in-one CRM for sales and marketing — free for 7 days, no commitment.