How to Create a Personal Calendar
Personal calendars enable you to organize your day while maintaining closed and familiar meetings, thereby improving overall communication and trust. At the same time, this aims to simplify single-user experiences and cater to your specific needs.
To set yours, navigate to the Calendar Settings tab inside the Calendars section.
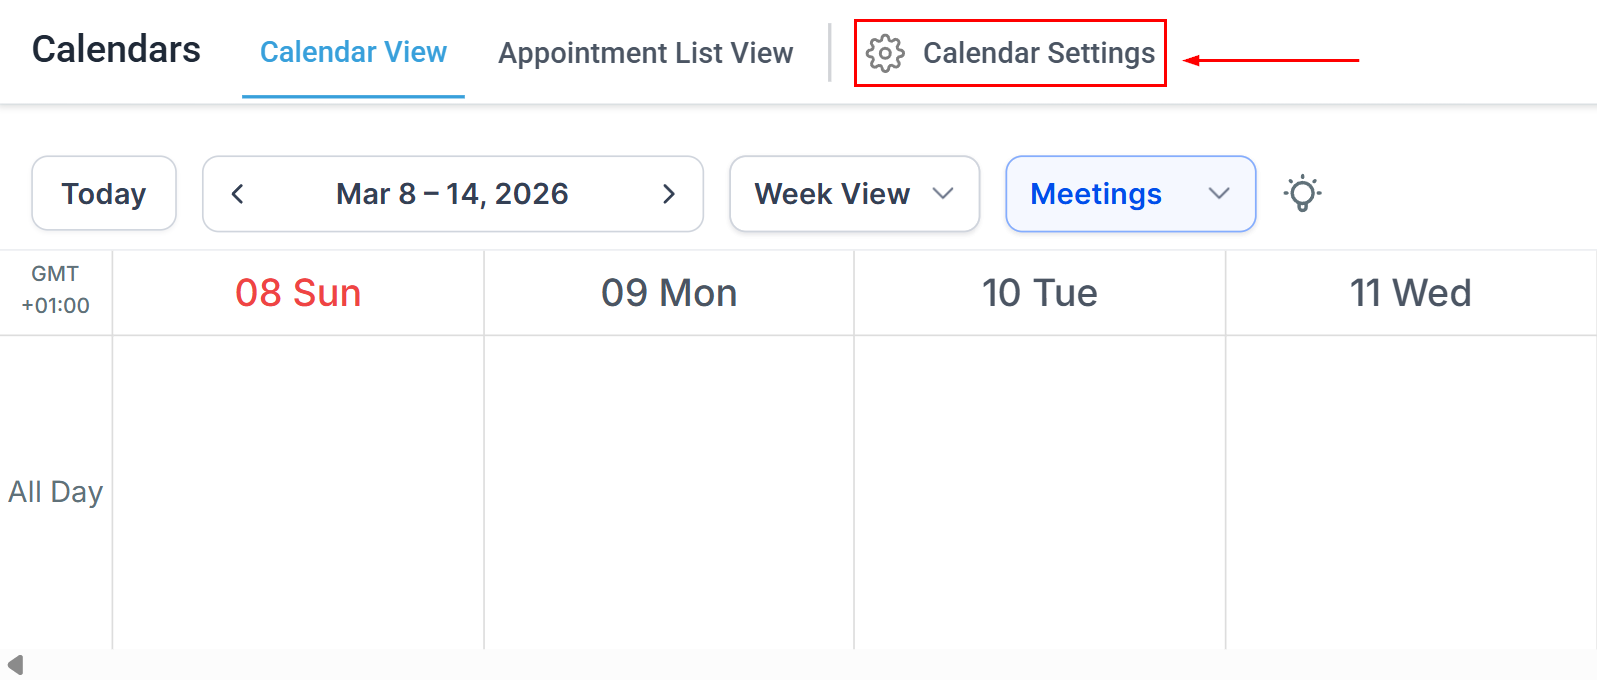
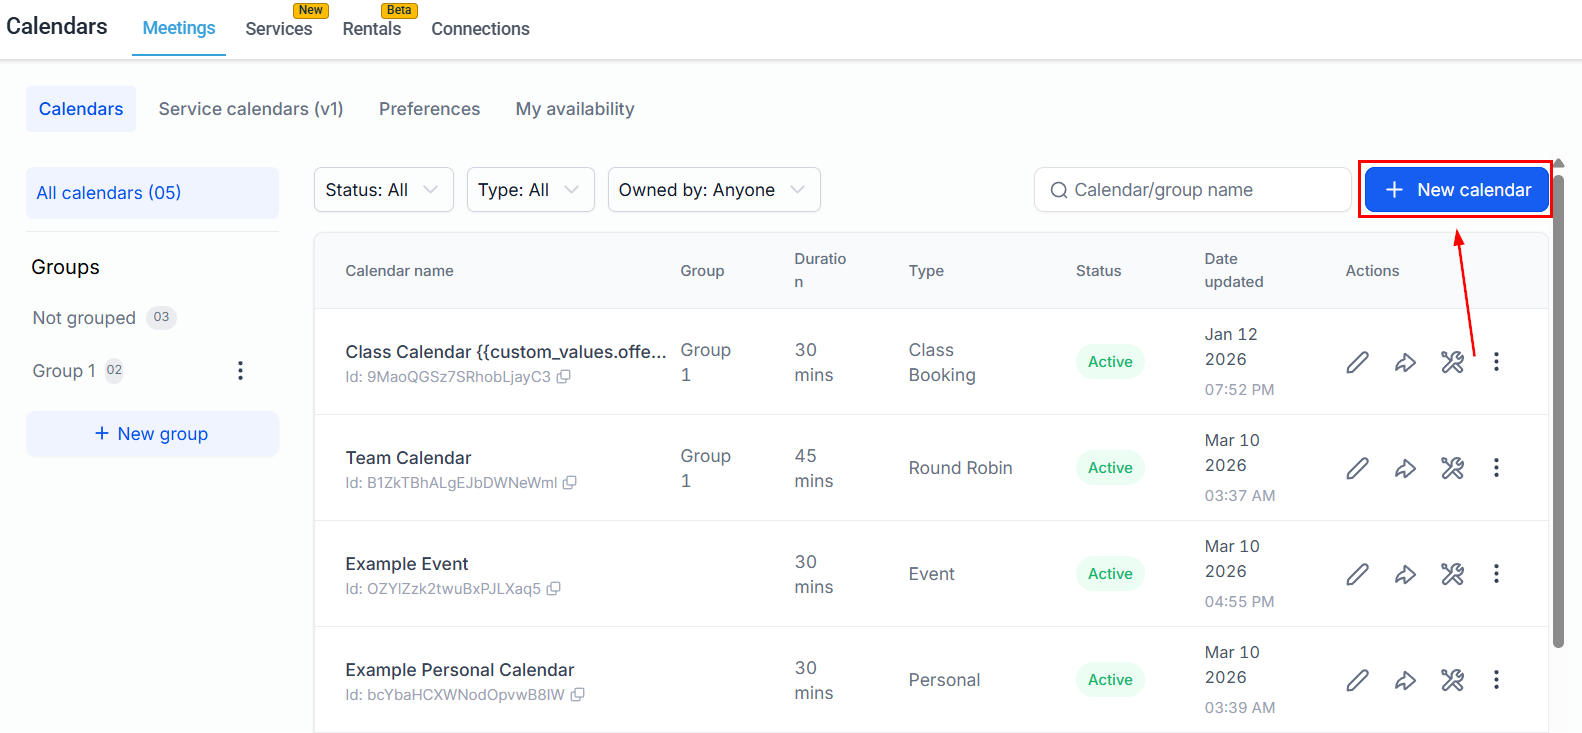
Click New Calendar.
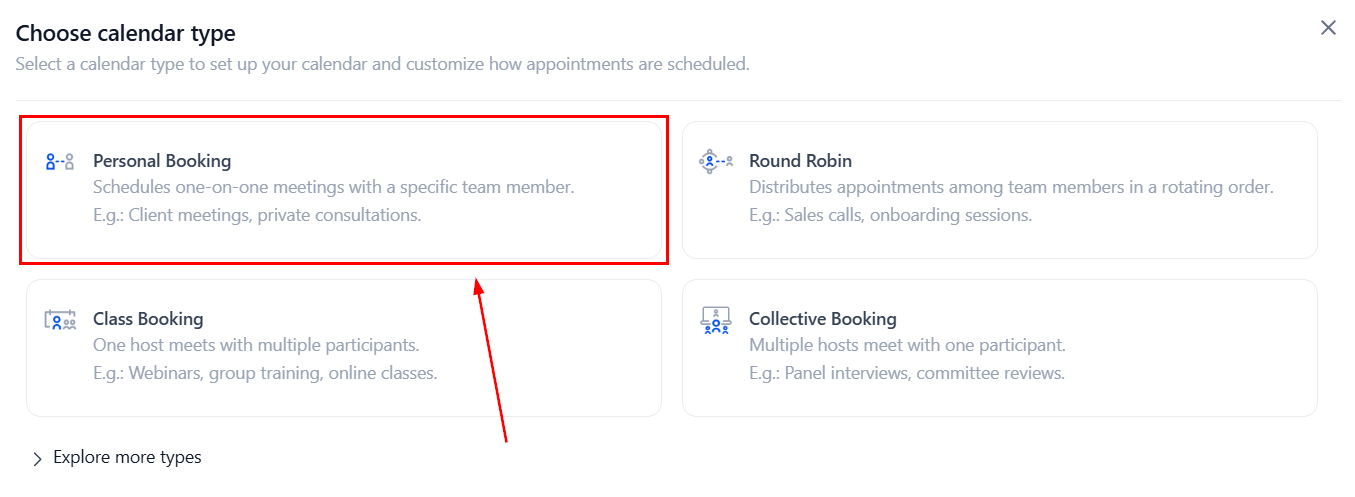
Select Personal Booking.
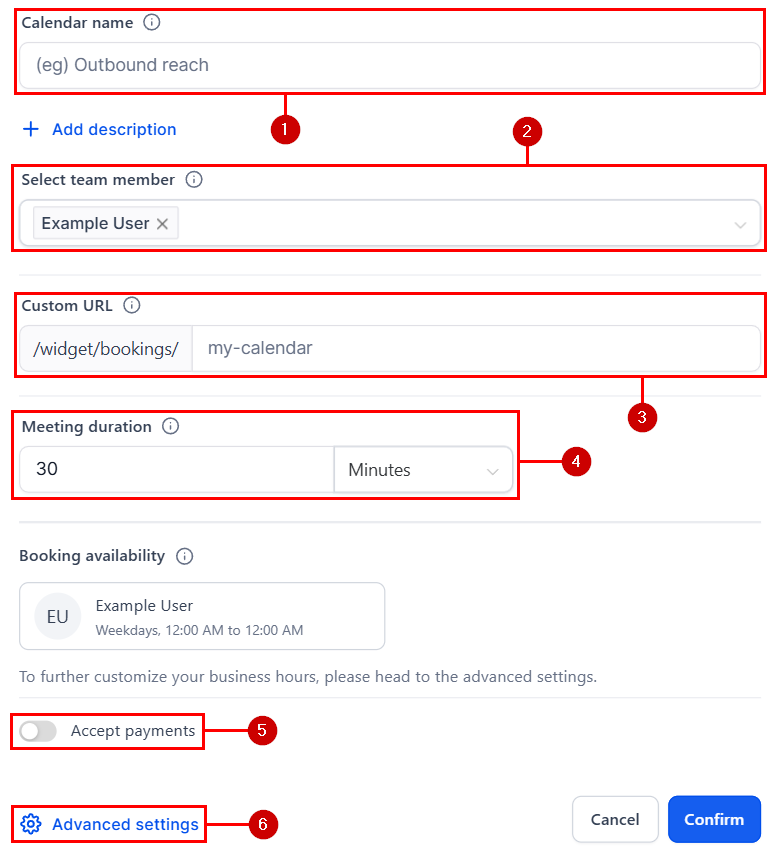
Once you select this calendar type, you will be directed to the Initial Setup, where you’ll take the first steps in getting your calendar ready to go. Those will be:
- Calendar Name: The name will show why they are scheduling an appointment for leads and customers.
- Team Member: The user who creates the calendar will be included by default, but you can change the team member as needed by clicking the X icon and then selecting a new team member.
- Calendar URL: Type in the calendar slug here.
- Meeting Duration: This will define how long the appointment should last.
- Accept Payments: Toggle this option on to accept client payments for this calendar.
- Advanced Settings: Once you’ve set the basics, click here to customize your calendar to your company’s specifications.
Basic Details
These are the details that will be visible to your leads and customers; they give a better understanding of what the appointment will be about. These details will be:
- Calendar Logo: Here, you can add your company’s logo or any other image that helps you represent the appointment.
- Description: Any information you consider relevant about the appointment, including a short explanation of what it is and any extra requirements you have for it.
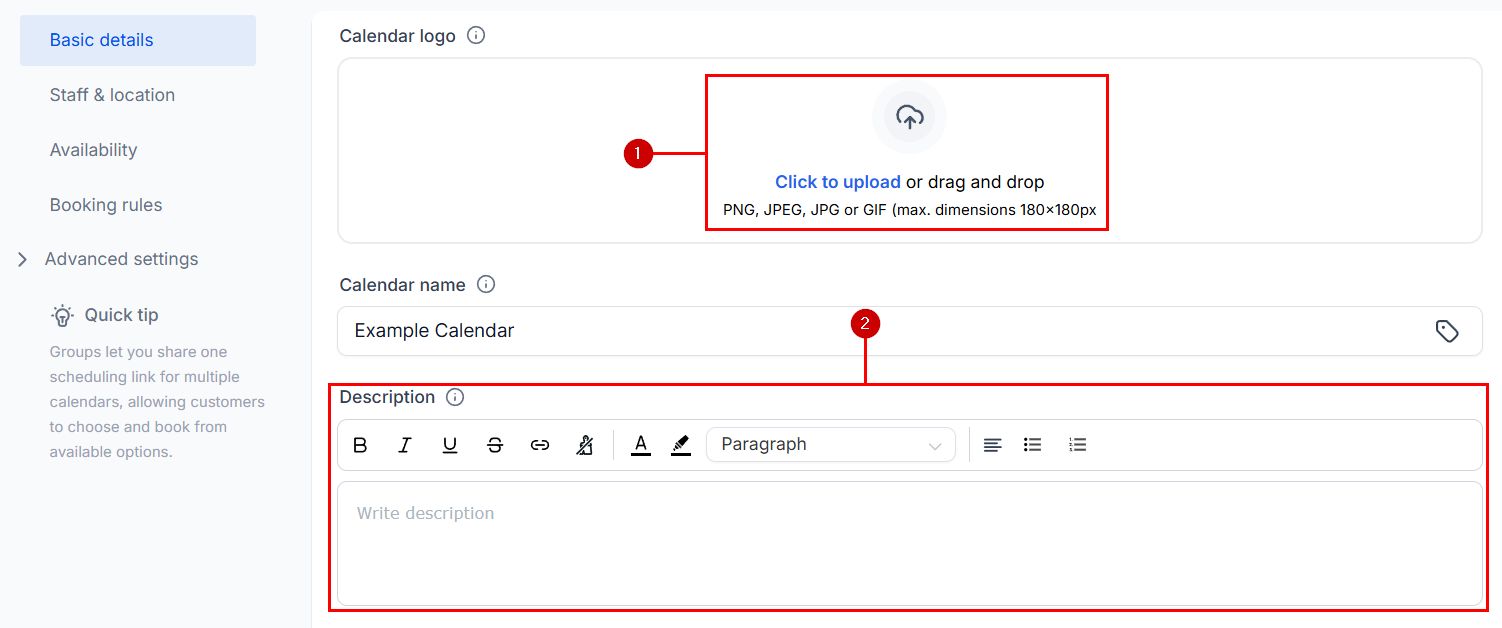
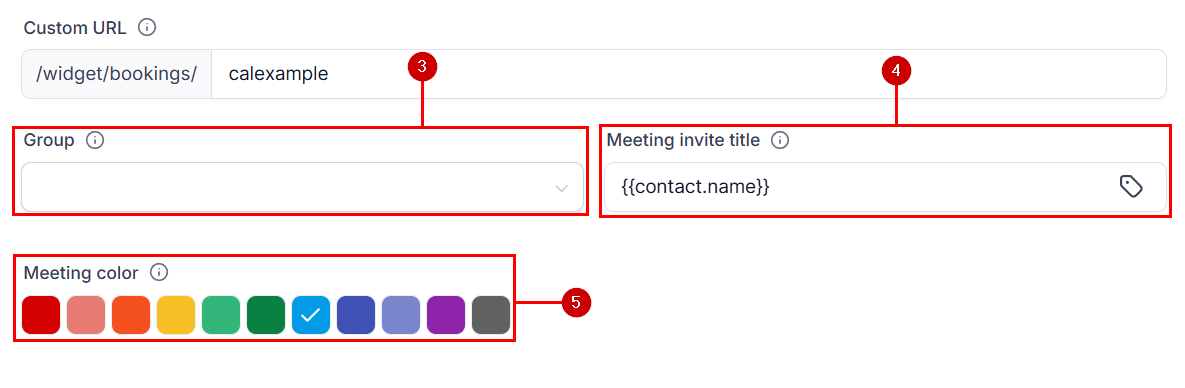
- Group: If you have a group for related appointments, you can select it here
- Meeting Invite Title: When your leads/customers schedule an appointment, this title will get added to your calendar and the confirmation email.
- Event Color: Assign a unique color to the event for easy identification and organization on the calendar.
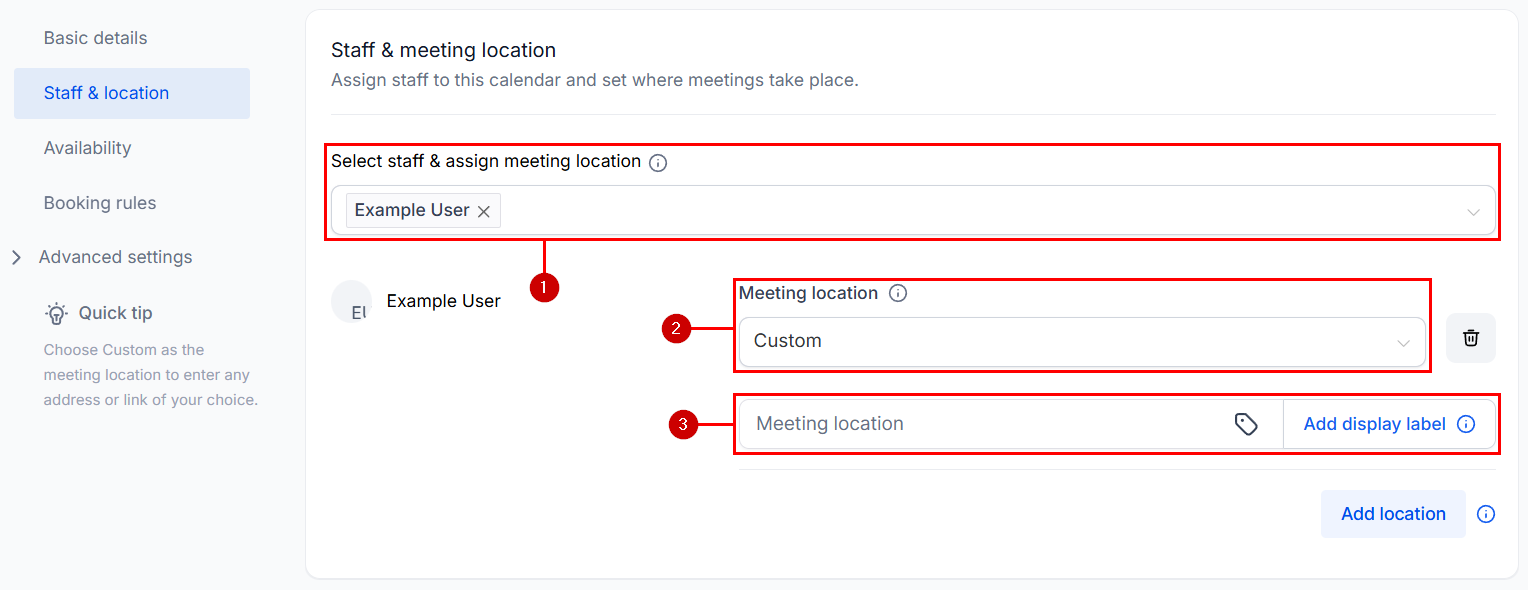
Staff & Location
- Select Team Member: Choose a specific team member or yourself to view or assign events to their calendar.
- Meeting Location: Specify the physical or virtual location where the meeting will take place.
- Custom: Pick your preferred communication method or platform for the meeting. Options include Google Meet, Zoom, a phone number, a full address for in-person meetings, or Microsoft Teams.
Availability
This is the time management section of your calendar; things like the general days and times you take appointments are managed here. If you have recurring meetings, set the way the repetitive scheduling will work, or change the settings for when the appointment slot should be open for booking.
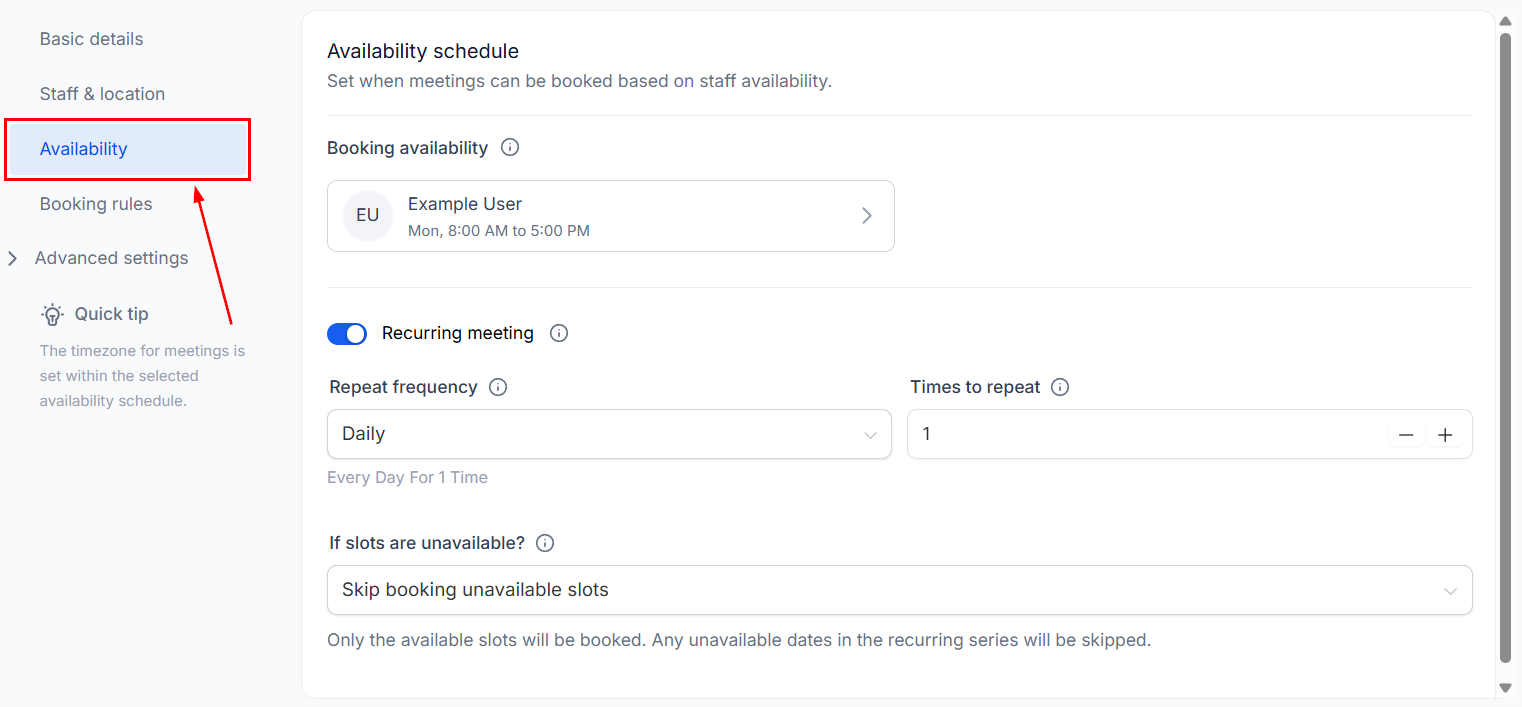
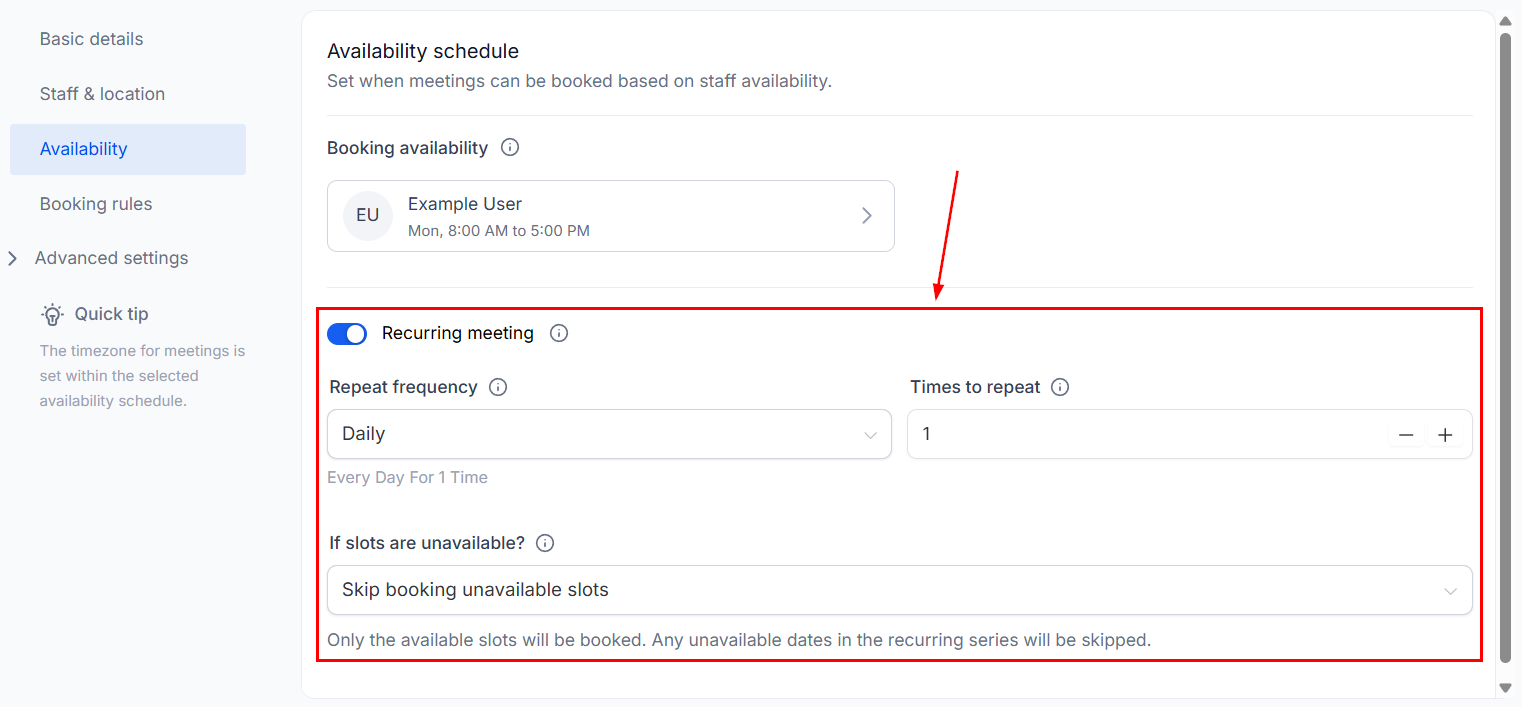
Recurring Meeting
Toggle this option for meetings that happen more than once. Set the frequency at which this appointment should happen; the times to repeat will be the total number of this appointment that will be scheduled consecutively. For unavailable slots, you can skip booking unavailable slots, book the appointment in the next available slot, or continue booking.
Booking rules
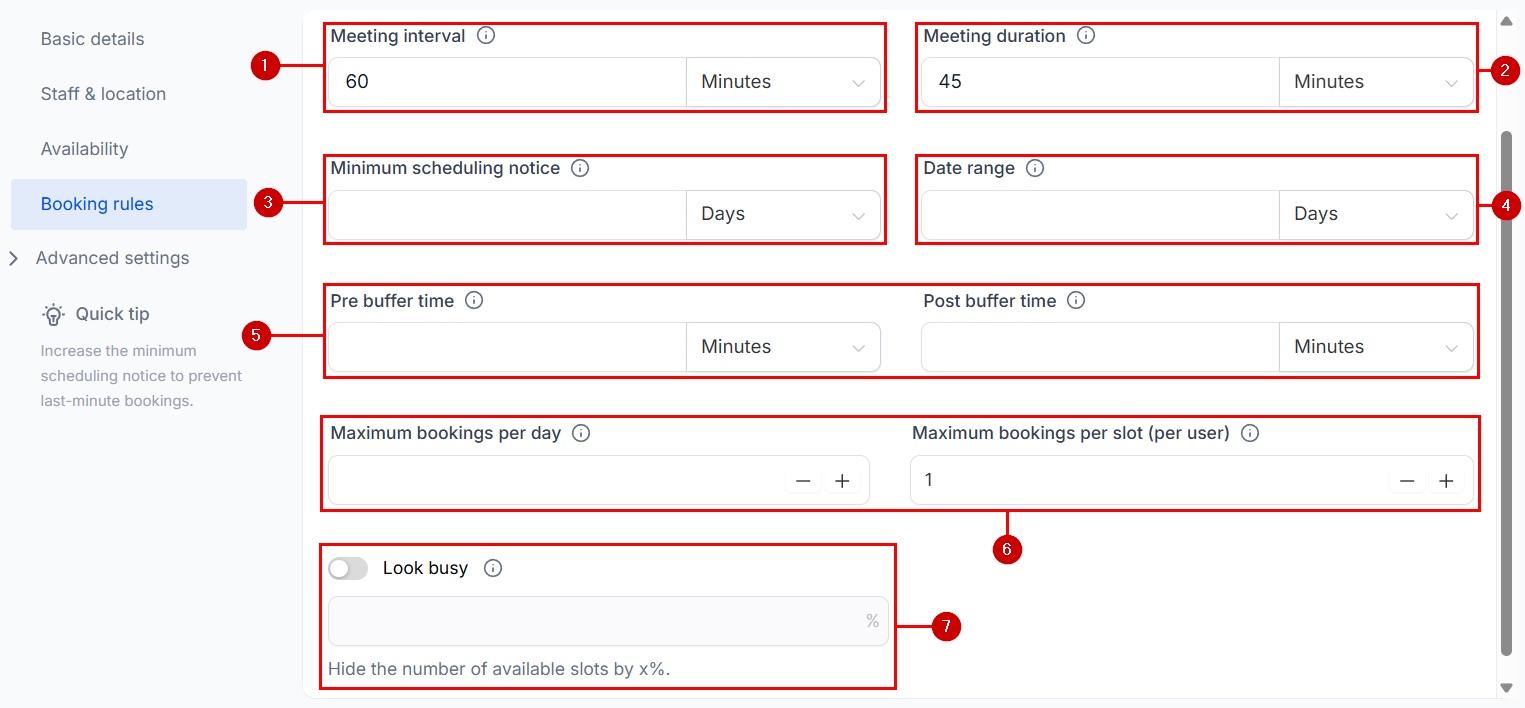
Here, you will see the availability slot and interval settings. These give you control over the time, length, and quantity of appointments scheduled.
- Meeting Interval: This will be the frequency for available time slots. For example, if you have a 30-minute slot interval, then your time slots will show availability every 30 minutes (10:00 am, 10:30 am, 11:00 am, etc).
- Meeting Duration: Define how long each appointment should last in minutes or hours.
- Minimum Scheduling Notice: This defines how soon appointments can be booked in your calendar; this will help you avoid surprise meetings. For example, if you choose 2 days, nobody can select a time slot less than 48 hours away from the time of booking.
- Date Range: This defines how far in advance an appointment can be scheduled. For example, if you set this to a month, then customers can’t select a date two months away from the time of booking.
- Pre and Post-Buffer: To give you or your team a break between appointments, you can establish a buffer before or after the appointments. This helps prevent back-to-back appointments.
- Maximum Bookings: These two help you define the total amount of this type of appointment your team will have on a day and the number of slots that the calendar should keep open per user (If the number of appointments exceeds the given slot for the user, then it either switches over to the next user in the round-robin queue or marks the slot unavailable for the prospect to book).
- Look Busy: The Look Busy toggle, when enabled, hides a specified percentage of available time slots (set by the percentage field) to make the calendar appear busier and create a sense of urgency for clients when booking.
Forms
To change the way you collect information about the contact booking the appointment or collect deposits/fees related to the booking, use one of the following sections:
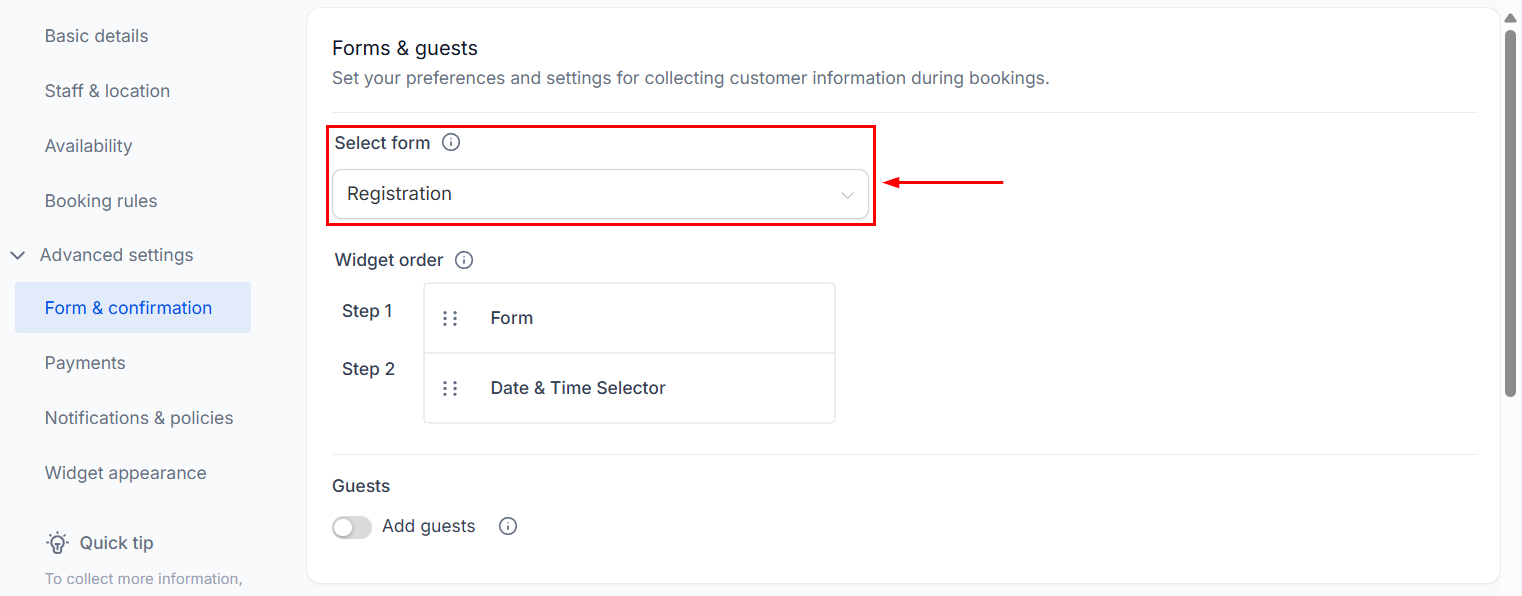
Select Form
Here, you can choose the form this calendar uses to book the appointment from the dropdown menu.
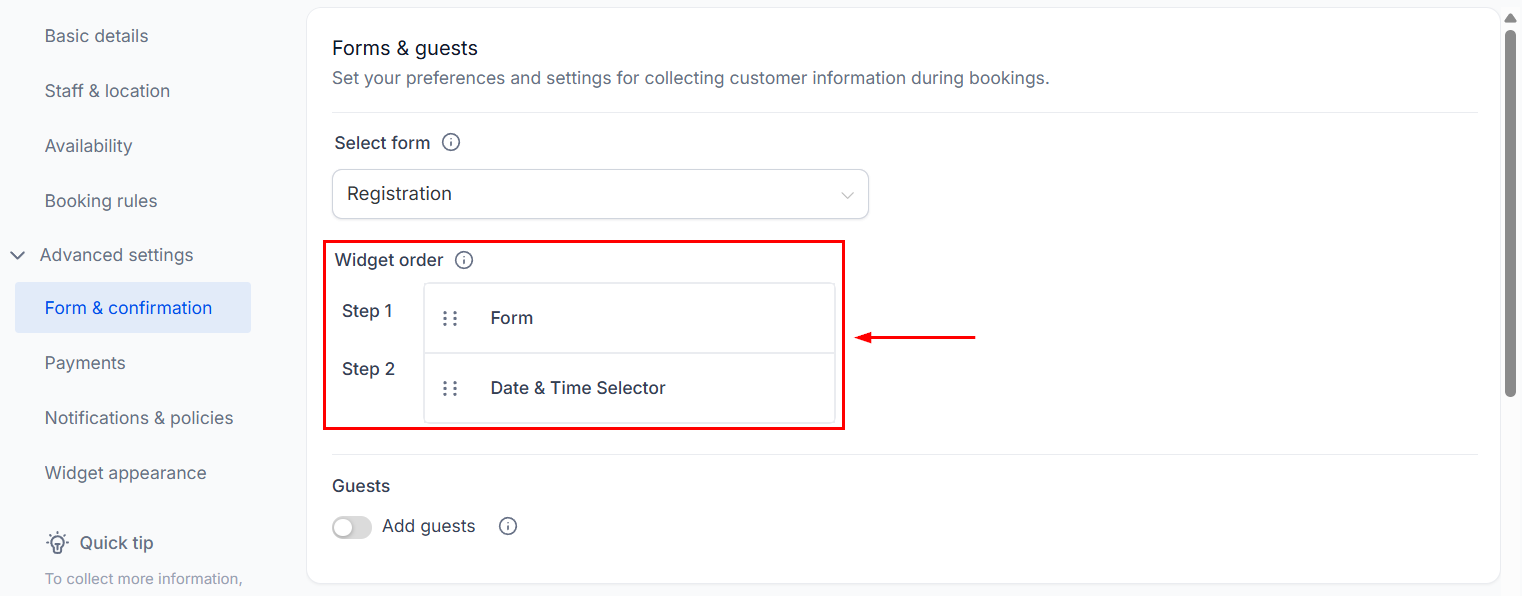
Widget Order
This will set the order in which the contacts fill out the form and book their appointment.
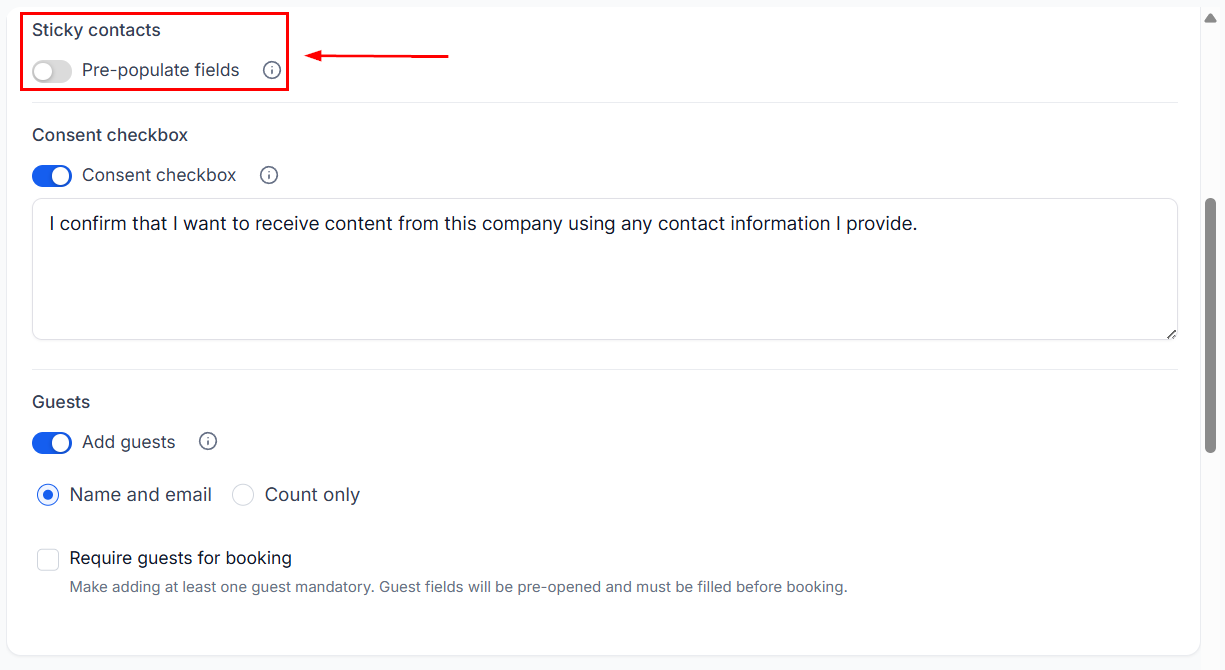
Pre-populate Fields
Also known as sticky contact, this will grab the information of any forms previously filled in by that IP address.
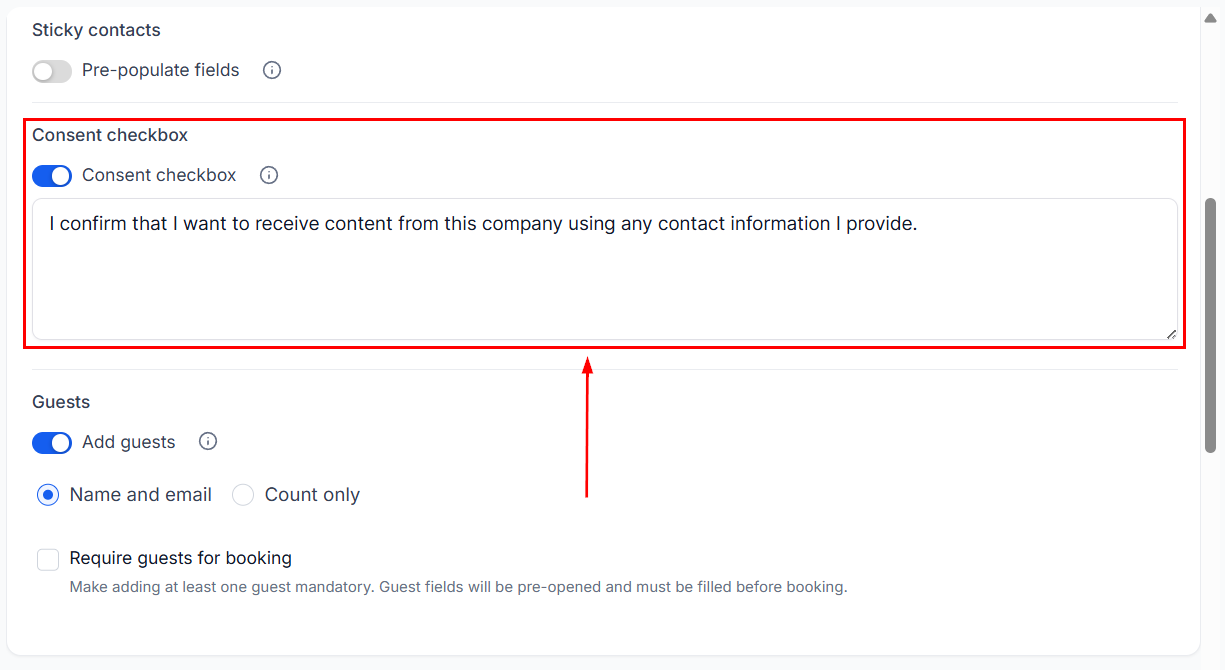
Consent Checkbox
This option enables you to secure consent from clients to be contacted again when they provide their contact information during the appointment booking process.
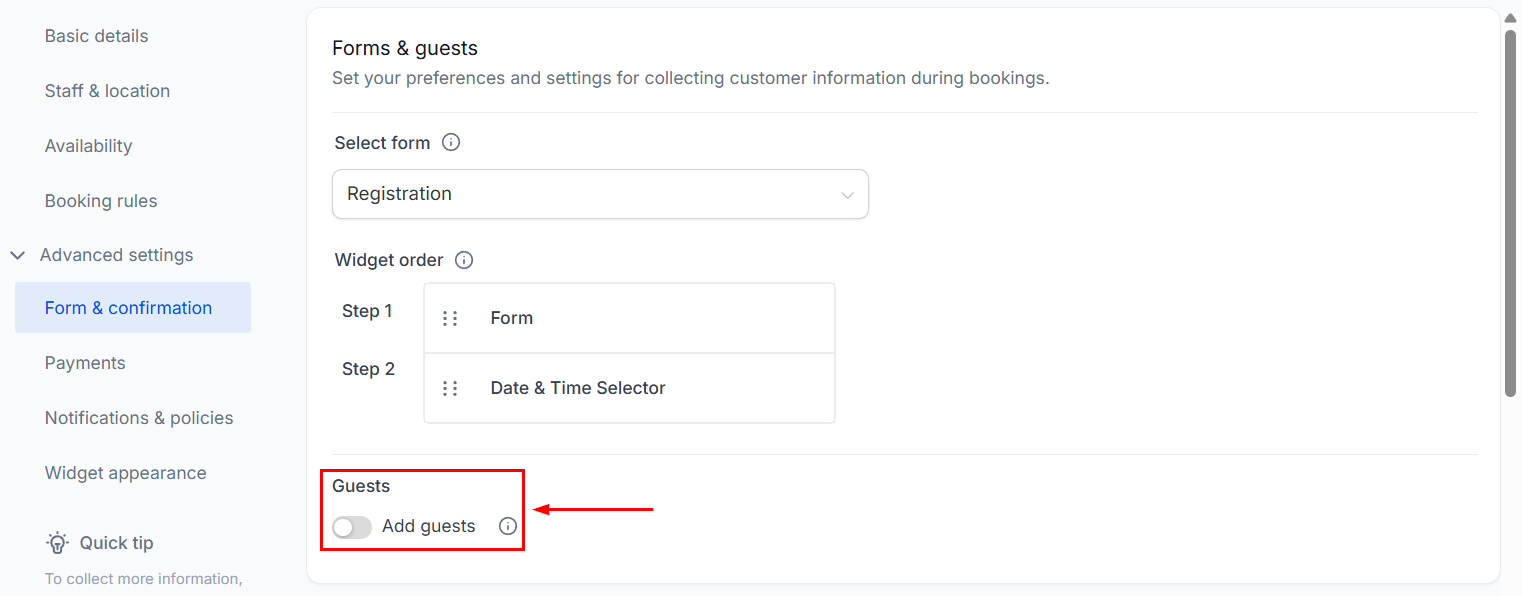
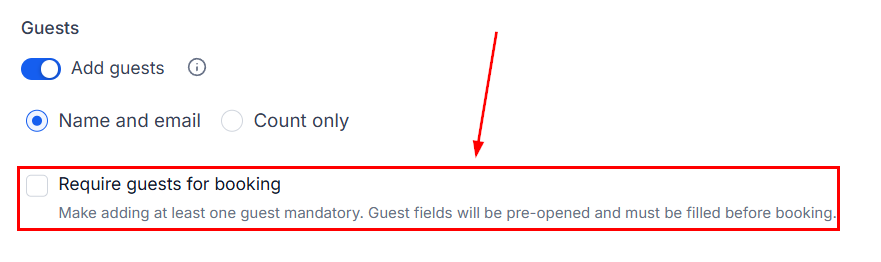
Add Guests
When enabled, this option allows the individual who booked the appointment to send invitations to multiple attendees, enabling them to join the meeting.
You can require the booker to include the guest information by selecting “Name and email”; selecting Count only will not require additional information.
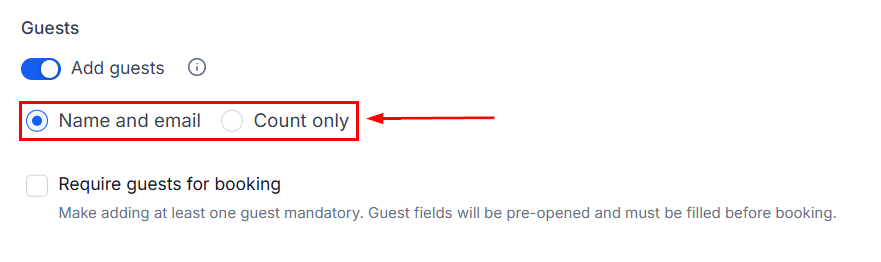
If bringing a guest is mandatory, check the box next to Require Guests.
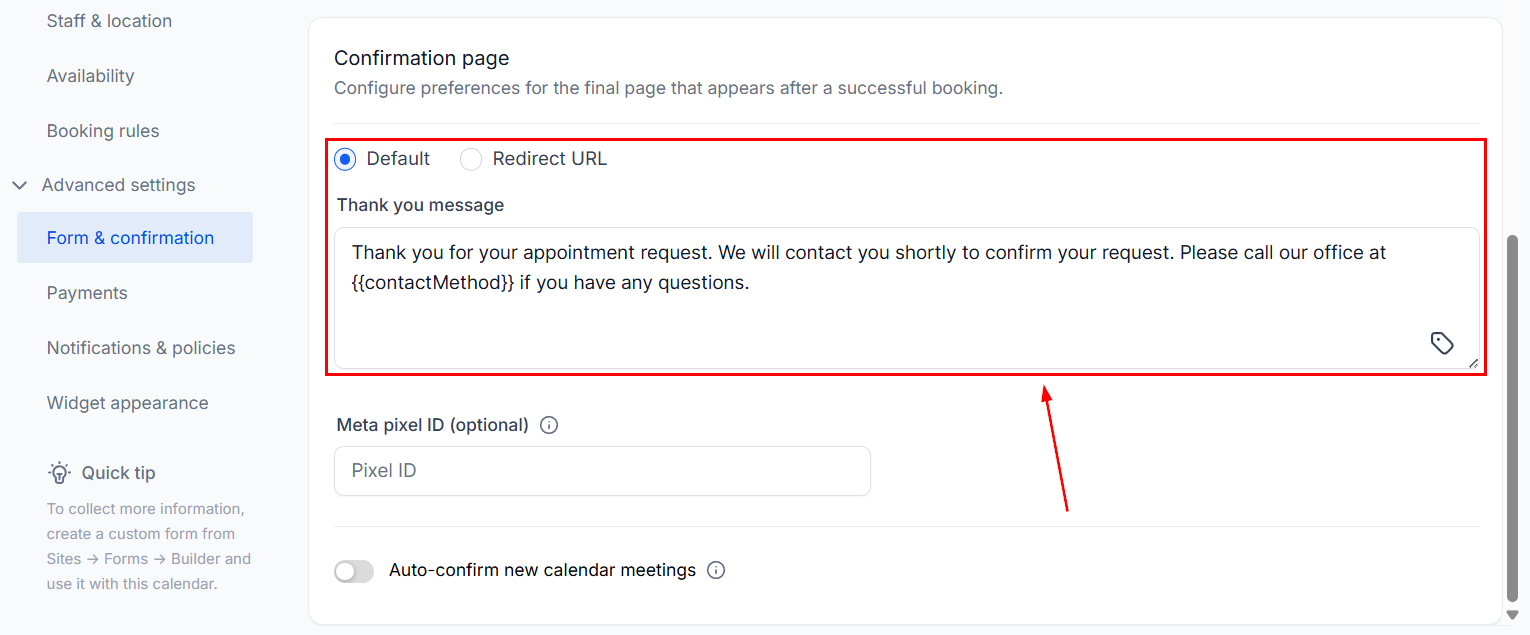
Confirmation Page
This option determines what is displayed after a booking is made. By selecting “Default,” you can set a custom message on the same page. Alternatively, by choosing “Redirect URL,” you can direct the contact to a website of your choice.
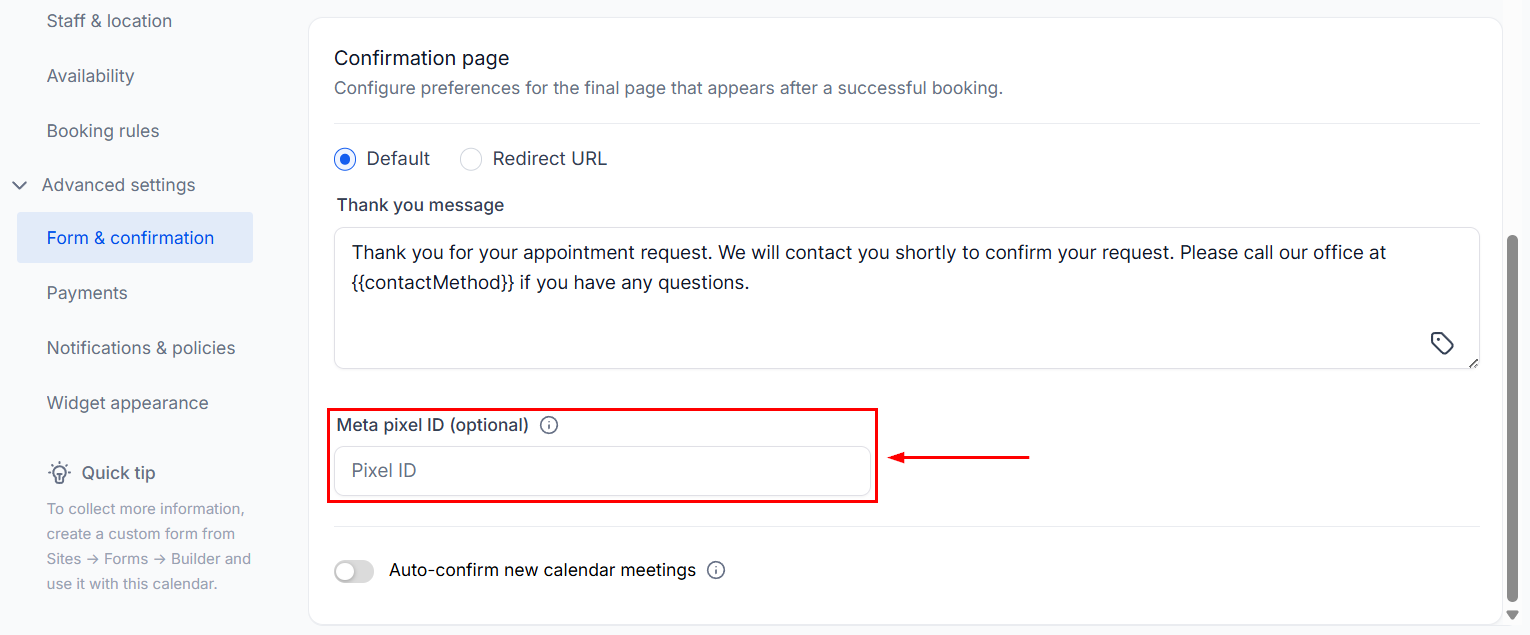
Facebook Pixel ID
To track new appointment bookings with your Facebook Ads Manager, add your Facebook Pixel here.
Payment
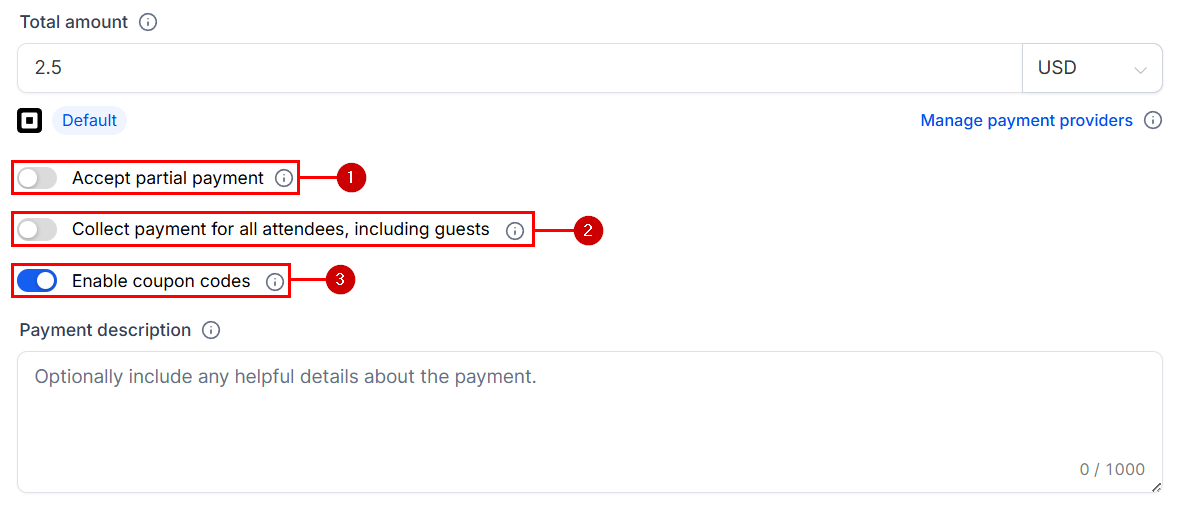
By enabling this option, you can take payment for the appointment at the moment of booking. To learn more about this section in particular, please refer to the article “Add Payments to Appointments”.
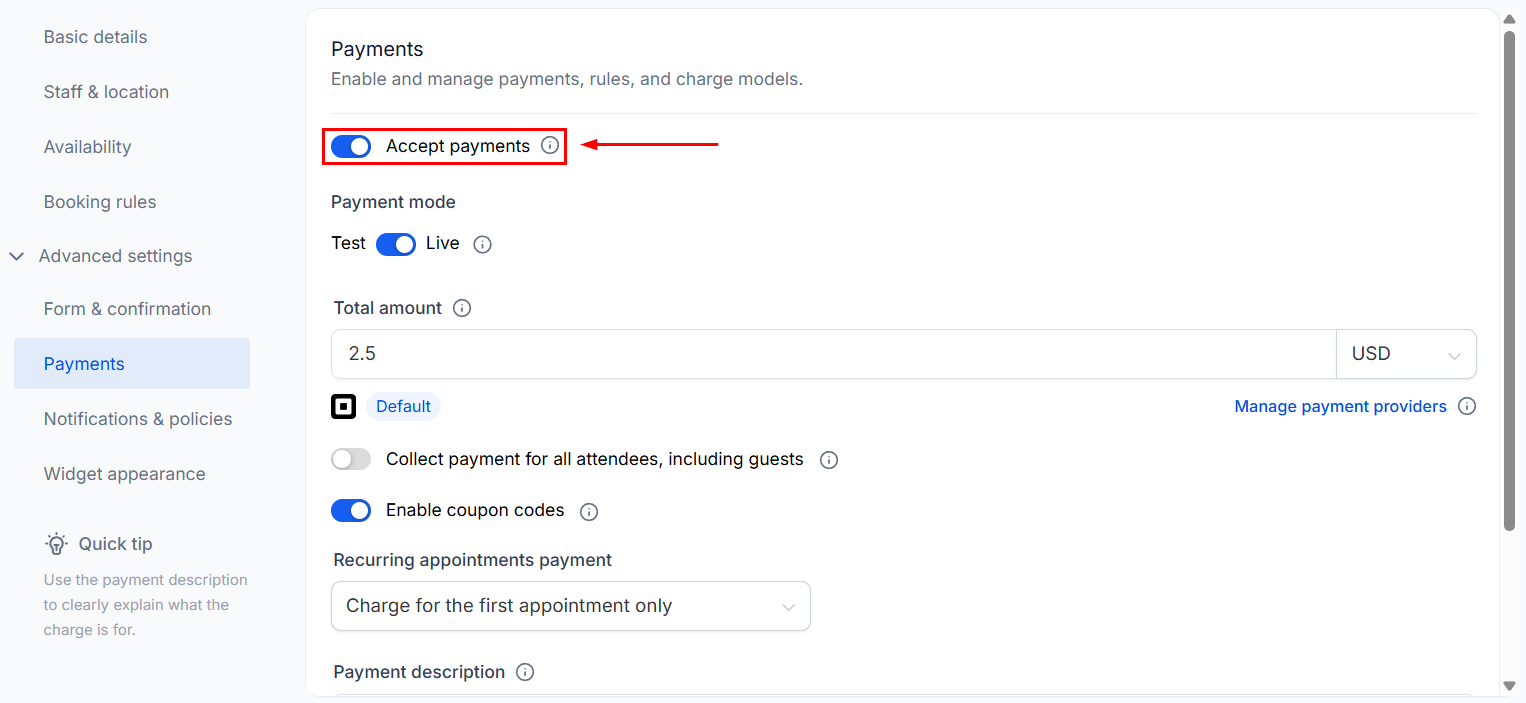
If accepting payments, you can let the customer pay a fraction of the total (1) to secure their appointment, charge each attendee (2), including guests, or enable coupon codes (3) for the calendar’s checkout.
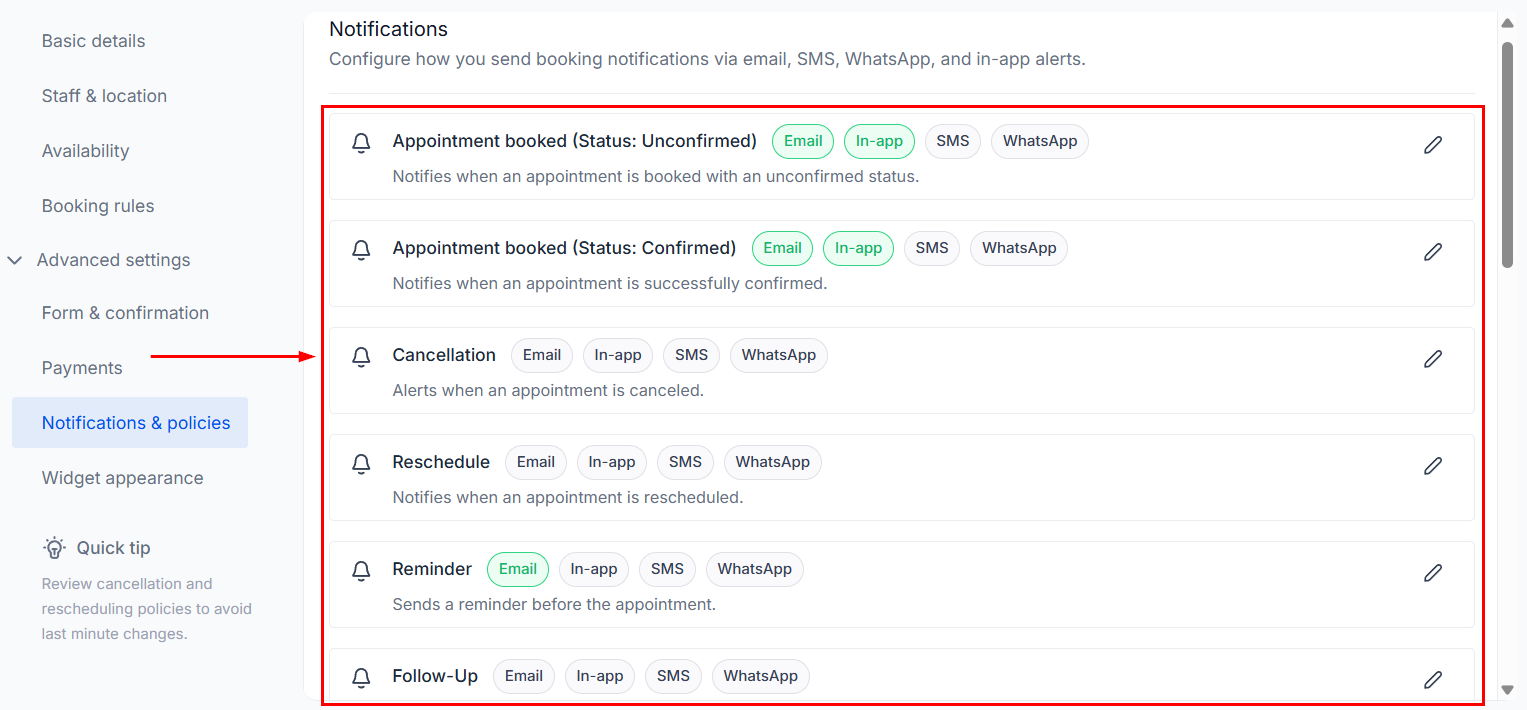
Notification & Policies
The pre-written notifications ensure everyone involved is informed about important updates, from initial booking to post-appointment follow-ups.
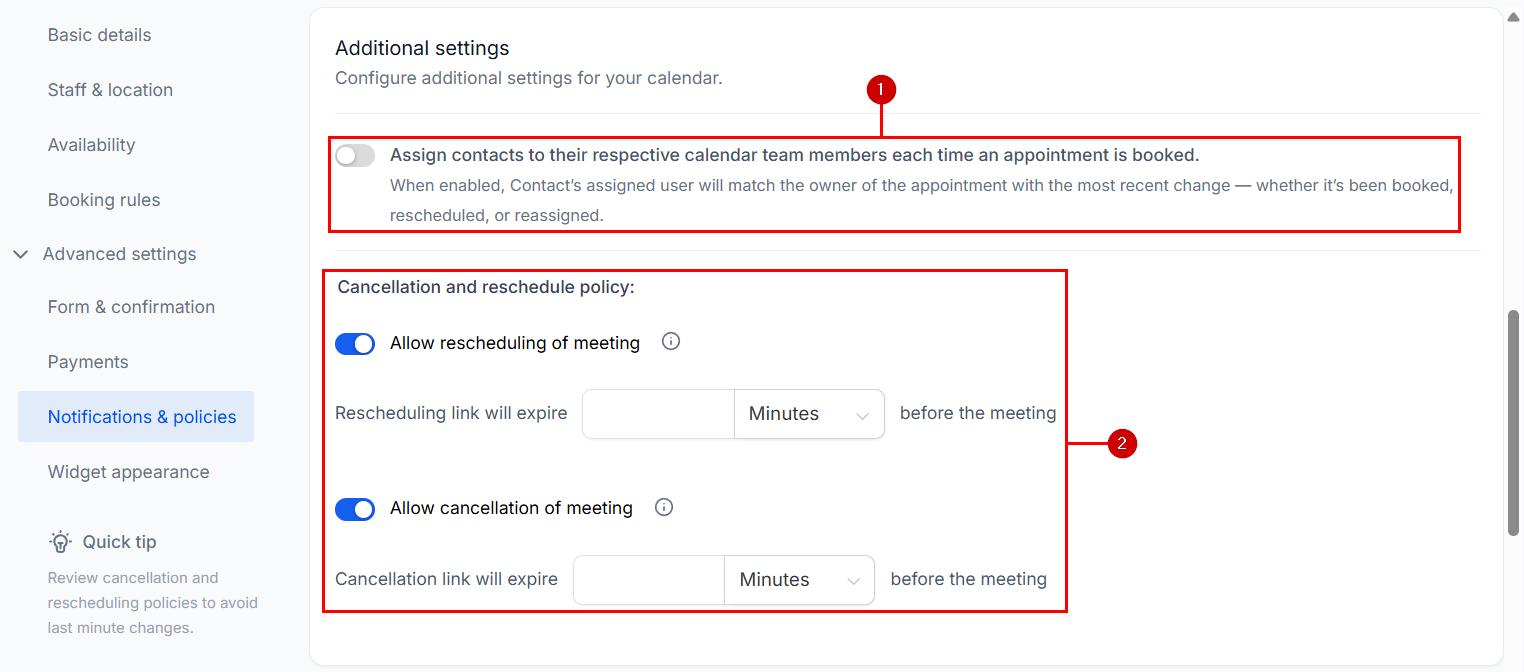
- Turn on “Assign Contacts to Their Respective Calendar Team Members Each Time an Appointment Is Booked” to assign the contact to a specific team member when an appointment is booked. It helps in linking attendees directly to the appropriate team member handling the session.
- Cancellation and Reschedule Policy: If the option is toggled on, the system automatically adds a link for the contacts to handle the rescheduling or cancellation. This link can be removed by toggling the button off. Additionally, you can give this link an expiration window, limiting how soon it can be used before the appointment.
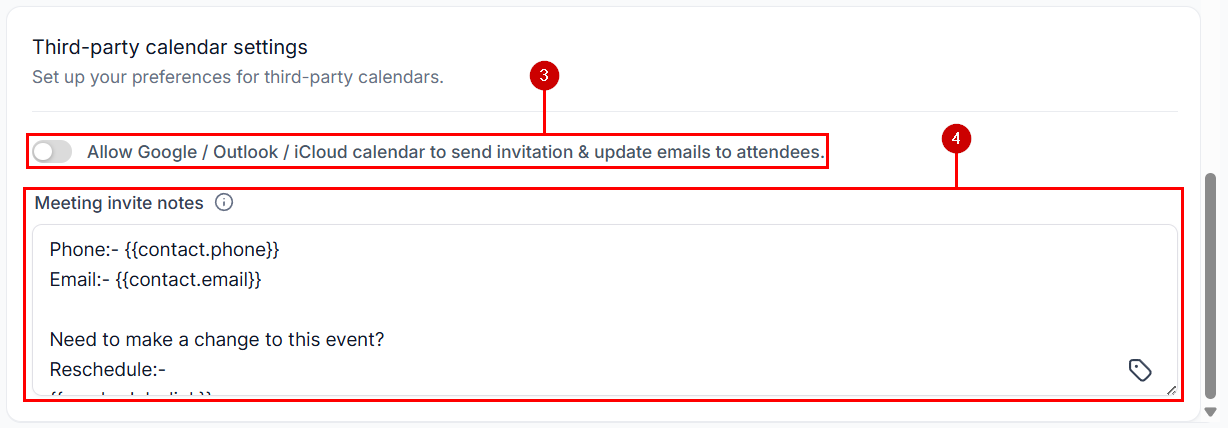
- Third-party calendar settings: By enabling option one, an email will be sent out if you make any changes to the appointment directly inside the Google/Outlook calendar. By enabling the second option when an appointment is booked, the team member will be selected as the contact’s assigned user from that point onward.
- Additional Notes: This allows you to modify the additional notes for the appointment.
Widget Appearance
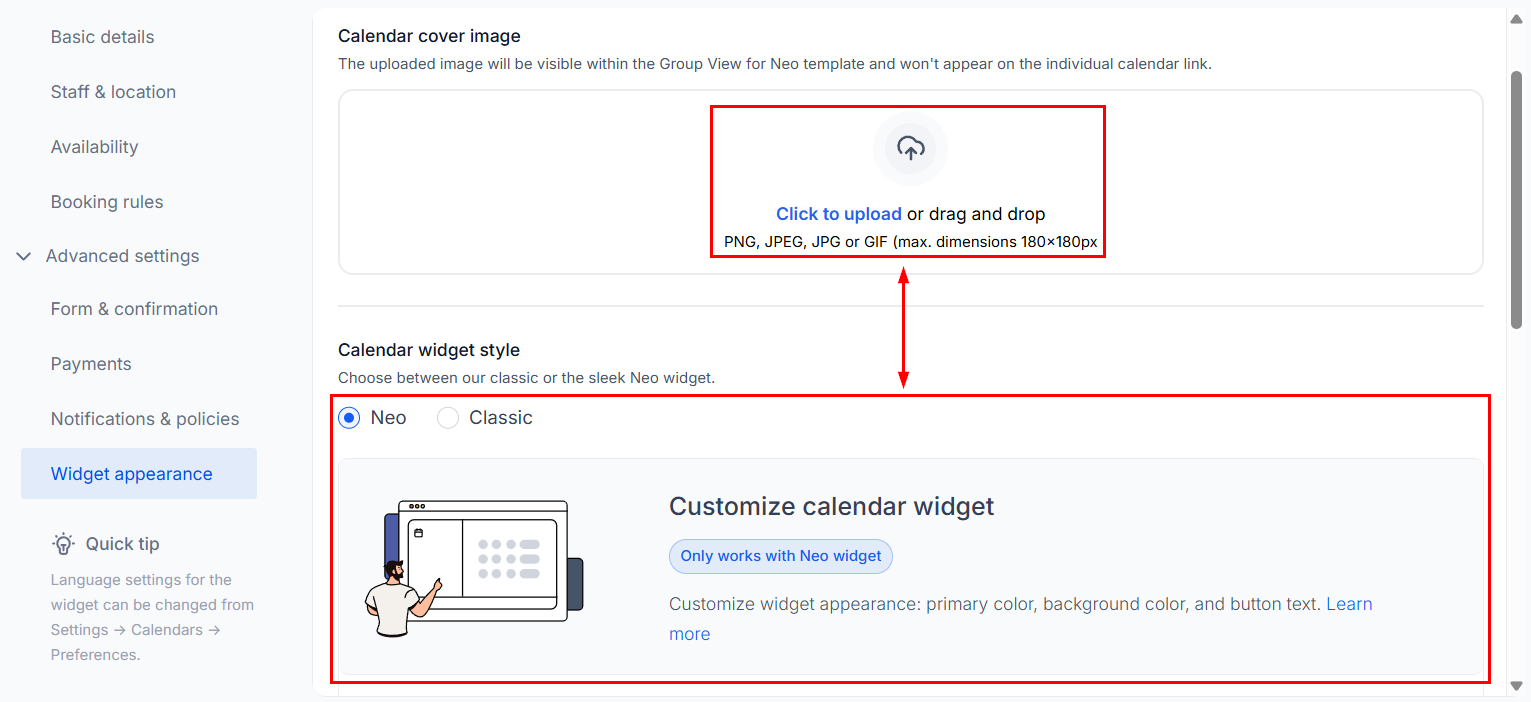
Personalize your calendar to the max here; you can add a cover image, change the style and colors of the calendar, the text of the button, and the information shown on the calendar.
Custom Code
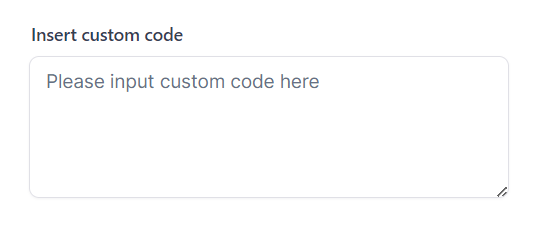
If you have software developers on staff or you know how to write custom code, you can add it in this field. This is an advanced step, so we recommend avoiding it if you’re unfamiliar with coding.
Whenever you make changes inside the Advanced Settings, click the save button in the top right corner, and you’re done.
Sharing Your Calendar
Click the Save button to complete the setup.

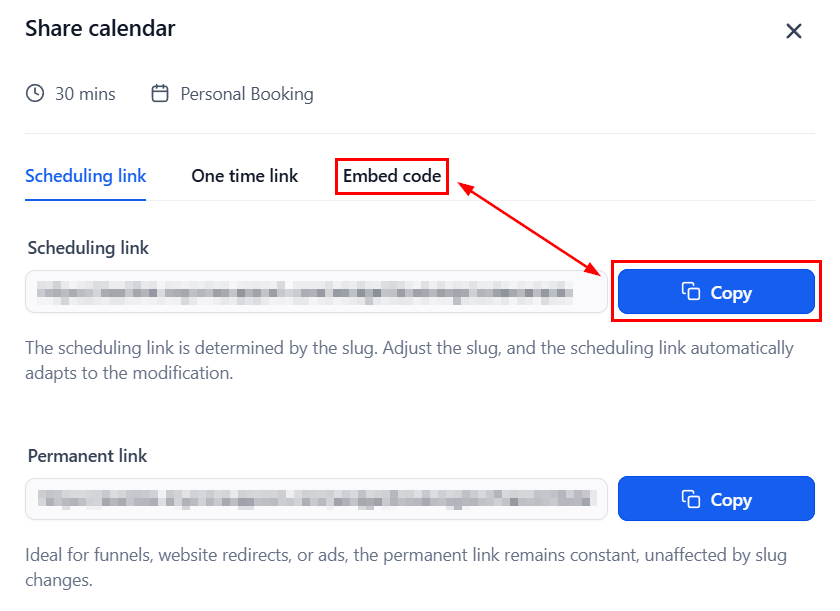
To quickly share your calendar, click the arrow pointing icon in the top right section.

This will open a module for you to select the link or embed code and share it with contacts.
Additionally, you can click the tool icon to see your calendar in action and find any issues that happened during configuration.

The Personal Calendar will allow you to create an intimate atmosphere that caters to your particular needs, resulting in a calendar tailored and limited to one user at a time. And, following these steps will ensure you can make the most of it. We hope you enjoy it and get fully booked!
Not a Funnelbud customer yet?
Try our all-in-one CRM for sales and marketing — free for 7 days, no commitment.