Setting Up Call Widgets on the Dashboard
The Call Widget provides users with a comprehensive visual and analytical overview of call activity. Designed to deliver real-time insights on both inbound and outbound calls, the widget supports data-driven decision-making for improved operational efficiency.
Key Benefits
- Visual Insights: Access instant call data, including metrics on incoming and outgoing calls, call durations, and participant-specific details, enabling quicker, more informed decisions.
- Customizable Dashboards: Personalize your dashboard by adding and configuring the Call Widget to align with your specific business needs.
- Seamless Setup: With intuitive customization options, configuring the Call Widget is straightforward, ensuring smooth integration with your existing dashboard.
Implementing the Call Widget into your dashboard is a simple yet impactful way to improve your call management. Follow these steps to get started:
Accessing the Dashboard
Navigate to your dashboard from the left-hand menu, then click the “Edit Dashboard” button.
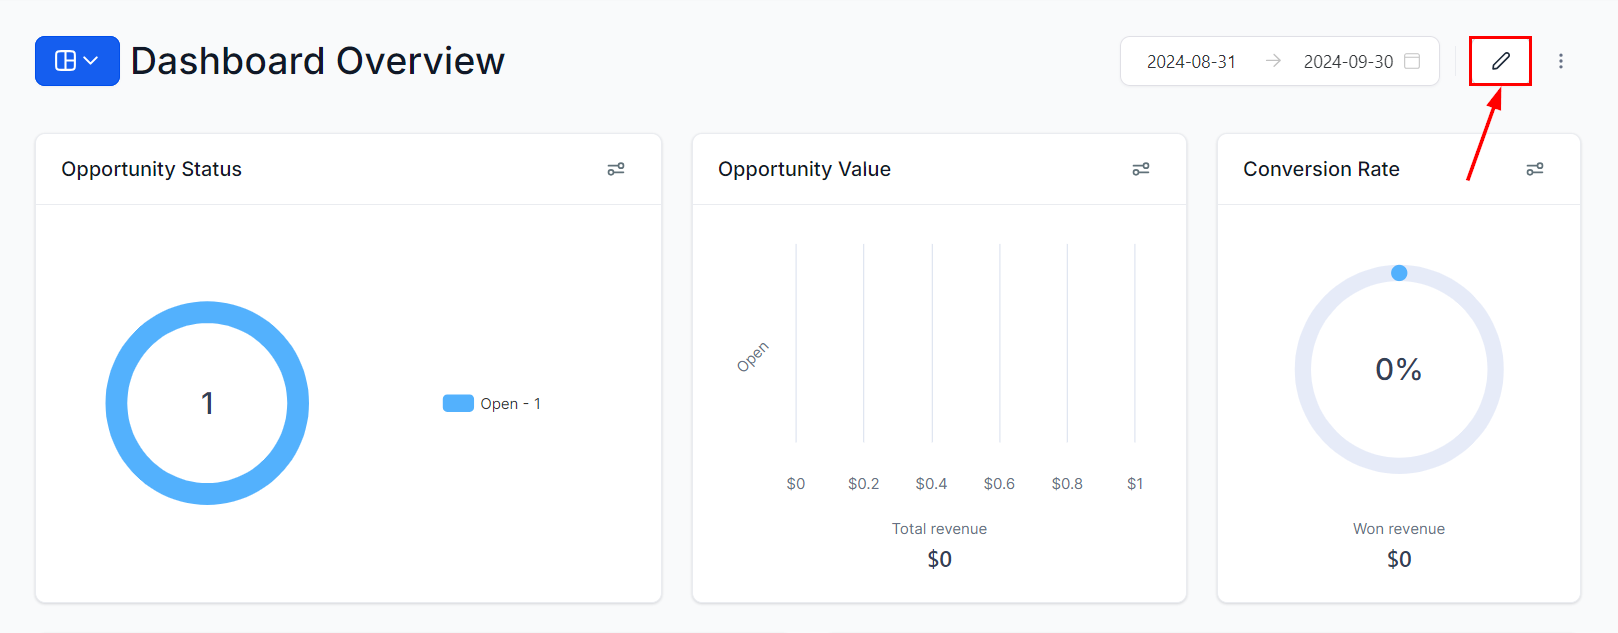
Adding the Widget
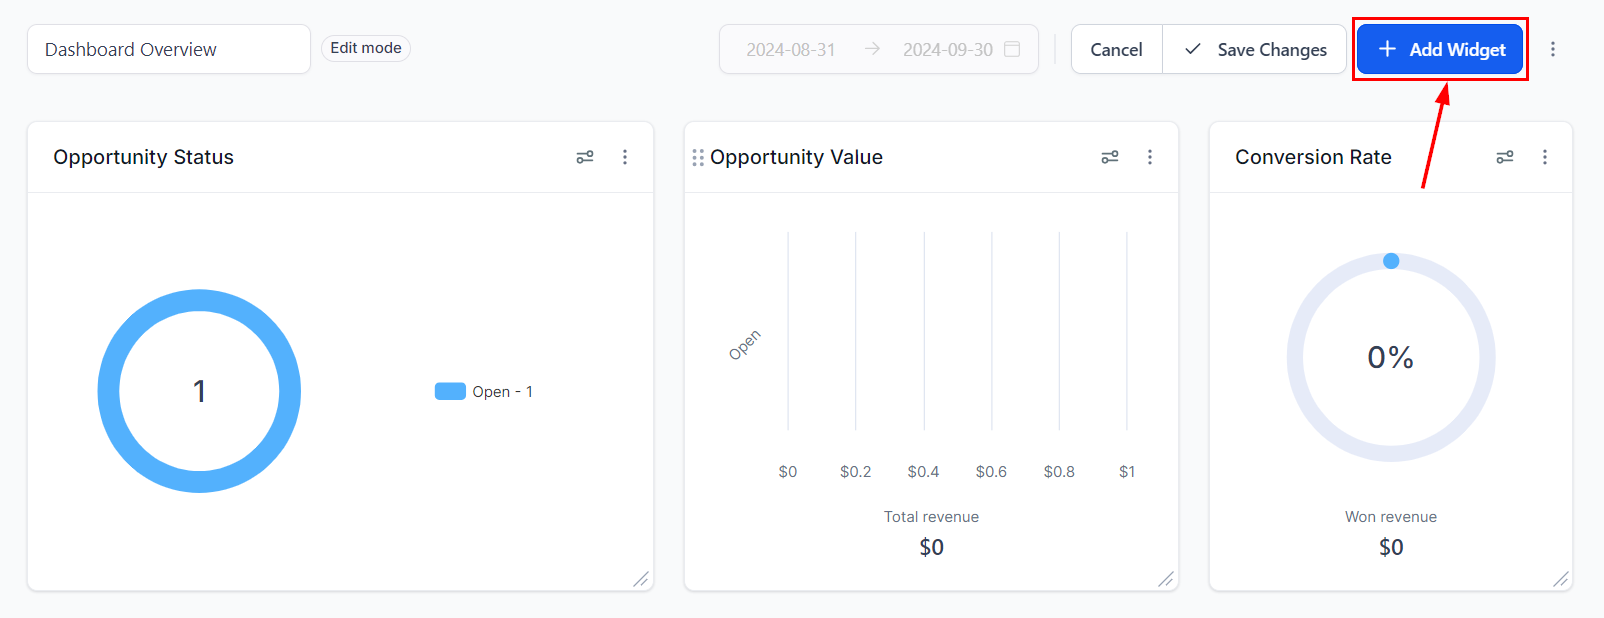
Click the Add Widget button in the upper right-hand section.
Proceed to select the “Calls” tab and view the available widgets within this section.
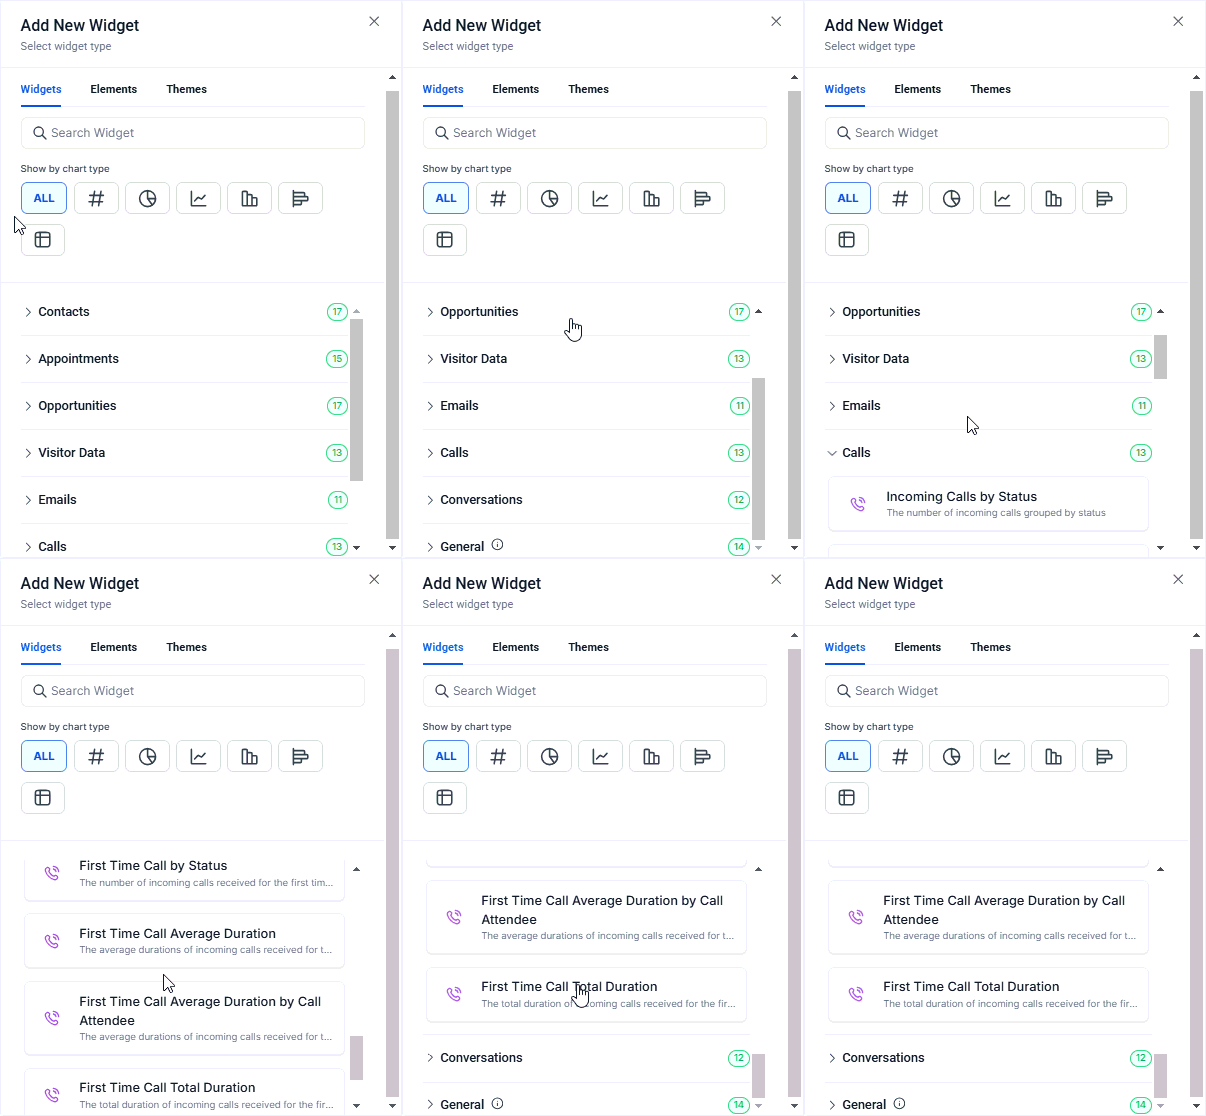
Choose the Call Widget that best suits your needs.
Customizing the Widget
After choosing a widget, complete the required fields within the Configure section. This includes editing the title of the widget and selecting your metric preferences.
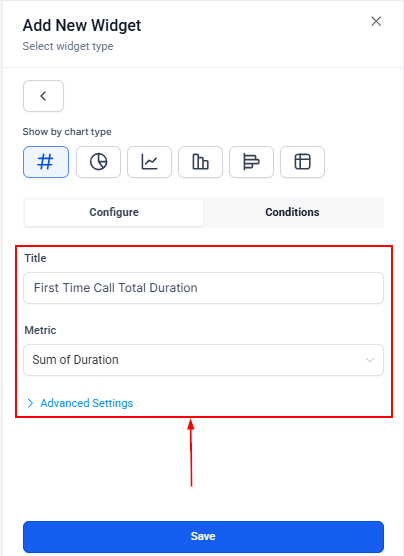
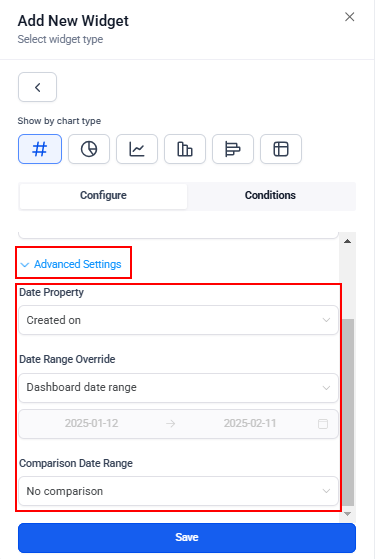
For advanced customization, select “Advanced Settings” and complete the relevant fields.
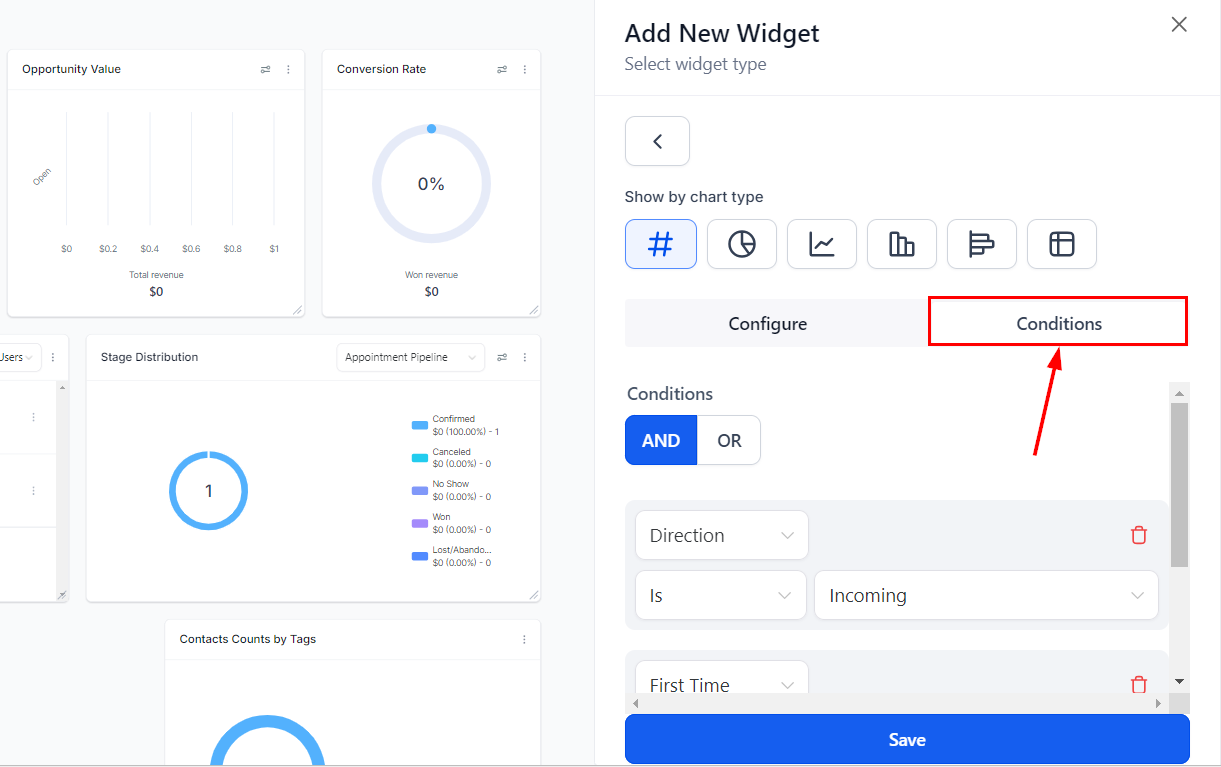
Use the “Conditions” tab to apply specific filters.
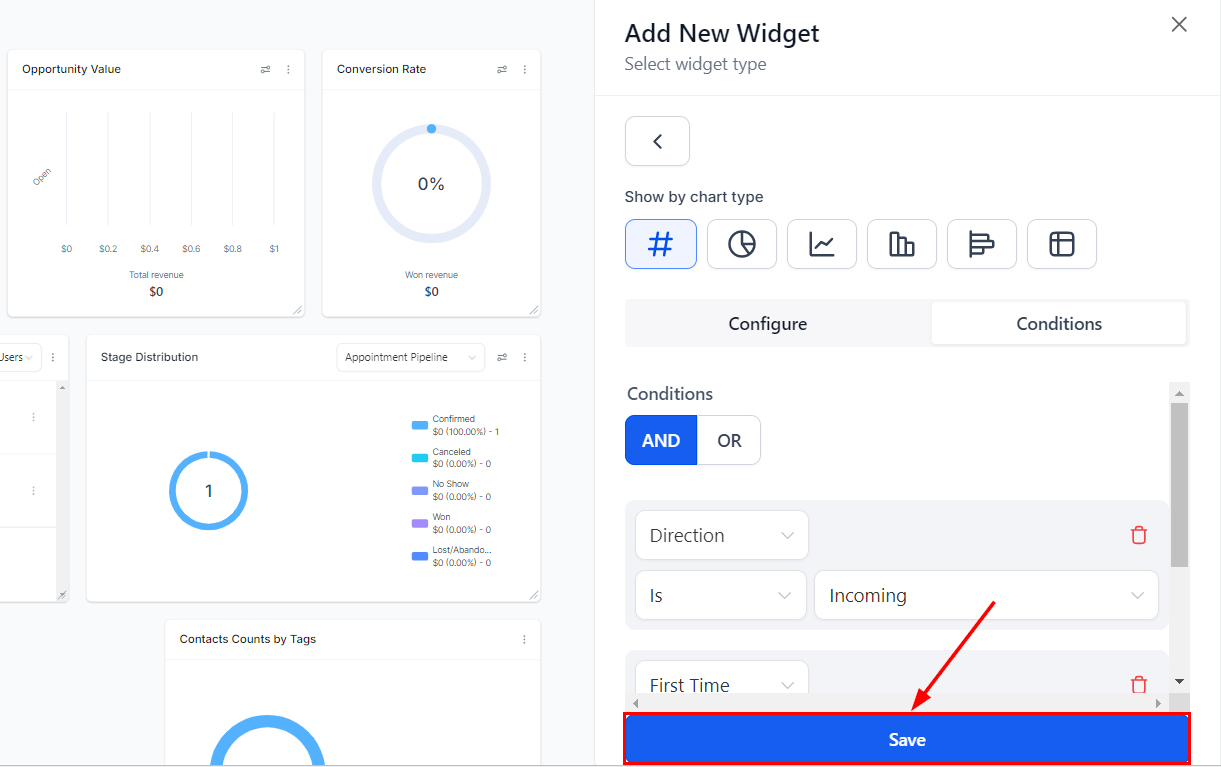
Click the Save button to apply the changes.
By following these steps, you’ll create a fully functional call dashboard that provides valuable insights into your team’s call performance.
Frequently Asked Questions
Q: Can I customize the Call Widget to display only incoming calls?
- Yes, you can filter the widget to show only incoming calls by using the “Conditions” tab during configuration.
Q: What should I do if the Call Widget is not displaying any data?
- Ensure that the widget settings and conditions are correctly configured. If the issue persists, check your platform’s call-tracking settings or contact support for assistance.
Not a Funnelbud customer yet?
Try our all-in-one CRM for sales and marketing — free for 7 days, no commitment.