How to Enable Email Notifications for Form/Survey Submissions
Email notifications for form and survey submissions offer significant benefits by streamlining communication and keeping your team informed in real time. This feature ensures that you never miss a new submission, allowing for quicker responses and improved engagement. In this article, we’ll dive into the advantages of email notifications and provide a step-by-step guide on how to set up and optimize this feature for your business.
Setting Up Email Notifications
To start benefiting from email notifications, follow these easy steps:
Access Forms or Surveys
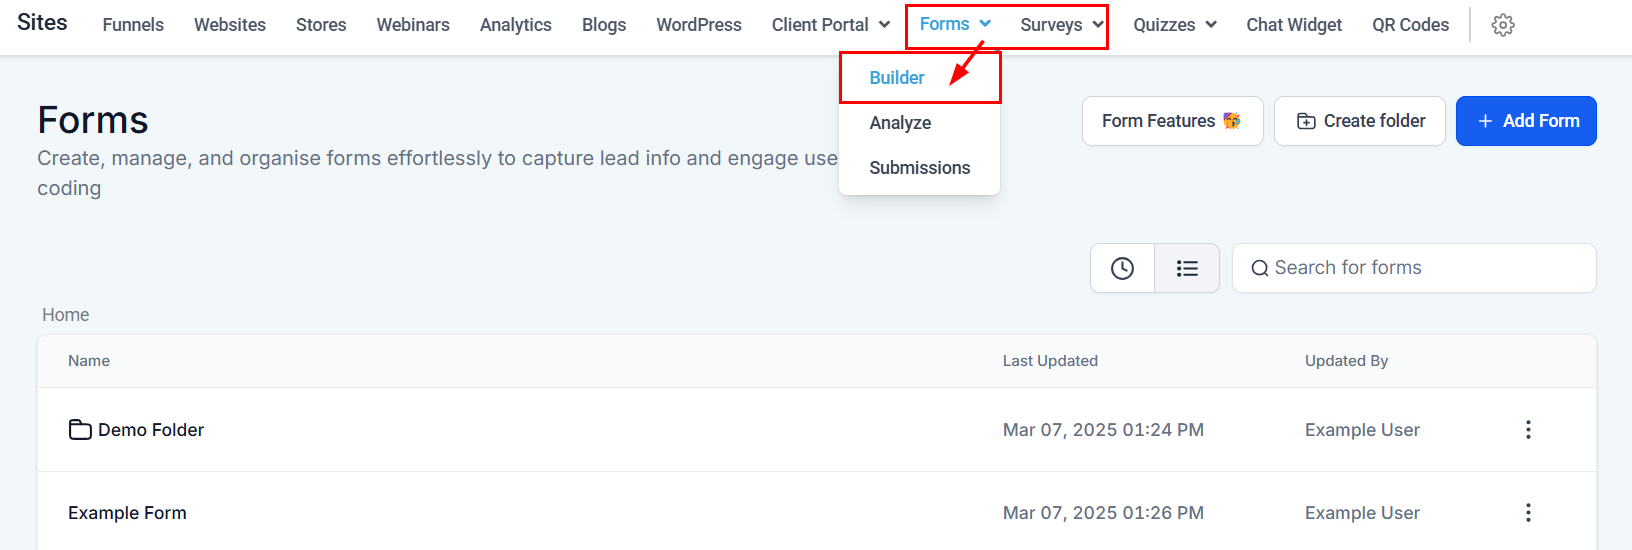
Navigate to the ‘Sites’ tab from the left sidebar and then select the ‘Forms/Survey’ tab from the top menu. For the purpose of this guide, we’ll focus on forms.
Create or Edit a Form
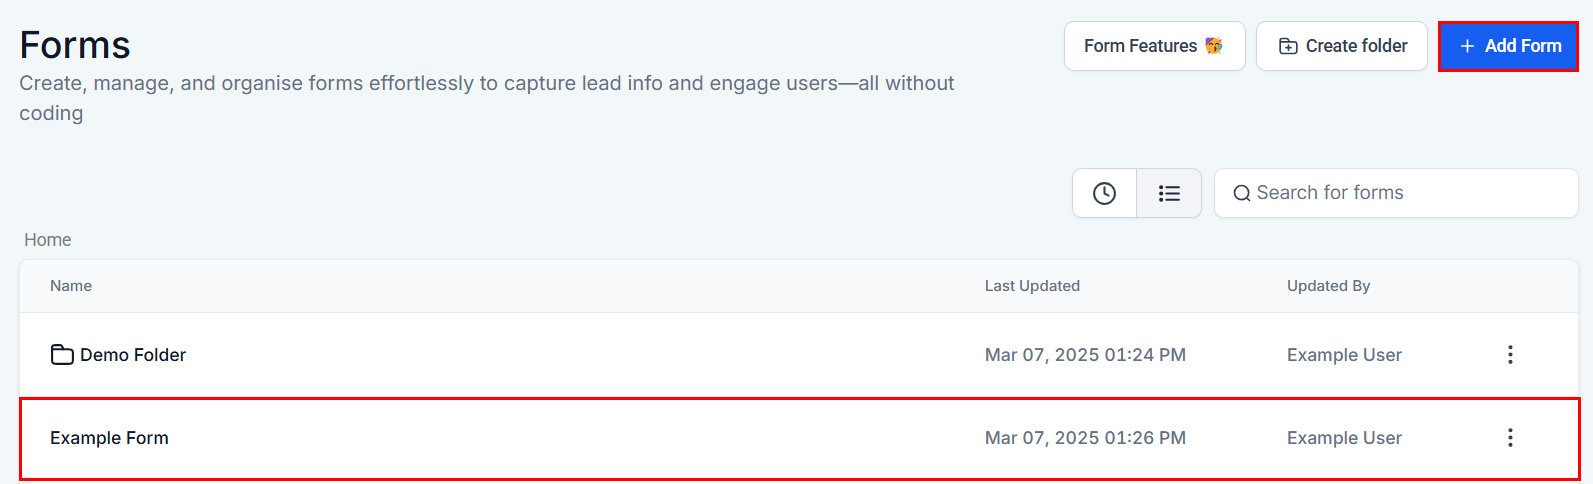
Click on “Add Form” to create a new form from scratch or select an existing form to edit.
Enable Notifications
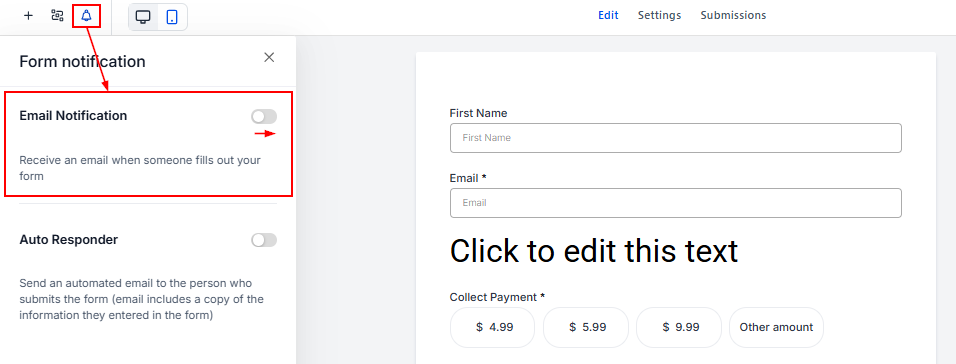
Now that you have accessed the form/survey builder, click on the bell icon in the top menu to access the notification settings, then turn the toggle on to activate email notifications.
Configure Notification Settings
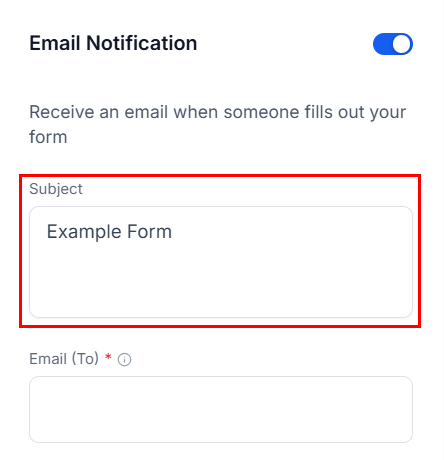
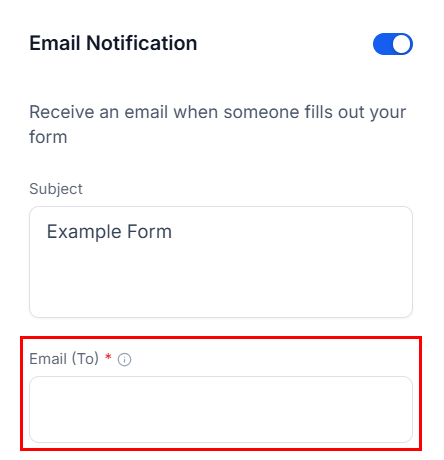
A few options will now appear, allowing you to configure the notification settings. Begin by customizing the subject line as needed to fit your preferences. By default, the name of the form will appear in this field.
In the “Email To” field, enter the email addresses of the recipients who should receive the notification. The first email address is designated for the ‘To’ field. Any subsequent email addresses will be included in the ‘Cc’ field.
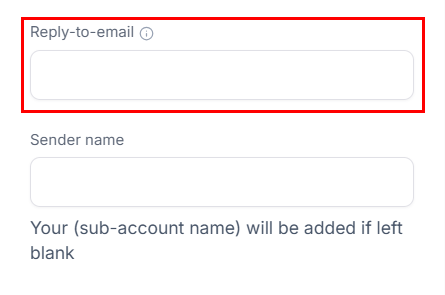
Next, customize the default Reply-To email address. You can use {{contact.email}} to enable replies to the contact who submits the form.
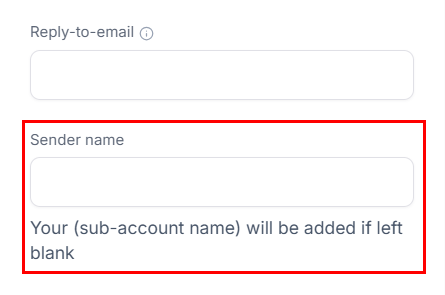
Include a sender name if needed. If you decide not to update this field, your business/sub-account name will be used.
When enabled, submission details are automatically generated as a PDF and included as an attachment in notification emails.
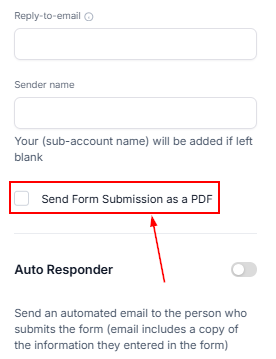
Finally, toggle the Auto Responder switch to send an automated email to the person who submitted the form, including a copy of the submission details.
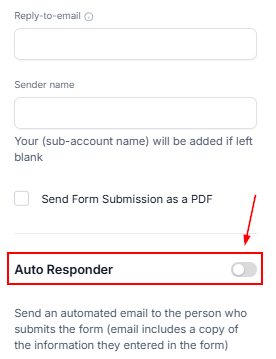
Fill out the fields with details you want to share with the customer if this feature is enabled.
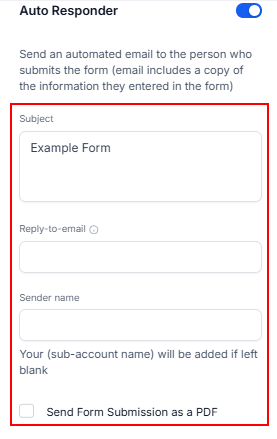
Once everything is set up, click ‘Save’ to apply your settings.
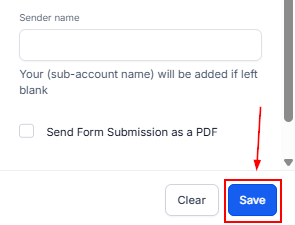
Don’t forget to save your form after completing the setup process!
From this point forward, every time your form or survey receives a submission, your designated team members will receive an email notification summarizing the submitted information. By automating email notifications, your team can stay informed at all times and respond quickly to new leads or survey responses. This leads to faster engagement and better client interactions, which can improve your business’s overall responsiveness and customer experience.
Frequently Asked Questions
Q: I’m not receiving email notifications. What should I do?
- Ensure that the email notification toggle is turned on and that the recipient email addresses are correctly entered. Also, check your spam or junk folder to verify that the notifications are not being filtered out.
Q: Can I send notifications to multiple email addresses?
- Yes, you can enter multiple email addresses in the “Email To” field. Simply separate each address with a comma to ensure proper delivery to all recipients.
Q: How can I test the email notification feature?
- After setting up the notification, submit a response to the form/survey. This allows you to verify that the notification system is working as intended before going live.
Not a Funnelbud customer yet?
Try our all-in-one CRM for sales and marketing — free for 7 days, no commitment.