Add Contact
Your CRM makes it simple to keep customer contacts organized. When an SMS, call, Facebook/Instagram/GMB message, or email is received from a potential client, the system automatically adds them to your contacts. However, you can manually input contact information by clicking the ‘Add Contact’ button at the top right of the contacts page.
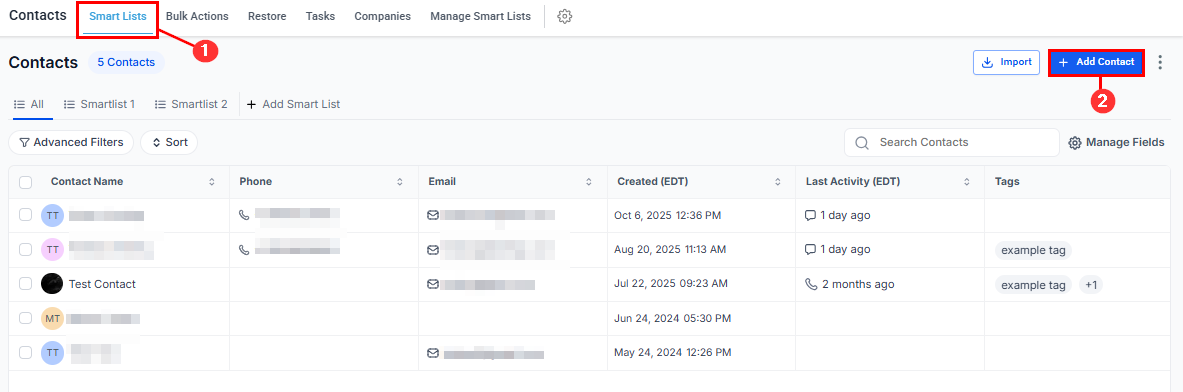
Once you click the button, a page will appear for you to input the contact details.
Adding New Contacts
-
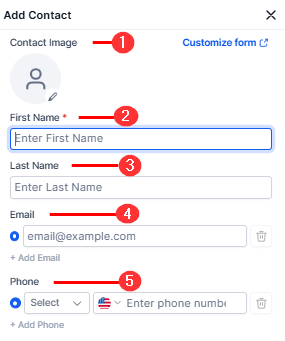
Contact Image: Here, you can upload a photo of each contact as a way to identify them, especially if you have clients bearing the same name. The proposed size is 512*512px and not bigger than 2.5Mb.
-
First Name: Enter the contact’s first name in this space to easily identify the contact.
-
Last Name: Optionally, add the contact’s last name.
-
Email: Enter the contact’s primary email address here. Add multiple email addresses by clicking the “+ Add Email” button.
-
Phone: Enter the contact’s primary contact number here. Include multiple phone numbers by clicking the “+ Add Phone Numbers” button.
-
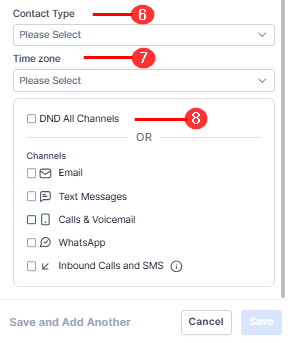
Contact Type: You can assign the contact as either a Lead or Customer to segment them based on their current status within your company.
-
Time Zone: Choose the time zone your contact is in. This will help you or your users know the best time to contact them.
-
DND All Channel or some Channels: Enable the Do Not Disturb feature for all the social channels or some of the channels based on the contact’s preferred mode of communication.
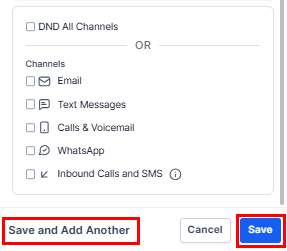
Review the contact details, then click Save to finalize the addition. If you intend to add another contact, go ahead and click the ‘Save and Add Another’ button to add the contact to your list and clear the fields of the add contact form.
Your contact will now appear in the list with their own contact card, where you can add notes, tasks, and appointments, track their enrolled courses, and more.
Not a Funnelbud customer yet?
Try our all-in-one CRM for sales and marketing — free for 7 days, no commitment.