How to Edit a Published or In-Review Ad Campaign
Editing a published campaign provides the flexibility to make strategic adjustments that can help optimize its effectiveness and ensure ongoing relevance. This guide will walk you through the benefits of editing a live campaign, the steps involved, and what can or cannot be modified, allowing you to take full control of your campaign’s performance without disrupting its continuity.
Why Edit a Published Campaign?
Editing a live campaign offers an opportunity to adapt to changing conditions, optimize for better performance, and make timely improvements without the need to pause or restart the campaign. By leveraging this functionality, you can:
- Correct errors made during the initial campaign setup.
- Optimize performance based on insights from key performance indicators (KPIs).
- Respond dynamically to feedback, improving ad content or refining audience targeting.
- Save time and resources by making minor adjustments instead of pausing the campaign and creating a new one.
How to Edit a Published or In-Progress Campaign
To edit a published or ‘In Progress’ campaign, navigate to the Ad Manager home page and locate the live or in-progress campaign you wish to edit.
Click on the Edit option within the campaign actions menu.
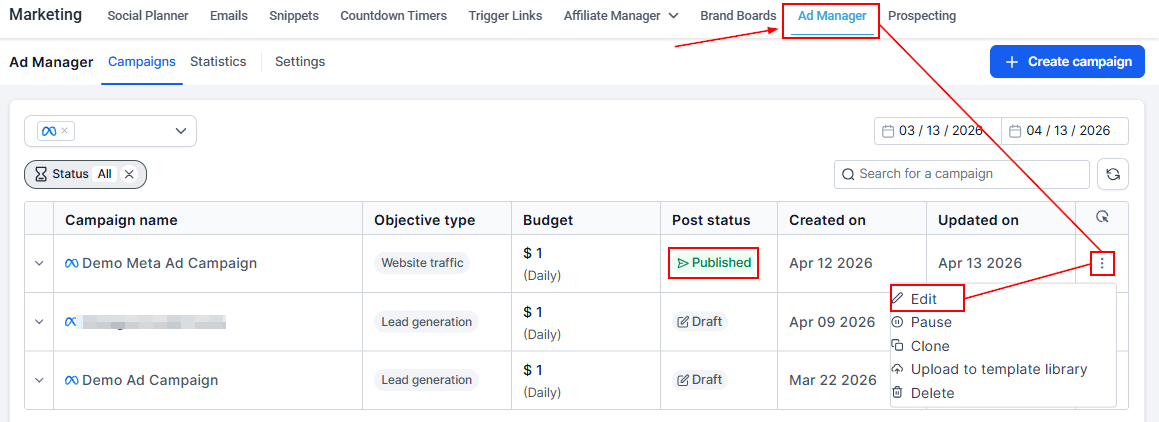
Once selected, the campaign builder screen will open, enabling you to make changes to the fields that are editable (as detailed below).
📌Note: After making any edits, an “Unpublished Changes” tag will appear at the top-right corner of the screen, indicating that updates are pending.
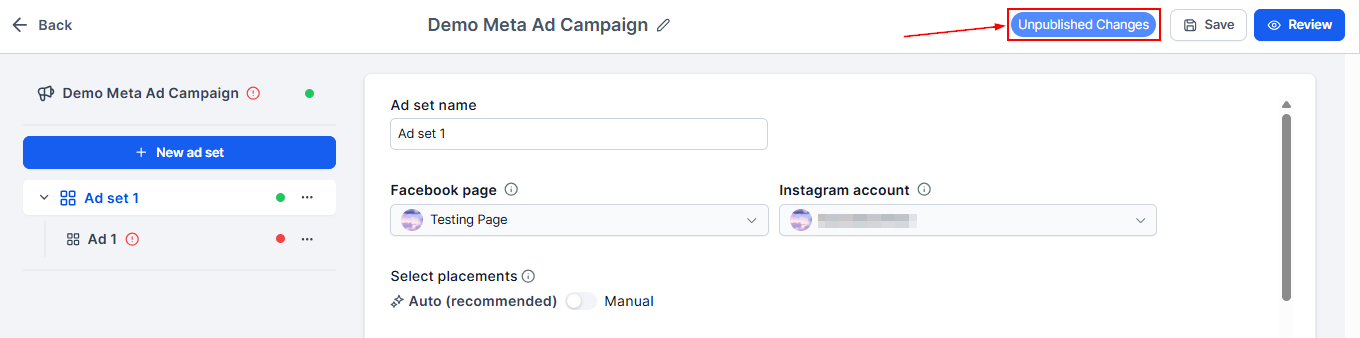
Editable Fields in a Published Campaign
When editing a live campaign, the following fields are available for modification:
- Campaign Name: Adjust the campaign name as necessary.
- CTA Button: Modify or update the call-to-action button.
- Lead Generation Form: Change or create a new form if the objective is Lead Generation.
- Website: Update the URL for Website Traffic campaigns.
- Special Ad Category: Add or modify the category if needed.
- Placements: Alter where your ads are displayed.
- Ad Text and Media: Revise the ad’s content and visuals.
- Budget: Adjust the campaign budget allocation.
- Geographic Location: Update targeted locations.
- Target Audience: Modify audience targeting parameters (e.g., interests, lookalikes, or retargeting).
- End Date: Change the campaign end date if using a lifetime budget.
Fields that Cannot Be Edited in a Published or In-Review Campaign
While editing is flexible, certain key campaign details remain locked after publication:
- Campaign Objective: This cannot be changed once the campaign is live.
- Facebook Page: The page used for the campaign is fixed.
- Start Date: The start date cannot be modified.
- Budget Type: Switching from a Daily to a Lifetime budget (or vice versa) is not permitted.
How to Discard Changes Made to a Published Campaign
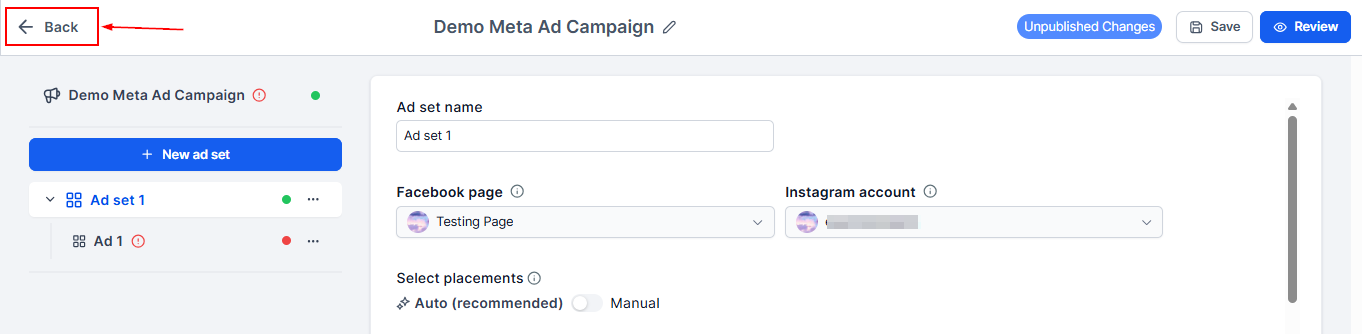
If you decide not to apply the changes made to a campaign, you can easily revert to the original version by clicking on the Back button at the top left of the campaign builder screen.
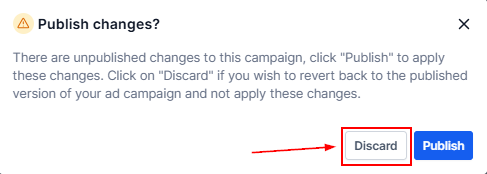
A prompt will appear, allowing you to select Discard to revert the campaign to its previous state and discard any changes made.
How to Publish the Campaign After Making Changes
Once your edits are complete and you’re satisfied with the adjustments, follow these steps to finalize and publish the updated campaign:
Click on the Publish button on the Review and Publish page.
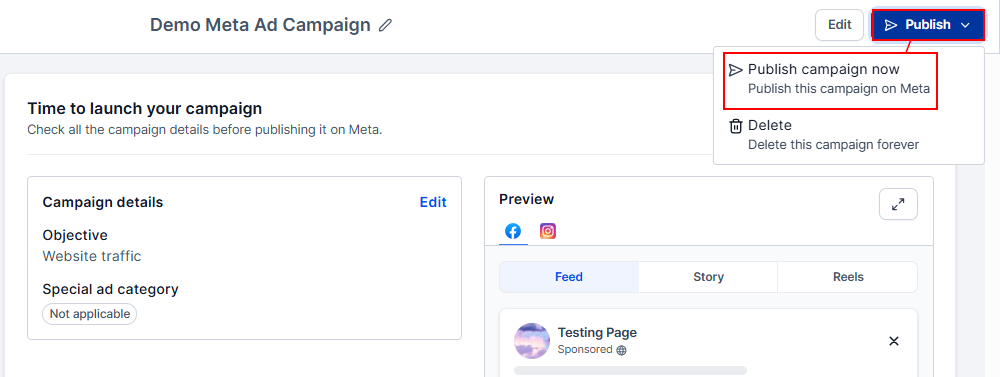
A confirmation dialog will appear. Select “Confirm” to proceed with publishing, or “Cancel” to make additional adjustments.
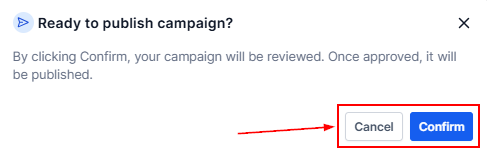
Upon confirmation, the campaign will transition to the “In Progress” state for Facebook’s review process. If approved, the changes will go live.
📌Note: If the edits result in any errors, the campaign status will change to Failed, and the reason will be displayed in a tooltip next to the failed status.
Follow the steps outlined to manage your campaign’s performance and ensure it stays aligned with your business objectives.
Not a Funnelbud customer yet?
Try our all-in-one CRM for sales and marketing — free for 7 days, no commitment.