How to Build a Course
Creating a course enables you to deliver structured and engaging content to your audience. By following these steps, you can efficiently design, customize, and manage your courses, ensuring they meet your students’ needs and reflect your curriculum’s objectives.
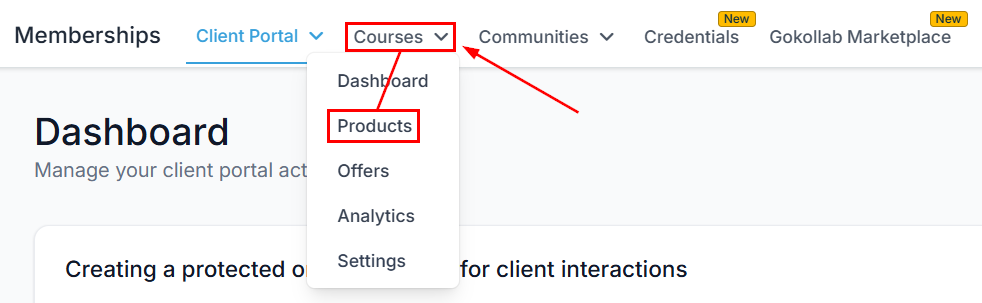
To begin, navigate to the “Memberships” section from the left sidebar. In the Courses dropdown, you will find the “Products” tab, where you can view existing courses or start creating a new one. Selecting “Create Product” allows you to use a pre-designed template or build a course from scratch.
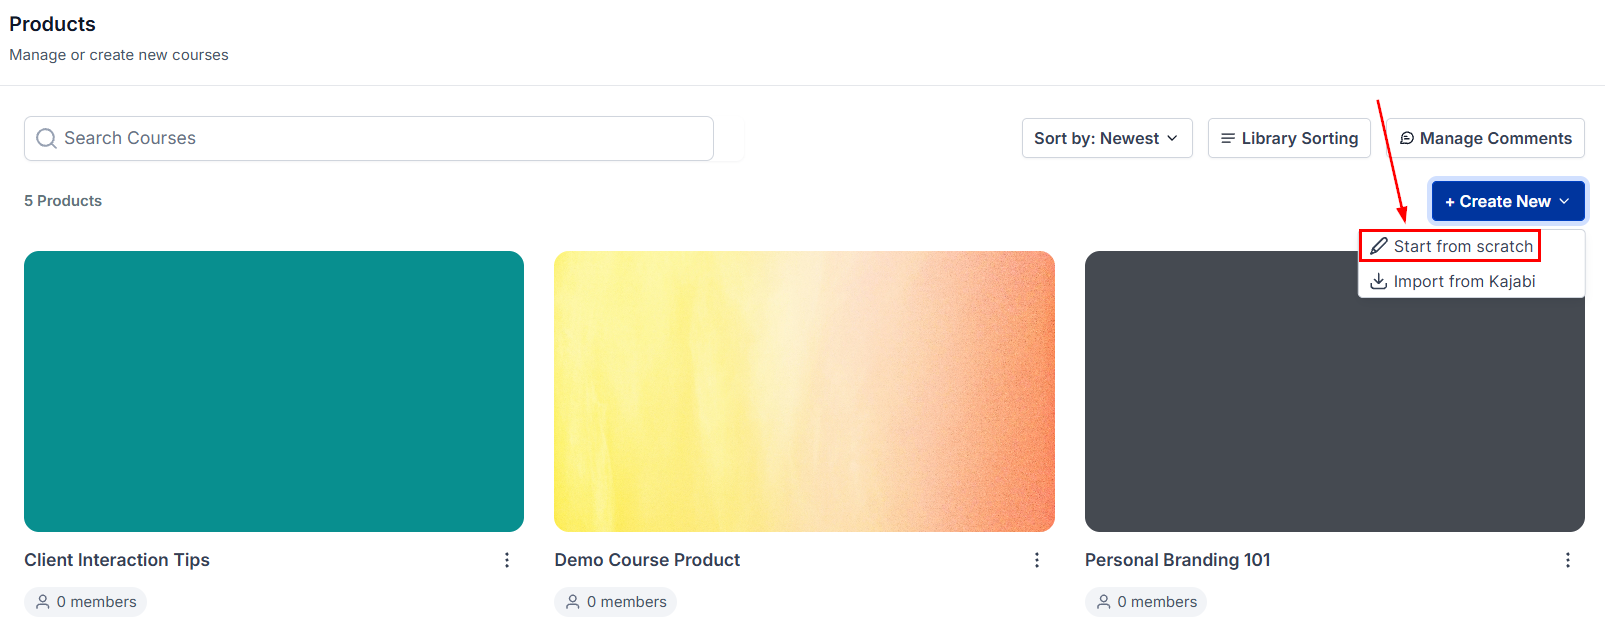
For this guide, we will focus on the custom creation approach. Click on “Start from Scratch” to continue to the next page.
Creating Your Product
Details
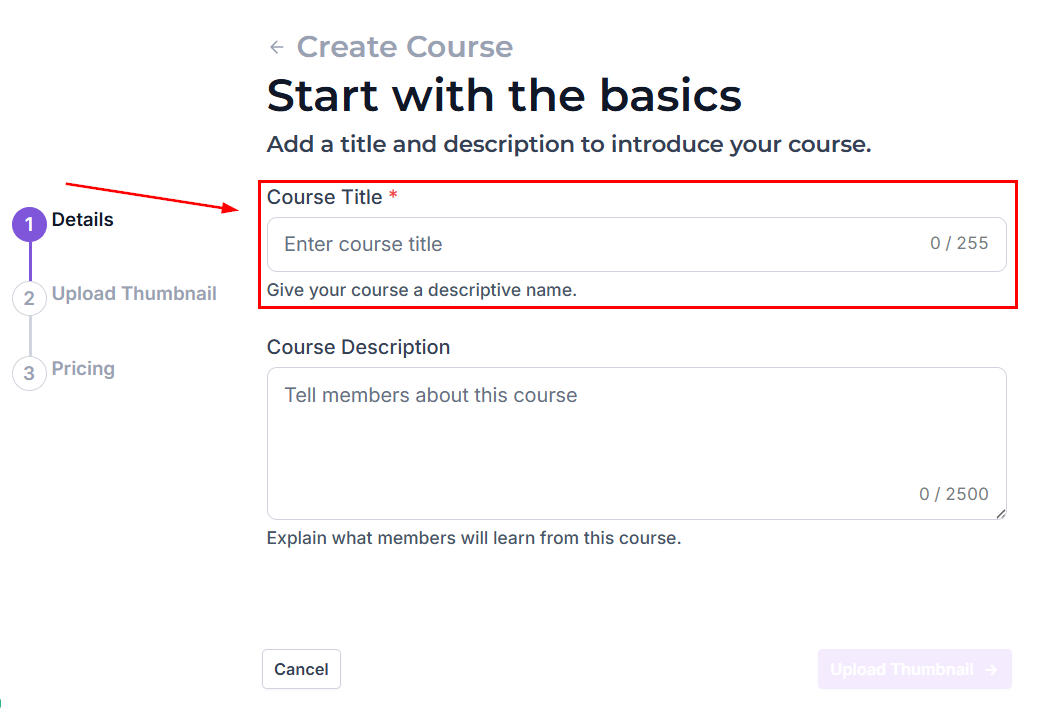
The first step in crafting your course is to name your product. This name should reflect the content and objectives of your course, as it will be visible to your students.
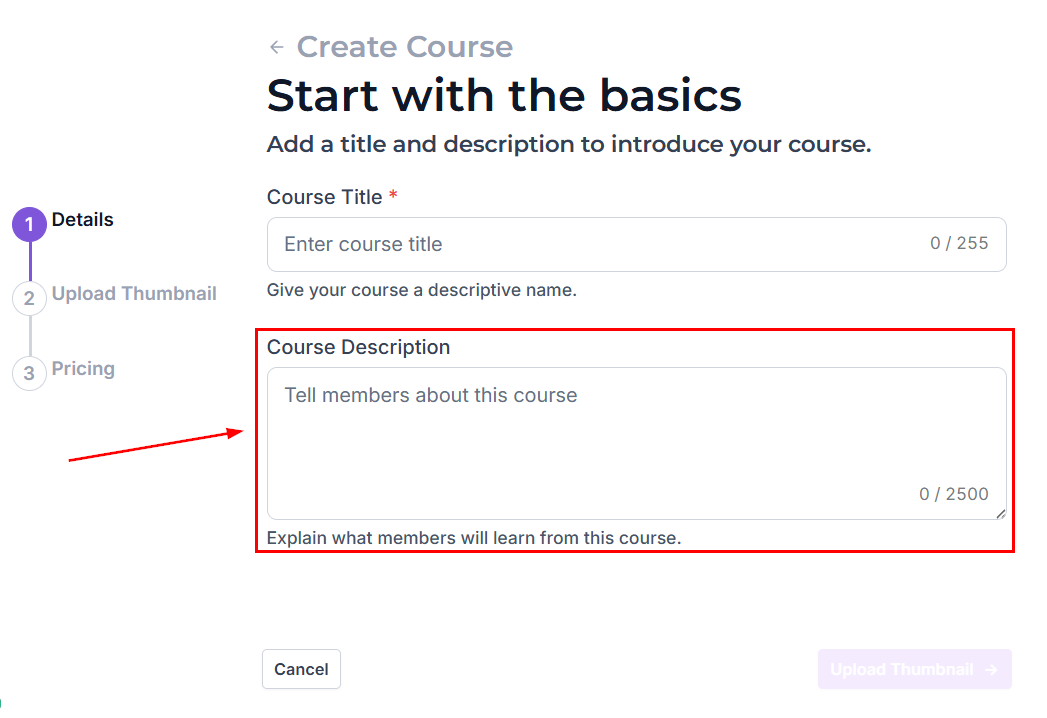
Add a description that clearly explains what your course is about. This step is optional but highly recommended.
Thumbnail
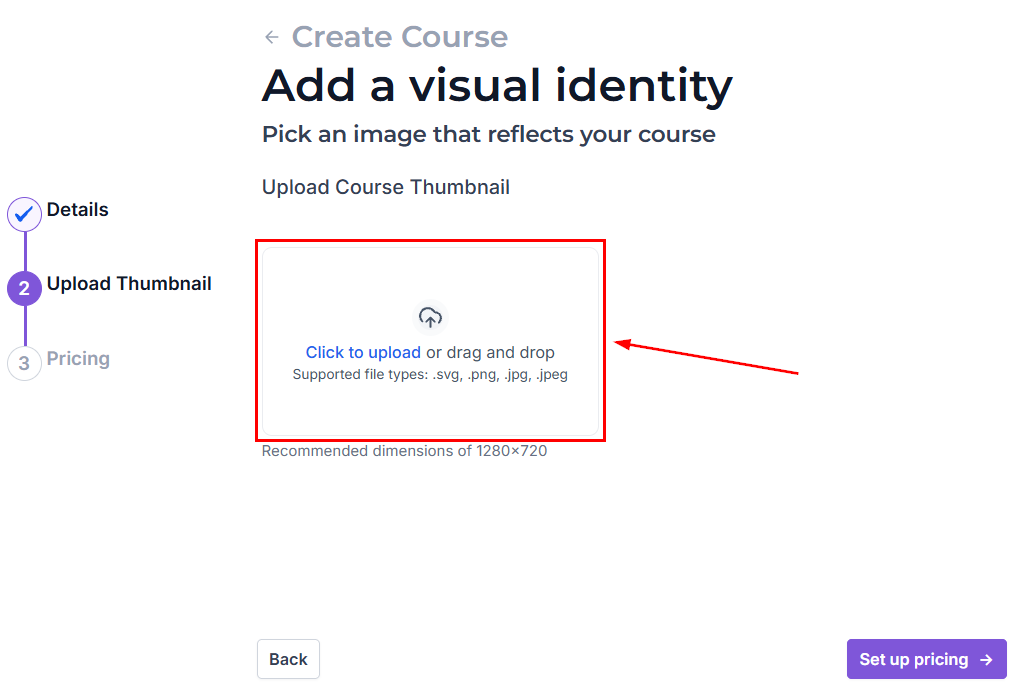
Drag or upload your course’s thumbnail; this will help you provide a cohesive image and easily identify your course inside the system. The recommended dimensions are 1280 x 720 px.
Pricing
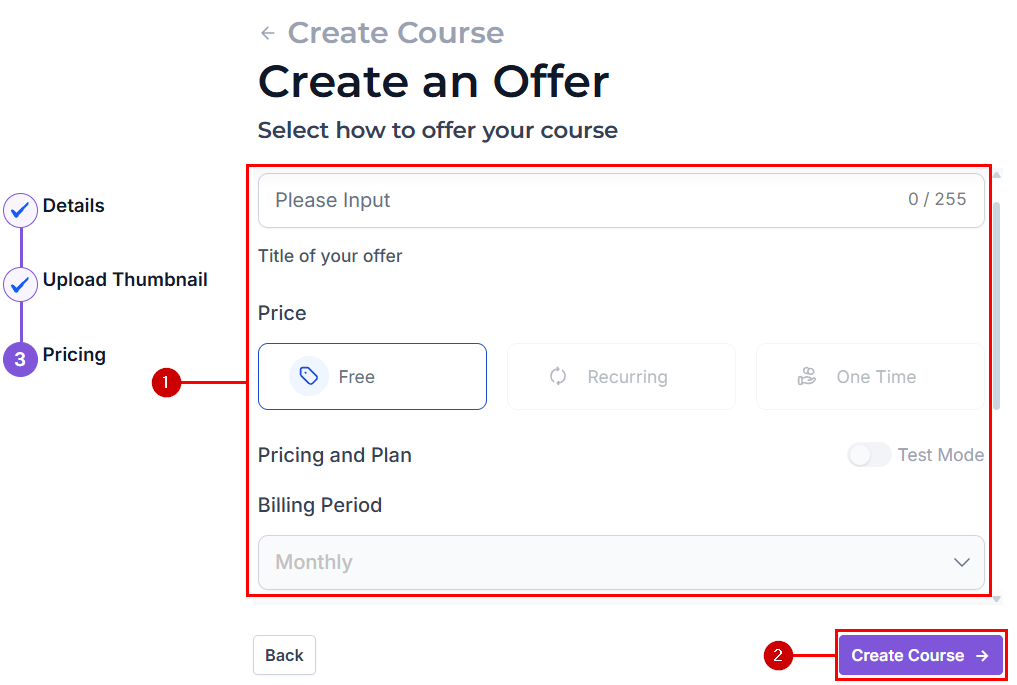
Optionally, you can directly create an offer for your Course by adding the billing details (1). Otherwise, skip this step by clicking Create Course (2).
Outline
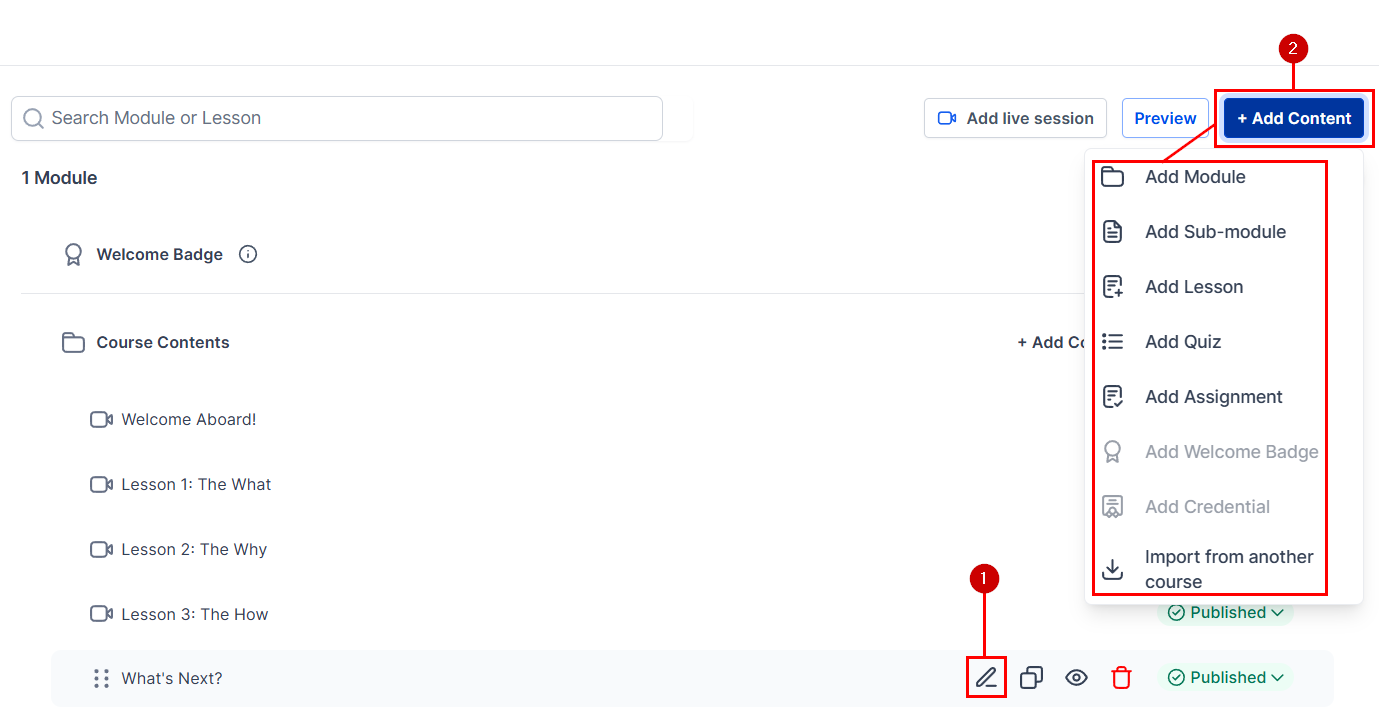
The Outline section contains your course content, including lessons, subcategories, and assessments. You can edit the pre-generated ones by clicking the pencil icon (1) or add new content by clicking + Add Content and selecting a content type (2).
Let’s start by adding a Module, you can think of them as the folders you use to organize your lessons, quizzes, and assessments in.
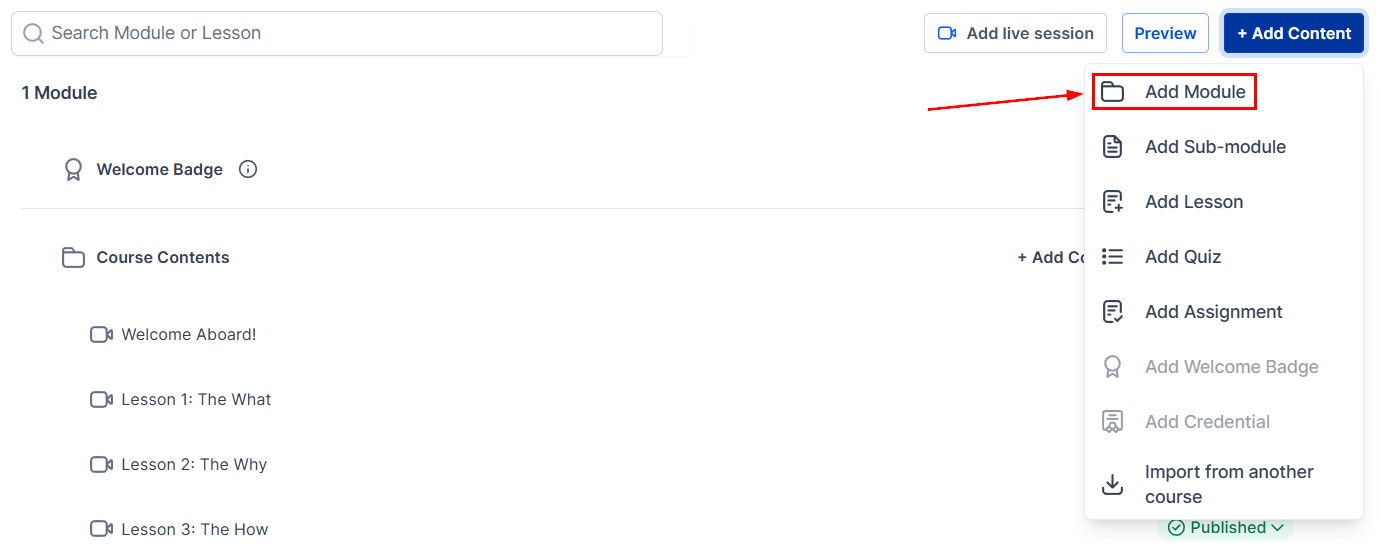
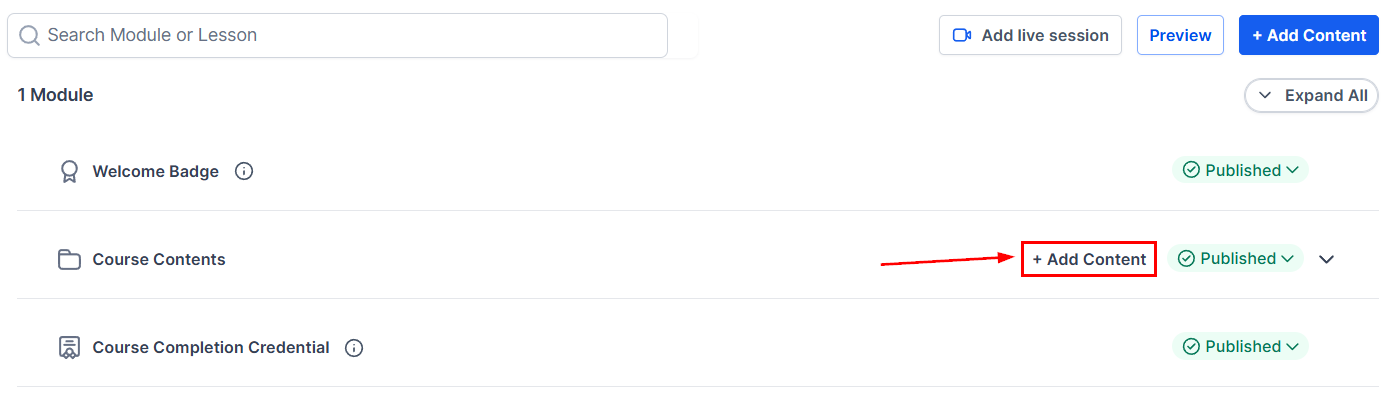
Then let’s add some content inside our module with the + Add Content button in the folder line.
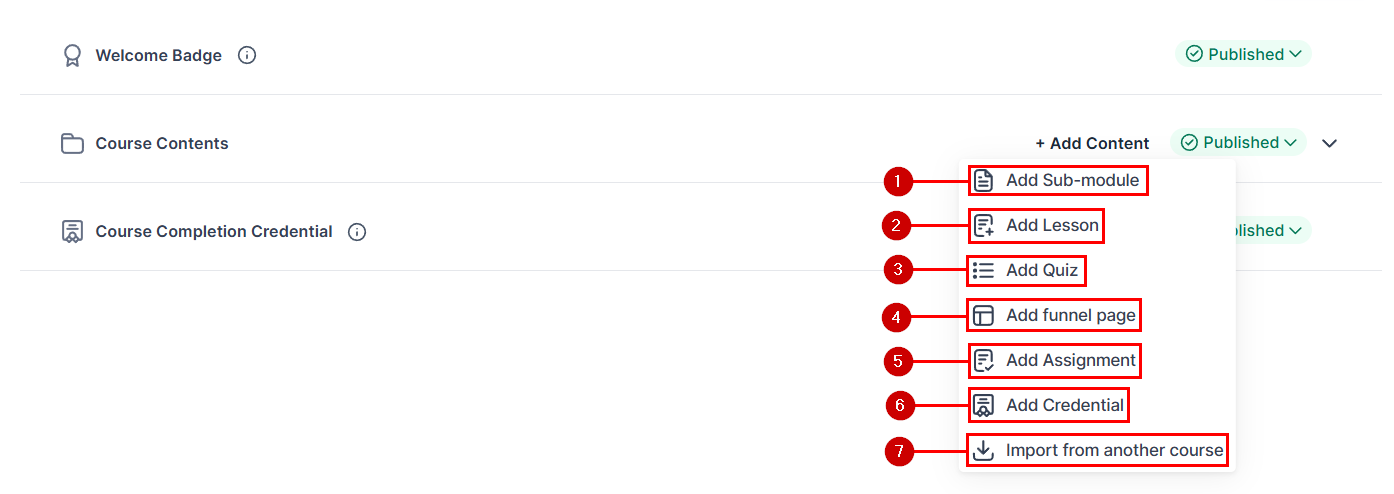
You can select between the following content types:
- Sub-Module: They allow you to create content subdivisions inside a module, making it easy to break down complex topics.
- Lesson: This is the nitty-gritty of your course, where you provide learners with the information they will gain from your course.
- Quiz: Use it to test your members’ knowledge with integrated questions.
- Funnel Page: You can add any previously built funnel as independent lessons within courses.
- Assessment: If you want to assign your members some homework or a project to complete, this content type is for you.
- Credential: This helps you add badges and certificates to provide members with proof of their progress and motivate them to continue learning.
- Import from another course: This allows you to import content from an existing course, supporting individual lessons and submodules.
Actions Menu
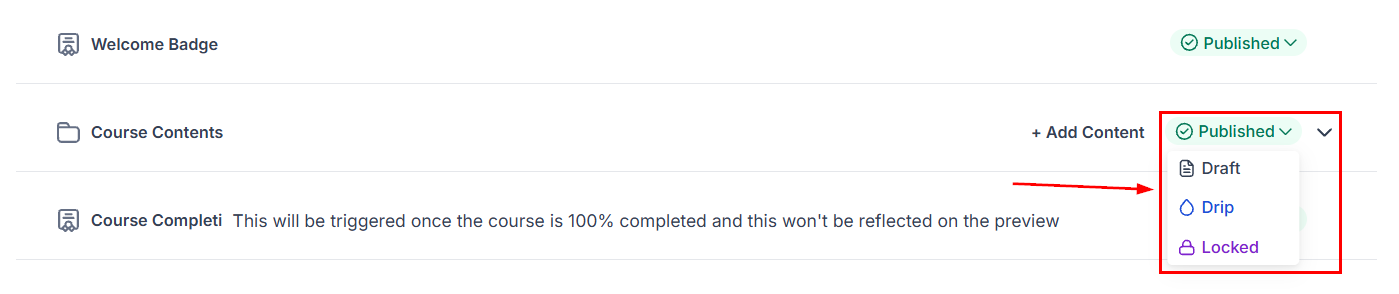
In the Actions menu, you have several options for managing your lessons, subcategories, and assessments:
- Draft Mode: Your product remains unpublished and editable in Draft Mode. Make any necessary changes until you are ready to go live.
- Published: When editing is complete, switch to Published mode to make your product live.
- Locked: For products with multiple categories, use the Locked mode to require visitors to complete previous categories before accessing subsequent ones. Click the “Locked” icon, then select the prerequisite post that must be marked complete to unlock the next category.
- Drip Mode: Set access limits for each category based on the number of days after purchase. Specify the time frame for visitor access to each category.
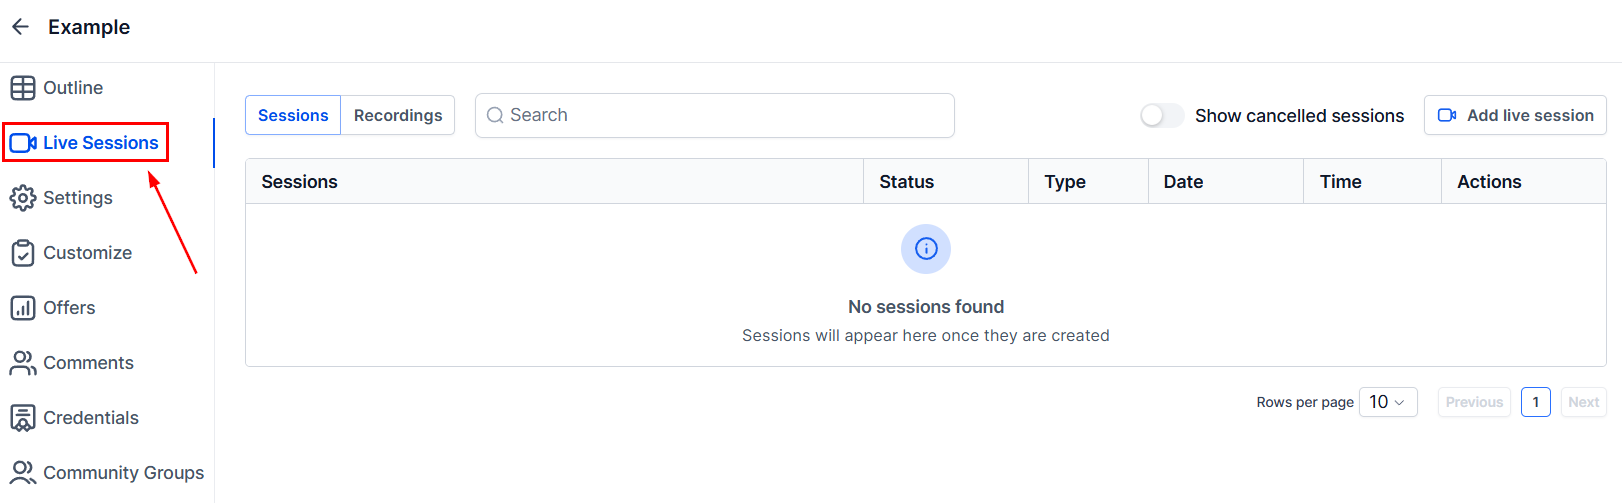
Live Sessions
Live Sessions give you a central hub, connected to your course’s content, where you can seamlessly interact with your learners by providing a space to plan, host, and reuse live learning.
Settings
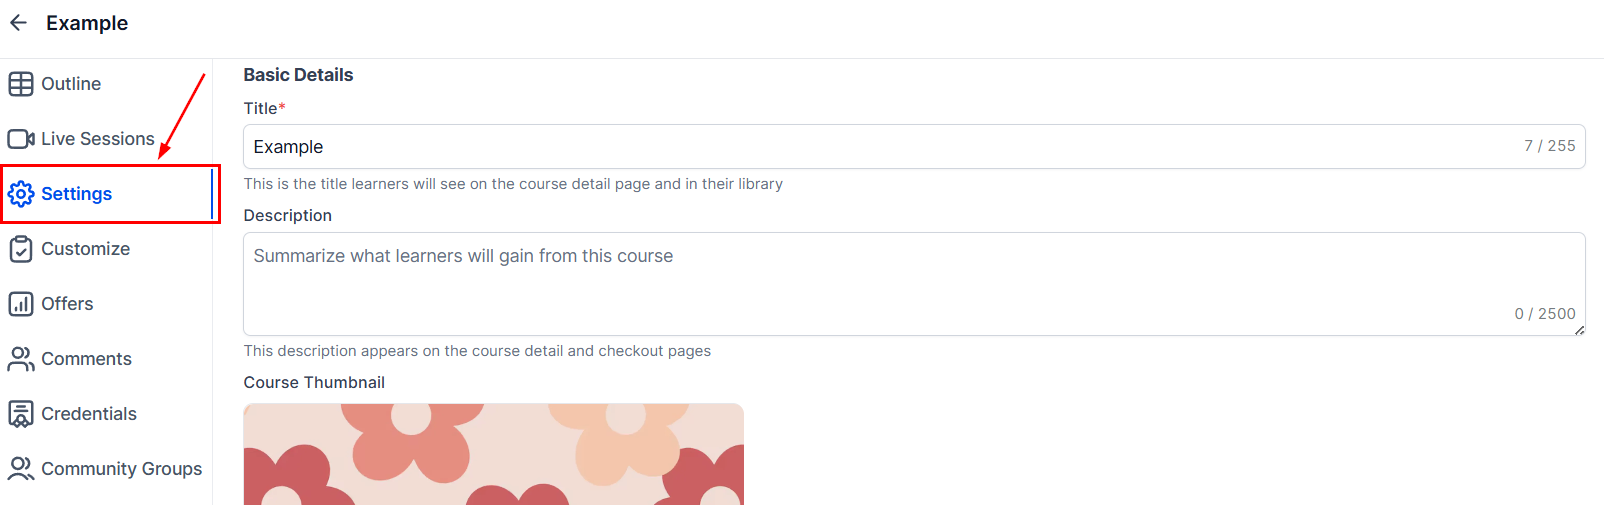
In the “Settings” section, you can edit the title, description, thumbnail, and instructor information. You also have the option to add custom code and adjust other core aspects of the course.
The recommended dimensions are as follows:
- Product Thumbnail: 1280x720
- Instructor headshot: 300x300
- Logo: 640x64
- Favicon: 32x32.
Customize
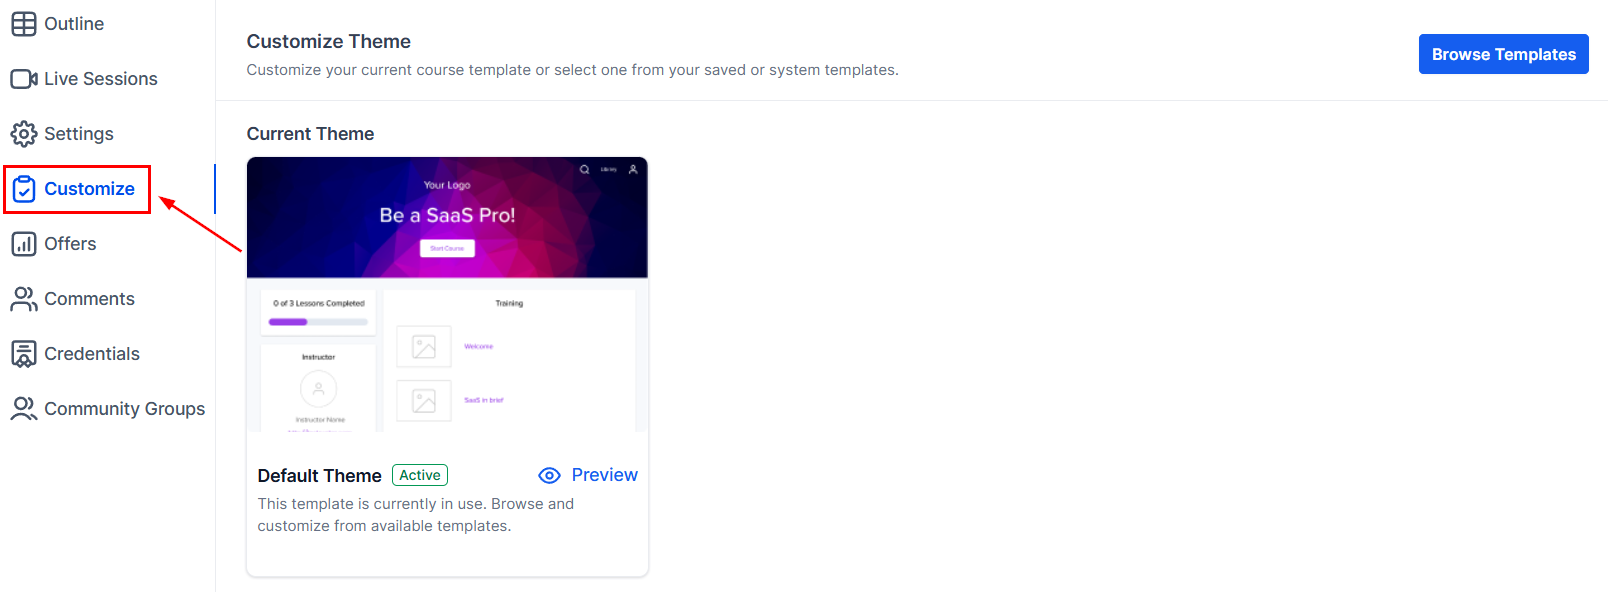
In the “Customize” section, you can personalize the appearance of your course page by selecting colors and background images and adjusting sections and lessons to align with your branding. You can also save these themes for future use. These can be managed in the “My Templates” section.
Offers
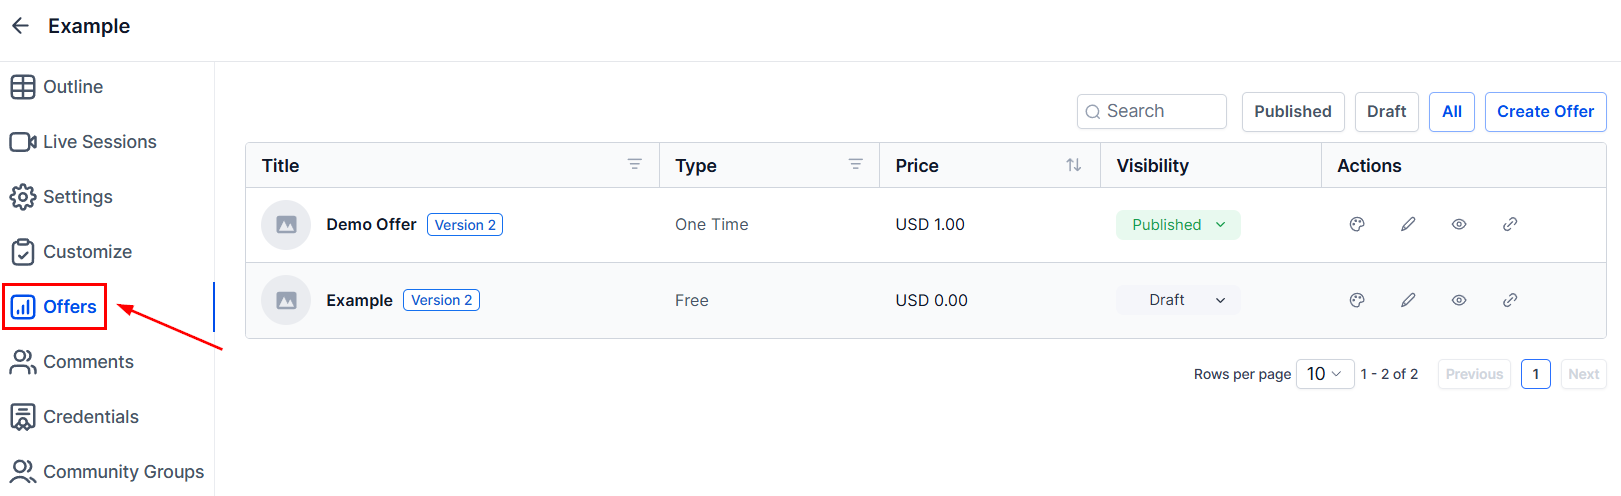
The “Offers” tab allows you to manage course-related offers linked to the product, including titles, prices, and checkout options.
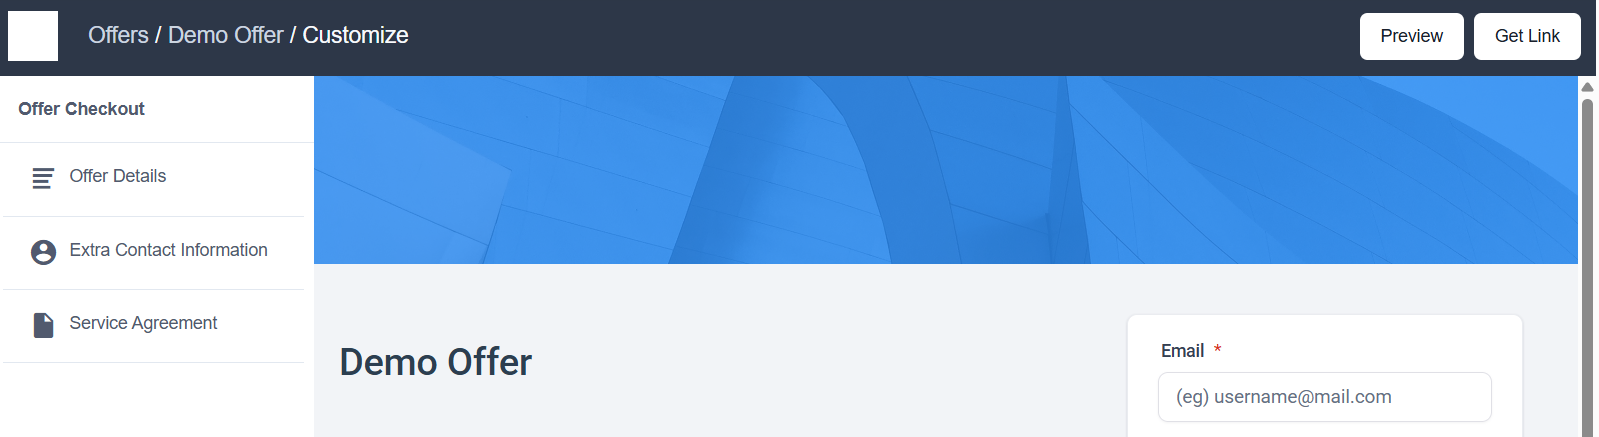
Checkout Page
Once you connect an offer to the course, click the pencil icon next to it to view and edit the checkout page.
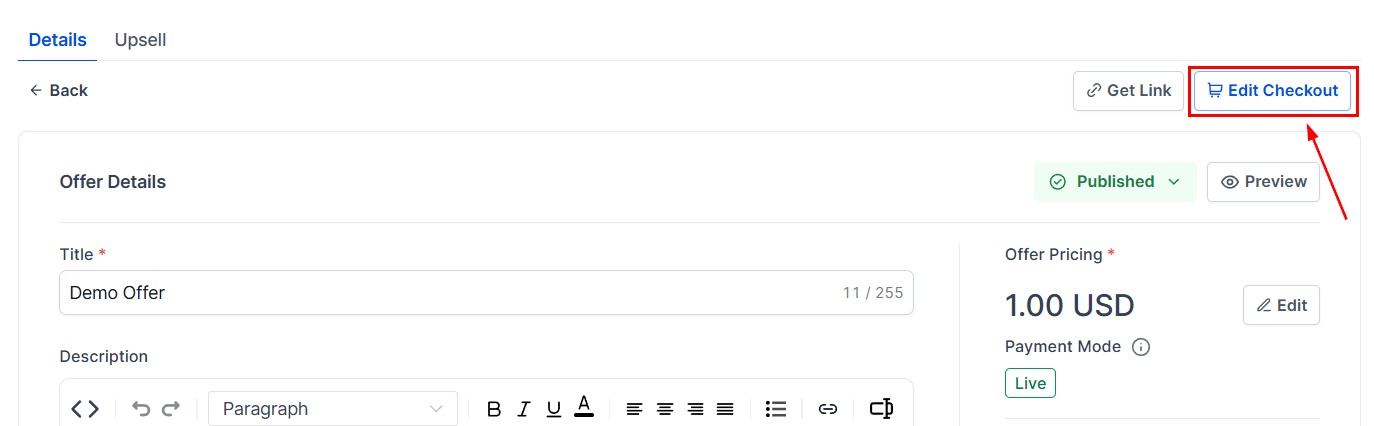
The Checkout page consists of:
- Offer Details: You can edit the offer banner, video, poster image, Logo image, and checkout copy.
- Extra Contact Info: You can enable the Collect Address and phone number.
- Service Agreement: Enable or disable the Service Agreement as a requirement. You can also customize your agreement text.
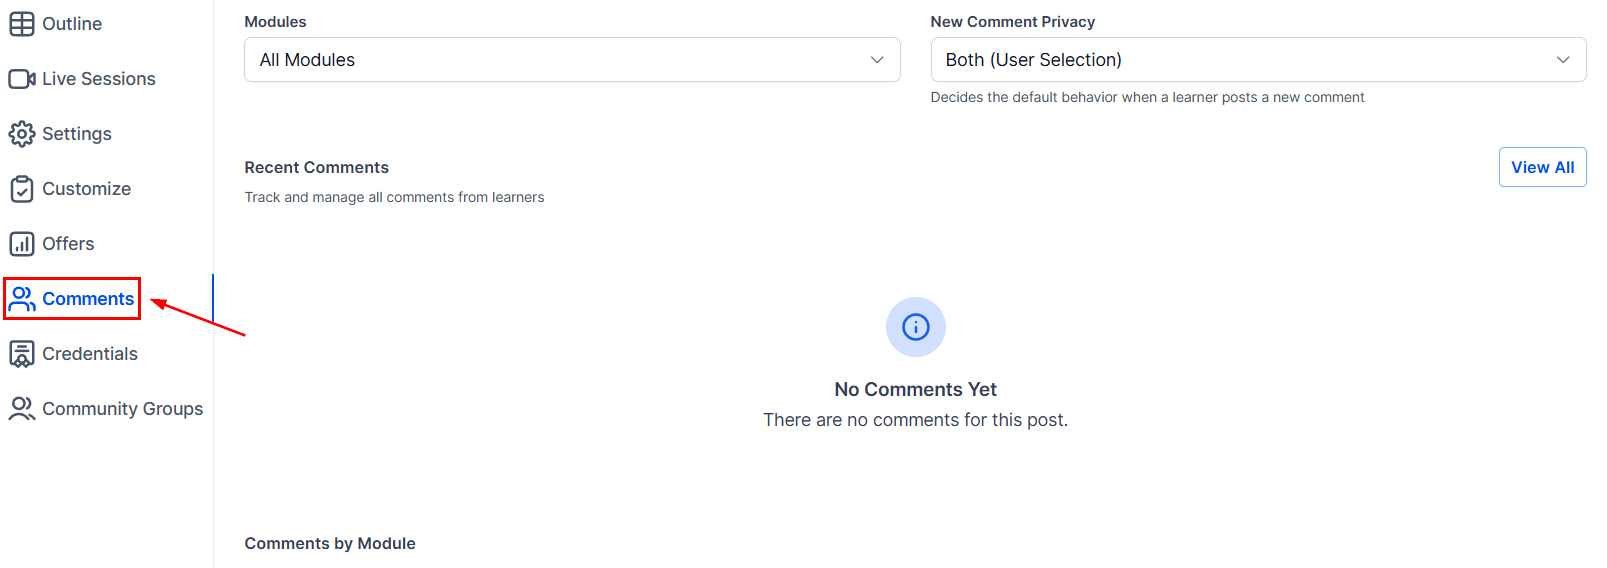
Comments
The “Comments” area is where you can monitor and respond to student interactions in your lessons and assessments.
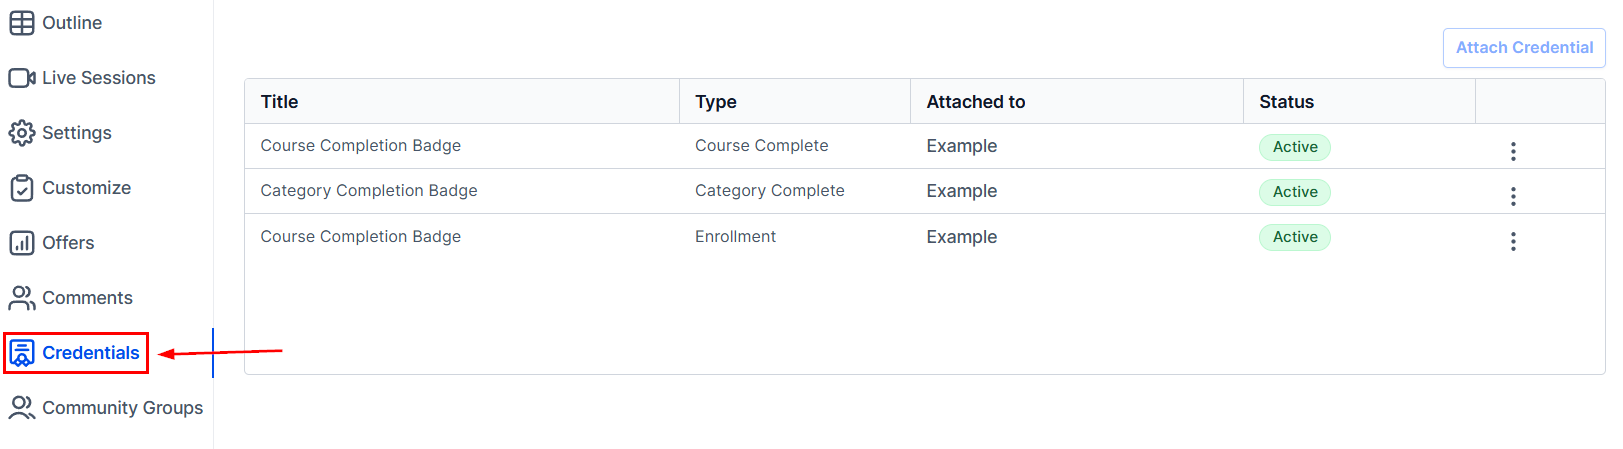
Credentials
The “Credentials” section lets you manage certificates and badges for course or module completion.
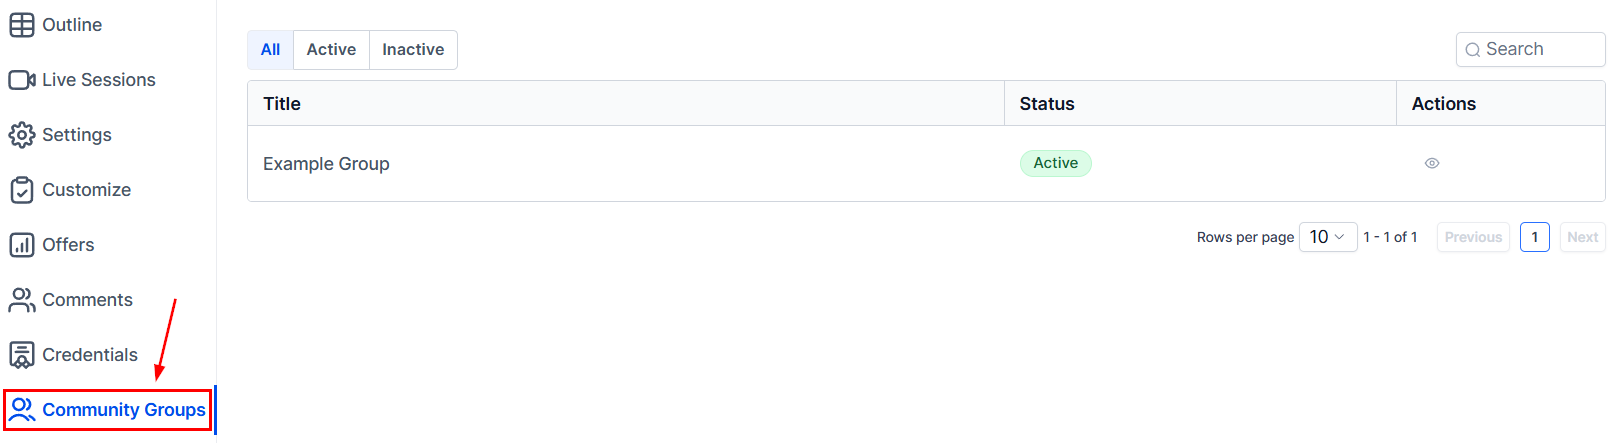
Community Groups
In the Community Groups section, you can view all the groups a product is part of in one convenient tab. The CRM table provides enhanced search and pagination for quicker navigation. You can preview groups directly from the product page and filter them by Active or Inactive status for better visibility and management.
After setting up your course, you can manage all your course offerings from the “Your Products” page, where you can preview, edit, clone, and share courses by hovering over the course and clicking on the three-dot action dropdown. This central hub makes course management straightforward and organized.
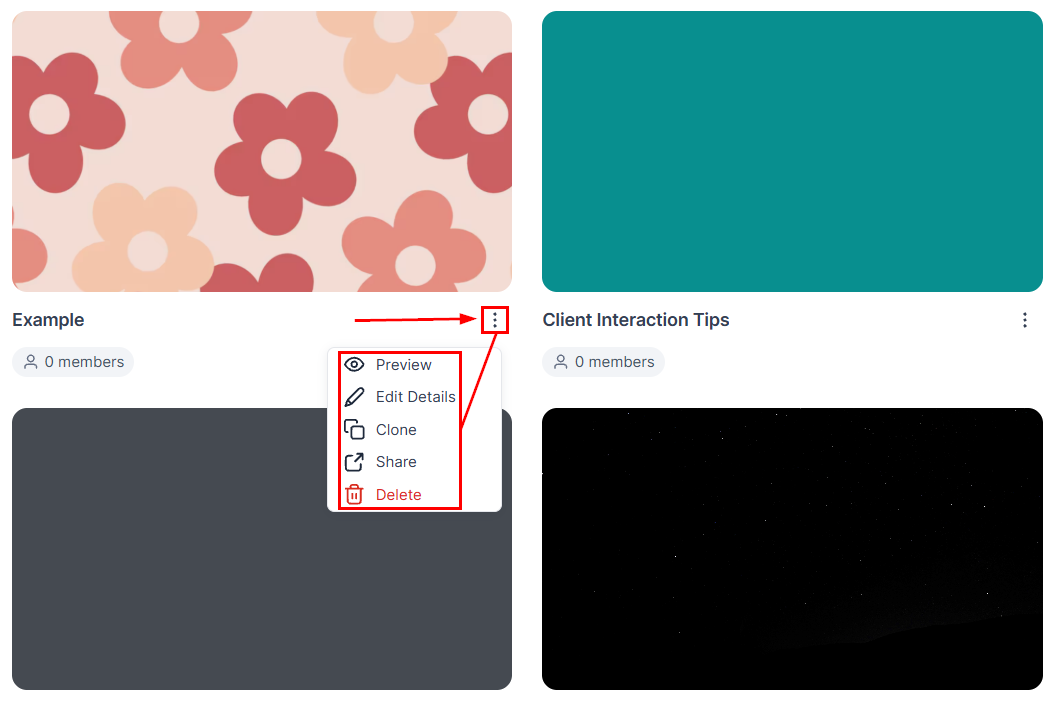
By following this structured approach, you can create a well-designed and engaging course that meets your students’ needs. This process not only allows you to deliver valuable content but also provides you with the tools to effectively manage and enhance your course offerings within the CRM, ensuring a seamless educational experience for your audience.
Important Info
- In the assessment section of the course, Quiz Explanations allow students to learn from their mistakes with answer details, while Single Choice vs. MCQ Clarity ensures questions are clearly labeled.
- You can track your learning using the new Course Progress Bar and distinct markers highlight Locked and Drip Lessons for better visibility. The Auto-Complete Button automatically updates after tasks are completed, and improved Start Pages and Status Pages make accessing and reviewing quizzes and assignments effortless. Your learners can also benefit from a detailed Full Quiz Review, faster navigation between questions, and easy management of downloads with Download Control.
- Features like Image Previews provide a better viewing experience, while modern Shimmers improve the look and feel of loading pages. Behind the scenes, optimized performance ensures faster, smoother interactions for both instructors and students.
Troubleshooting Tips
- Preview Your Course: Regularly preview your course to ensure it looks and functions as intended.
- Check Visibility Setting: If a lesson does not appear in the preview of your course, ensure it’s set to “Published.”
Not a Funnelbud customer yet?
Try our all-in-one CRM for sales and marketing — free for 7 days, no commitment.