Affiliate Highlights
Affiliate Highlights offers an easy way to monitor an affiliate’s performance, whether across all active campaigns or within a specific one. This feature helps you gain quick insights into individual contributions, allowing for more informed decisions and strategic adjustments.
To access affiliate highlights, navigate to the Affiliate section of your account then select an affiliate from the list.
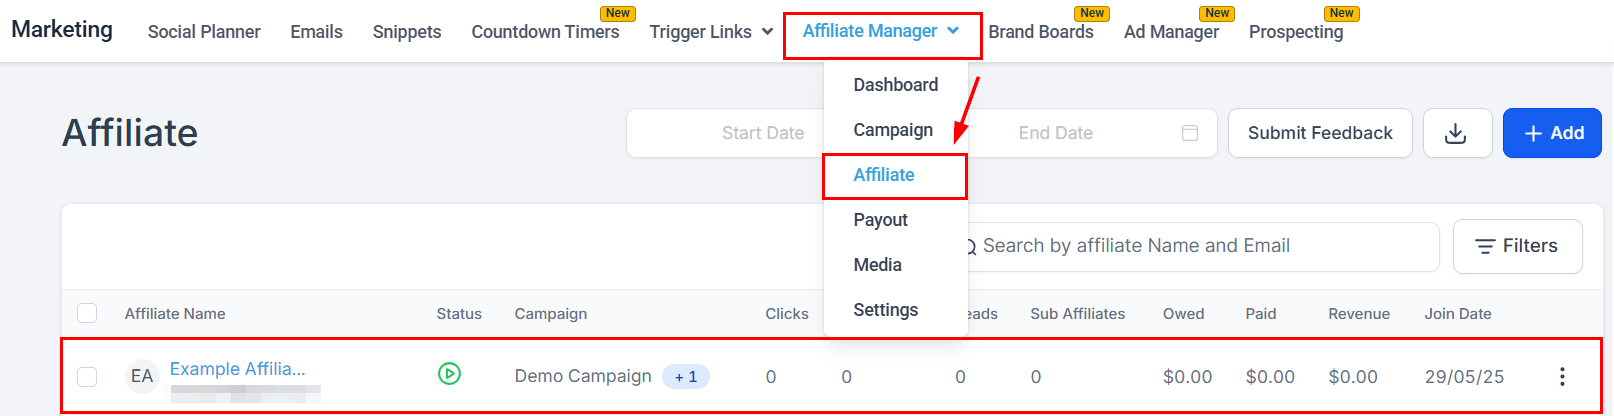
Edit Affiliate
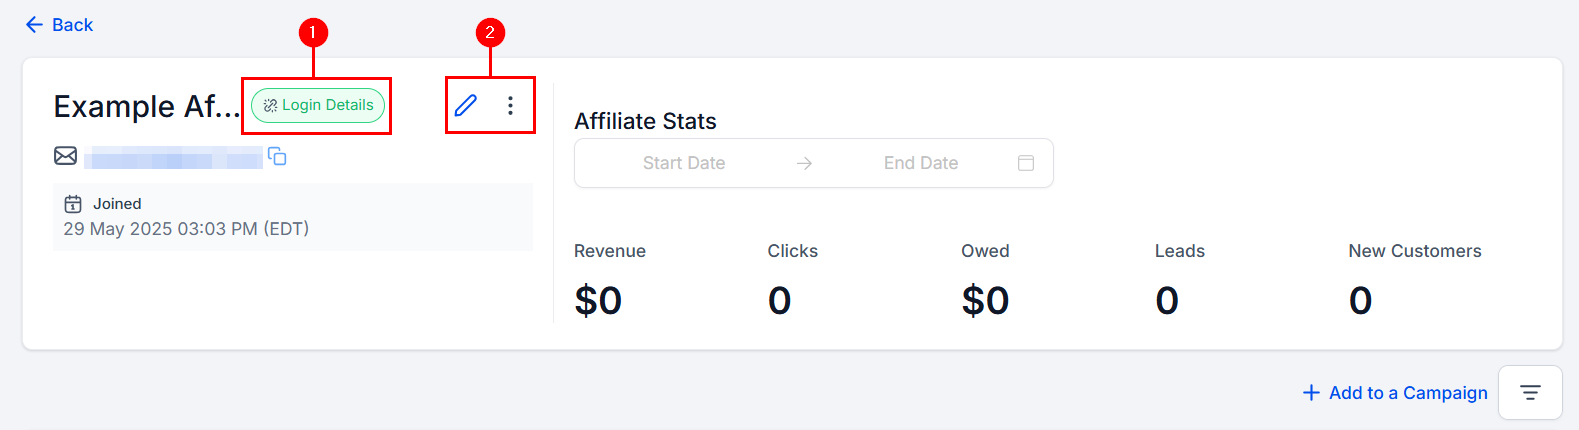
You will be provided with an overview of the affiliate, including their name and email address as well as the date they were first enrolled in an affiliate campaign.
Click the Login Details icon (1) to generate the affiliate’s magic link to share it via email or another social platform. Additionally, you can update their affiliate profile by clicking on the “Edit Affiliate details” button or perform other actions by clicking the three vertical dots (2).
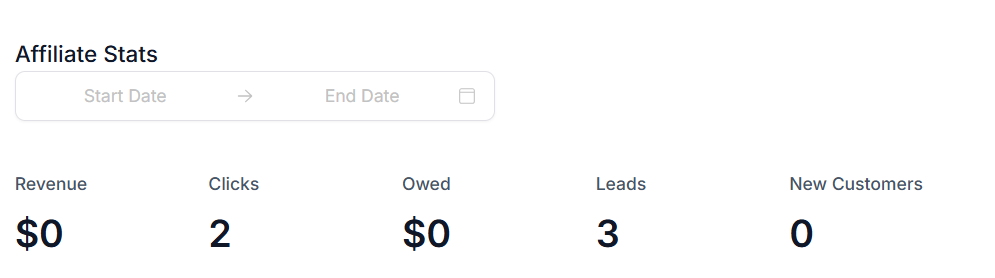
Affiliate Stats
On the Statistics dashboard, you can easily access data about your affiliates.
- Filter by Date Range: This can be useful when you want to access data for a particular period. Choose a start and end date range you want.
- Revenue: This shows the total revenue generated by this affiliate.
- Clicks: Displays the number of leads that clicked a referral link.
- Owned: You can see the amount of payout owed to the affiliate in this area.
- Leads: The number of leads the affiliate brought in.
- New Customers: You can see the number of customers who came in using the Affiliate’s Unique ID.
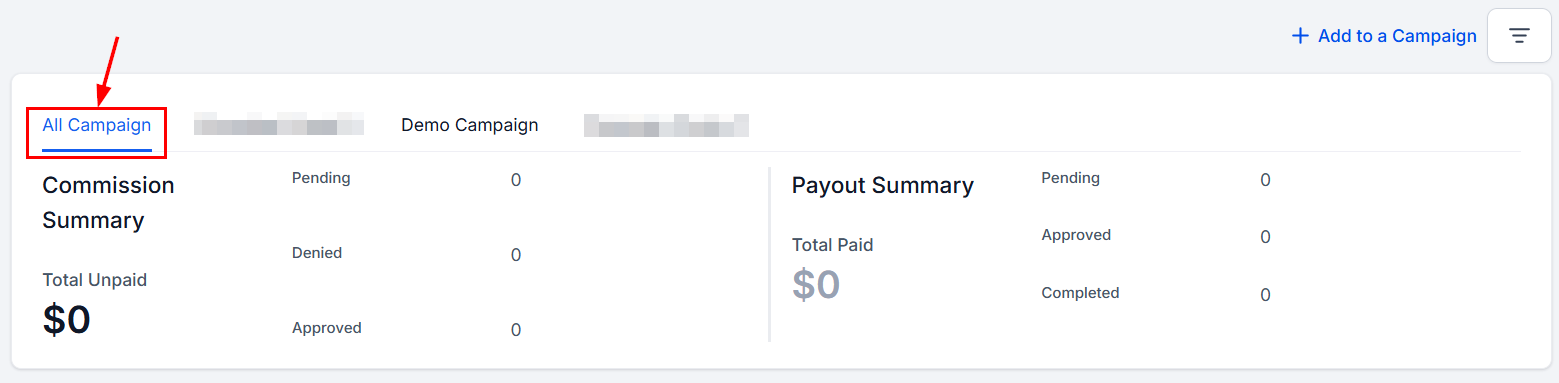
All Campaign
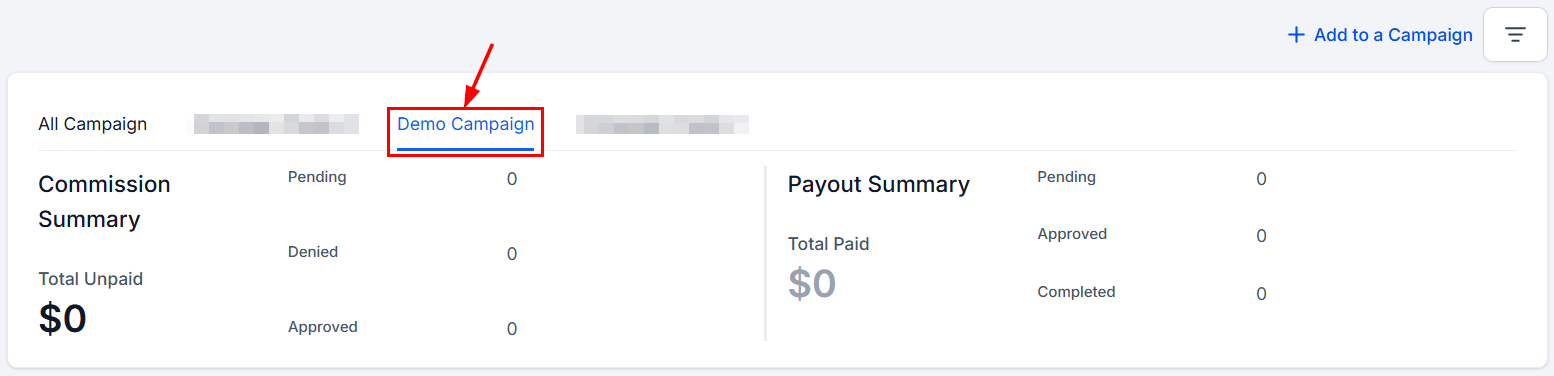
This shows the summary of all the campaigns the affiliate is enrolled in.
- Commission Summary: This shows the number of commissions that are Pending, Denied, or Approved, and the Total amount unpaid for all commissions.
- Payouts Summary: The Payout summary shows the number of Payouts that are Pending, Approved, or completed, and the Total payments made.
Individual Campaign View
By switching to the tabs next to all campaigns, you can see the summary of individual campaigns. There will be a tab for every campaign the affiliate is added to.
Add to a Campaign
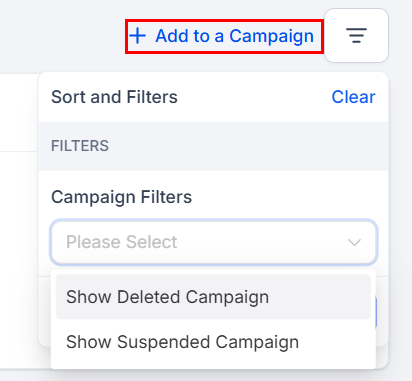
Click on the “Add to a Campaign” button to add an affiliate to a campaign.
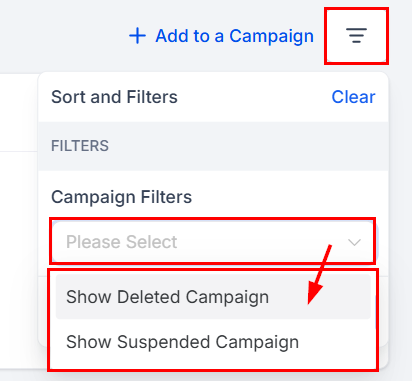
Campaign Filters
Choose whether to show deleted and suspended campaigns in the view by applying the filters relevant to your analysis.
Active Referral Link
When in the All Campaigns window, you will see the lists of all active referral links below. Press the Customize button to update the referral ID or add a coupon code, or copy the link for sharing.

Commissions
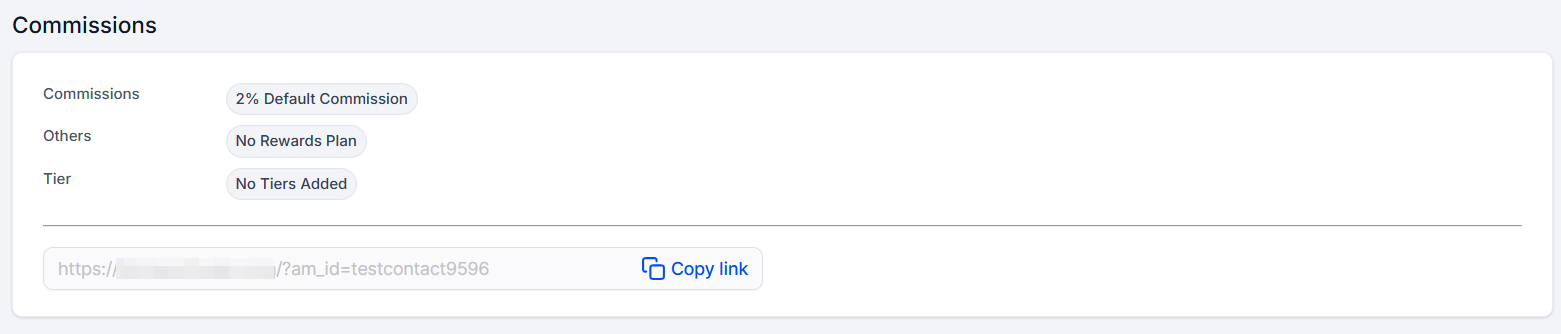
If you have selected a campaign, a preview of its commission structure will be displayed instead. You can also copy their referral link within this section.
Affiliate Table
In the Affiliate Table, you can access all activities associated with each affiliate. Note that activities will only be displayed when campaigns linked to the affiliate are live.
Commission
You will see the commission that all affiliates earned from customers in each campaign.
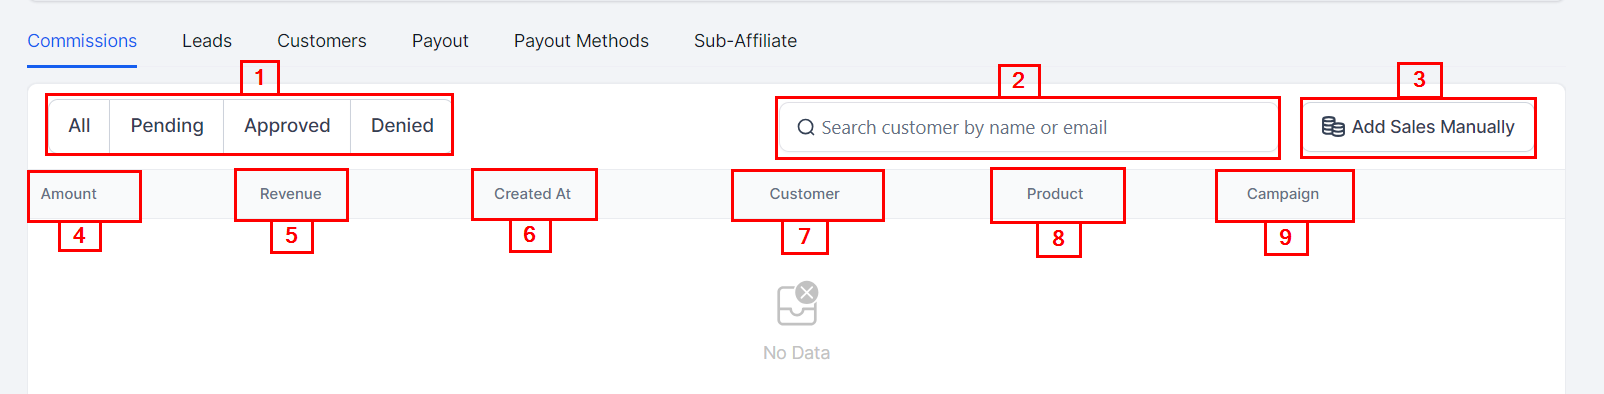
- “All, Pending, Approved, and Denied” - You can filter all your commission details. This filter will enable you to narrow down the commission search using the status, to either All, Pending, Approved, or Denied.
- Search Bar: With the search bar in the Commission table, you can easily and quickly search using any affiliate’s customer name or email.
- Add Sales Manually: Commission a reward manually by clicking this button
- Amount: This column shows the amount for each customer.
- Revenue: You will see the revenue that has been generated from each customer.
- Created At: You can see where the commission was created.
- Customer: You will see the names of all Affiliate Customers.
- Product: You can see the product added to the campaign here.
- Campaign: The campaign each customer came in through will be displayed here as well.
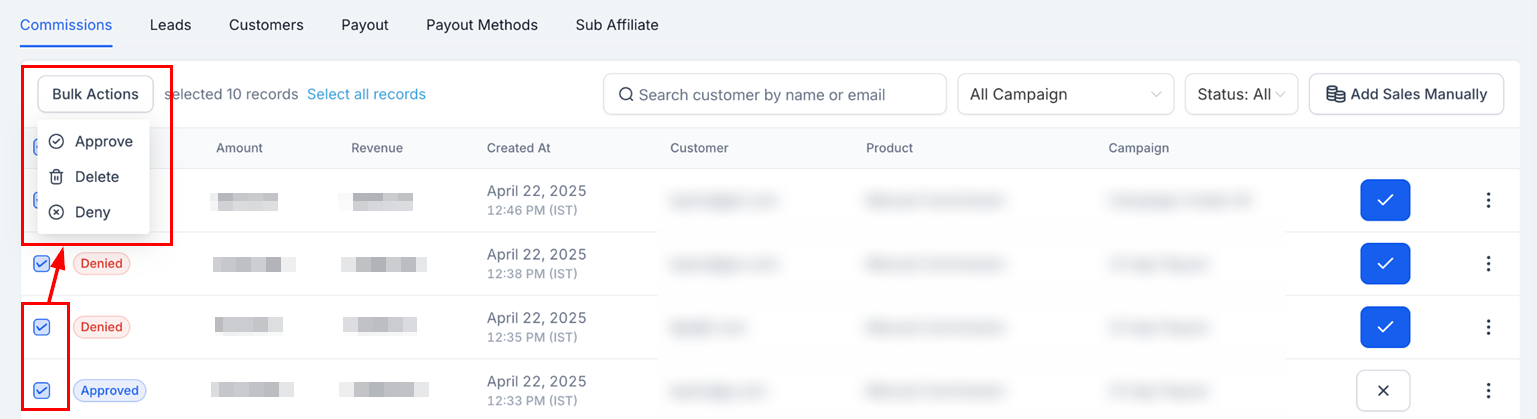
You can also select commissions from the list to approve, deny, or delete them in bulk. You may choose them manually or select all at once by using the checkbox at the top of the list.
Leads
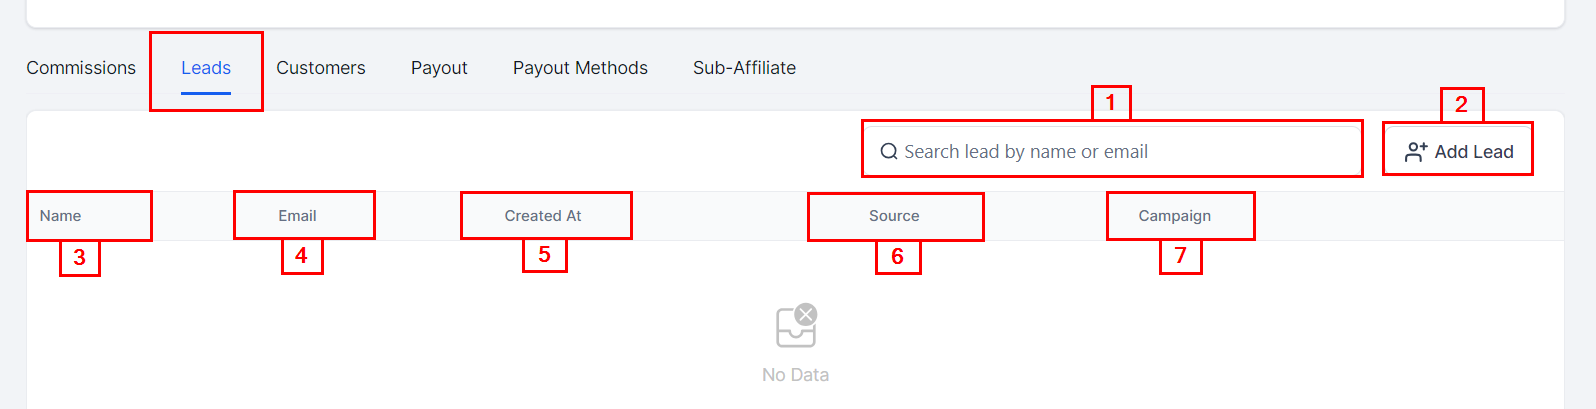
You can see the number of leads here
- Search Bar: With the search bar, you can easily and quickly search for any lead name or email.
- Add Lead: Click here to add new leads manually or import from contacts.
- Customer Name: You will see the names of all Customers assigned to this affiliate.
- Email: The customer’s email will be displayed here.
- Created At: You can see where the commission is been created.
- Source: Shows where the lead comes from, such as specific website.
- Campaign: The campaign each customer came in through will be displayed here.
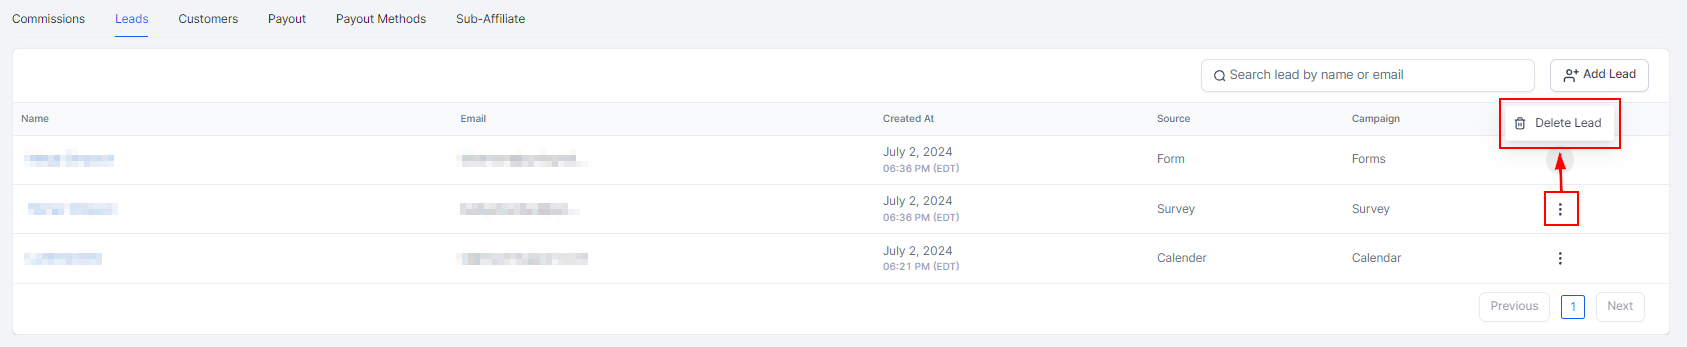
If you want to remove a lead from an affiliate, click on the three dots next to the campaign and then click Delete Lead.
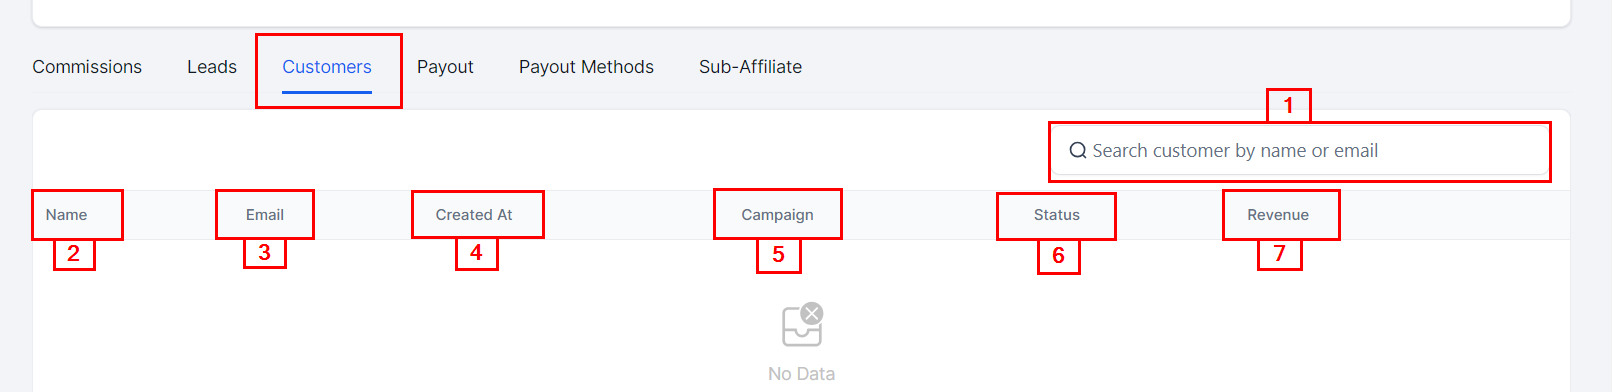
Customers
- Search Bar: With the search bar, you can easily and quickly search for any lead name or email.
- Name: You will see the names of all Customers assigned to this affiliate.
- Email: The customer’s email will be displayed here.
- Created At: You can see where the commission was created.
- Campaign: The campaign each customer came in through will be displayed here as well.
- Status: Provides details such as whether the customer is new, active, pending, or inactive.
- Revenue: You will see the revenue that has been generated from each customer.
Click the three dots next to a customer to manually add commissions, view previous commissions, or delete/disable the customer.
📌Note:
- Setting a customer as “Disabled” ensures that no further sales are tracked, and they will no longer generate commissions. This option is useful for managing fraudulent sign-ups or preventing commission assignments in specific situations.
- Deleting a customer removes their association with the affiliate, and no future commissions will be generated from that customer.

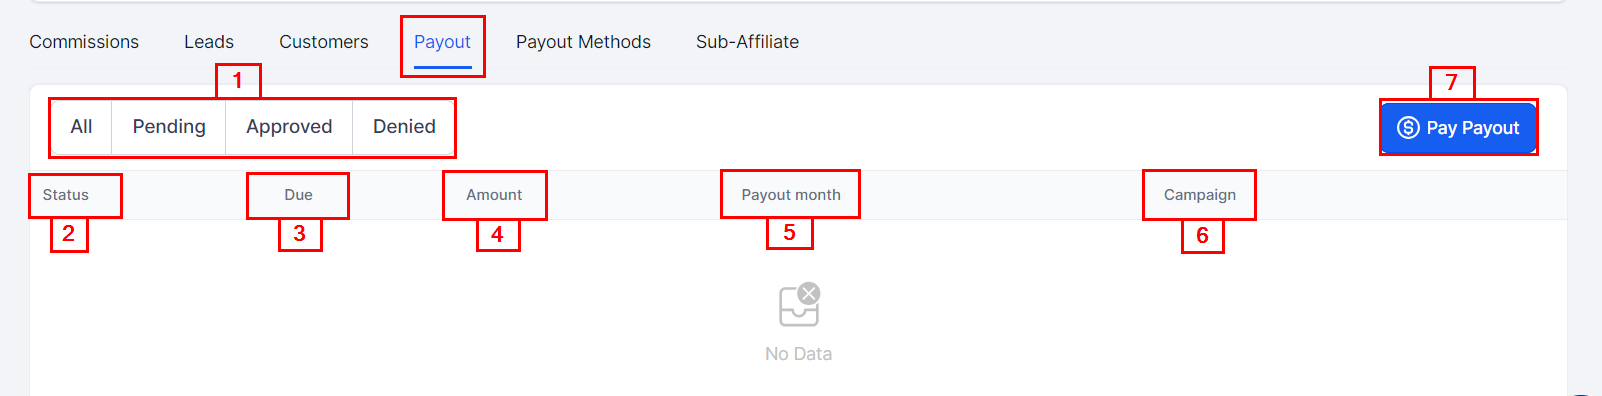
Payout
- “All, Pending, Approved, and Denied”: You can filter all your commission details This filter will enable you to narrow down the commission search using the status; to either All, Pending, Approved, or Denied.
- Status: Shows if the payout is pending or completed.
- Due: Indicates the due dates for each payout.
- Amount: This column shows the amount to be paid for each campaign.
- Payout Month: This shows the default Monthly date for each payout.
- Campaign: The campaign each customer came in through will be displayed here.
- Pay Payout: Seamlessly issue commissions to the affiliate by clicking this button.
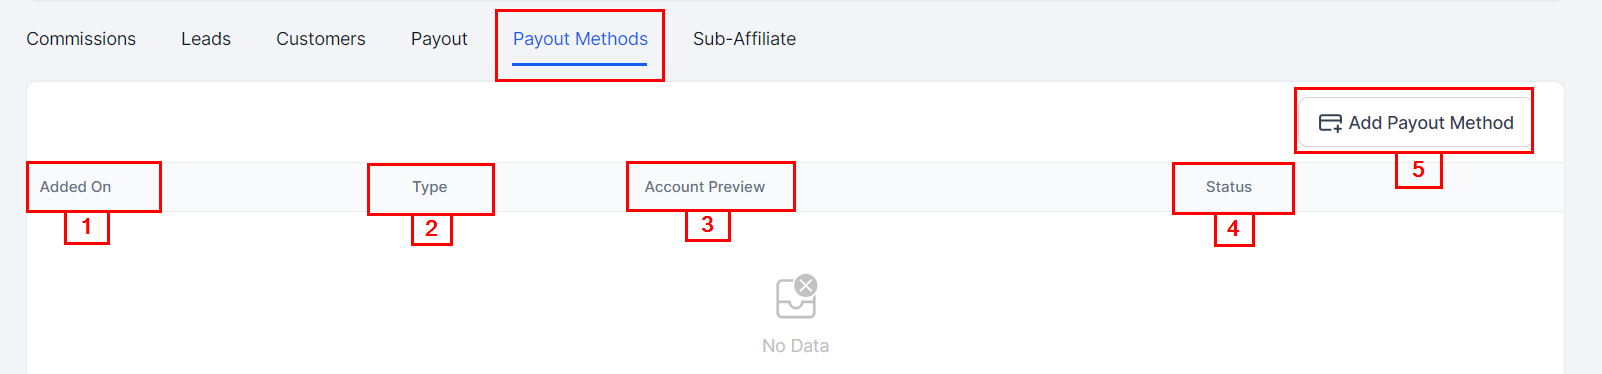
Payout Methods
- Added On: You can see the date the payout method was added to the system.
- Type: Displays the Payment provider associated with the payout method (currently limited to PayPal).
- Account Preview: The email address associated with the payout method will be displayed here.
- Status: A check mark indicating if the payment method is live.
- Add Payout Method: Enables you to add the PayPal account associated with the affiliate directly to the system.
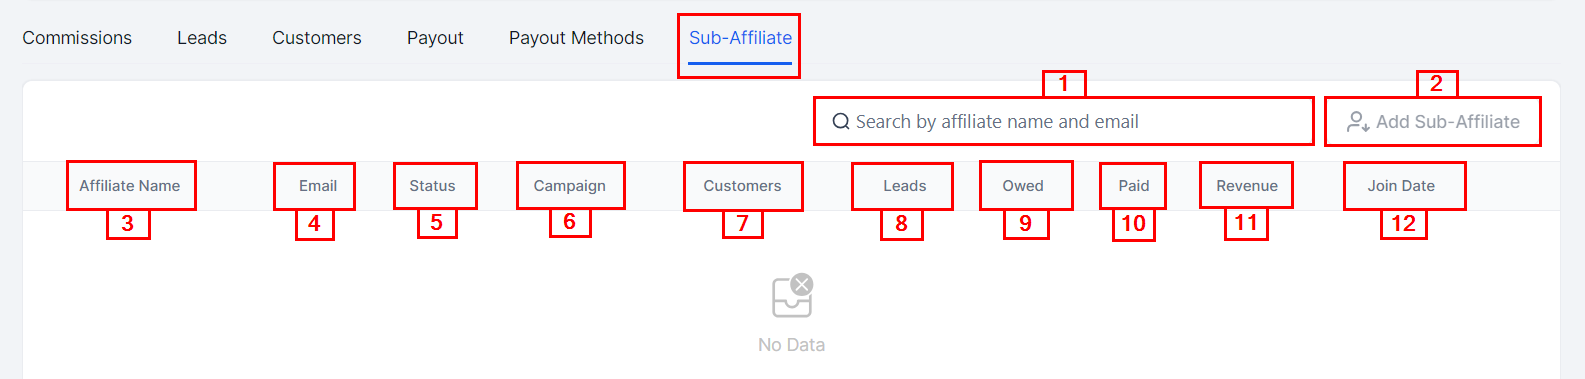
Sub-Affiliate
- Search Bar: With the search bar, you can easily and quickly search for any lead or sub-affiliate name or email.
- Add Sub-Affiliate: Seamlessly add a new sub-affiliate to an existing affiliate for campaigns with a multi-tiered structure.
- Affiliate Name: You will see the names of all sub-affiliates.
- Email: The sub-affiliate’s email will be displayed here.
- Status: You can also see the status of the sub-affiliate.
- Campaigns: The campaign each sub-affiliate came in through will be displayed here.
- Customer Name: You will see the names of all Customers assigned to each sub-affiliate.
- Leads: You can see the number of leads assigned to each sub-affiliate.
- Owed: The payout owed to each sub-affiliate will be displayed here.
- Paid: This tab displays the amount of funds that have been successfully issued to the sub-affiliate.
- Revenue: The revenue that has been generated from the sub-affiliate to date.
- Join Date: The date the sub-affiliate joined the campaign.
Now you have the basics of how to manage your affiliates’ profiles! Start rocking that affiliate marketing world, or if you’d like to learn more, visit the other articles available in the Affiliate section.
Not a Funnelbud customer yet?
Try our all-in-one CRM for sales and marketing — free for 7 days, no commitment.