How to Automate Community Management with Workflow Trigger and Actions
Managing your community and ensuring a seamless user experience often hinges on automation. Payment Received Workflows allow you to streamline the onboarding process for new members, manage subscription issues, and engage your community effectively. In this guide, we’ll walk you through setting up workflows for payment receipt, membership access, and follow-up engagement using real-world examples.
Creating a New Workflow
To get started, navigate to the Workflows section in your CRM. You can either create a new workflow from scratch or select an existing template that fits your requirements.
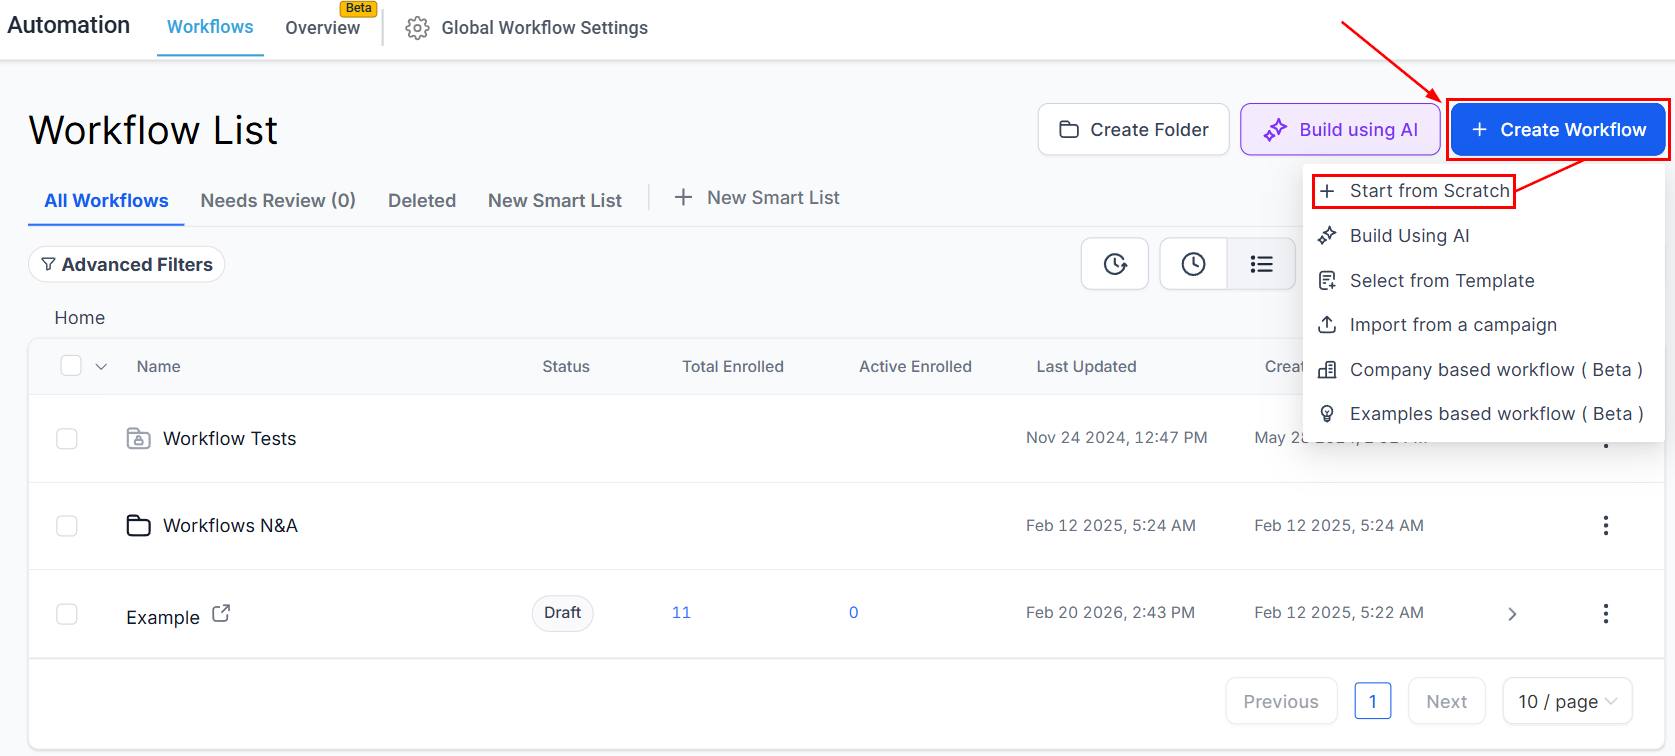
Trigger Creation
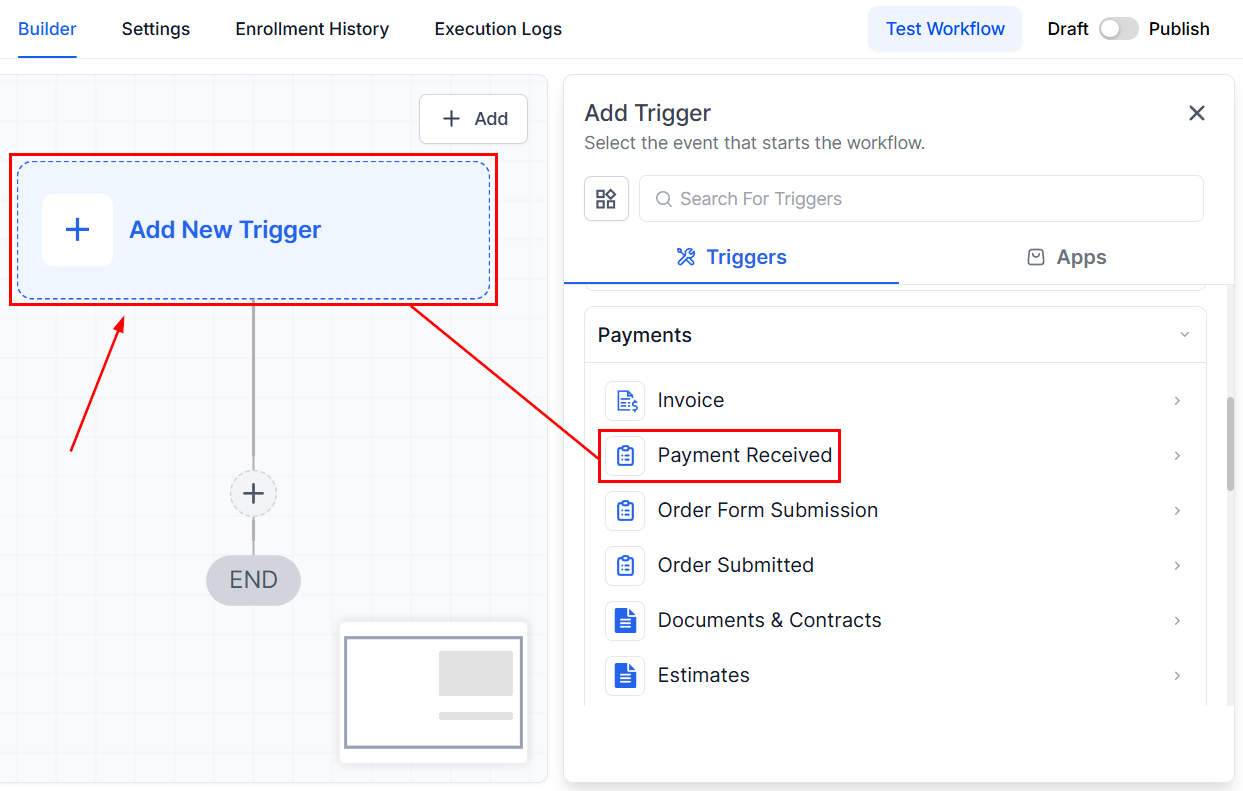
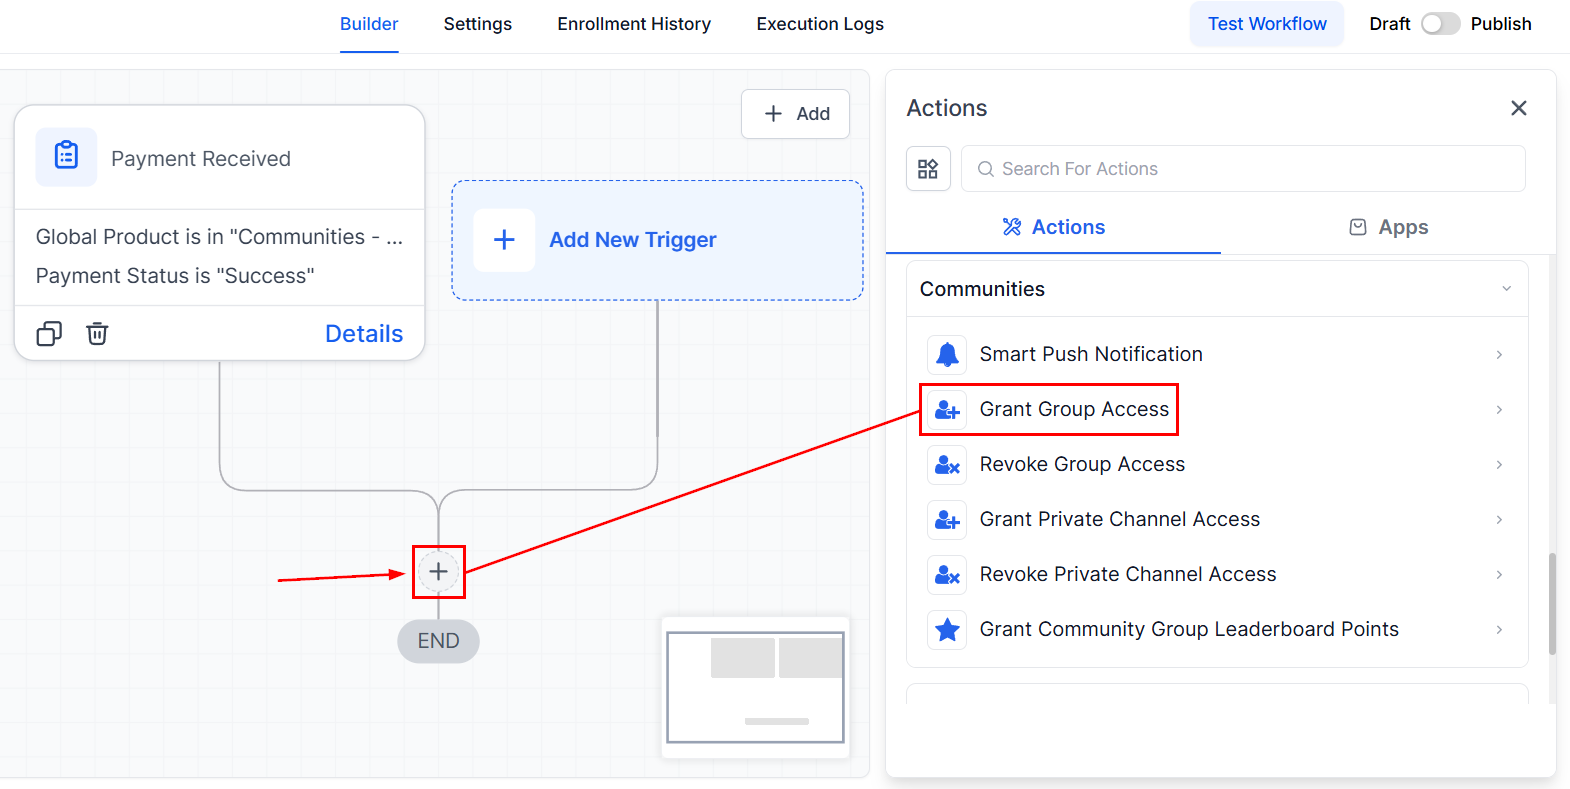
Click the Add New Trigger button, navigate to the “Payments” section, and select Payment Received as your trigger. This will let you automatically add new members to your community upon payment.
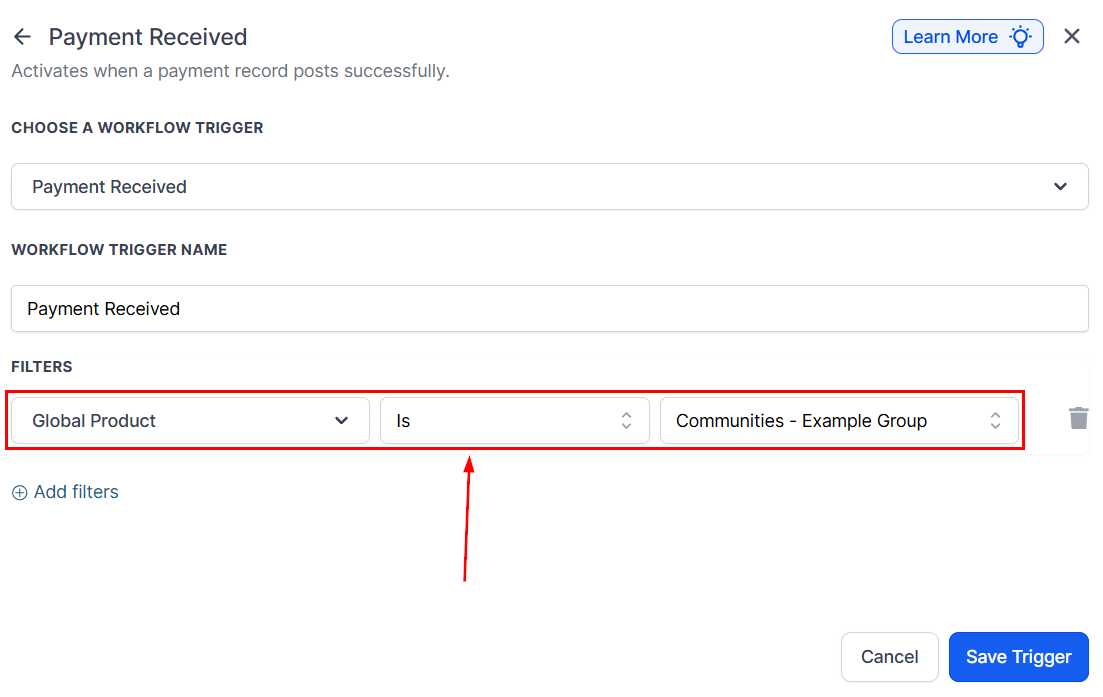
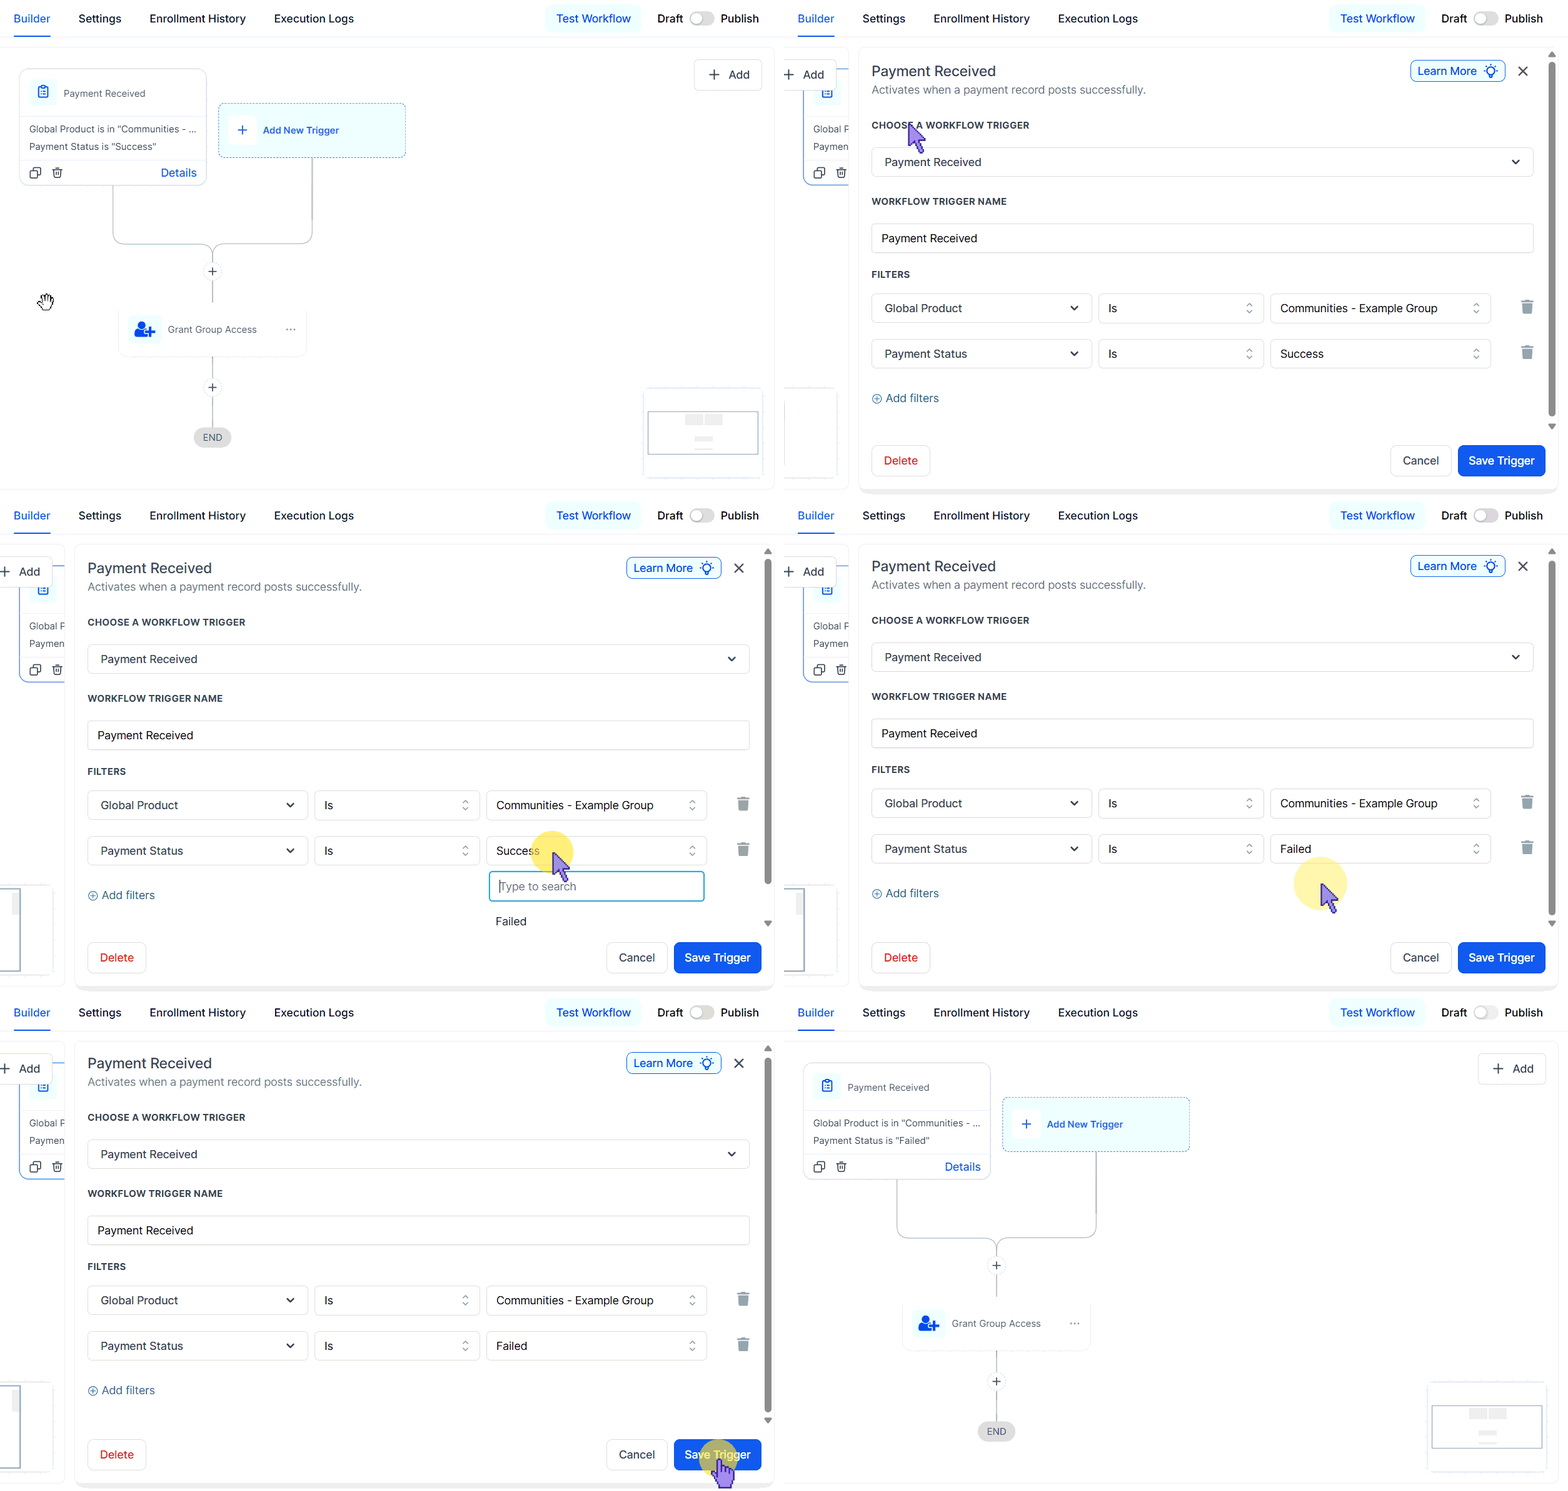
Add filters to specify which product this trigger applies to. For example, select “Global Product” and then specify your product, like “Communities - Example Group.”
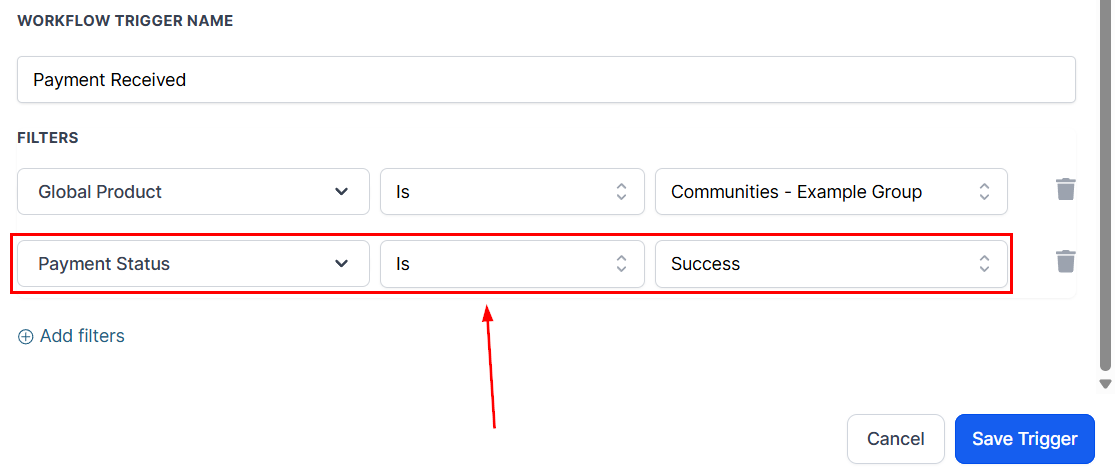
Filter for Successful Payments
Triggers determine when a workflow activates. Use the “Payment Received” trigger to automate membership access. Add a second filter for Payment Status and set it to Success. This ensures the workflow only activates for completed payments.
For instance: With Communities - Example Group, add a second filter for “Payment Status” and set it to “Success”. This ensures the workflow only activates for completed payments.
Add Follow-Up Actions
Grant Group Access
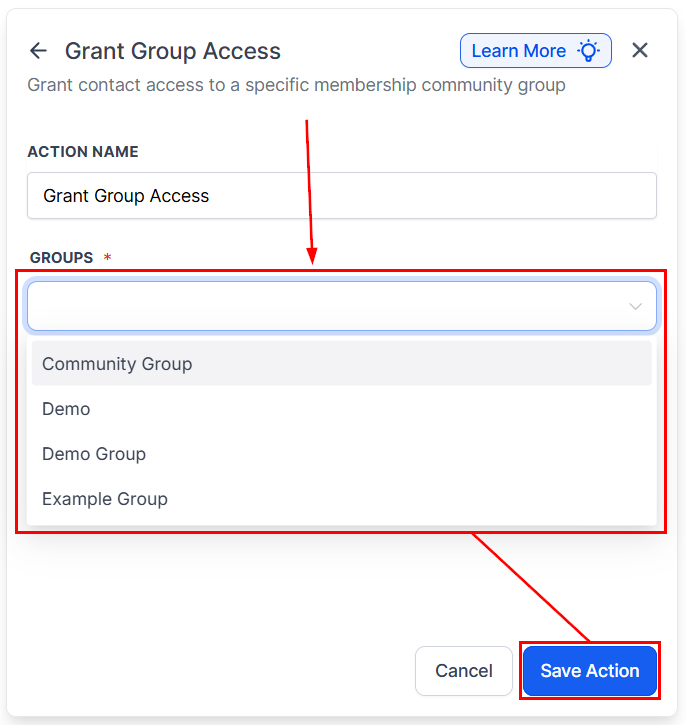
Click on the “+” button, search, and add the “Grant Group Access” action. This action allows you to automatically grant a user access to the group as soon as payment is received.
Select your group from the list to grant access to new paying members.
Welcome Email
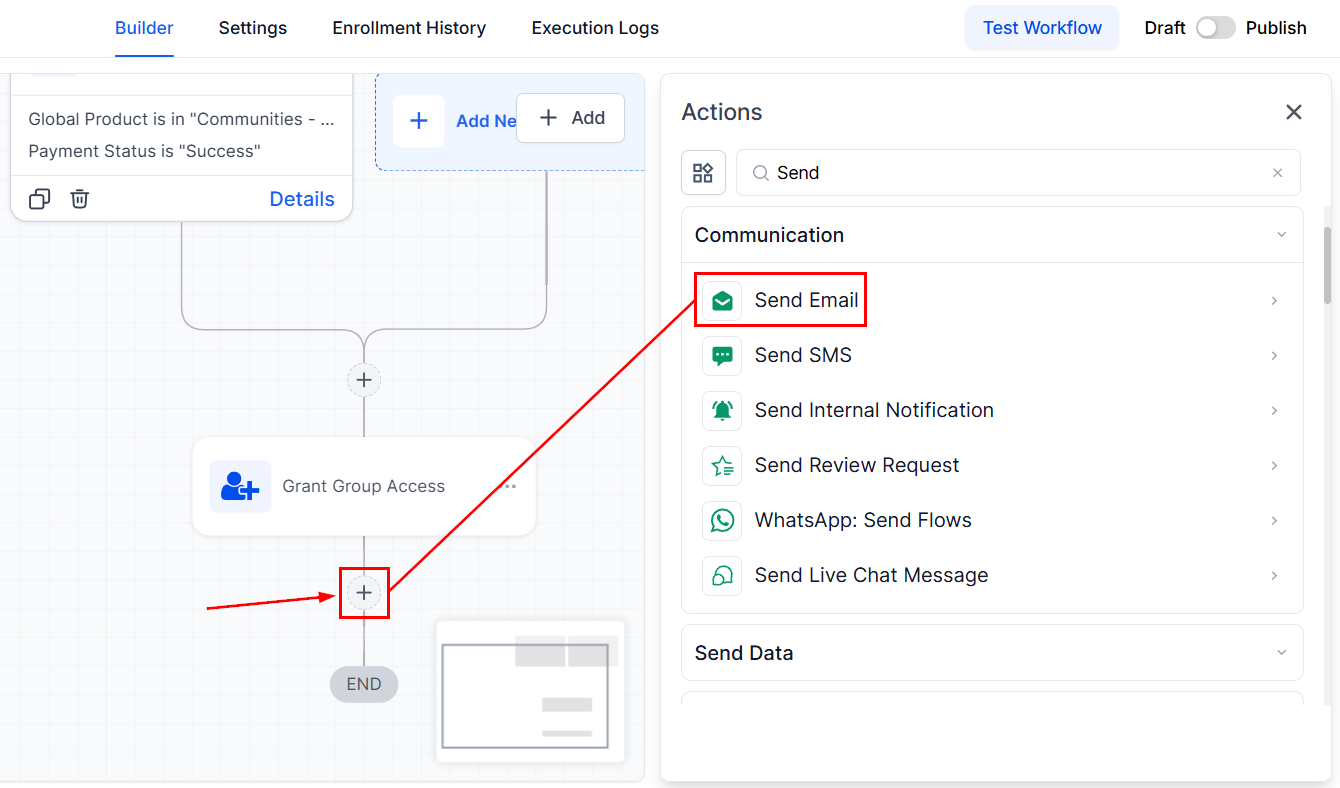
Optionally, add an action to send a welcome email providing new members with essential information about the group.
- You can set up this email through workflow automation or via the client portal email settings.
- If you choose to send the welcome email in the workflow, ensure you customize the email with custom values, such as login credentials or group access details.
Managing Membership Revocation
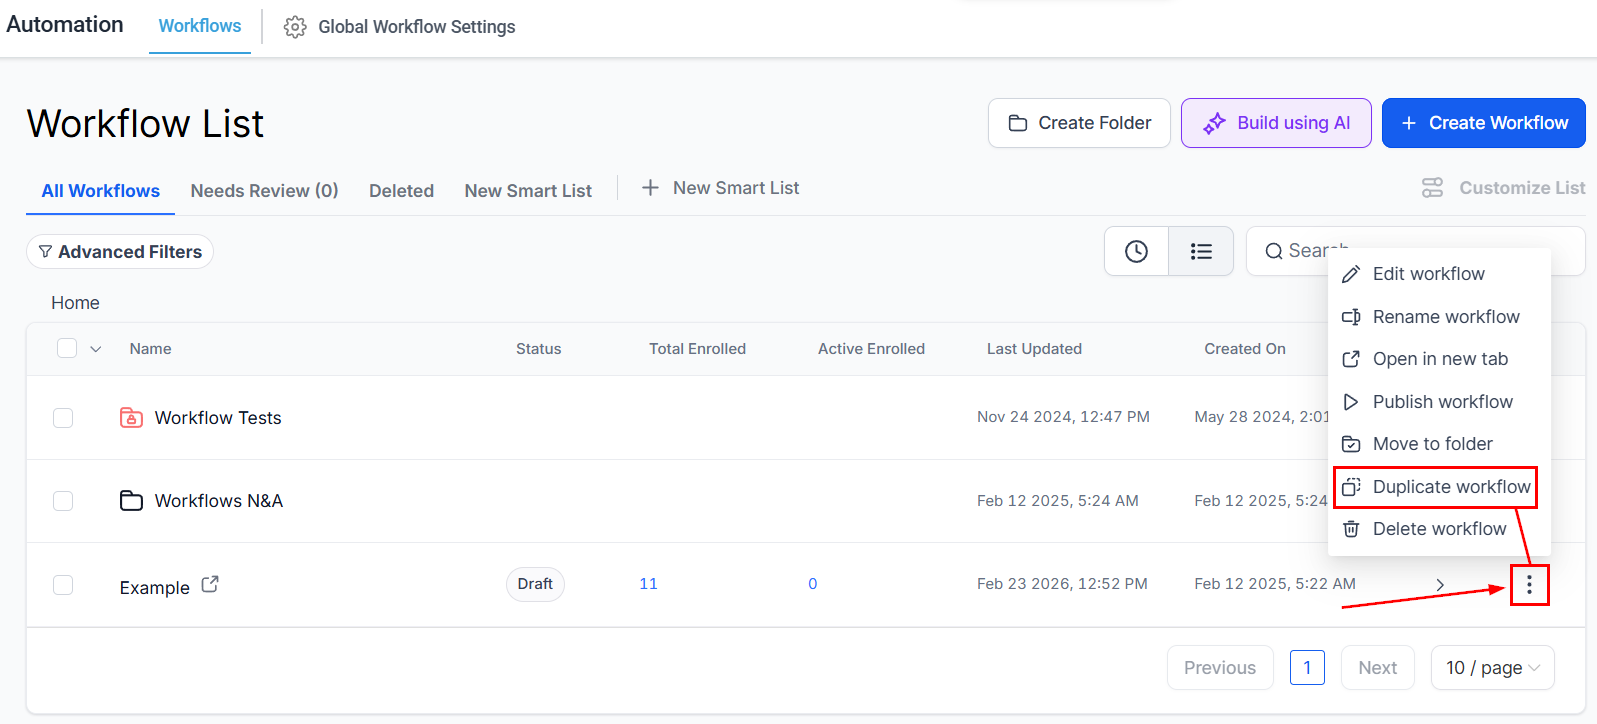
Next, we’ll cover how to handle scenarios where a member cancels their subscription or their payment fails. To start, clone the workflow you’ve just created by clicking the three dots next to it and selecting Duplicate workflow.
Modify Trigger for Failed Payments
Adjust the “Payment Status” filter in your trigger to “Failed” to target unsuccessful transactions.
Revoke Group Access Action
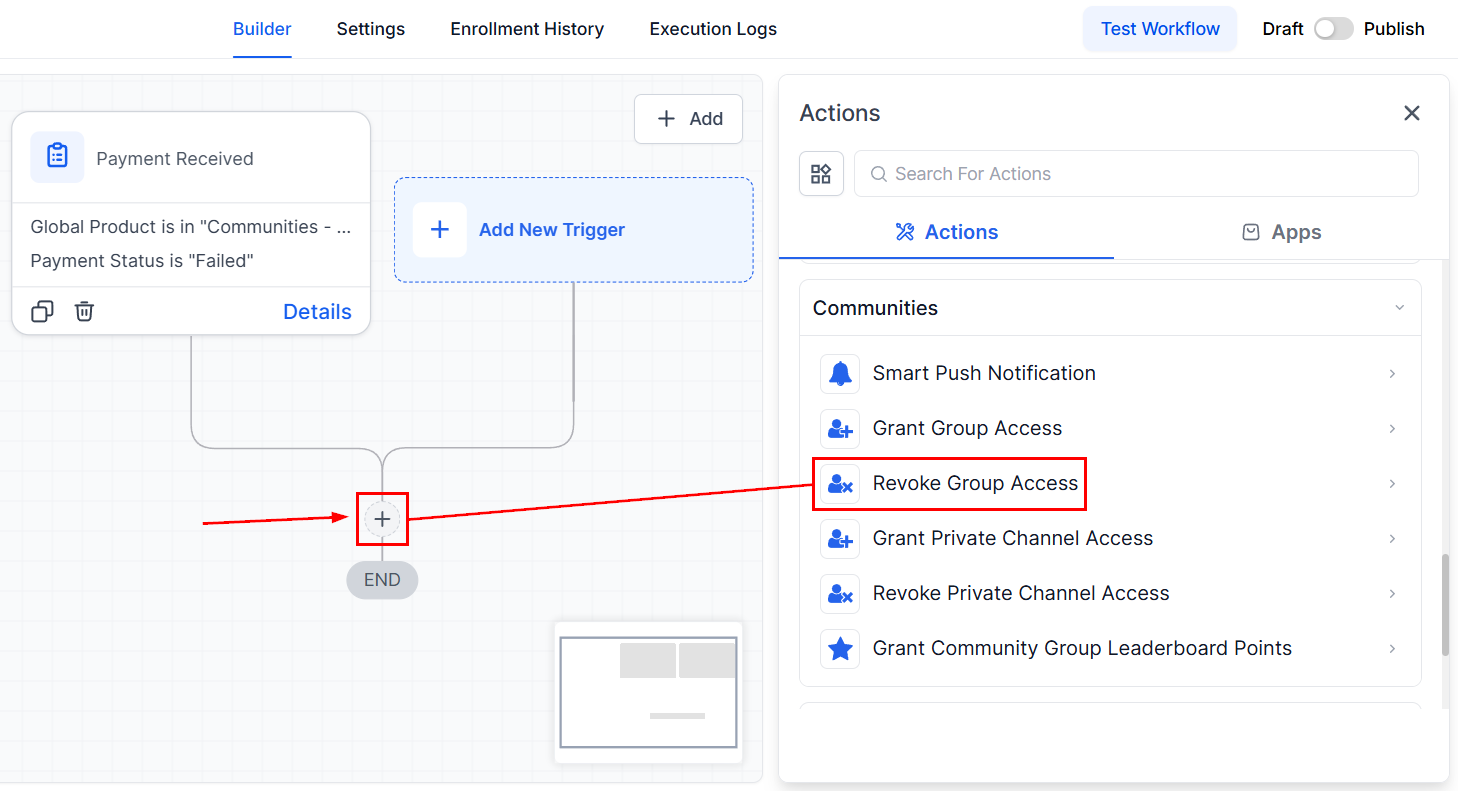
To remove members whose payments did not go through, replace the “Grant Group Access” action with “Revoke Group Access.”
Utilizing the Access Grant Trigger
Finally, let’s explore how to engage new members further by using the access grant as a trigger for additional actions.
Group Access Granted Trigger
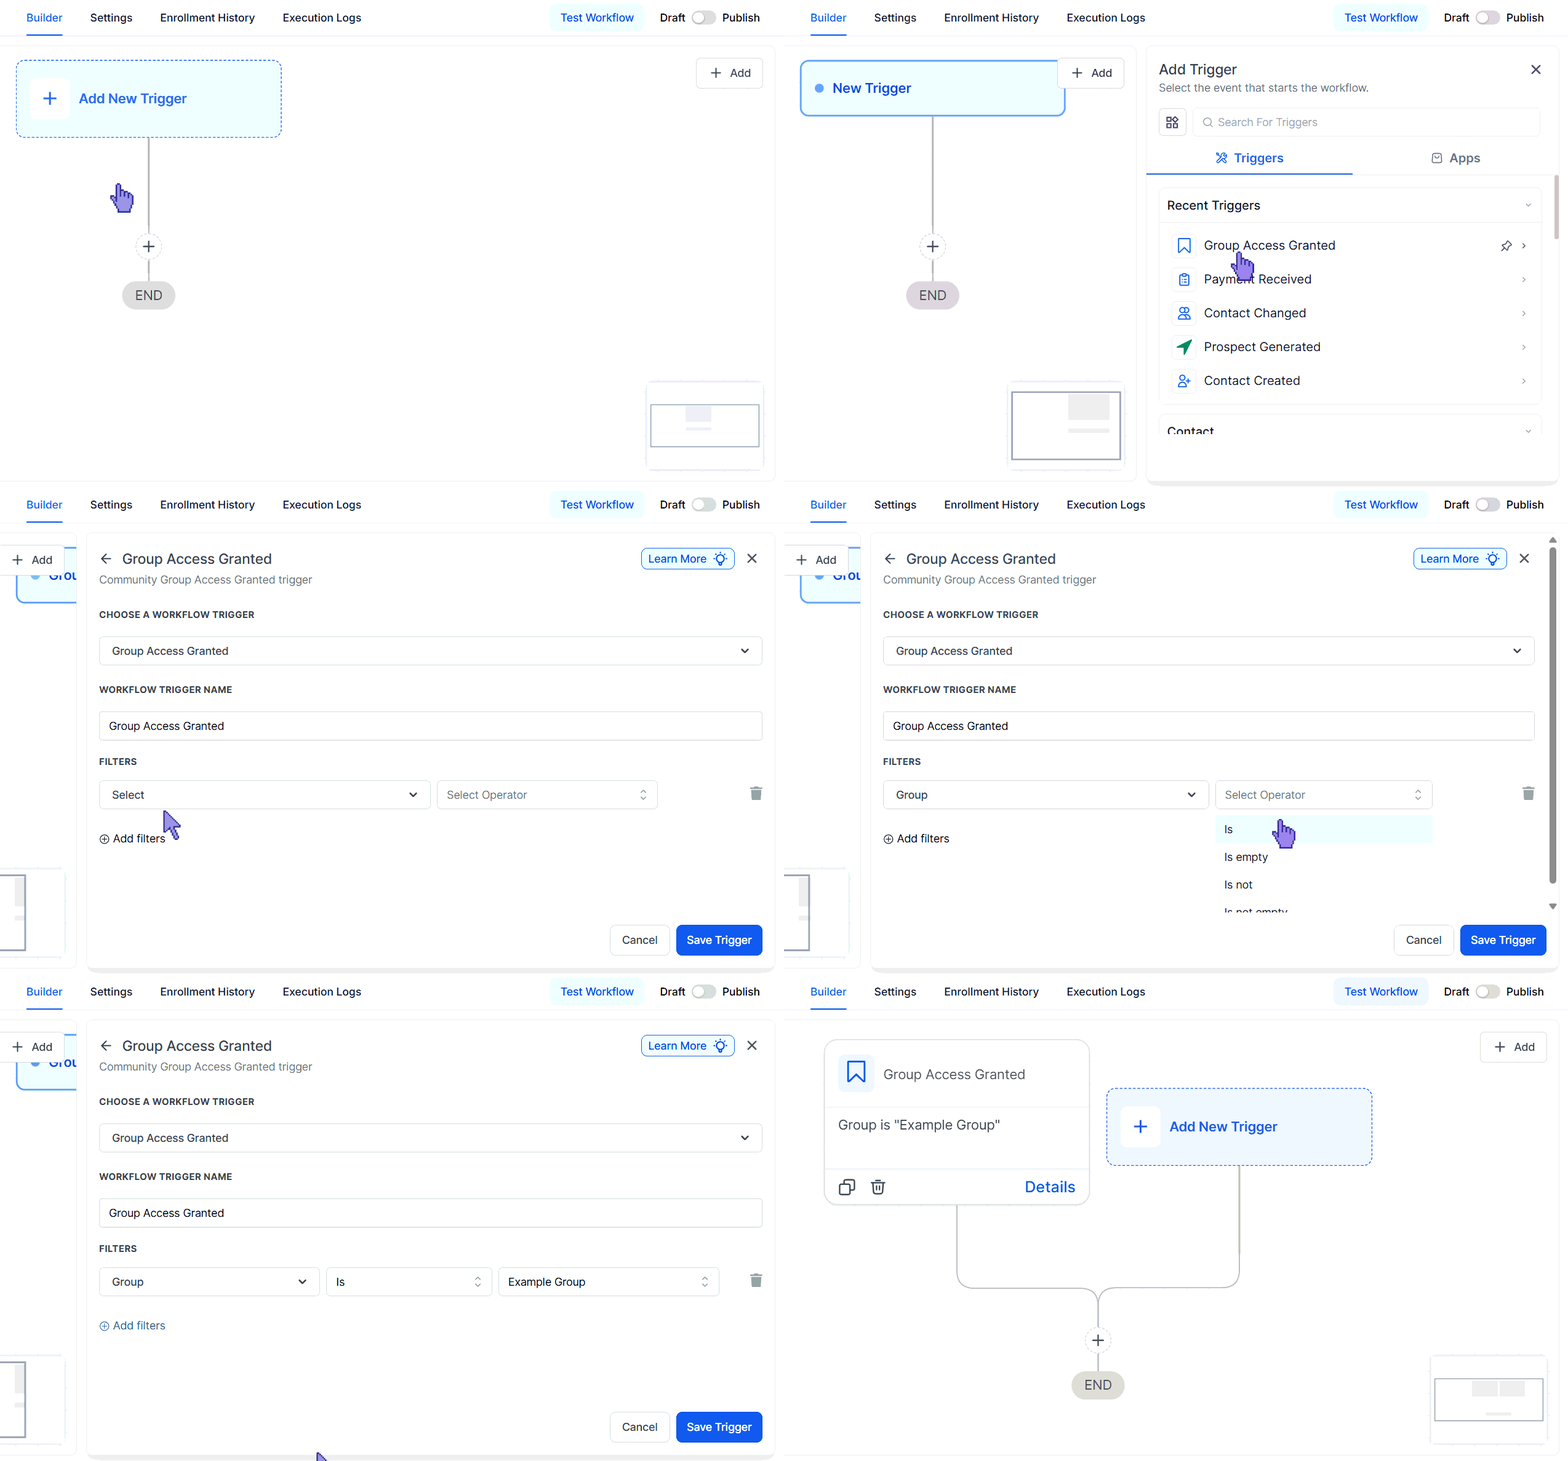
Utilize the “Group Access Granted” trigger and add a filter to specify your group.
Add a Tag Action
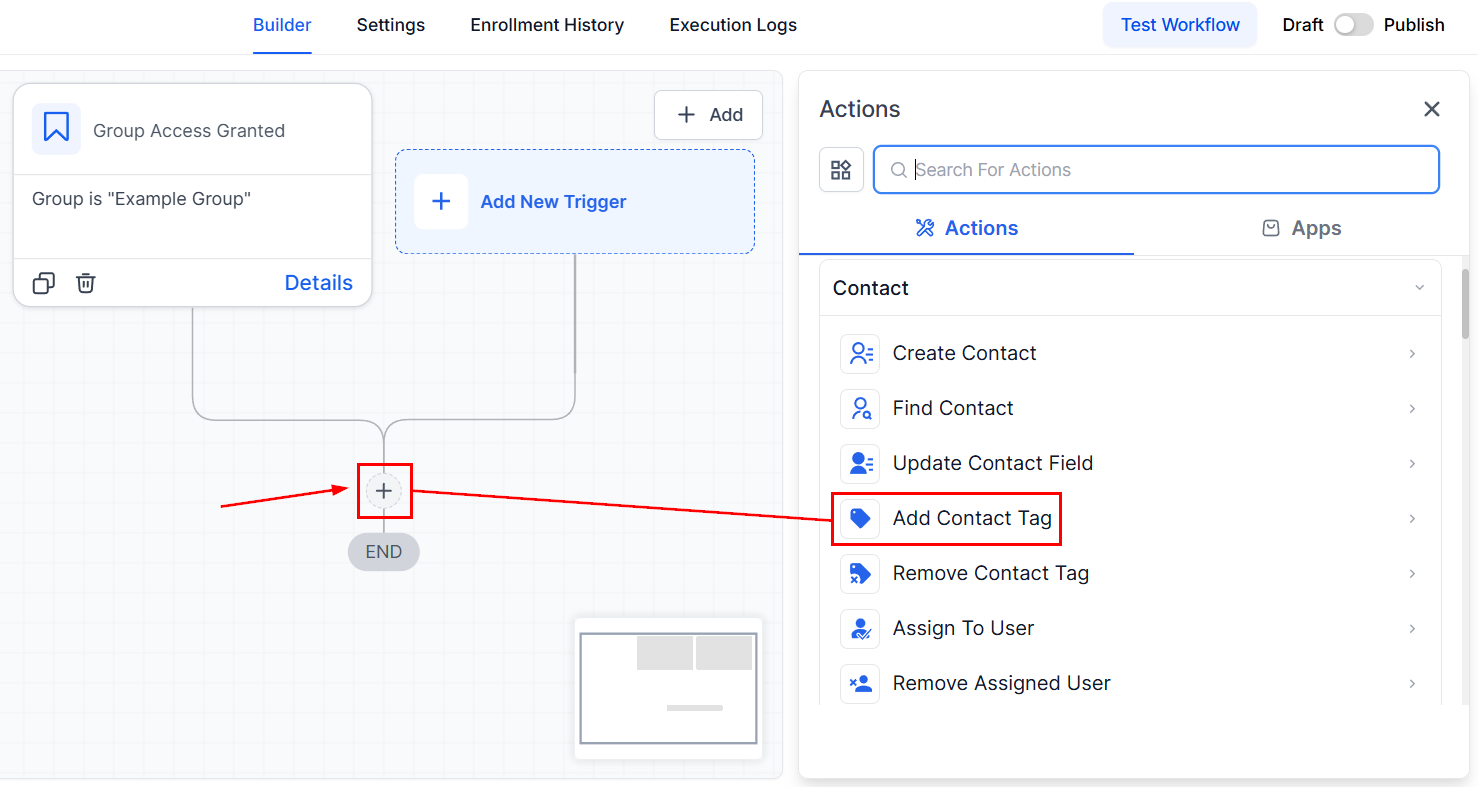
Add an action to tag new members, for example, with “New Lead.” This helps in organizing and identifying members within the CRM. Add a new tag by typing the name of the tag or choosing an existing tag from the list dropdown.
Engagement Actions
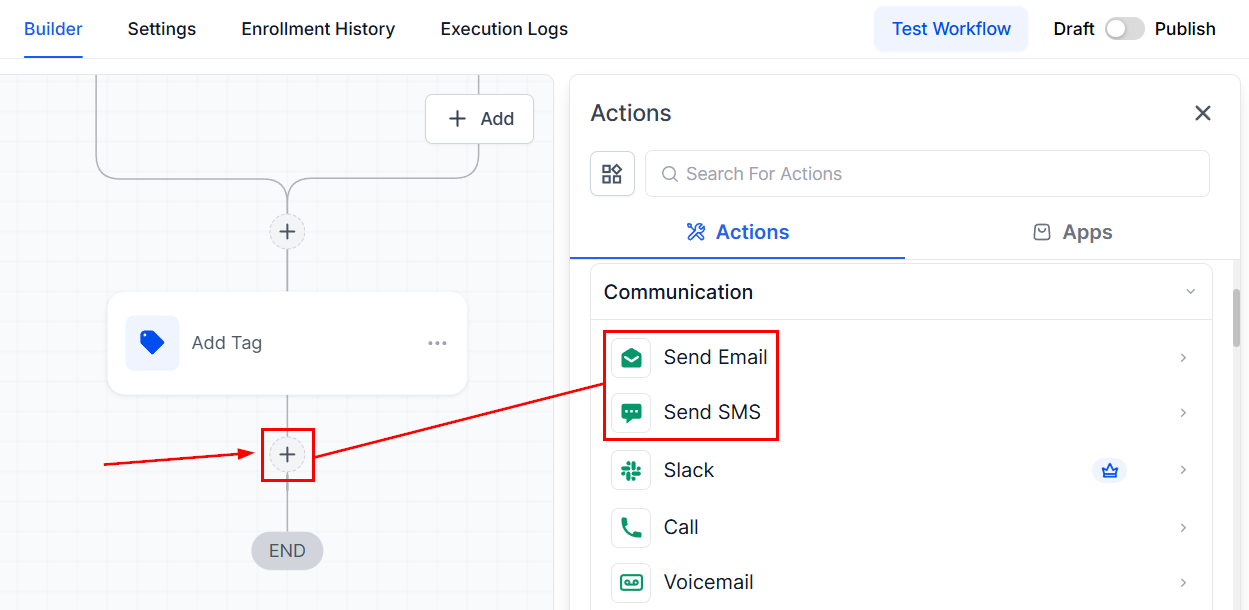
Consider adding actions to send text messages or emails to new members, encouraging them to engage with the community or explore additional products.
Setting up Payment Received Workflows is a vital step in managing memberships and keeping your community thriving. By automating access, follow-ups, and revocation processes, you can enhance member satisfaction and maintain a professional image.
Troubleshooting and FAQs
Q: What if a member’s payment status changes to successful after being revoked?
- A: You can create an additional workflow that re-grants access upon payment status changing back to successful.
Q: Can I customize the welcome email?
- A: Yes, the CRM allows for full customization of emails, enabling you to tailor the message to fit your community’s tone and brand.
Not a Funnelbud customer yet?
Try our all-in-one CRM for sales and marketing — free for 7 days, no commitment.