Publish or Schedule Blog Post
Your blog post’s success depends on more than its content, it can be helped by ensuring every detail is optimized for your audience and search engines. Once you’ve added and saved your content, the next step is to configure the settings that determine how and when your blog will be published. These details, from URL slugs to scheduling options, help you fine-tune your post for maximum impact. Let’s walk through the key settings you’ll need to complete before hitting “Publish.”
Accessing the Blog Post
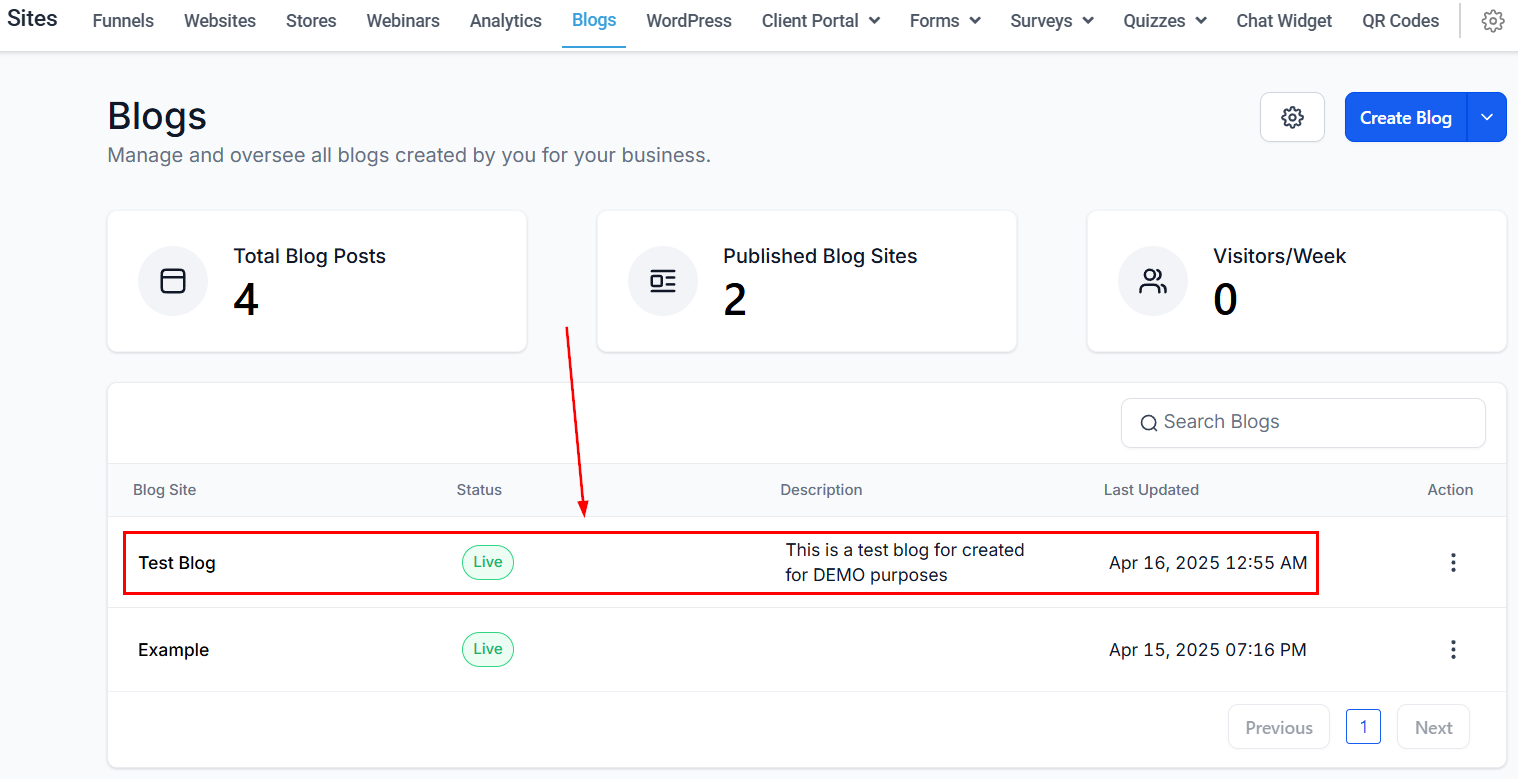
To start, access the blog site containing the post you want to publish.
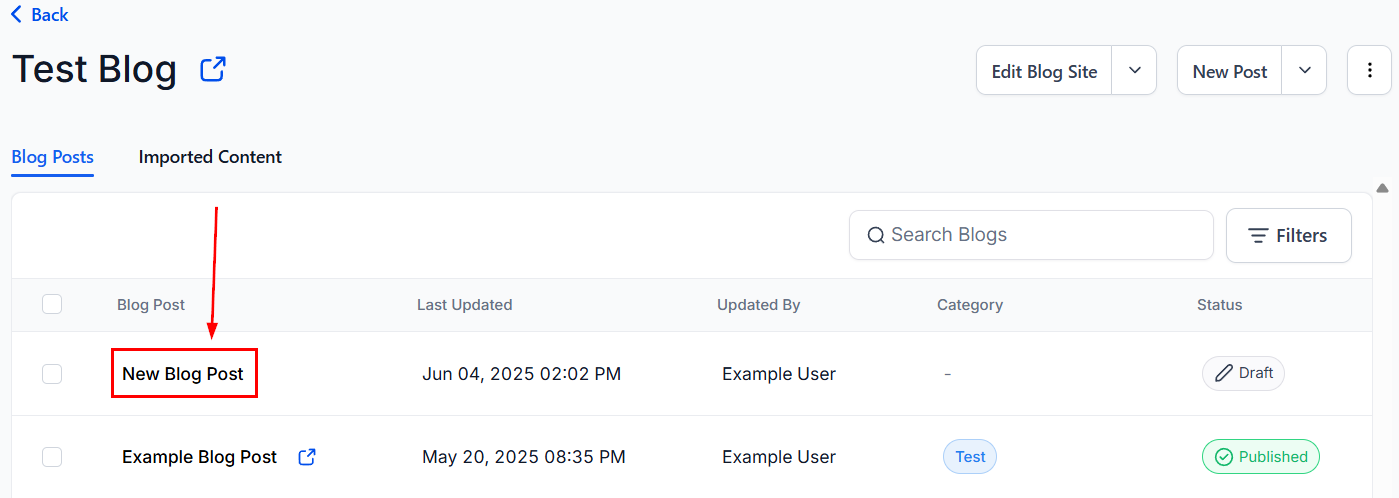
Within the site, choose the blog post you wish to edit.
On the blog editor page, after adding your content, use the “Save” button to save your work, then click on the “Continue” button, which takes you to the blog details page.

Setting Up Your Blog Post Details
In the details page, the configuration for your blog will be divided into two sections. Let’s go over them.
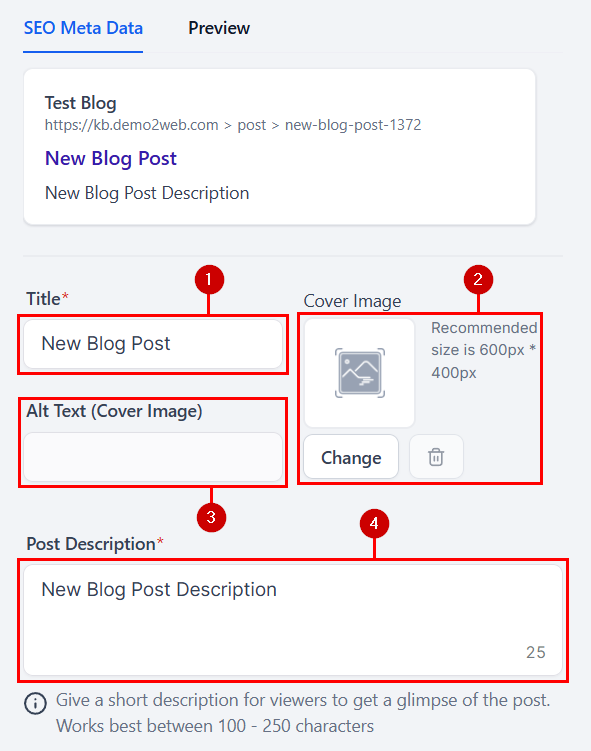
SEO Meta Data
The right side will contain all SEO metadata for your blog. This will include:
- Title
- Cover Image
- Alternative Text for the cover image
- Post Description
Publishing Details
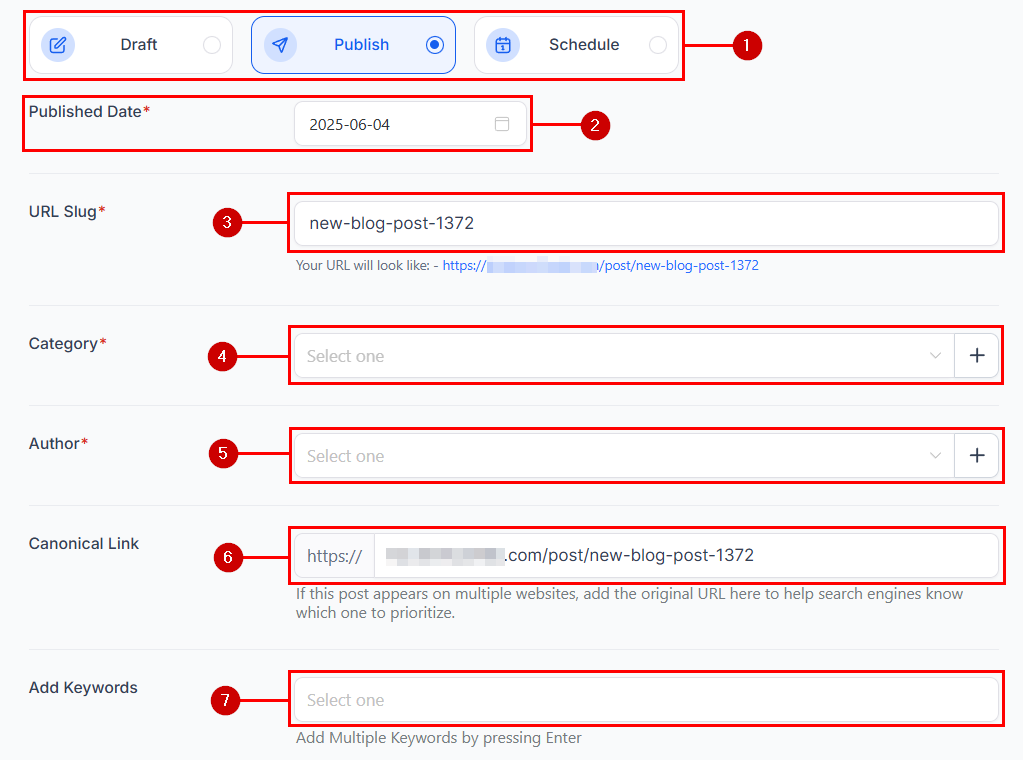
- Blog Status: Here you can decide the status of your blog by either;
-
- Save as Draft: If you are not done reviewing your post, you can save it by keeping it in draft mode so you can access it later.
- Publish: Once the blog details are reviewed then you can decide to publish the post immediately by clicking this option.
- Schedule & Publish: You can also schedule the date and time to publish the post. The minimum time you can schedule your post is 15 minutes from the set date and time. Your time zone will also be displayed here. Once you’ve selected your desired date and time, click the Schedule button to confirm. The minimum time you can schedule is 15 minutes from the current time, and your time zone will be displayed for reference.
- Published Date: Set the date and time when your blog post will be published. This option shows up when to click the Publish option.
- URL Slug: This will be the path for your blog post. Your URL will look like this: https://www.example.com/b/blogtest.
- Category: You can set the category in blog settings by clicking “Add New Category” beside the category field.
- Author: If you want to add a blog post’s author, click “Add New author” to set it up. When setting up, you can add the URL of the author’s posts from their social media accounts.
- Canonical Link: This is Optional. A canonical link helps prevent duplicate content issues by specifying the preferred version of your blog post. If this post has been published elsewhere (e.g., on another website), add the original URL here to ensure search engines prioritize the correct version.
- Add Keywords: Add relevant keywords to your blog post to improve its visibility in search engine results. Think about the terms your audience might use to find your content and include them here.
Once you’ve configured all the settings, you can either click cancel to discard your changes or click publish to make your blog post live and accessible to your audience.
Setting up your blog post details is the final step before sharing your content with the world. By optimizing your URL slug, adding keywords, and choosing the right publishing options, you can ensure your post reaches the right audience at the right time.
Not a Funnelbud customer yet?
Try our all-in-one CRM for sales and marketing — free for 7 days, no commitment.