Statistics in Automation
When building workflows, it’s important to know not just what you’ve set up—but how it’s actually performing. Whether you’re working with triggers that start a workflow or actions that move things forward, having clear visibility into what’s happening behind the scenes can make a big difference. This article breaks down how you can better understand both triggers and actions, using simple tools and insights to improve your workflow results.
What Are Triggers and Actions?
Before diving in, let’s quickly define the two:
- Triggers are the starting point of a workflow. They decide when a contact should enter based on certain conditions (like form submissions or tag assignments).
- Actions are the steps that happen after a trigger fires—such as sending emails, assigning tasks, or updating contact details.
Both work together and understanding how each performs helps you spot issues and improve outcomes.
How to Use Statistics in Automation
Triggers
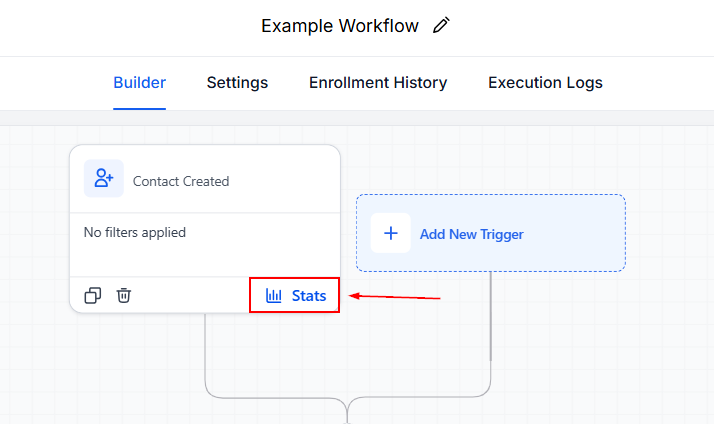
Open your workflow then click the trigger stats button to view Attempted, Matched, and Unmatched totals.
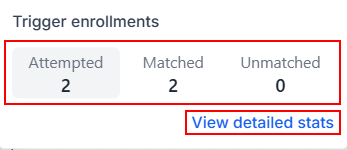
Select any metric or the blue “View detailed stats” button to open the detailed statistics panel. Below is a summary of each metric:
- Attempted: The total number of contacts evaluated by the trigger
- Matched: The number of contacts that met all defined conditions
- Unmatched: The number of contacts that did not meet the qualification criteria
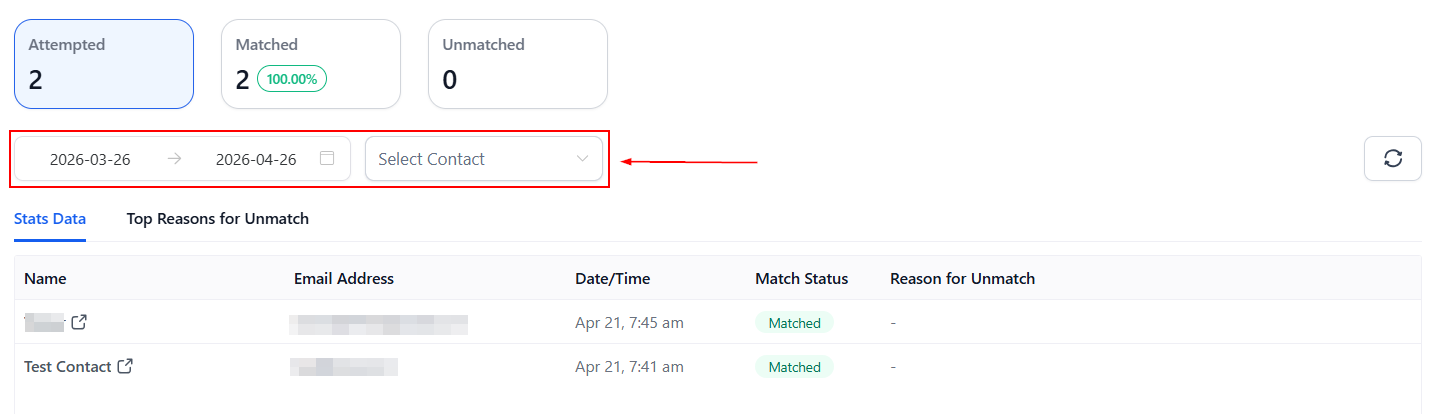
You can apply date filters to analyze a specific timeframe or investigate spikes or use the search bar to look up specific contacts and confirm their status.
Review contact-level details relating to the selected metric, including match status and timestamps.
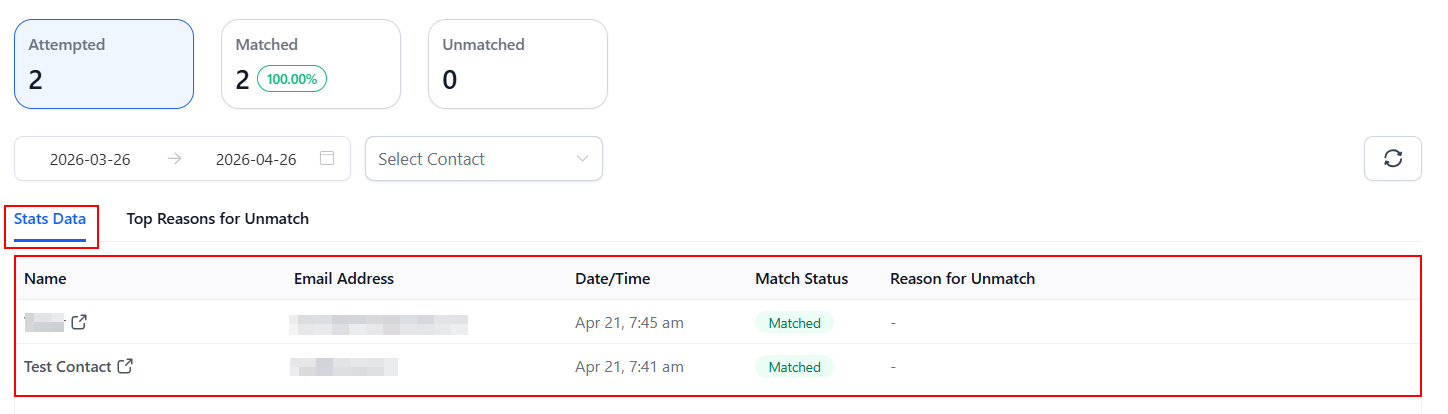
Check the “Reason for Unmatch” field to identify filter mismatches or missing data.
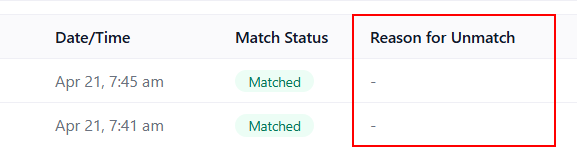
Make adjustments to your trigger as needed, then test changes and monitor how the stats update to confirm improvements.
Actions
While triggers control entry, actions determine what happens next—so they’re just as important.
Here’s how to think about actions alongside trigger data:
- If many contacts are matching the trigger but not progressing, check if an action is misconfigured.
- If contacts are getting stuck, review delays, conditions, or missing steps.
- If results are lower than expected, compare trigger enrollment with action completion rates.
Statistics are available for specific actions such as Send Email, Send SMS, and WhatsApp. You can access the tab by clicking the action.
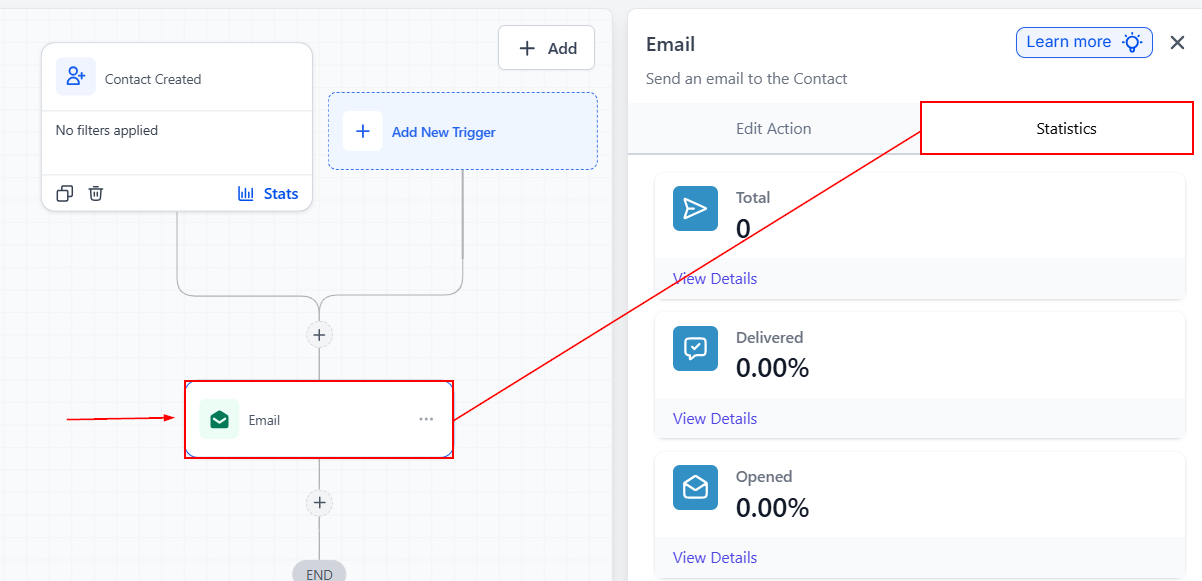
By consistently reviewing performance and making small adjustments, you can build workflows that are more reliable, efficient, and effective over time.
Important Notes
- Stats reflect data from the last 30 days
- The stats panel complements broader reporting tools, such as overall workflow and communication metrics
Best Practices
- Review trigger stats weekly to catch issues early
- Monitor the ratio of matched to unmatched contacts
- Use filters and search to investigate specific problems
- Test changes and validate results using real-time updates
Why This Matters
Having clear visibility into both triggers and actions helps you:
- Confirm that contacts are entering workflows correctly
- Understand why some contacts don’t qualify
- Quickly identify and fix issues
- Improve workflow performance with confidence
Not a Funnelbud customer yet?
Try our all-in-one CRM for sales and marketing — free for 7 days, no commitment.