How to Import Opportunities
Importing files into the system is simple when following the steps outlined below. While contacts and opportunities can be imported simultaneously, this guide is dedicated to the opportunity import process. By following this article, you will ensure a smooth and effective import, enabling seamless management of opportunities within the platform.
📌Note: Opportunity imports cannot be reversed.
Prepare Your Data
Supported File Types
Ensure your file is in .csv format.
File Preparation Requirements
Limit your data to a single sheet, ensuring it includes a header row with columns corresponding to fields in the system. The file size must not exceed 30 MB.
Fields Required to Create Opportunities
- Contact ID
- Opportunity Name
- Pipeline ID
✍️Note:
- If the Stage ID is absent, it defaults to the first stage under that pipeline.
- If the Opportunity Value is absent, it defaults to 0.
- If the Opportunity Status is absent, it defaults to “Open”.
- If the Opportunity Lost Reason is added and is valid, the Opportunity Status will be updated to “Lost”.
The Opportunity ID, Pipeline ID, and Stage ID can be fetched by exporting opportunities. Fetch the Contact ID by exporting contacts.
Structuring Your File
Field Formatting
- Date Picker: Acceptable formats: mm/dd/yyyy (e.g., 10/28/2020), yyyy/mm/dd (e.g., 2020/10/28), mm-dd-yyyy (e.g., 10-28-2020), yyyy-mm-dd (e.g., 2020-10-28).
- Multiple Options, Checkbox, Textbox List: Acceptable formats: Value 1, Value 2, Value 3 (e.g., Blue, Yellow, Green). You can also use “;” or “.” as separators.
- Radio, Single Option: Acceptable formats: Value 1 (e.g., Blue).
- Opportunity Owner: Format: FirstName LastName (e.g., Logan Paul).
- Tags: Acceptable formats: Value 1, Value 2, Value 3 (e.g., Blue, Yellow, Green). You can also use ; or . as separators.
- Phone Number: Format in E.164 (e.g., +1 1234567890). For US numbers, formats like 123-456-7890 or (123) 456-7890 are also acceptable.
- Numerical: Acceptable formats: 1.23, 1234, .123.
- Monetary: Acceptable formats: 1234, 1,234,234.33.
- Opportunity Followers: Acceptable format: FirstName LastName, FirstName2 LastName2 (e.g. Adam Smith, David Lee)
Importing Your File
Initiating the Import
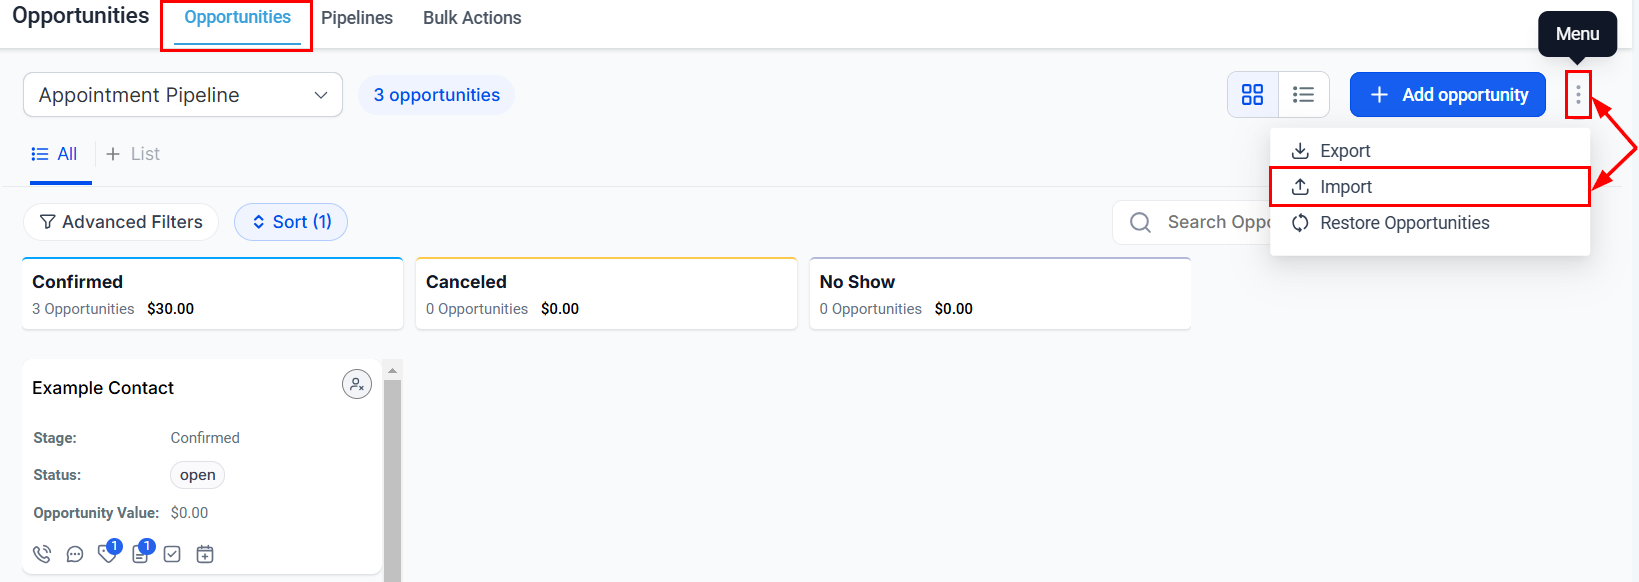
Navigate to the Opportunities tab from the left sidebar. In the upper-right corner, click on the three dots and select “Import.”
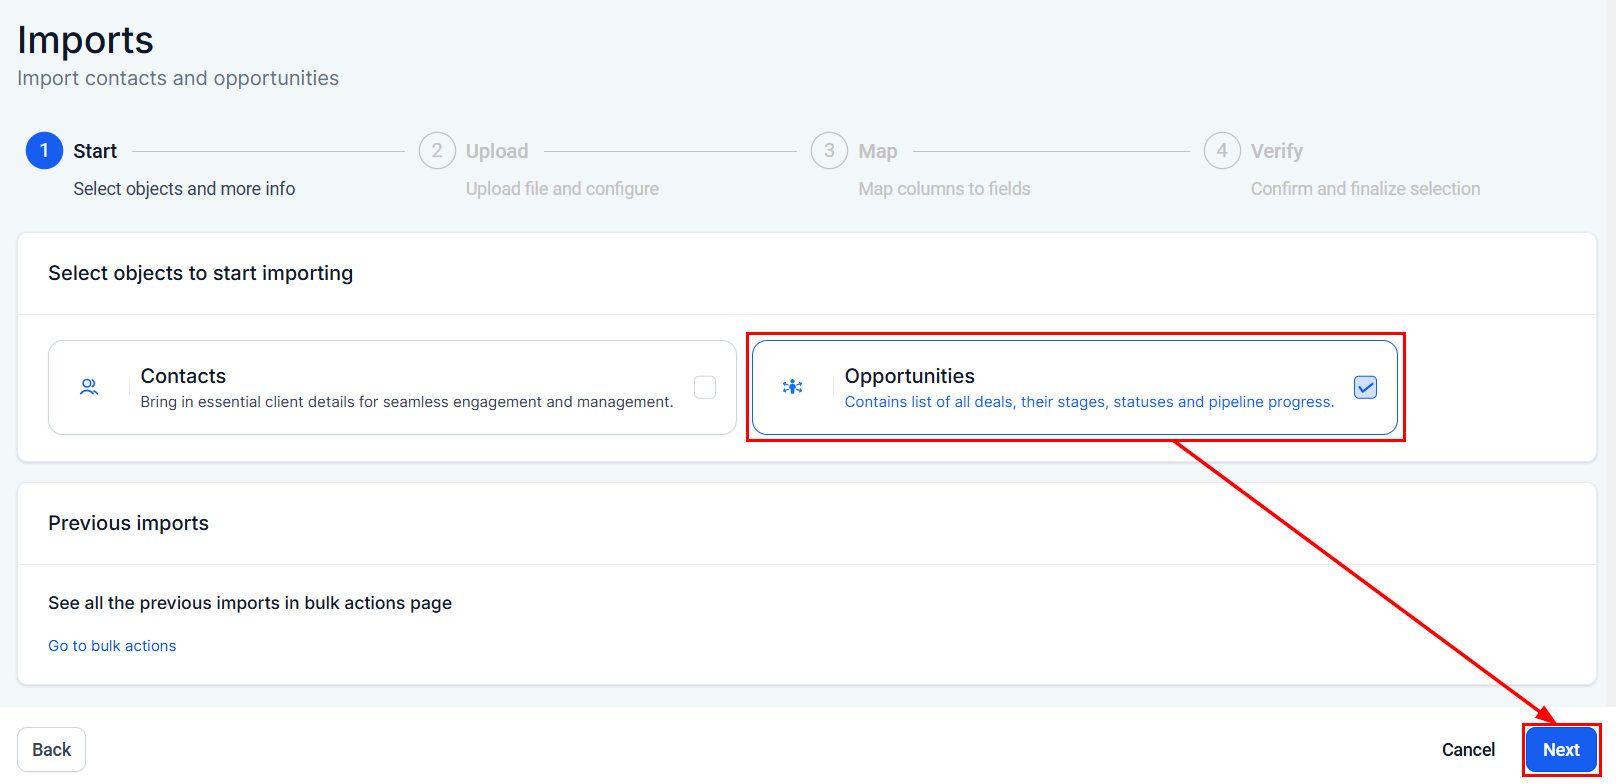
Select Opportunities within the Objects section, then click “Next” to proceed.
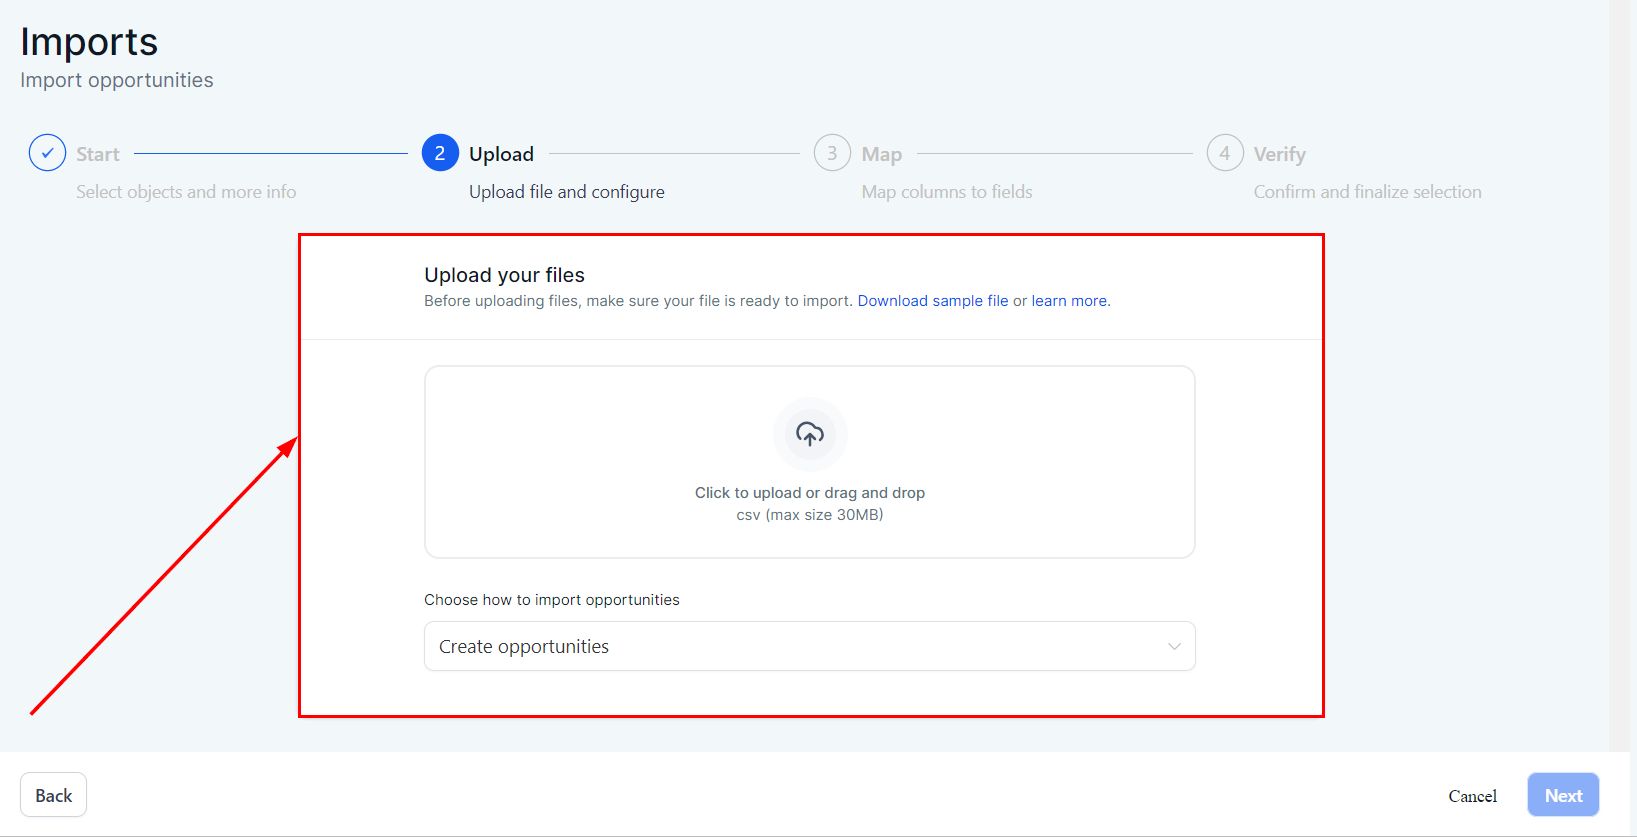
Upload Your File
Upload your file and configure your import preferences.
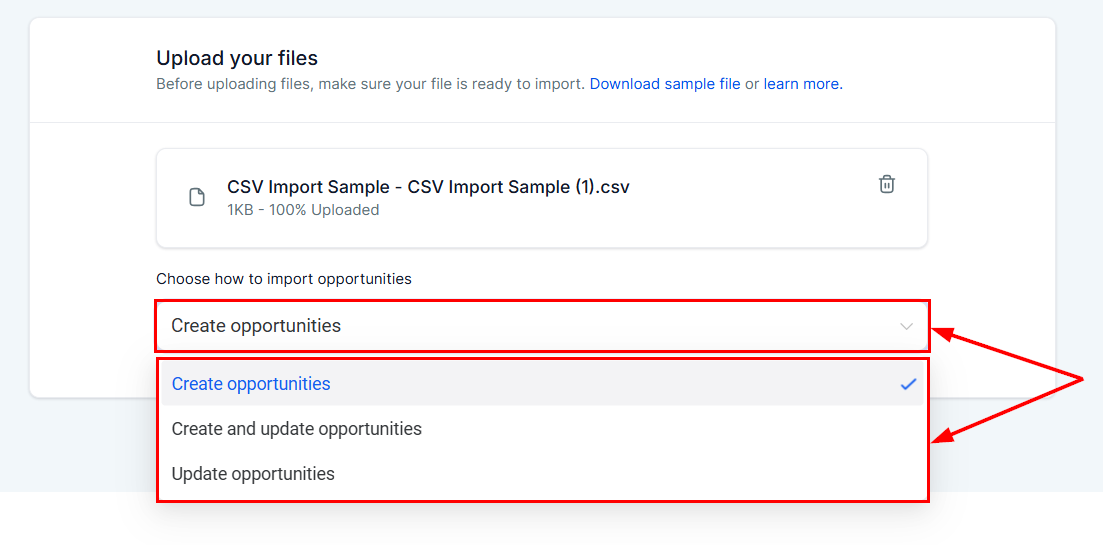
When importing objects, you have three options to choose from:
- Create Opportunities: Upload only new records into the system.
- Update Opportunities: Update information for existing records.
- Create and Update Opportunities: Combine adding new records and updating existing ones.
Map Fields
Ensure each column in your file is correctly mapped to the corresponding field in the system. Adjust the mappings if necessary.
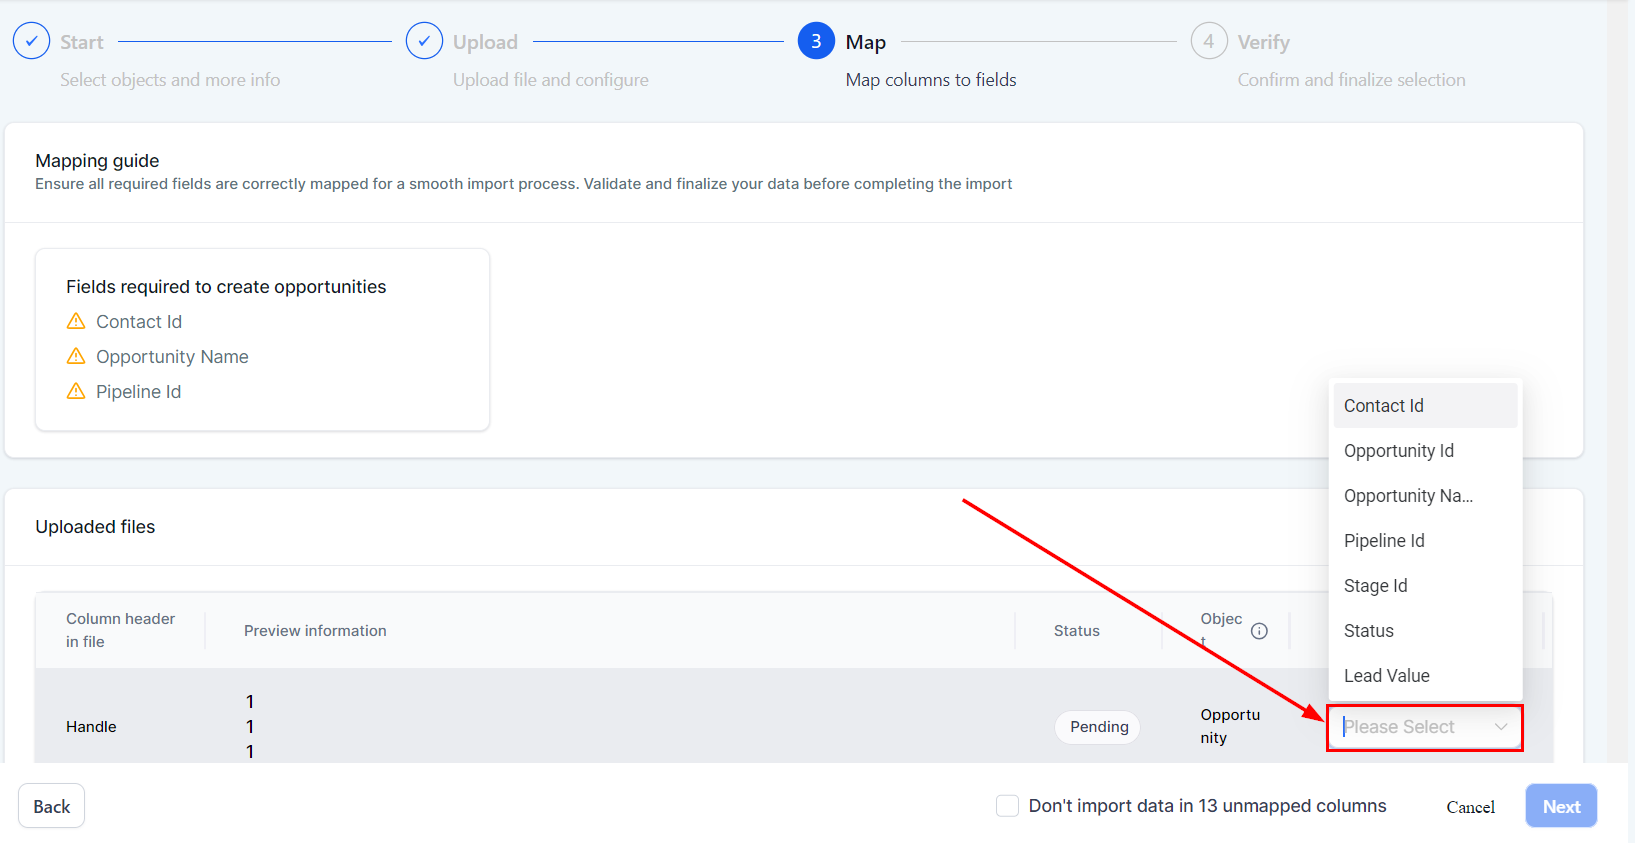
✍️Note:
- Checking the “Don’t update Empty Values” checkbox will prevent updates to any field if the imported file has empty values and the field has existing values for the opportunity.
- To prevent importing certain fields, you can leave them unmapped and check the box at the bottom to proceed. Ensure all mandatory fields are mapped.
Review and Confirm
Review the data preview to ensure everything looks correct. You can also add tags to the corresponding contacts for these opportunities on this screen.
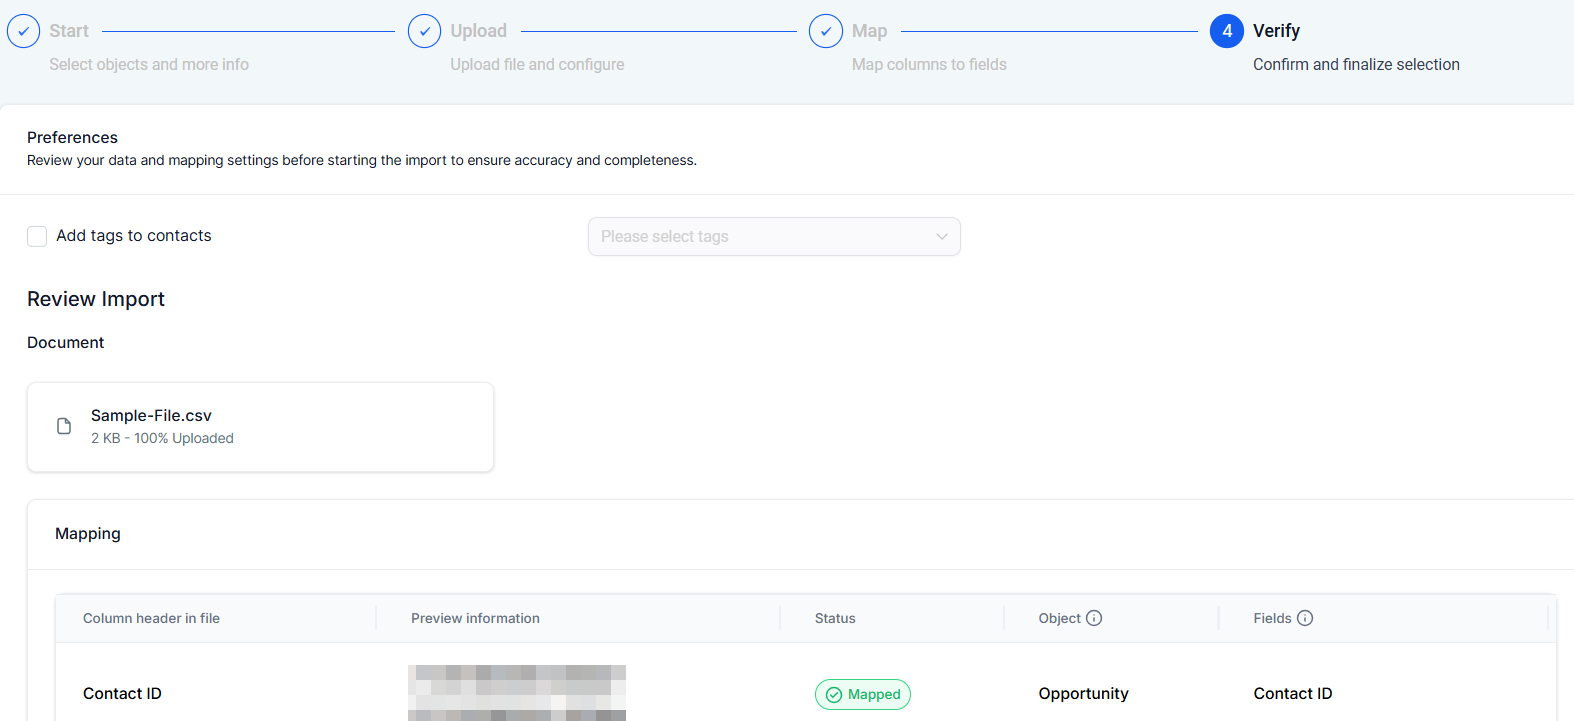
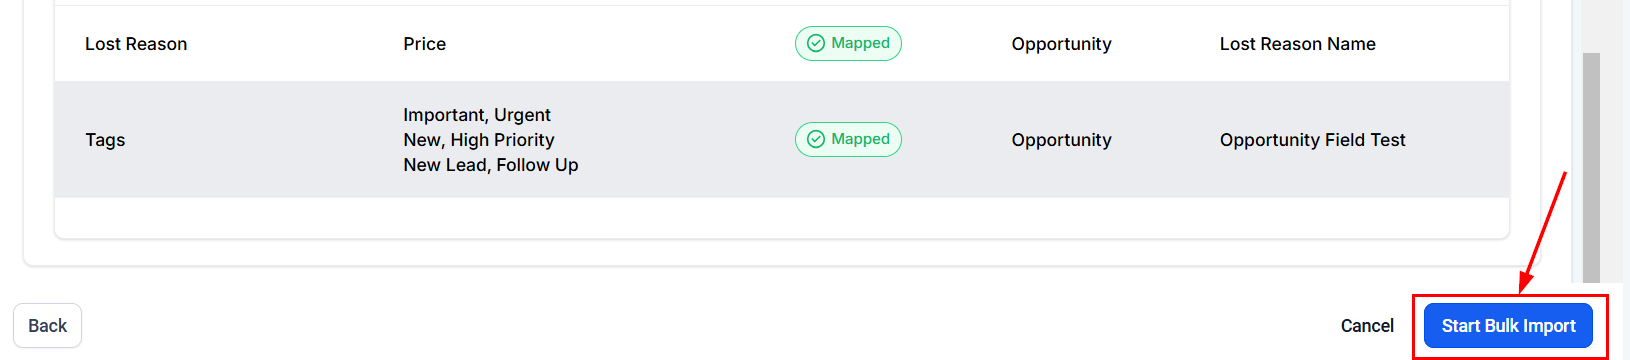
At the lower right-hand section of the page, select the Start button to usher the Bulk Import action into the queue.
Monitor the Import
To monitor the progress of an import, go to Opportunities > Bulk Actions and locate the action within the list. Apply filters or select the desired date range if necessary.
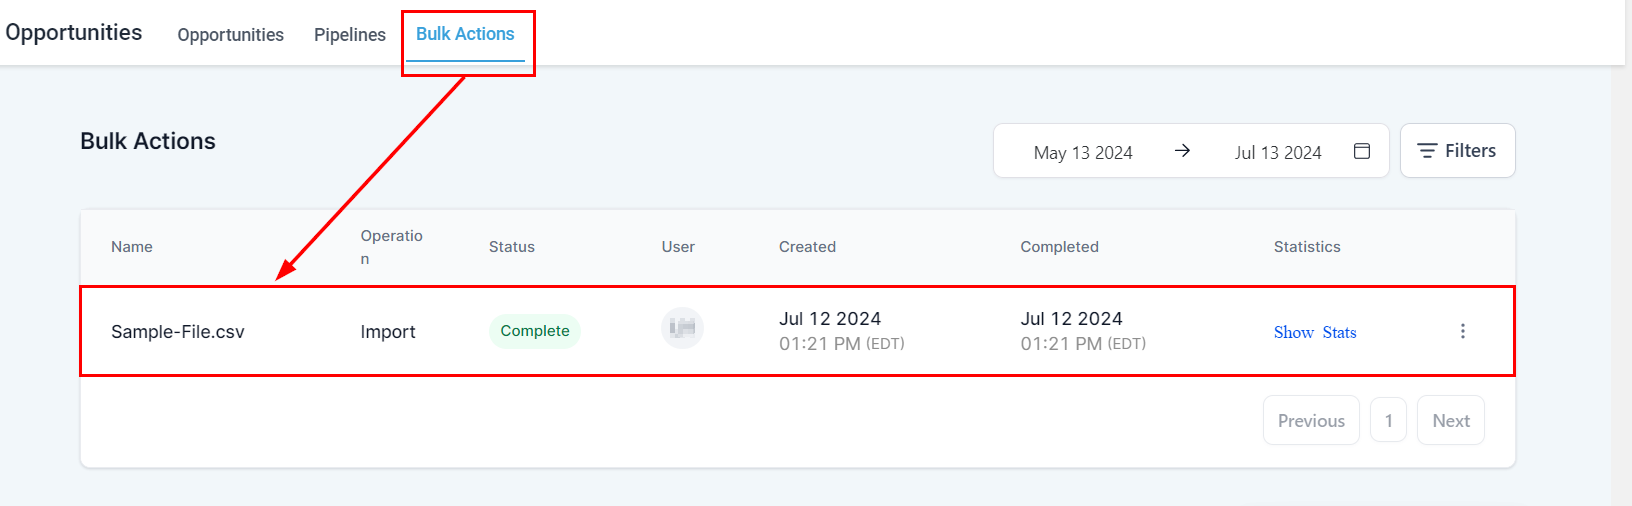
Select the Show Stats button next to any import to view detailed statistics, including any errors or warnings that may require attention.
For more details on importing contacts, please refer to the related articles.
Troubleshooting Common Errors
Error: Invalid Option Selected for Multiselect or Dropdown Field
- Check your import file for incorrect values in multi-select or dropdown fields by comparing them with the options in the system. Update the value in your file to match an existing option or add it as a custom option in the system. Then re-import the file.
Error: Invalid Contact ID
- Verify that the Contact ID exists in the system or remove the ID if not updating an existing contact.
Error: Could Not Parse Date
- Ensure date fields are in one of the acceptable formats: mm/dd/yyyy, yyyy/mm/dd, mm-dd-yyyy, yyyy-mm-dd.
Error: Duplicate Unique Property Value
- Ensure there are no duplicate values in fields marked as unique, such as emails or IDs.
Error: File Not Found
- Verify that your file is the correct type and format, then re-upload the file.
Error: Required Fields Missing
- Ensure all mandatory fields (e.g., Opportunity Name for opportunities, Email/Phone/Name for contacts) are included and correctly formatted.
Frequently Asked Questions
Q: How can I ensure my file is prepared correctly for import?
- Ensure your file is in .csv format, includes only one sheet, is smaller than 30 MB, and has a header row with columns corresponding to system fields.
Q: What are the mandatory fields for creating opportunities?
- For creating opportunities, you need the Contact ID, Opportunity Name, and Pipeline ID. Other fields like Stage ID, Opportunity Value, and Opportunity Status have default values if not provided.
Q: How do I fetch IDs required for import?
- You can fetch Opportunity ID, Pipeline ID, and Stage ID by exporting opportunities, and Contact ID by exporting contacts.
Q: Can I import and update opportunities simultaneously?
- Yes, select the “Create and Update Opportunities” option to add new records and update existing ones in a single import.
Not a Funnelbud customer yet?
Try our all-in-one CRM for sales and marketing — free for 7 days, no commitment.