Integrating Payment Into Forms
Managing payments directly through forms simplifies transactions, reduces back-and-forth communication, and creates a seamless experience for both businesses and customers. Whether you’re selling products, collecting service fees, or accepting donations, embedding payment options into your forms ensures convenience and efficiency.
To begin, navigate to the “Sites” section within your CRM dashboard. From there, head over to the Forms dropdown and select Builder, where you’ll see a list of all your existing forms. You can either modify an existing form or create a new one from scratch or a template, depending on your needs.

Choose the form you wish to integrate with payment functionality. If you’re creating a new form, follow the prompts to set it up according to your needs.
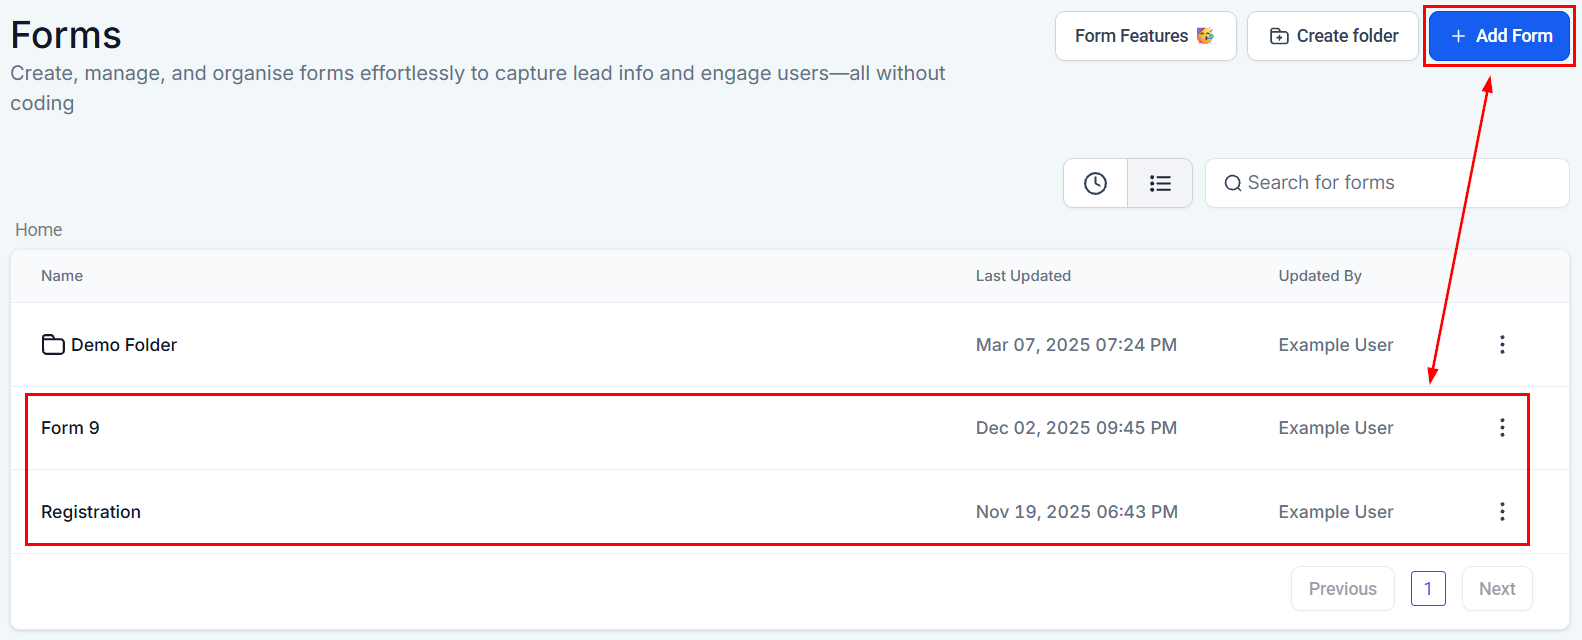
Adding Payment Elements to Your Form
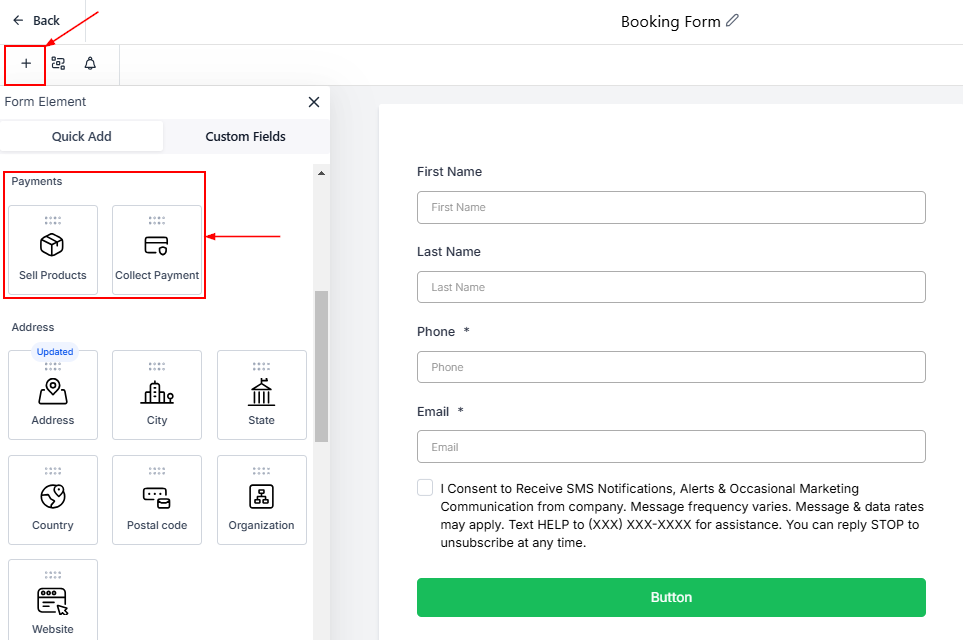
Inserting the Payment Element
Scroll to the section where you’d like to place the payment option. Click the plus (+) icon to add a new element, then locate the “Payment” element. Drag and drop it into the desired spot within your form.
You have two key options:
- Sell Products: Ideal for turning your form into a checkout page, allowing customers to purchase products directly.
- Collect Payment: Best for services or donations, enabling customers to enter payment amounts freely.
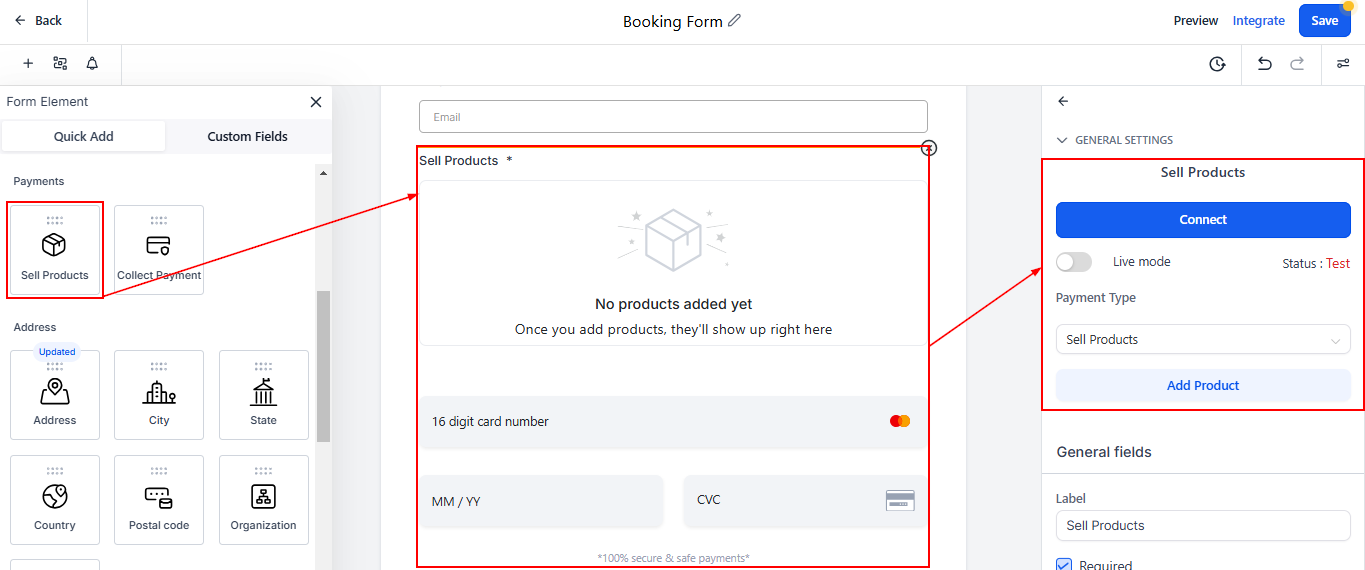
Customizing the Sell Products Element
Drag and drop the Sell Product element to the form builder. If you’re ready to start accepting payments immediately, ensure the payment element is set to “Live Mode.”
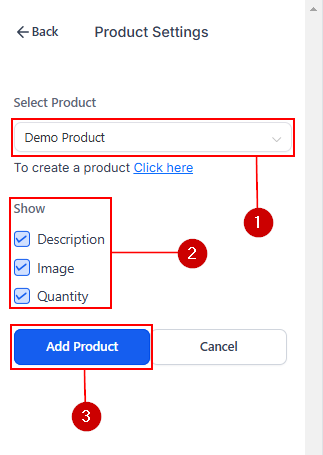
Selecting the Product
Click on “Add Product” to open the product selection menu. Choose the items you want to sell and for each product. Add a description, image, and quantity if needed. Keep the corresponding boxes checked to display these details or uncheck them to hide. Click “Add Product” to finalize the addition. Repeat this process for each product you wish to include.
Adding Coupons
If you offer promotional discounts, toggle the “Coupons” feature on. This allows customers to apply existing coupon codes during checkout. You can also adjust the coupon field’s alignment within the form for better visual appeal.
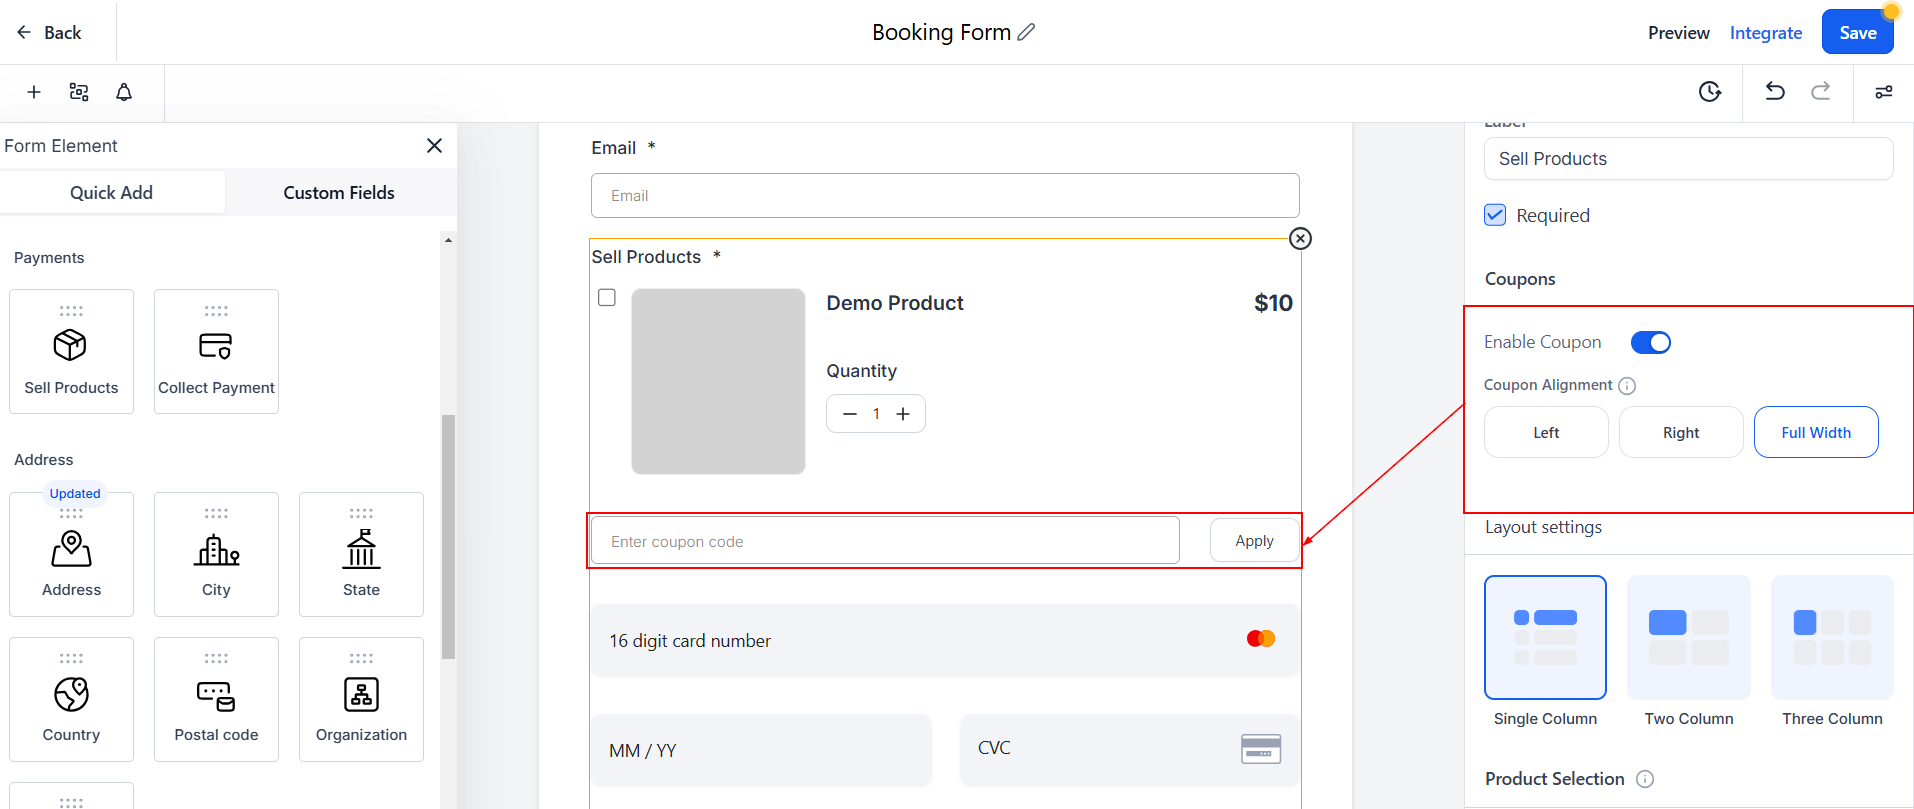
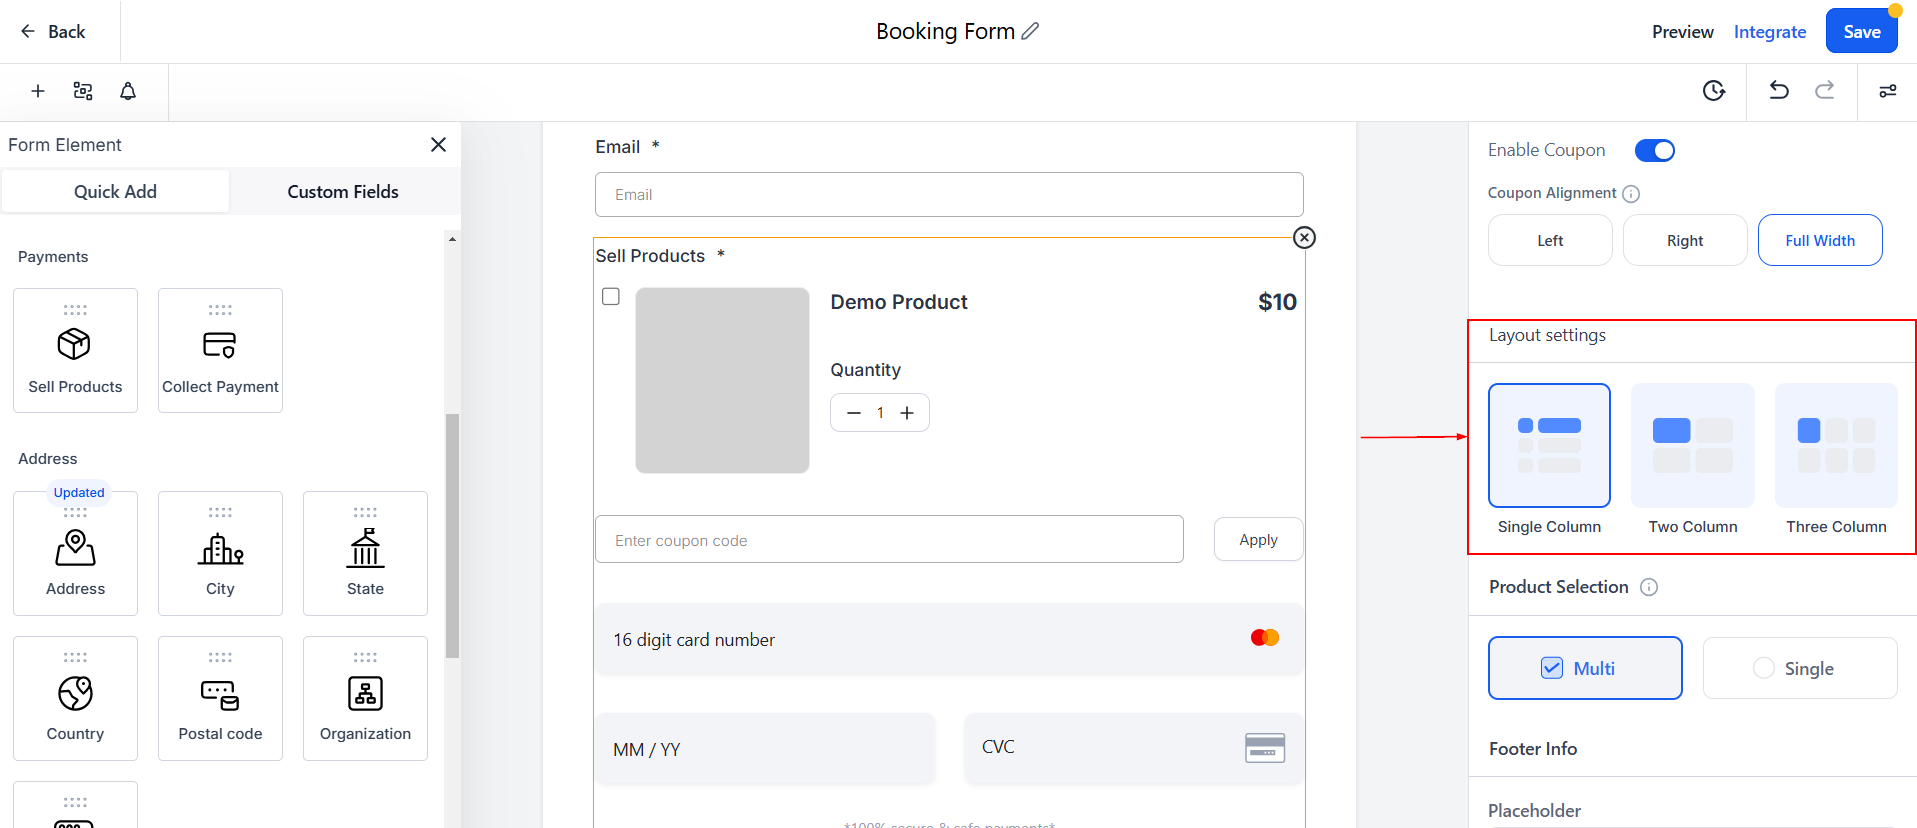
Layout Settings
By changing the Layout, you can modify the appearance of the products.
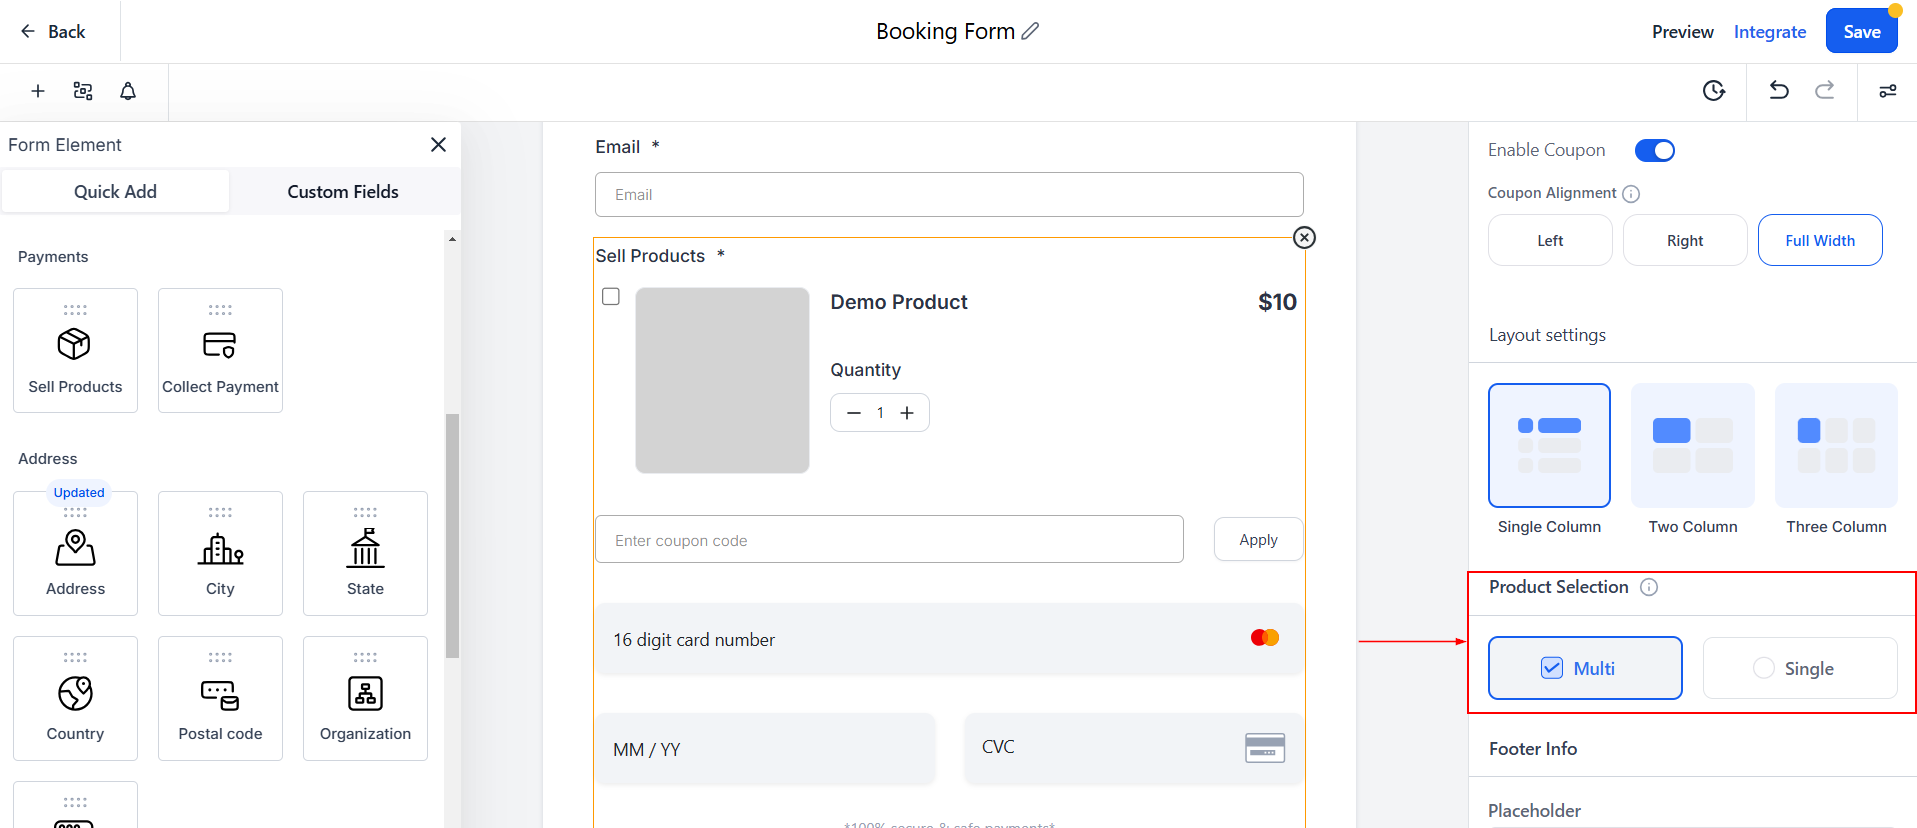
Product Selection
Choose between Single-product or Multi-product selection based on your sales strategy.
Customizing the Payment Element
Ensure the payment element remains in “Live Mode” for active transactions. Personalize the payment section by adding a clear payment description that outlines what the customer is paying for. Including a short label for easy identification during form submissions.
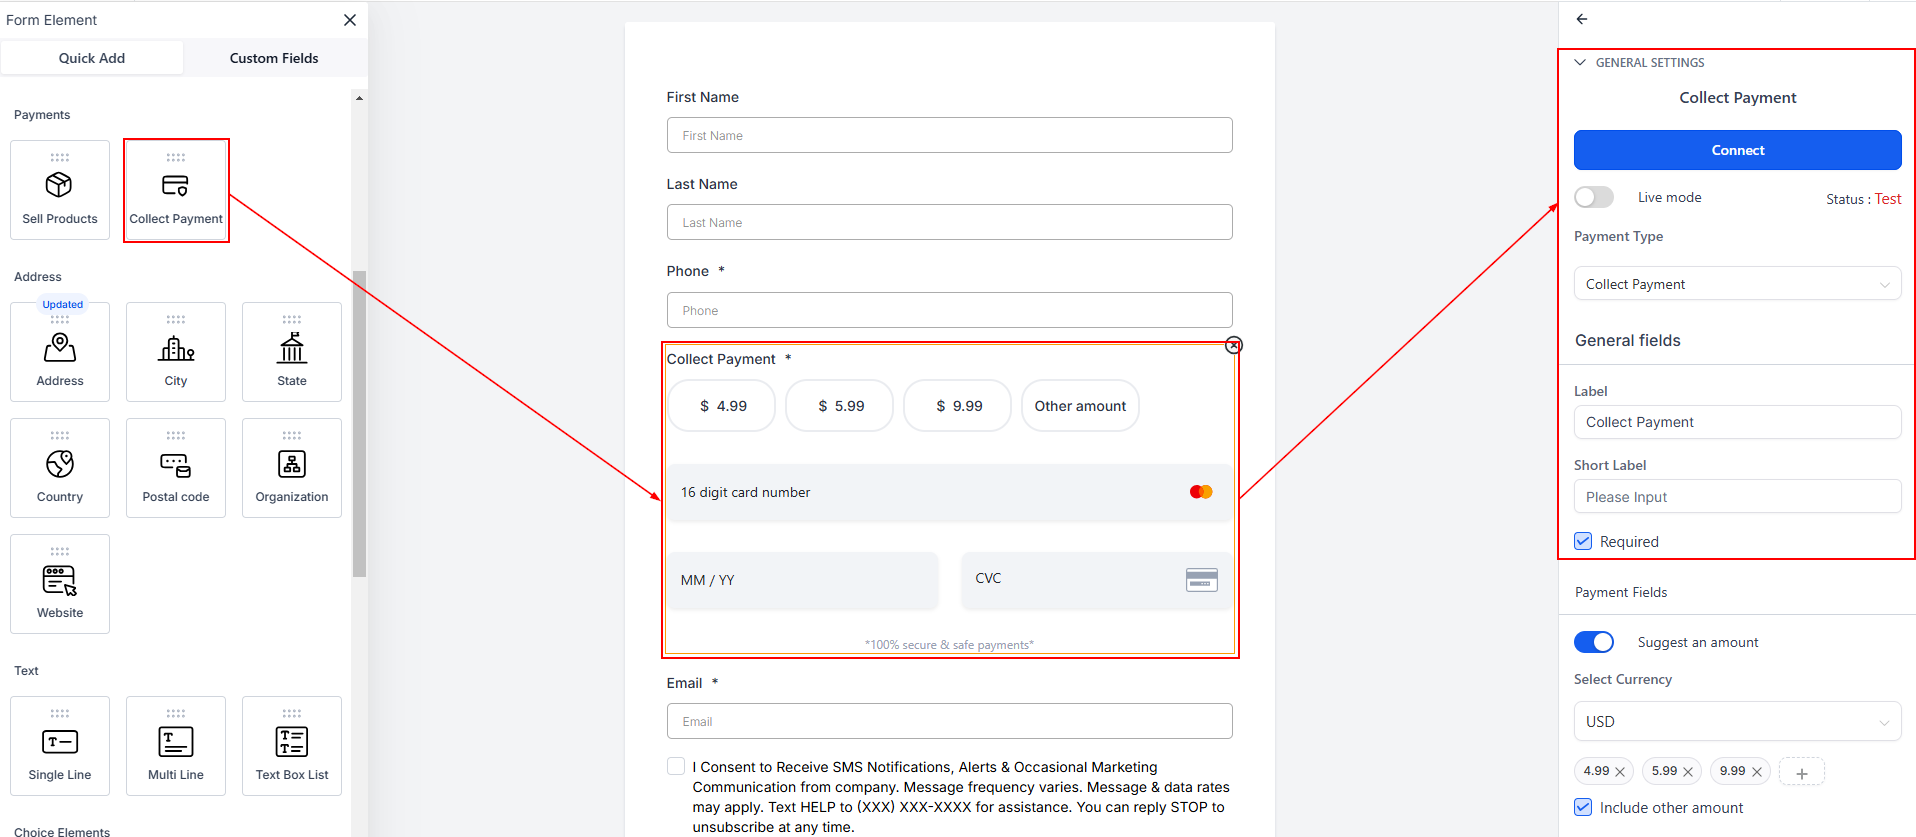
Setting the Payment Amount
If charging a set fee (e.g., $500 for a service), enable the fixed amount option and enter the exact figure. For donations or flexible payments, disable the fixed amount option, allowing users to input any amount they wish.
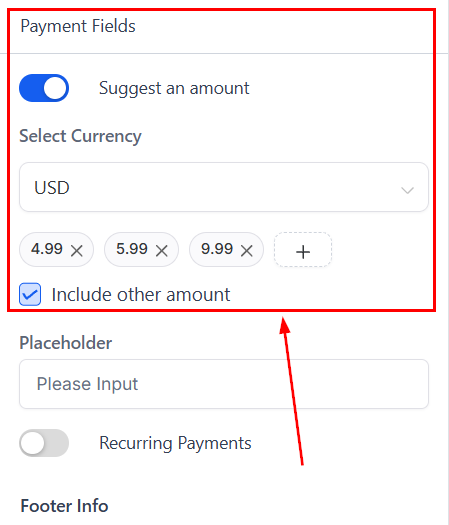
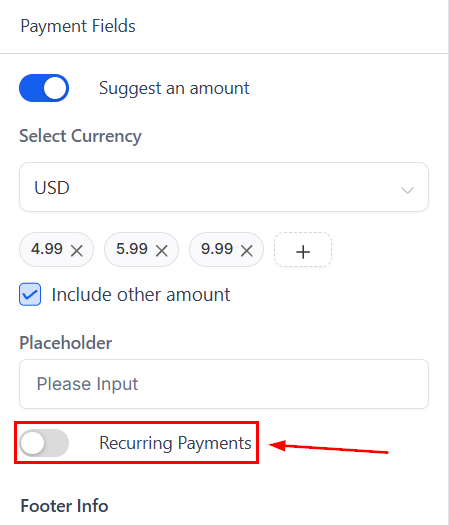
Enable the Recurring Payments option if this will be a repeating payment.
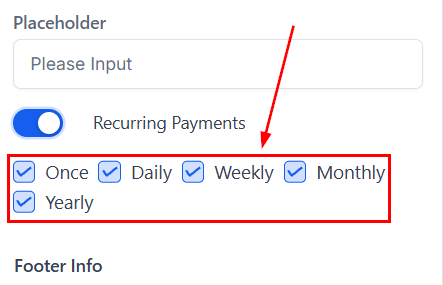
Check the box next to your desired frequencies or uncheck the box next to the frequencies you don’t wish to include.
Final Adjustments
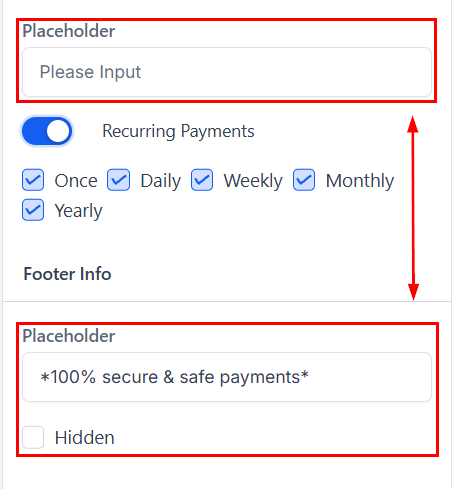
If you’re collecting variable payments, consider adding placeholder text like “Enter any amount” for clarity. For the Footer, you can decide whether to display or hide it based on your design preferences.
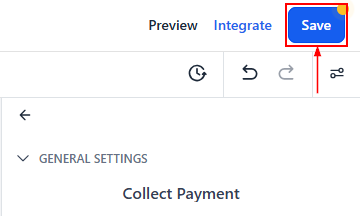
Once satisfied, review the form for accuracy, then save your changes.
📌NOTE: Payments made through the form will be recorded under the “Transactions” section within the CRM’s “Payments” tab, allowing you to easily track and manage incoming payments.
Once you’ve customized your form with the payment element, your customers will be able to make payments directly within the form. This setup is ideal for reducing the number of steps required to make a payment, thereby streamlining the process for both you and your customers.
Troubleshooting and FAQs
Q: What if the payment element doesn’t appear in my form?
- A: Ensure you’ve correctly dragged the payment element into the form and that it’s set to “Live Mode”.
Q: How do I refund a payment made through a form?
- A: Refunds can be processed through the “Transactions” section by selecting the specific payment and opting to issue a refund.
Not a Funnelbud customer yet?
Try our all-in-one CRM for sales and marketing — free for 7 days, no commitment.