Setting Up Shopify Integration
If you have a Shopify store, you may be wondering if you can view customer orders in your account, manage payment processing, trigger automation for follow-up actions, and more. The Shopify integration allows you to do just that. The process involves two main steps:
- Create a Custom App in Your Shopify Store
- Connect Shopify to Your Account
Creating a Custom App
Before setting up the integration, you need to create a custom app in your Shopify store.
Selecting “Apps” in Shopify Dashboard
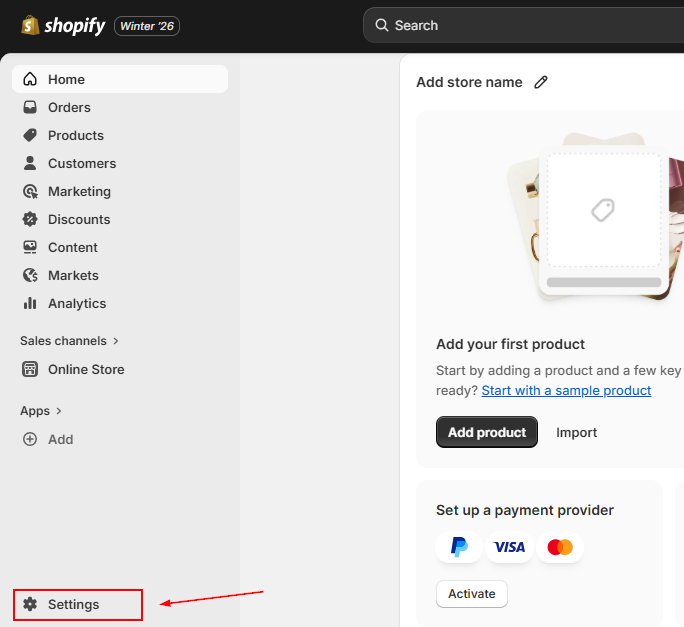
Log in to your Shopify store and click on “Settings” in your dashboard.
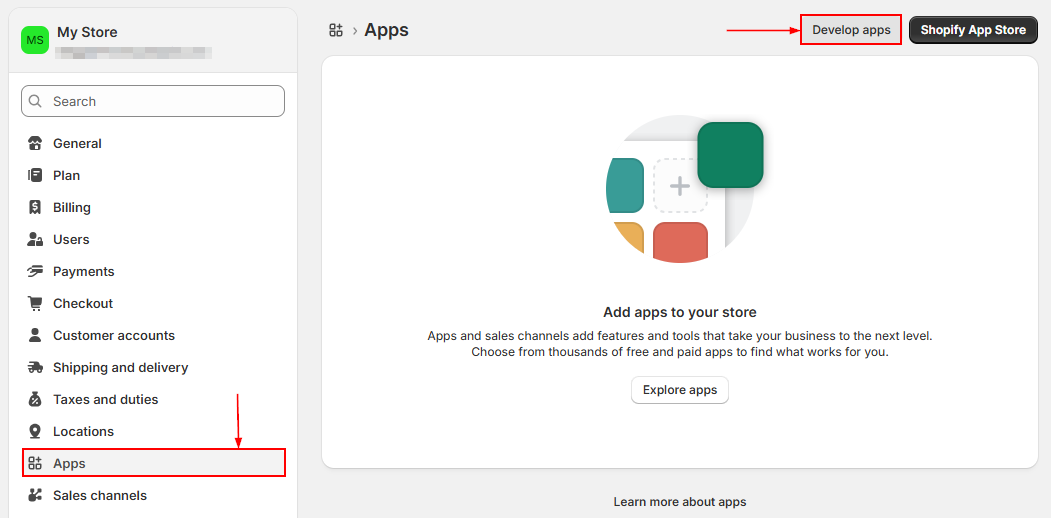
Develop Apps
Click on “Develop apps” at the top of the Apps screen.
Enable custom app development if necessary, then click Create an app.
Name the app, select your email under App Developer, and click Create app.
Next, configure the Admin API integration:
- Enable read_orders under Orders
- Enable read_products under Products
- Click Save (top right)
Then, click Install app and confirm the installation.
Once installed, go to API credentials, reveal the Admin API access token, and copy it using the clipboard icon.
Connecting Shopify to your CRM System
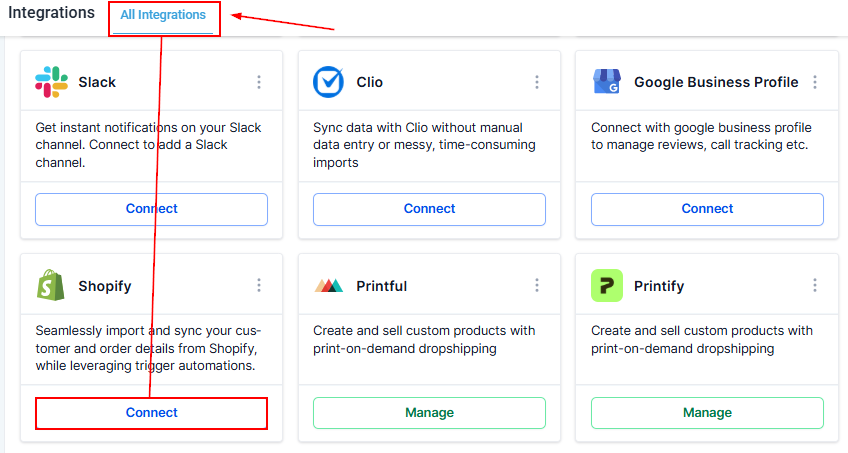
Once you have done so, go to the Settings > Integration area of your CRM and click on the “Connect” button to integrate your Shopify store.
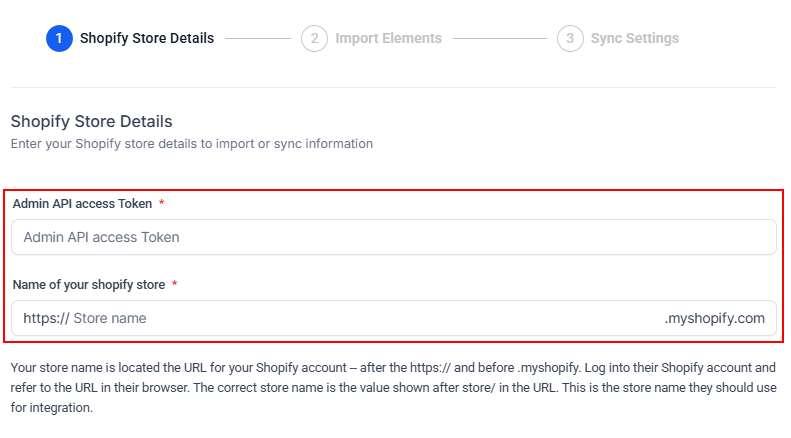
Setting up the Store
Paste the “Admin API access token,” enter the “Name of your Shopify store,” and click “Next.”
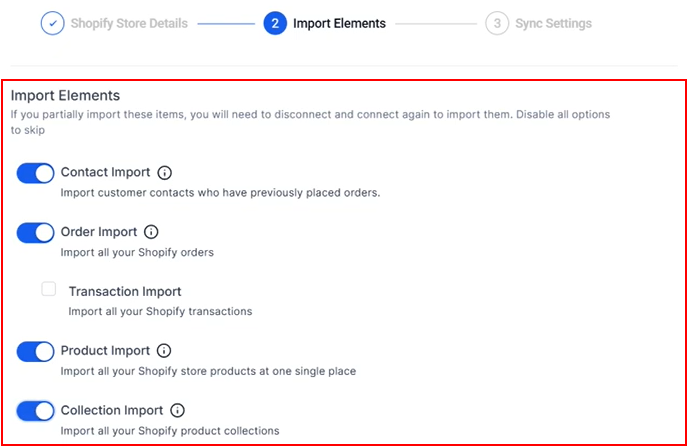
Import Elements
Toggle the switches on the features you want to import to the “ON” position.
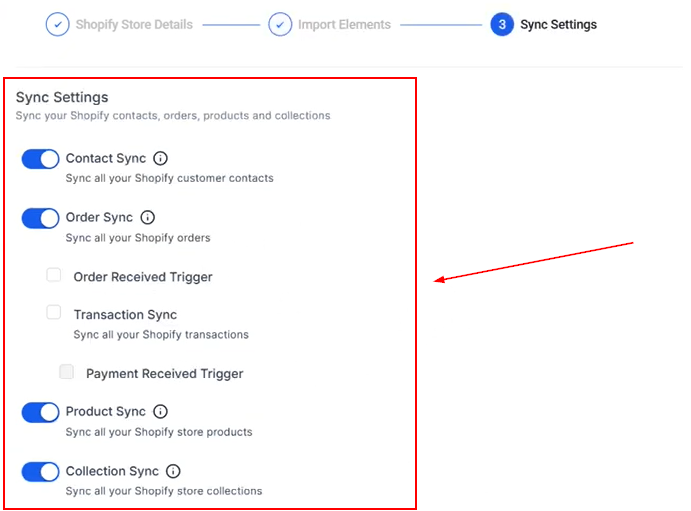
Sync Settings
Choose between syncing orders, contacts, products, or collections to the platform, and select the triggers that can be used for automation.
Click Save to finalize the integration.
Now that you have connected your store, you can use Shopify workflow triggers to send emails, SMS messages, and more. To learn more about other tools you can connect, visit the other articles in this section.
Not a Funnelbud customer yet?
Try our all-in-one CRM for sales and marketing — free for 7 days, no commitment.