Auto Followup Action in Conversation AI
The Auto Follow-Up feature empowers your Conversation AI to intelligently re-engage contacts in your workflows who have gone inactive, dropped off during a conversation, or requested a follow-up at a later time. By eliminating the need for manual outreach or complex workflow setups, this feature ensures timely, relevant follow-ups that maintain the flow of conversation and drive better results.
Key Capabilities
- Smart Drop-Off Detection: Identifies unresponsive contacts or messages like “I’m busy” or “Call me later.” Automatically schedules follow-ups based on user behavior.
- Dynamic Channel Switching: Automatically switches channels (e.g., from Live Chat to SMS) if engagement drops. Helps maximize message delivery and contact responsiveness.
- Visibility via Response Info Panel: View all scheduled follow-ups directly within the Response Info panel.
How It Works
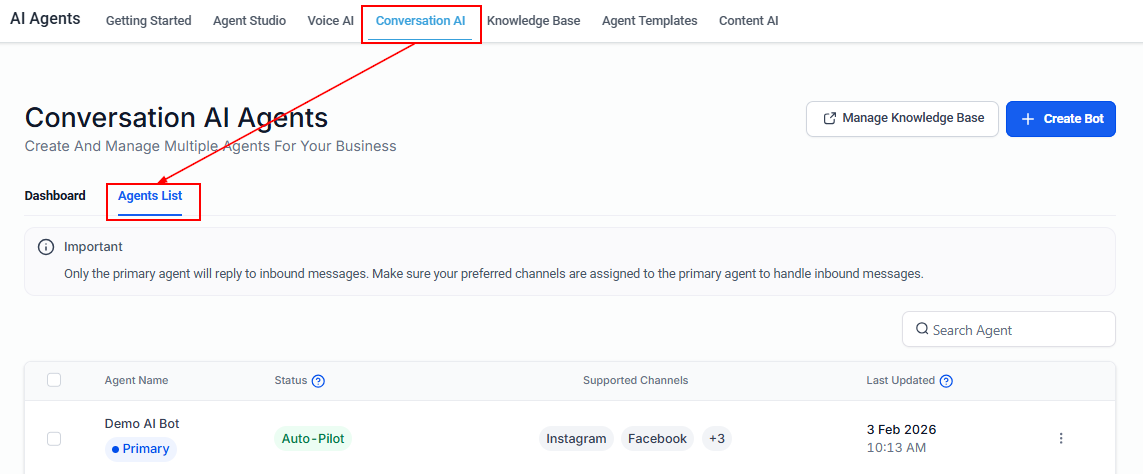
Log in to your account and navigate to the Conversation AI Agents List within the AI Agents section.
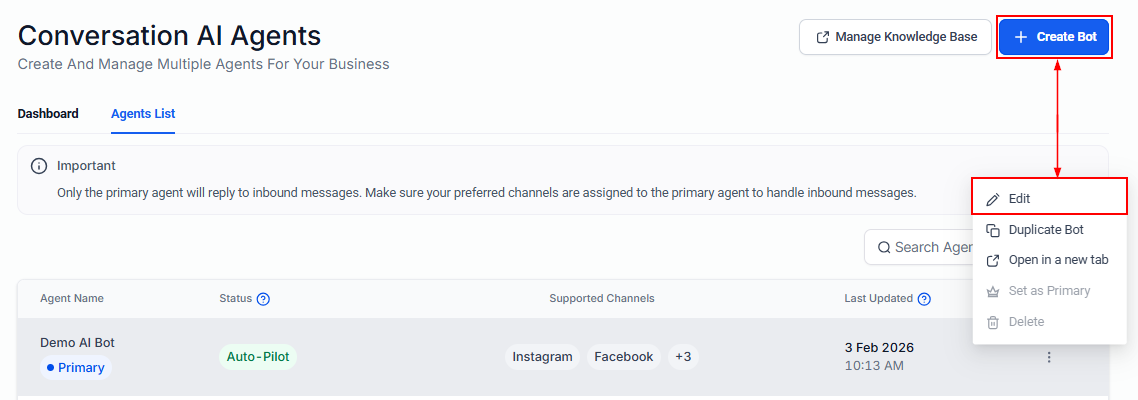
Click Create New Bot to start fresh or click the three dots next to a prompt-based or flow-based bot and select Edit.
📌Note: The Auto-Followup feature is not available for Guided Form Setup bots at this time.
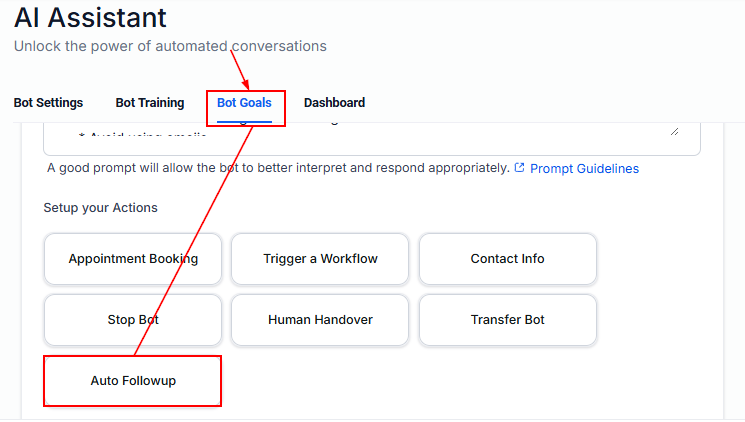
Inside the bot editor, navigate to Bot Goals in the top navigation, scroll to the Set Up Your Actions section, and click on Auto Followup to begin configuring follow-up behavior.
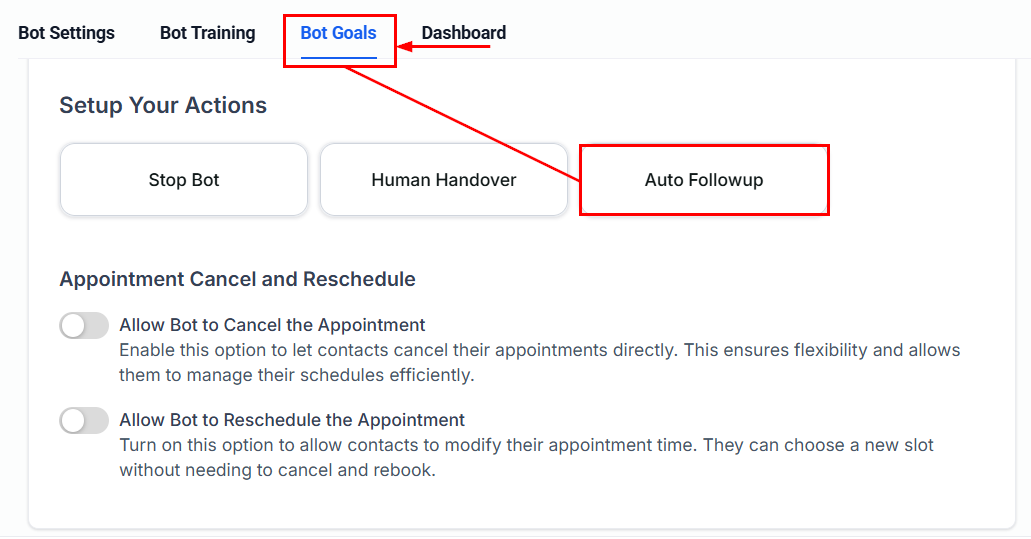
This is how it will appear in the Flow-Based builder:
Auto Follow-Up supports three key scenarios. You can enable each and define a sequence of up to five follow-up messages per scenario.
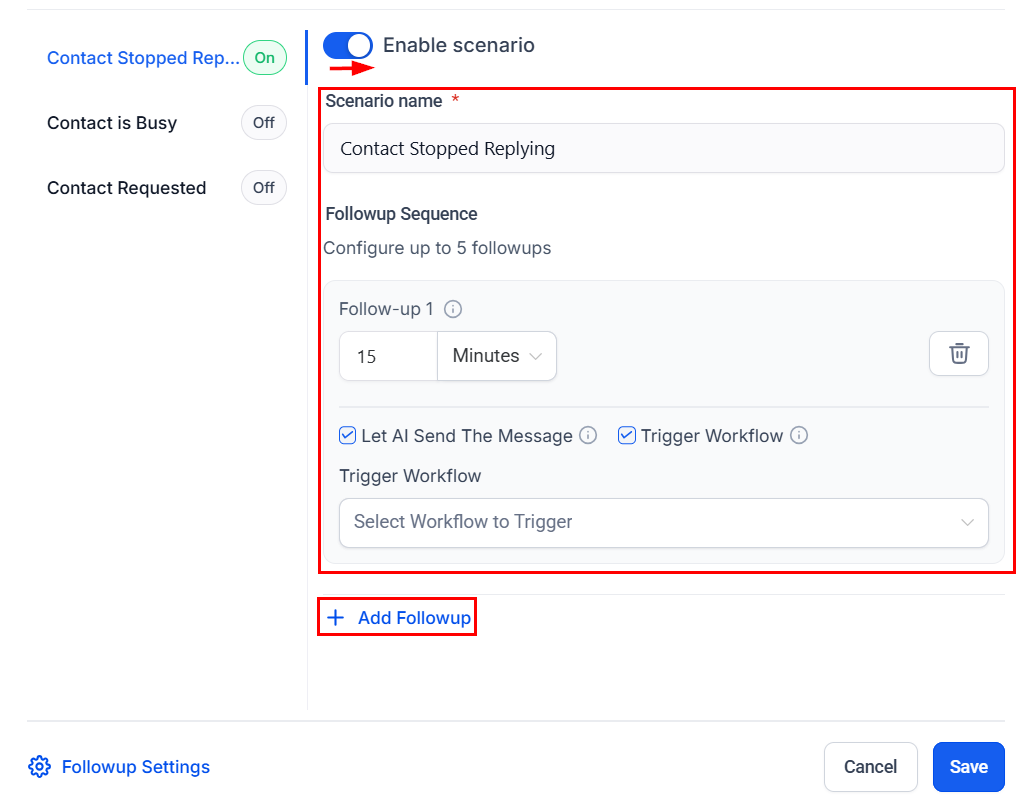
Scenario 1: Contact Stopped Responding
Toggle Enable Scenario ON, then add up to five follow-up sequences.
For each sequence, set the delay (in minutes, hours, or days), choose between Let AI Send the Message (auto-generated based on context) or a Custom Message (manually entered), and optionally Trigger a Workflow by toggling it ON and selecting one from the list.
📌Note: Avoid triggering another bot through a workflow, as this will disrupt the automated follow-up logic.
Click + Add Followup to include additional sequences.
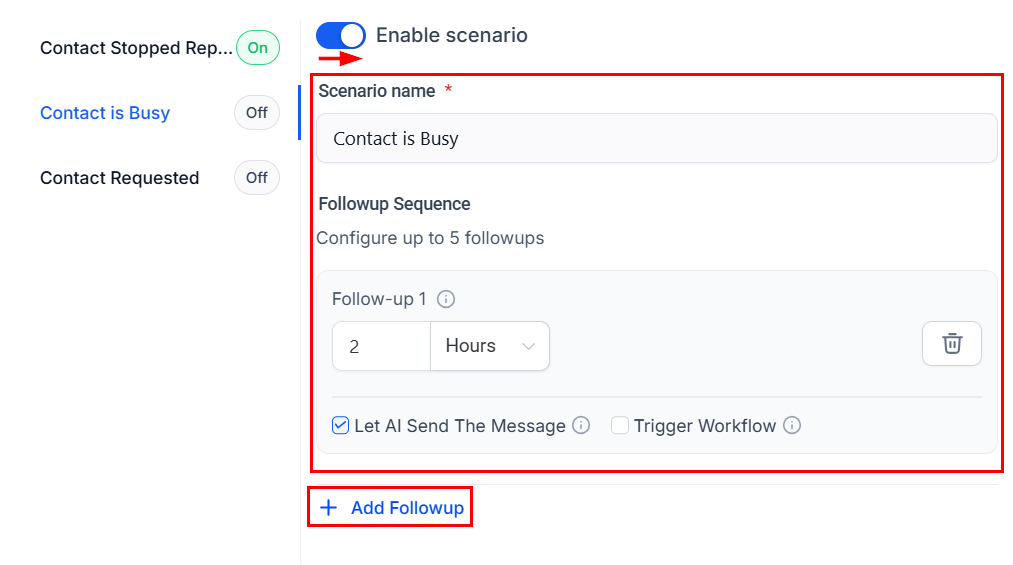
Scenario 2: Contact Marked as Busy
Toggle Enable Scenario ON, then configure the follow-ups similarly to Scenario 1—set delay intervals, choose between AI-generated or custom messages, and optionally assign workflows as needed.
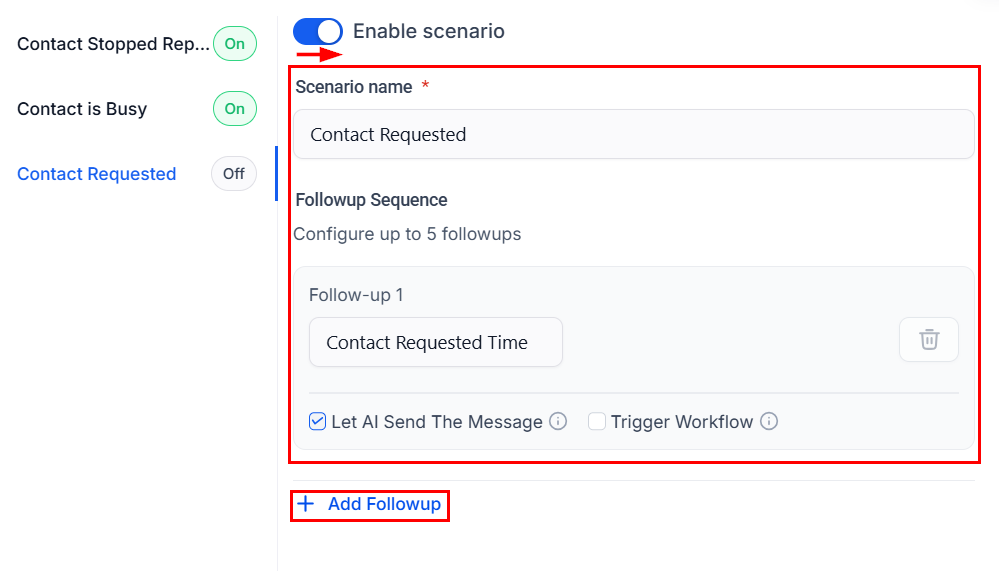
Scenario 3: Contact Requested a Follow-Up
Toggle Enable Scenario ON. The first sequence will auto-set based on the contact’s request. You can add up to five sequences—define delay intervals, customize messages, and optionally attach workflows as needed.
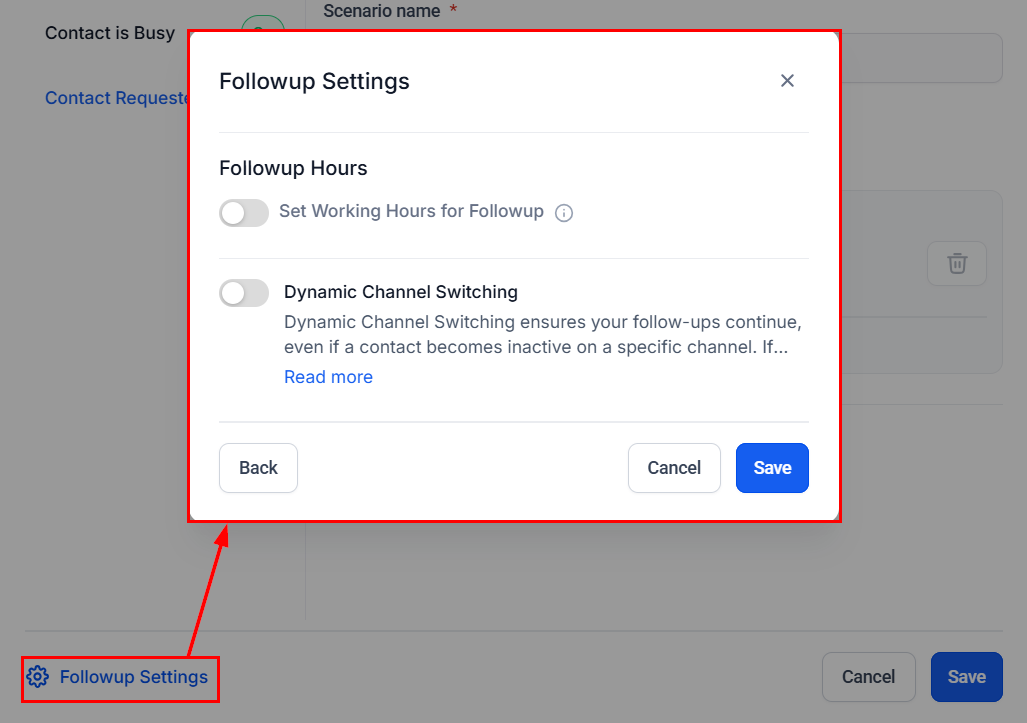
To ensure follow-ups are timely and considerate, open Follow-Up Settings and configure the following options:
- Enable Working Hours: Set your preferred time window for follow-up messages (e.g., 9 AM – 6 PM). This setting applies only to follow-up messages, not general AI replies. If a follow-up is scheduled outside business hours, it will be deferred to the next available time slot.
- Enable Dynamic Channel Switching: Allow the bot to switch to an alternative channel (e.g., SMS) if the original becomes inactive. Supported platforms include Live Chat, Facebook, Instagram, WhatsApp, and SMS. On platforms like Facebook, Instagram, or WhatsApp, follow-ups automatically switch to SMS after 24 hours of no response (This setting is optional and can be turned off.)
Click Save to apply changes.
Save All Changes
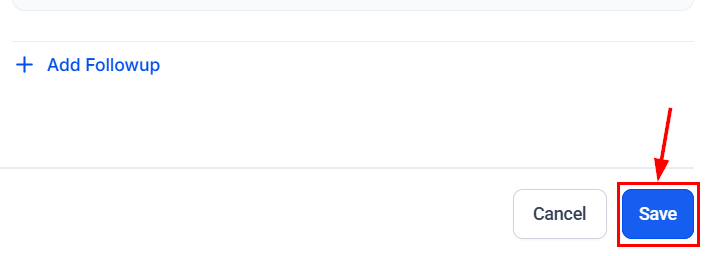
Once you are satisfied with your configurations, click the global Save button to confirm and activate your Auto Follow-Up settings.
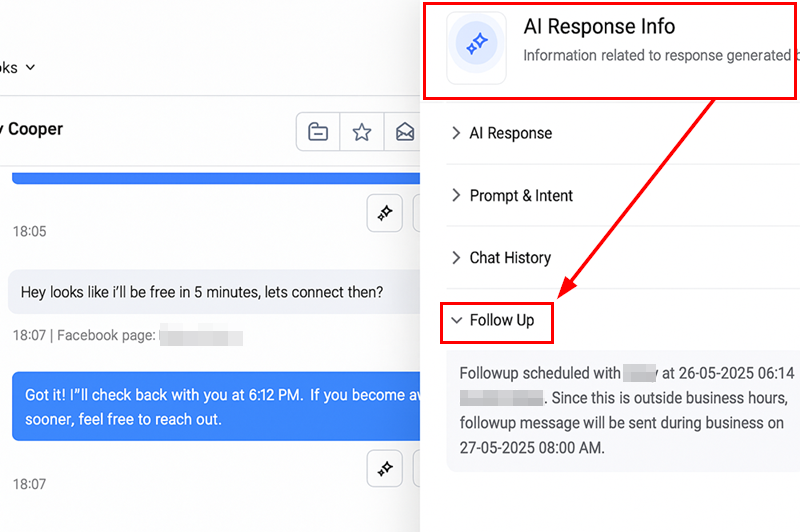
You can then monitor scheduled follow-ups in the Response Info panel of the Conversation.
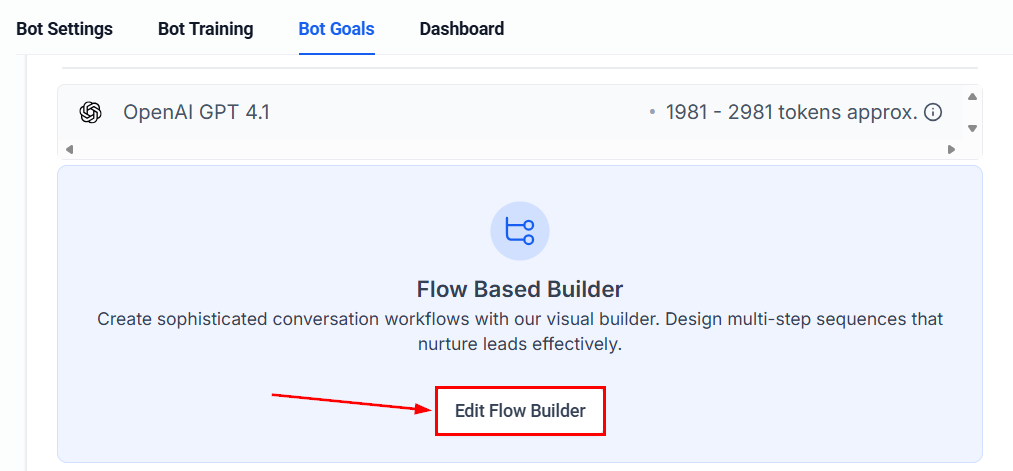
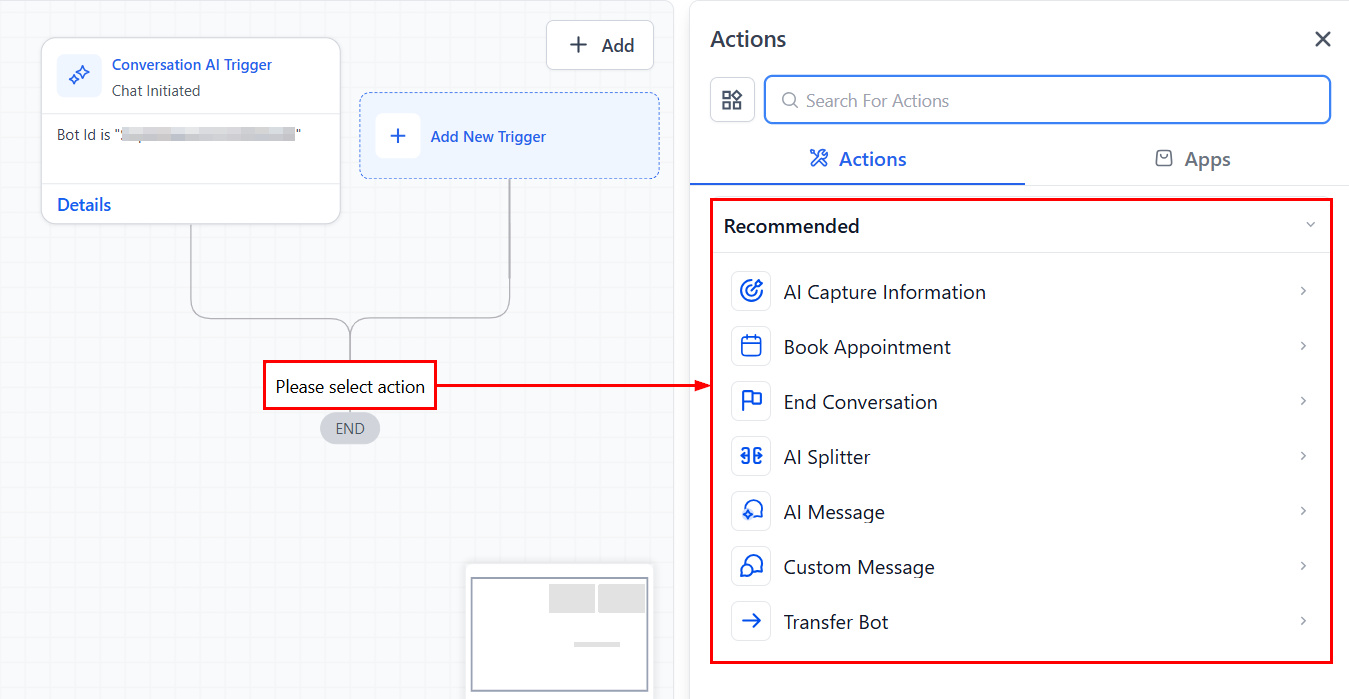
For your Flow-Based bot, you can also open the builder to choose actions you would like to perform on contacts.
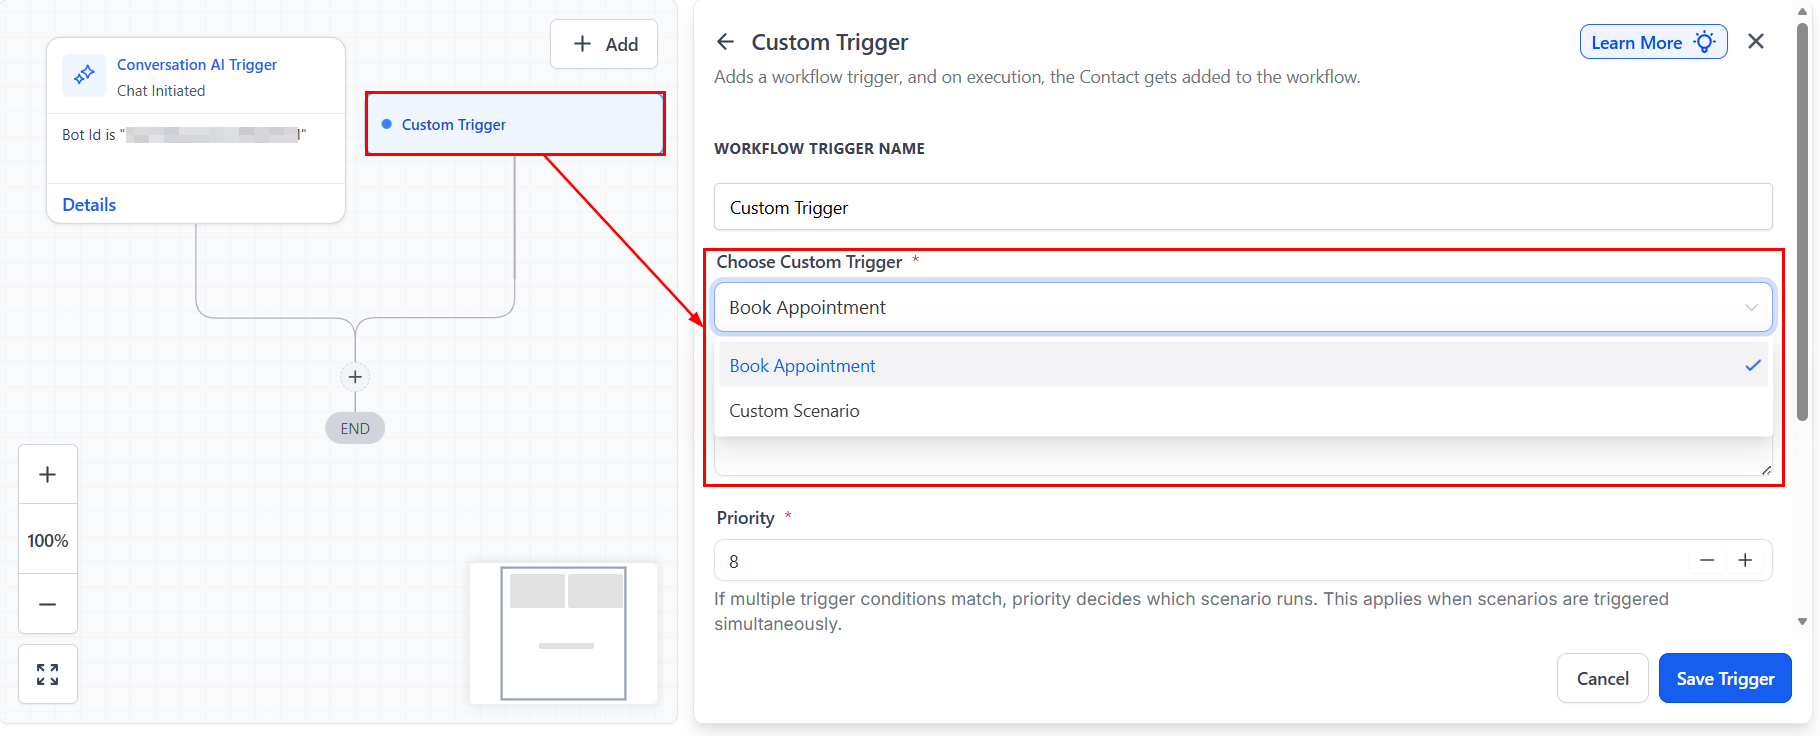
By default, the workflow will trigger when a chat is initiated on your flow-based bot, but you can add other triggers such as when an appointment is booked or another custom scenario.
Once you are satisfied with your triggers, go ahead and add some actions to bring your workflow to life. Don’t forget to save your changes!
Auto Follow-Up enables smarter, more responsive engagement by allowing your Conversation AI bot to reinitiate conversations based on real-time behavior. With customizable triggers, message options, working hour constraints, and channel flexibility, this feature ensures no lead is left behind—while maintaining a professional, timely user experience.
Activate Auto Follow-Up today and let your AI assistant handle the follow-up work for you.
✍️Important Notes
- Ensure the bot is active to send follow-ups
- Avoid triggering another bot mid-conversation to preserve logic
- Use realistic delay intervals to prevent spam complaints
- Contact replies automatically cancel any scheduled follow-ups
Frequently Asked Questions
Q: What happens if a contact replies before the scheduled follow-up?
- A: The follow-up logic is canceled automatically, and no additional messages will be sent for that session.
Q: Can I customize the messages the bot sends?
- A: Yes, you can either use AI-generated messages or enter your own custom responses.
Q: How do I avoid overwhelming contacts?
- A: Set appropriate delays between messages and limit the number of follow-ups to maintain a respectful cadence.
Not a Funnelbud customer yet?
Try our all-in-one CRM for sales and marketing — free for 7 days, no commitment.