How to Create an Opportunity
While automation is commonly used to create opportunities, it is crucial to understand the process of crafting them from scratch as well. Creating opportunities for your clients makes keeping track of the sales process quick and simple.
To commence the creation of a new opportunity, head to the Opportunities section from your account Dashboard, then click the “+ Add Opportunity” button.
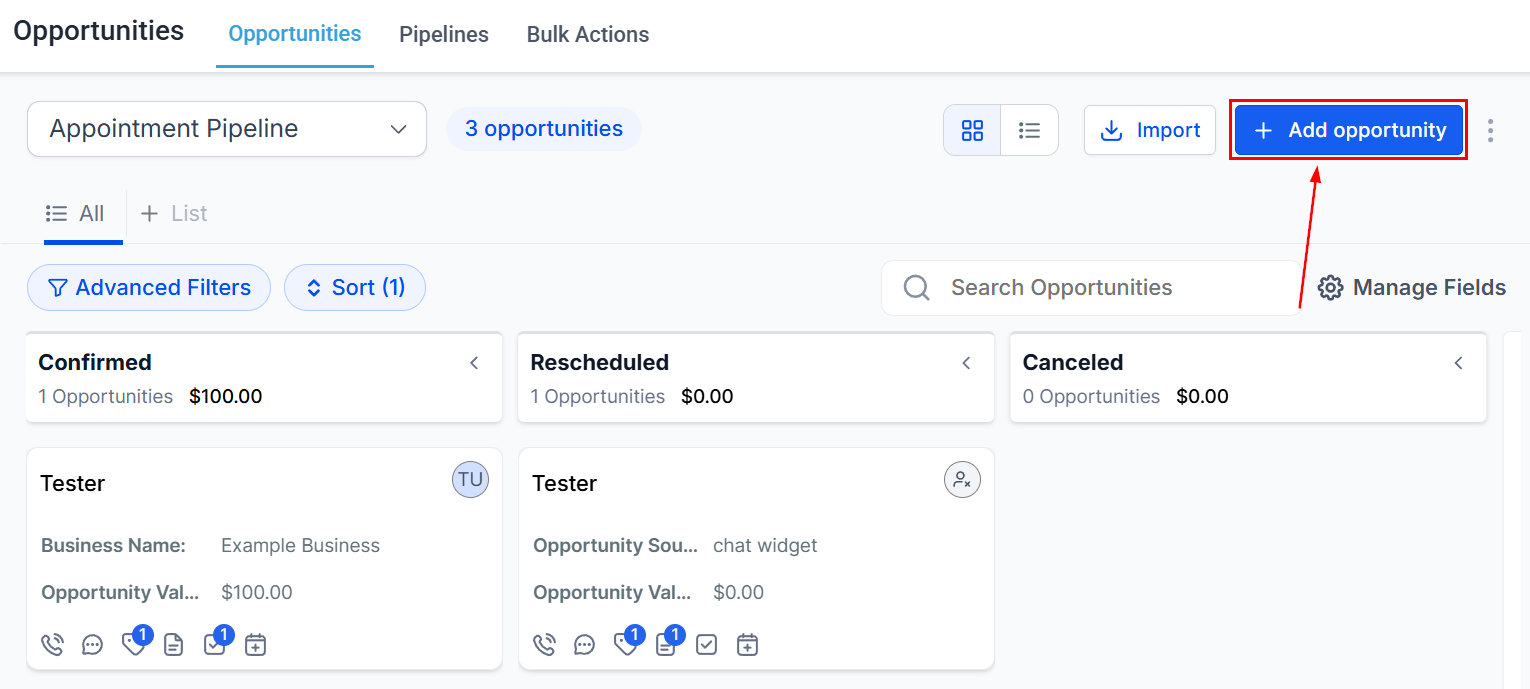
Contact Details
Begin creating your opportunity by entering their contact information.
- Primary Contact Name: Enter the name to be associated with the opportunity card.
- Primary Email: Add the best email for your contact here.
- Primary Phone: Add the contact’s phone number.
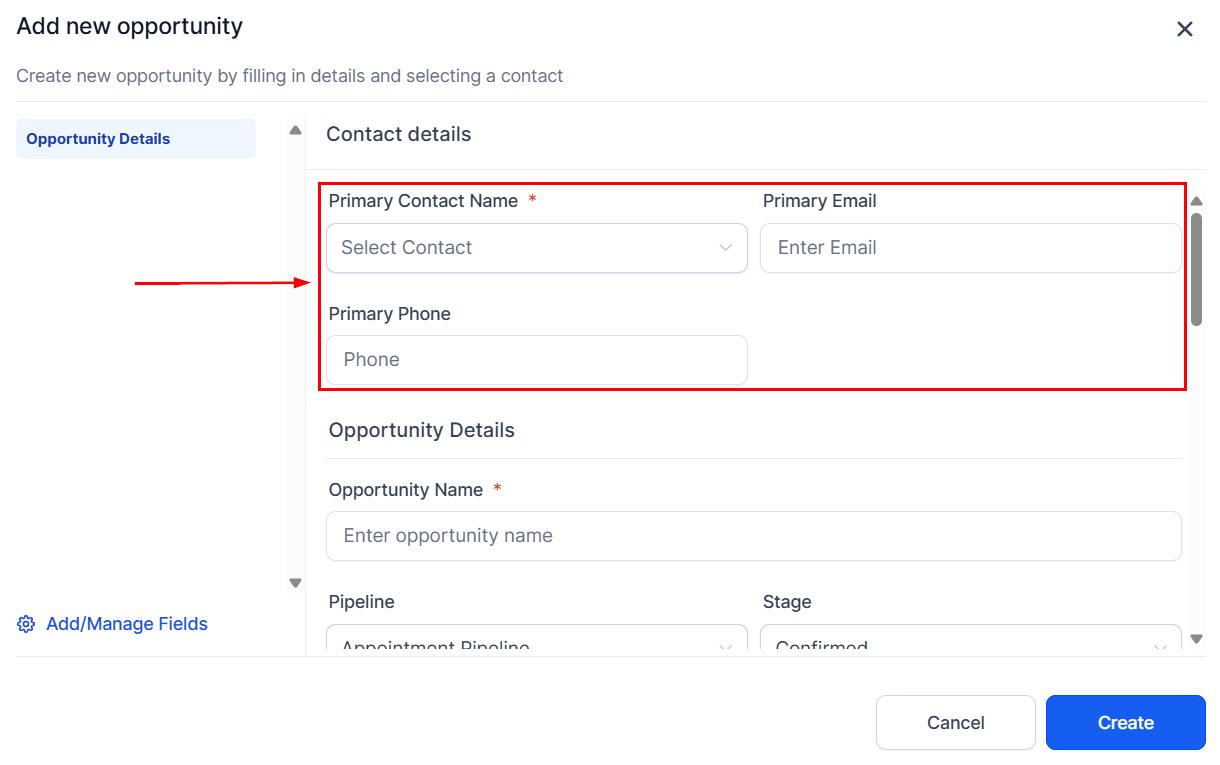
Opportunity Details
- Opportunity Name: You will need to give your opportunity a name. This is usually the full name of the opportunity or company name.
- Pipeline: Here, you will select which pipeline you are allocating this new opportunity into. This is very important for organizational purposes and tracking data correctly throughout the pipeline.
- Stage: You will need to assign the opportunity to a certain stage in your pipeline to show and track where they are in the sales process.
- Status: You will need to assign a status to the opportunity. The status shows if the opportunity is still open, won, abandoned, or lost.
- Opportunity Value: In order to properly track conversion revenue and costs, you should add monetary values to the opportunities. By default, this is tracked in USD.
- Owner: Here, you can assign a user to the opportunity. This is very useful when managing sales teams or Call centers, so the agents know which opportunities are their responsibility.
- Followers: Assign users to monitor progress and ensure that tasks and milestones are being met.
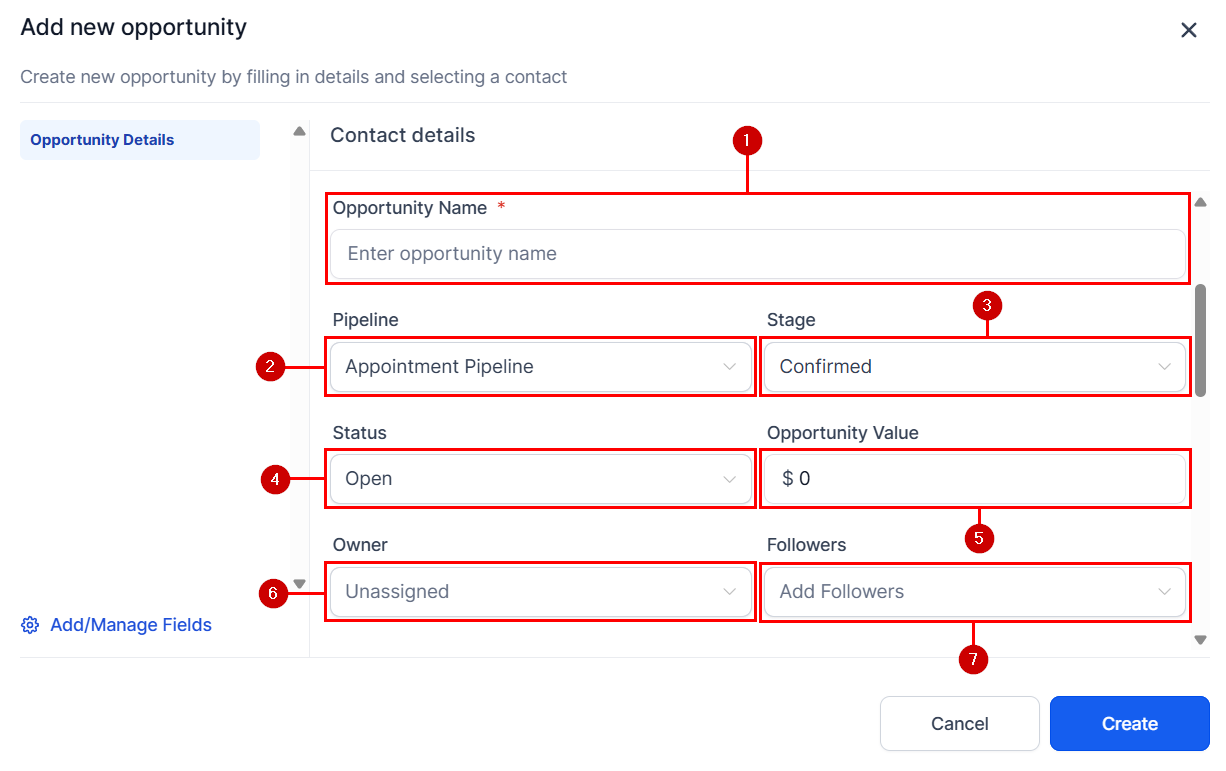
- Business Name: Enter the name of the business the opportunity is affiliated with.
- Opportunity Source: If you know where the opportunity came from, you can enter a source here to keep track of acquisition data.
- Tags: Add tags to the opportunity.
- Custom Fields: Love
Edit Opportunity
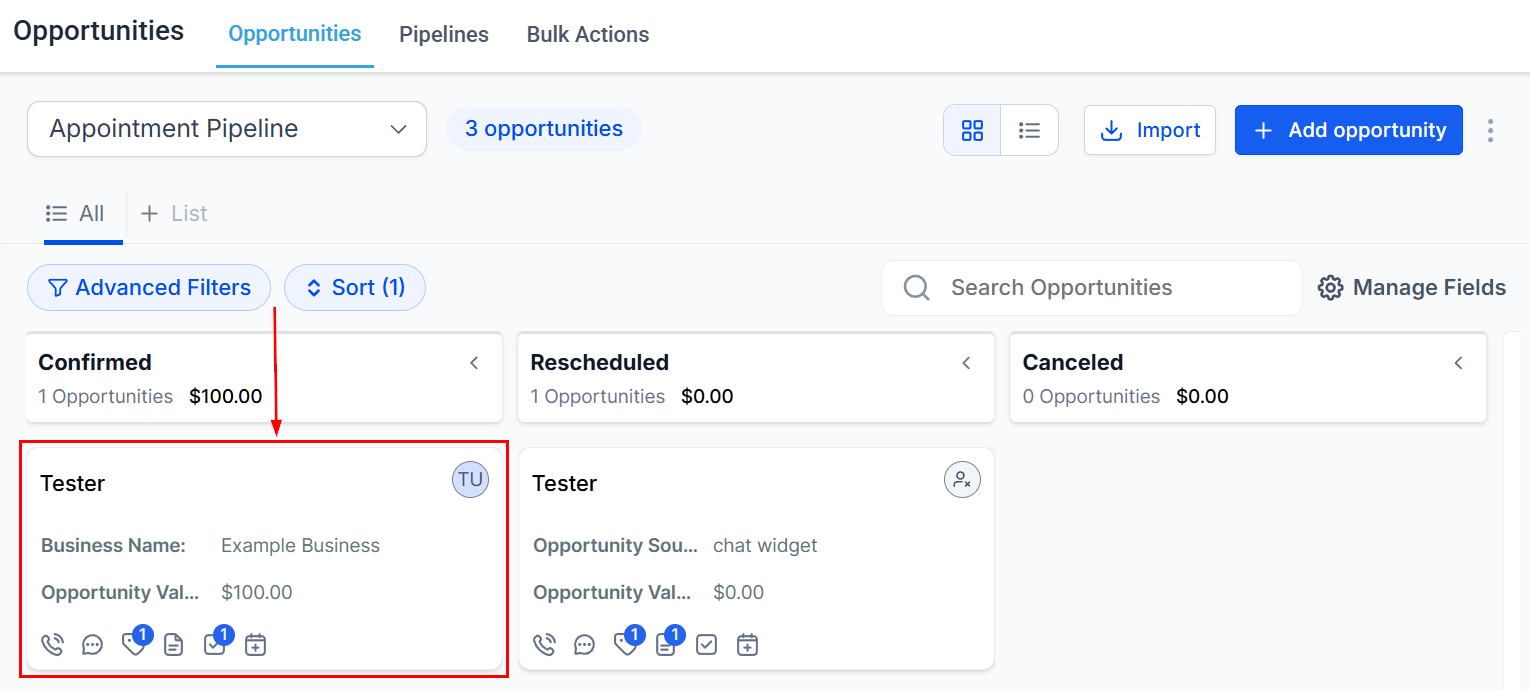
If you want to edit the opportunity, simply click on the opportunity card and it directs you to the edit popup.
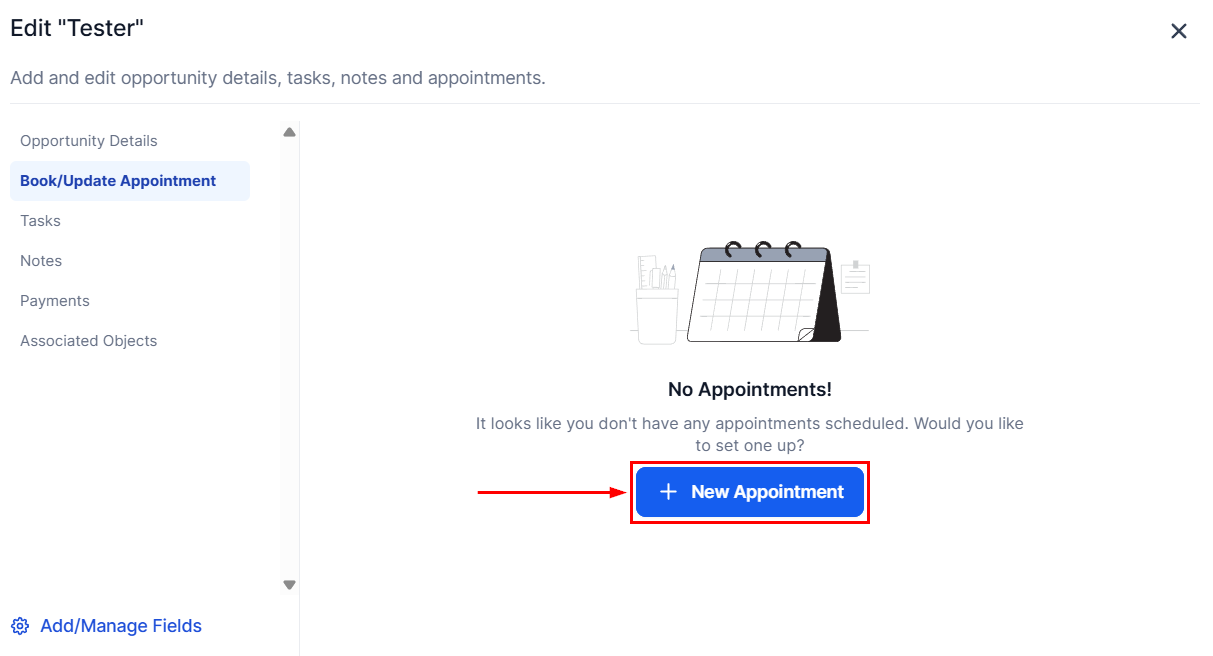
Book/Update Appointment Tab
This section allows you to manage any appointments associated with this opportunity. If no appointment exists, you can click “New Appointment” to create one.
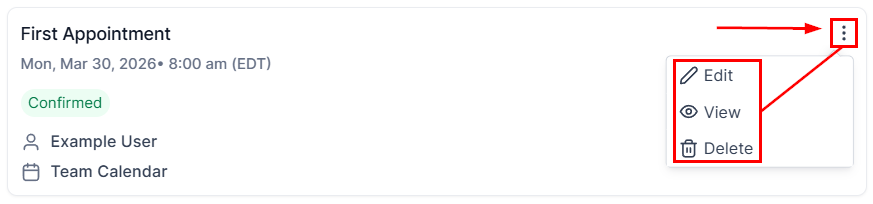
If an appointment already exists, you can edit, view, or delete it by clicking the three-dot icon.
Tasks Tab
If you would like to add a new task to the opportunity, you can do so here.
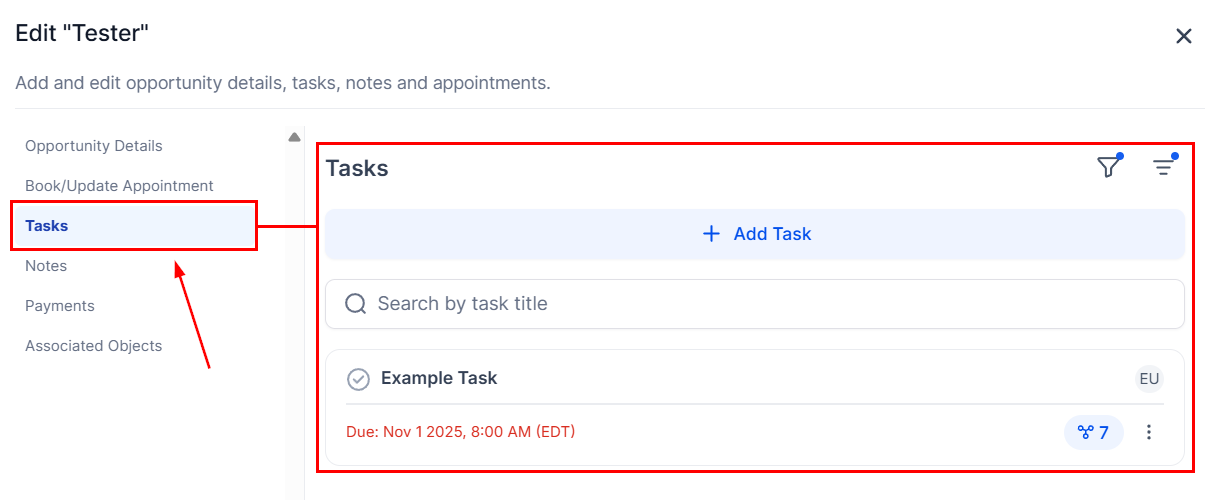
Click the Add Task button to create and assign the task for the selected opportunity.
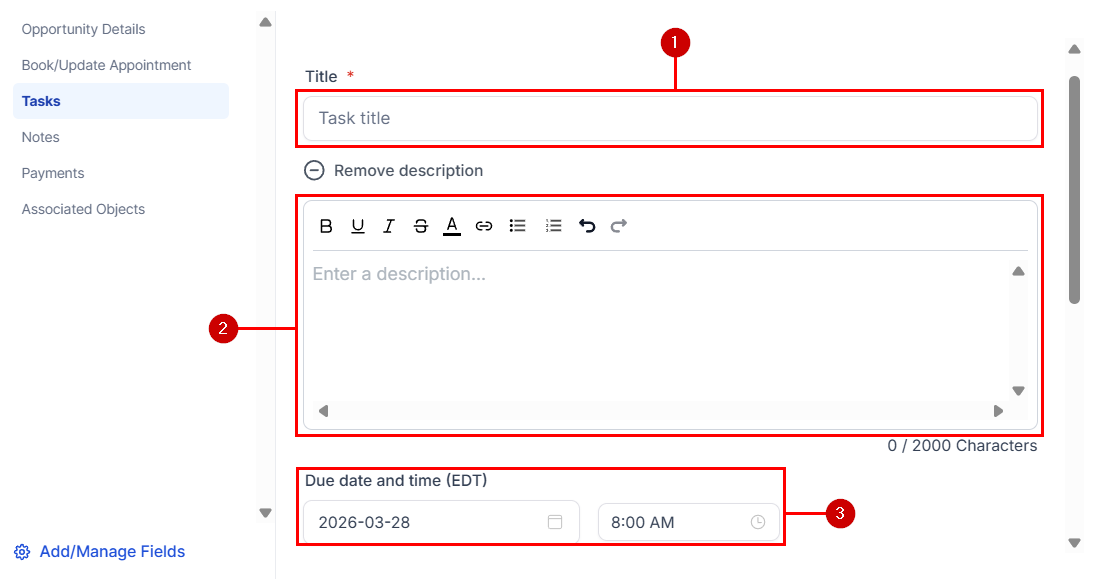
- Title: Give your new task a title, so it can be easily identified.
- Description: The task description can mention the key details of the task and other relevant details. Use the rich text editor to apply styling options.
- Due Date: Select a due date by which you would like this task to be completed.
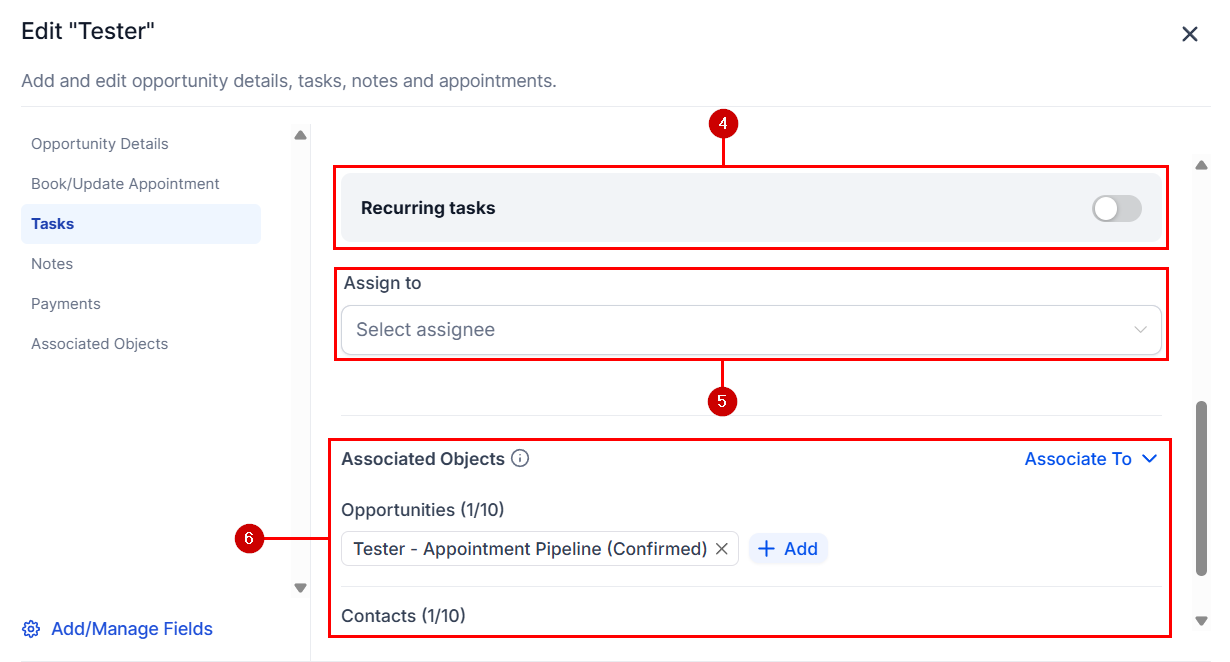
- Recurring Tasks: Toggle this switch to set this task to repeat.
- Assign To: Assign the task to a team member or leave it unassigned for all team members to see.
- Associated Objects: Link the task to relevant records such as contacts, opportunities, or custom objects.
Notes
You can view or edit notes in the notes tab. Here you can add important details related to the opportunity in your pipeline. These notes will show in the Opportunity Card as well as in the contact details within the Contacts tab.
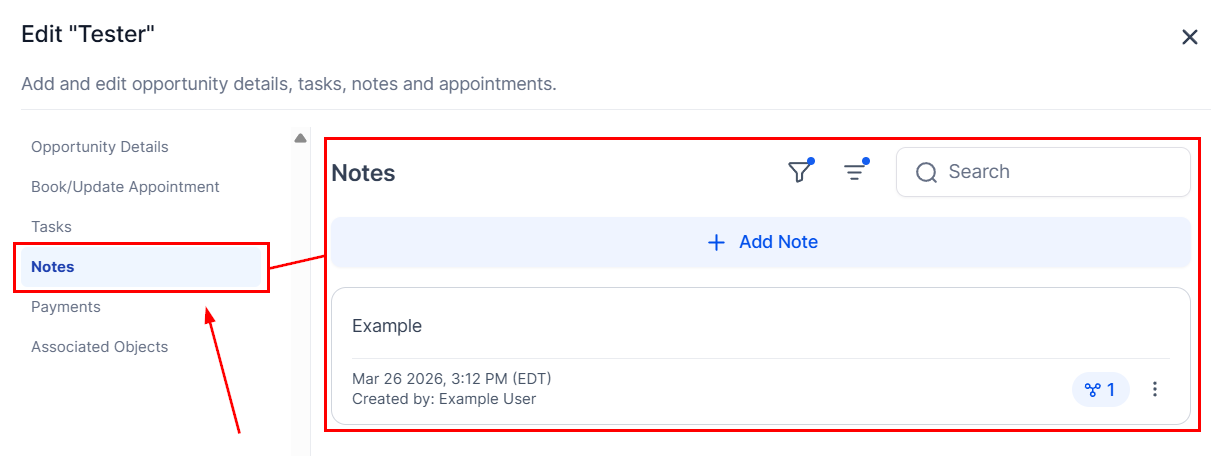
Click the Add Note button to create a new note. Similar to tasks, you can use the rich text editor to enter any details relevant to the opportunity and then select the objects with which the note should be associated.
Once you are satisfied, click Save.
Payments
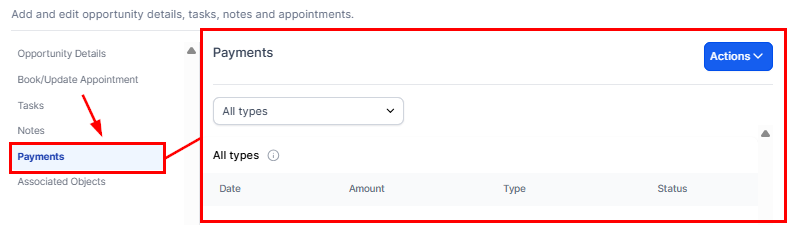
You can view or edit Estimates, Invoices, and Transactions. Or, by clicking the Actions button, send a new Invoice or Estimate. Helping you easily seal the deal and move customers along.
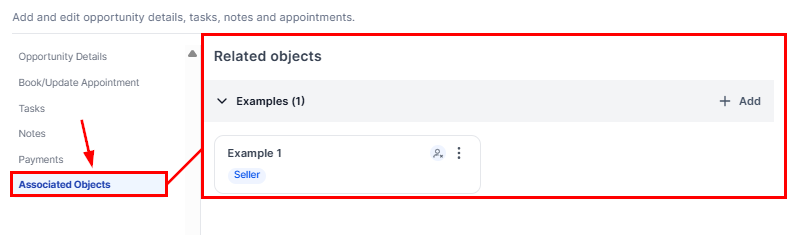
Associated Objects
Within this tab, you can view existing object associations or add new ones. This allows you to connect the record to related objects, ensuring all linked information is organized and easily accessible.
Quick Card Actions
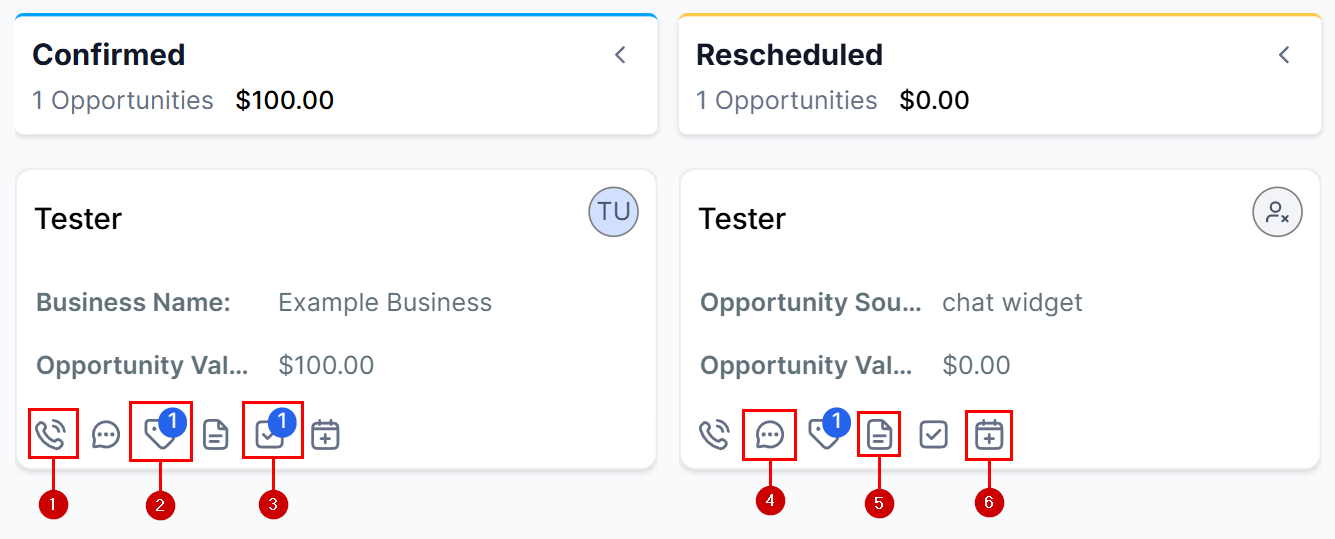
These action icons at the footer of each card allow you to add and manage activities seamlessly.
- Call: Clicking on the call icon speed-dials the contact number.
- Add Tag: Click on this icon to add a tag to your contact card.
- Add Tasks: Clicking on this icon allows you to assign any user in your team to a task specifically for that contact.
- View Conversation: Clicking on this icon directs you to the contact’s conversation thread.
- Add Notes: This icon directs you to the Note tab, where you can add any additional information about the contact.
- Appointments: If no appointment is booked, click on this icon to book an appointment with the contact. Otherwise, clicking on it will take you to the update module.
By understanding and utilizing these features, you enhance your ability to manage your opportunities.
Not a Funnelbud customer yet?
Try our all-in-one CRM for sales and marketing — free for 7 days, no commitment.