How to Set Up a Dedicated Sending Domain
How to create a dedicated sending domain?
- Navigate to Settings - > Email settings - > Email Services
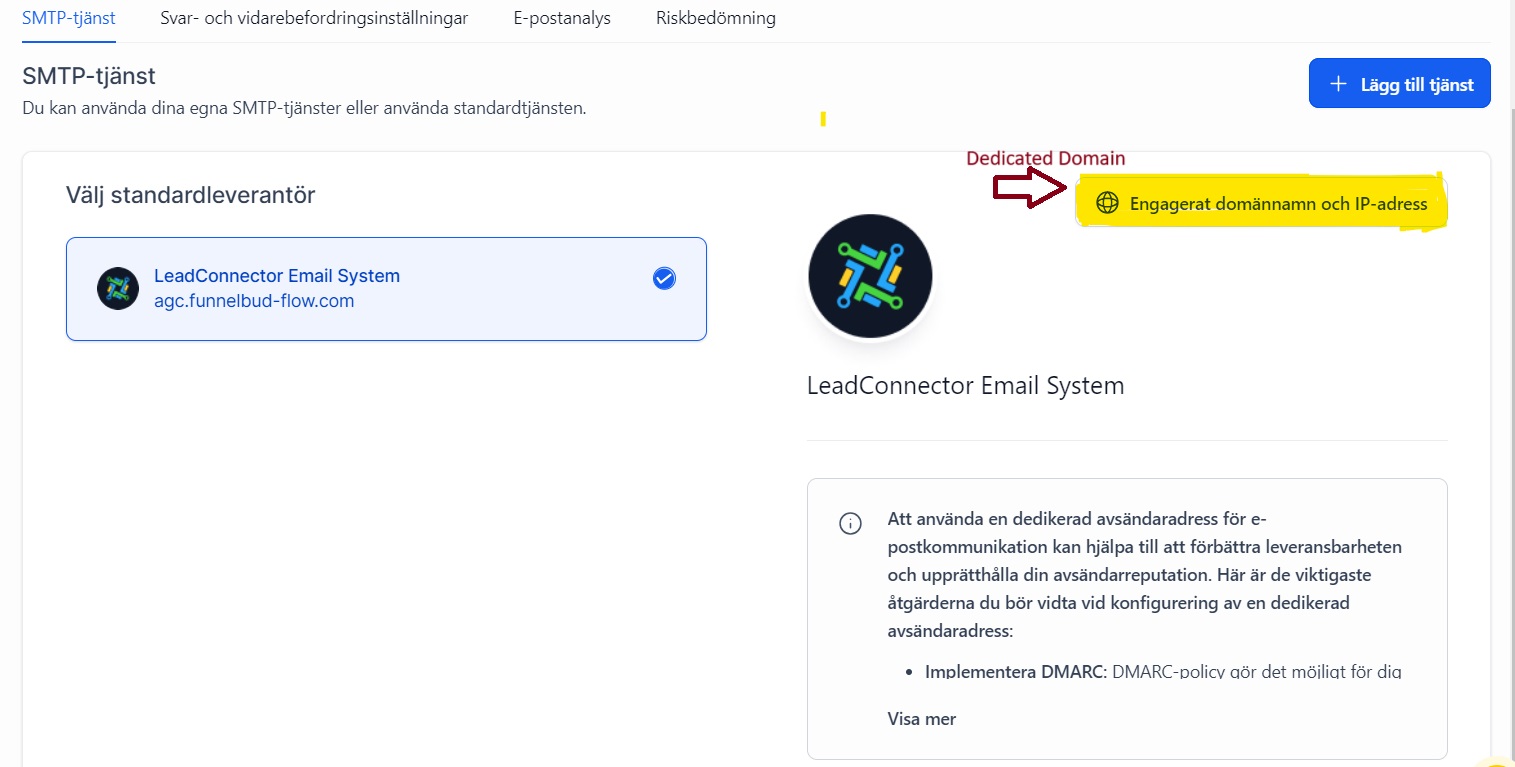
- Click the ‘Dedicated domain’ button.
- Add your domain details
- Verify Domain : Apply your new DNS records to your company’s DNS provider’s platform to activate the sending domain.
How to set up set up specific sending sub-domains for Workflows, Bulk Actions, Email Campaigns, etc.
f you’d like to use different sending sub-domains for things like Workflows, Email Campaigns, Bulk Action Emails, and Manual 1-to-1 emails, you can configure that by navigating to Sub-account Settings - Email Service -> SMTP Service -> Dedicated Domain and IP -> Domain Configuration
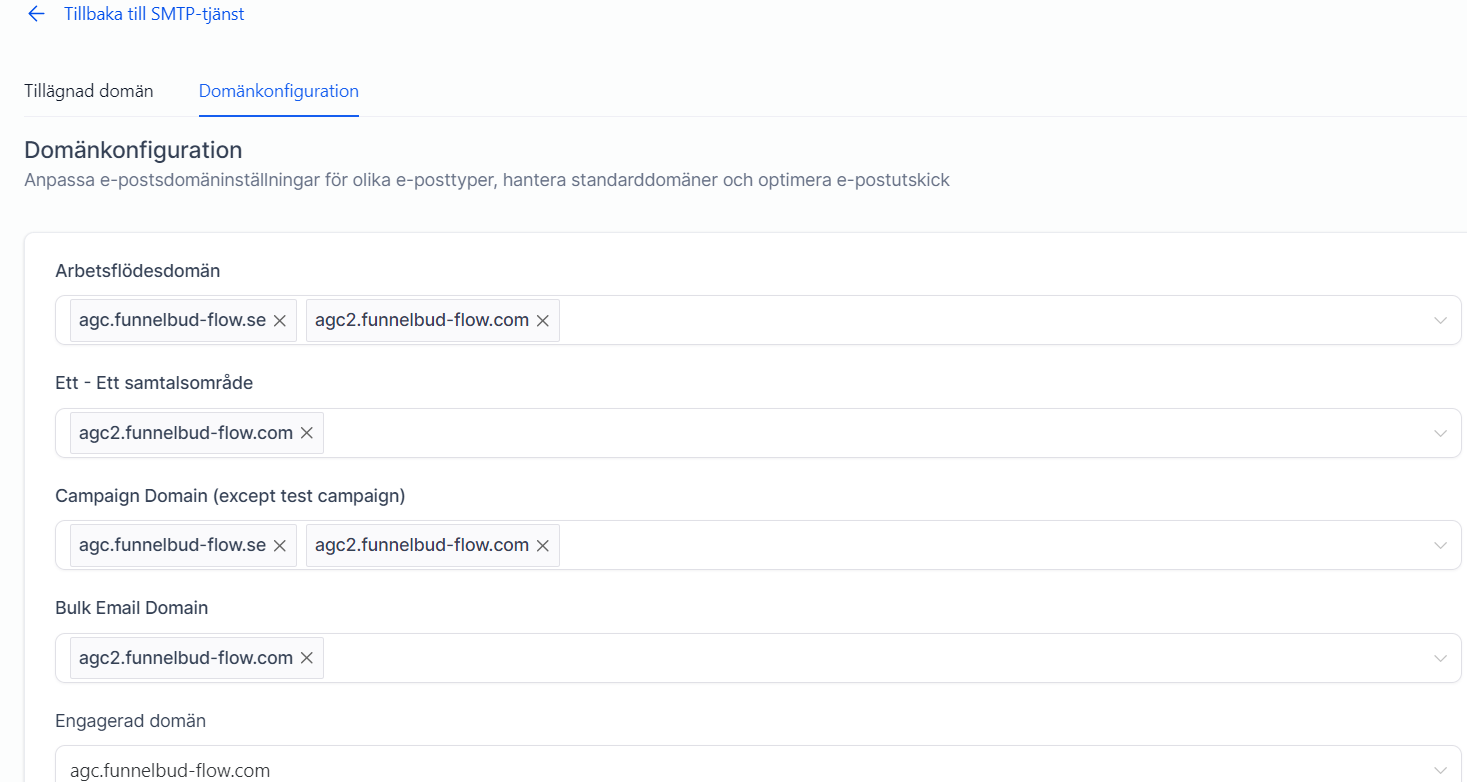 set up set up specific sending sub-domains for Workflows, Bulk Actions, Email Campaigns
Currently domains can be assigned to Campaign, Bulk email, One-One Conversation and Workflow emails. Default dedicated domain will be used for all other emails.
How to set up a default header for a dedicated sending domain?
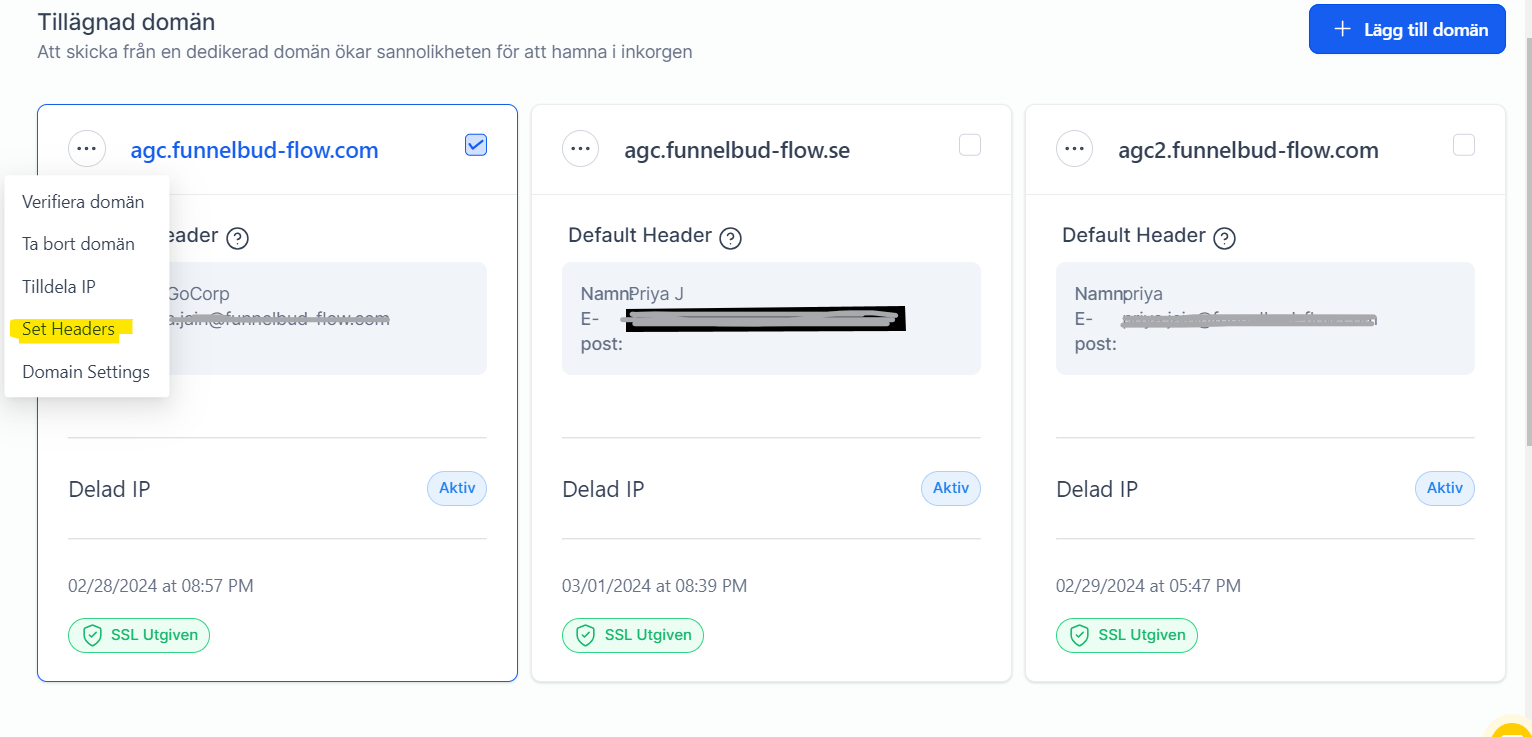
You can set up default “From address and Email” for dedicated domains under your account.
Navigate to Settings - Email Service -> SMTP Service -> Dedicated Domain and IP -> Set headers under dedicated domain.
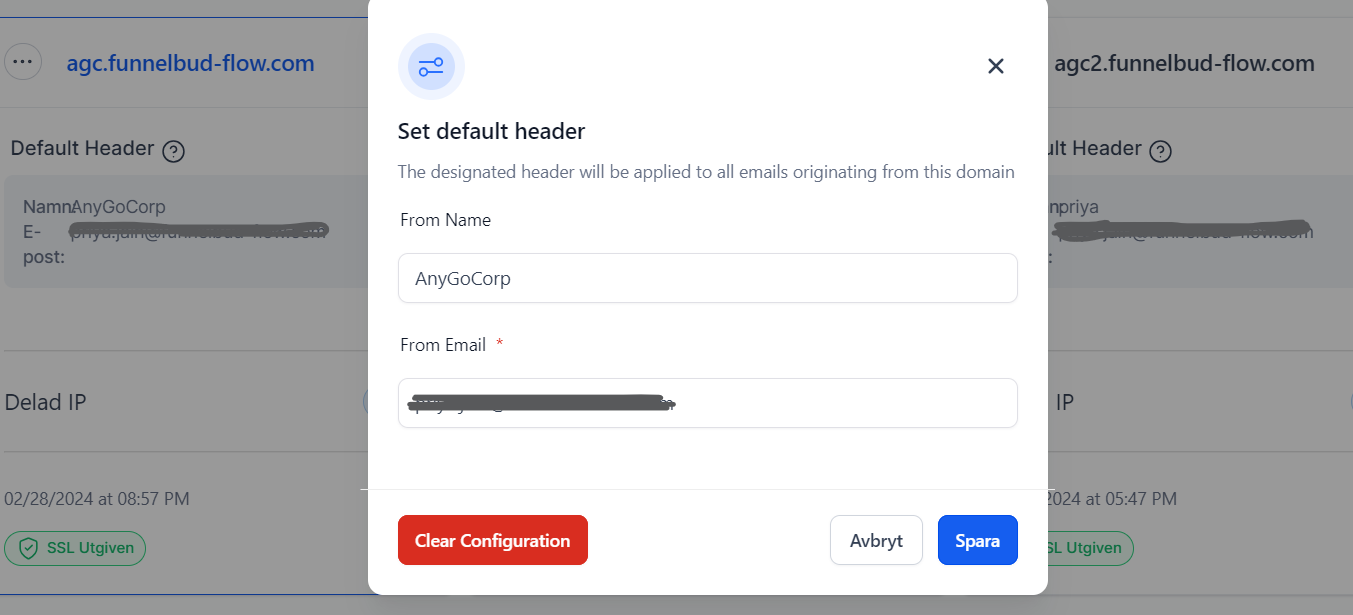
The designated header will be applied to all emails sending through the domain.
For FunnelBud Use Only
Not a Funnelbud customer yet?
Try our all-in-one CRM for sales and marketing — free for 7 days, no commitment.