How to Create Quizzes in Your Course
Quizzes are valuable tools for assessing student progress and enhancing learning experiences. This guide walks you through creating, customizing, and finalizing quizzes in your CRM. You’ll learn how to structure assessments, personalize settings, and optimize questions for engagement. Finally, you’ll see how to preview and publish quizzes, ensuring they’re ready for student participation.
Getting Started with Assessments
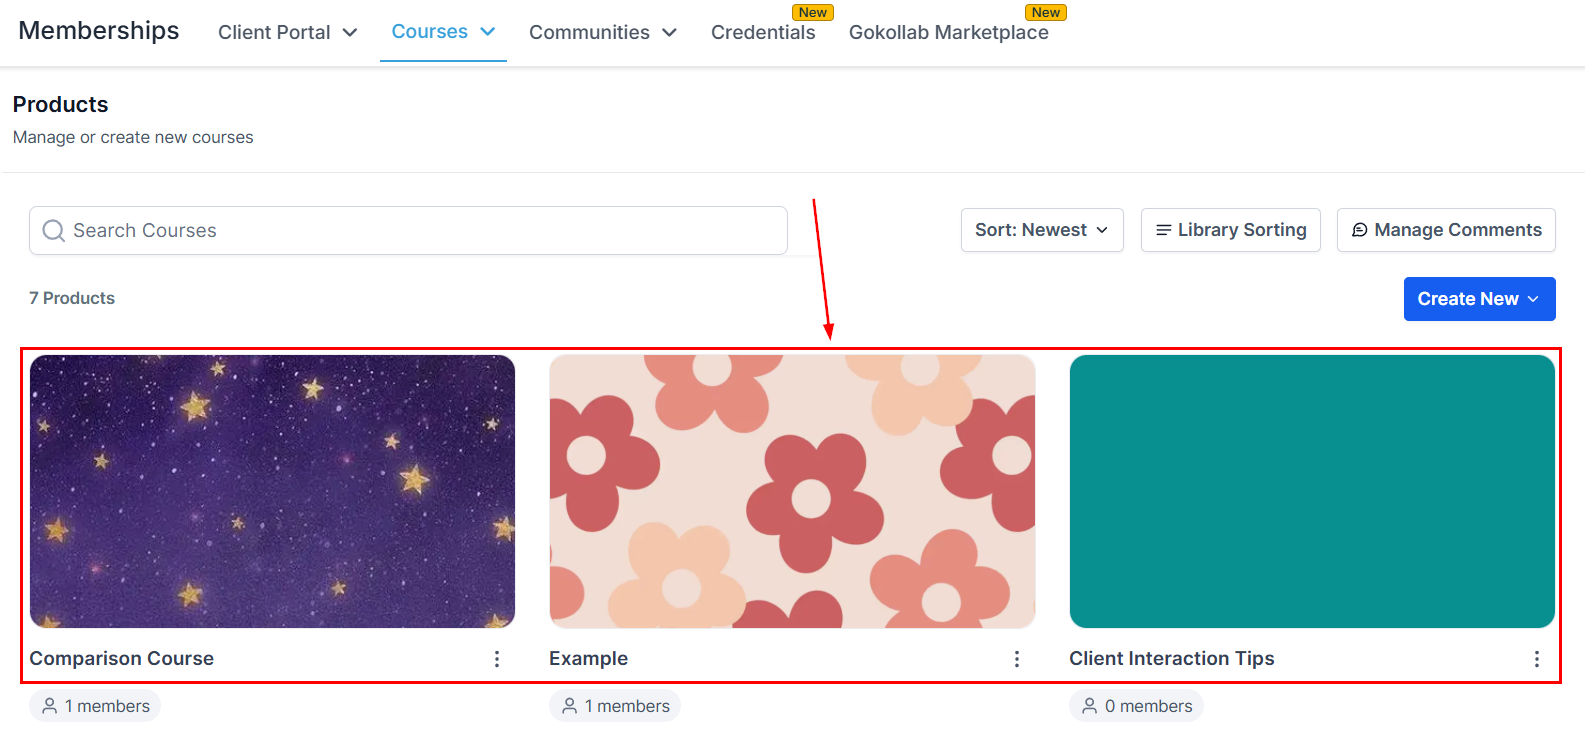
Select the specific membership course where you wish to add an assessment or quiz.
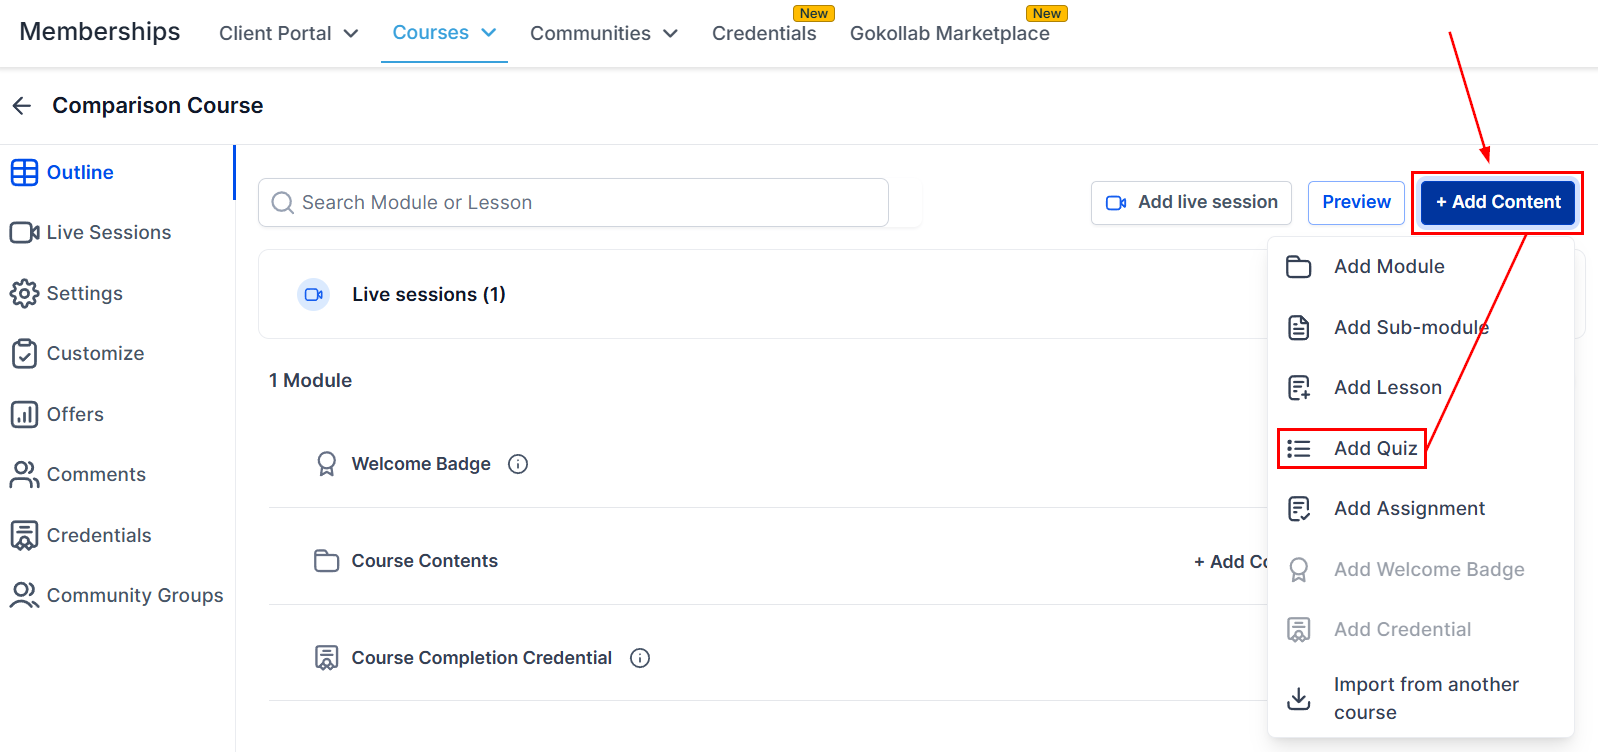
Identify the category or subcategory under which you want the assessment to appear and click the plus icon to add a quiz.
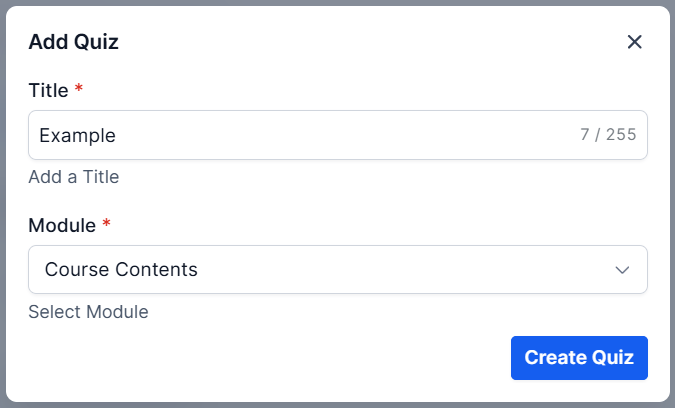
Enter an appropriate name and select the module where your quiz will be, then click Create Quiz.
Customizing Your Assessment
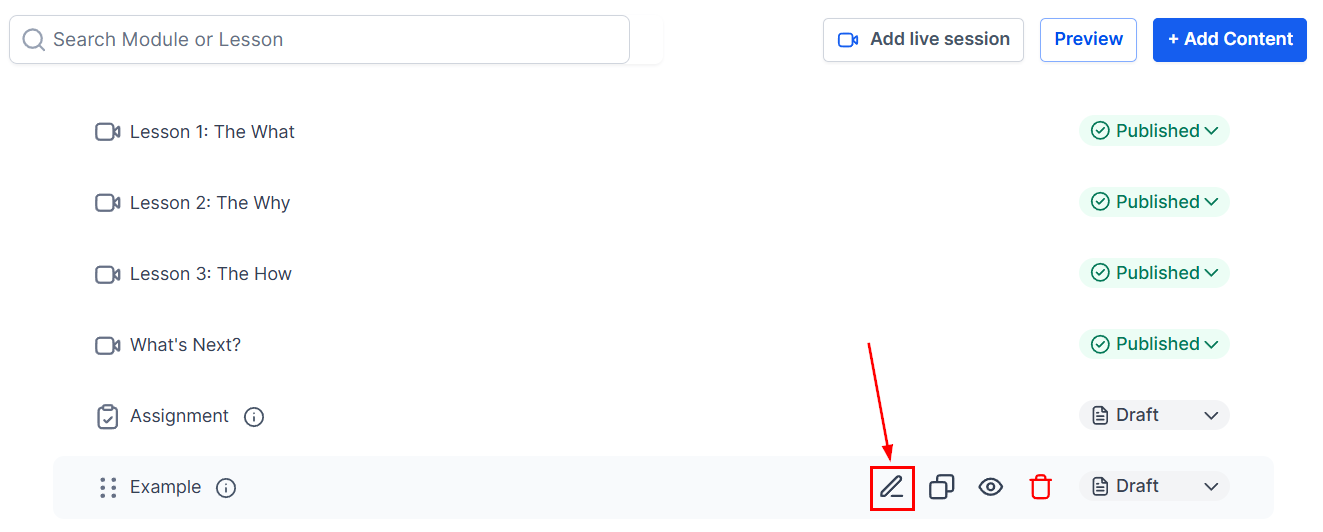
After creating your assessment, it’s time to customize it to suit your course needs
Setting a Passing Grade
Decide if the quiz requires a passing score. If so, specify the percentage needed to pass.
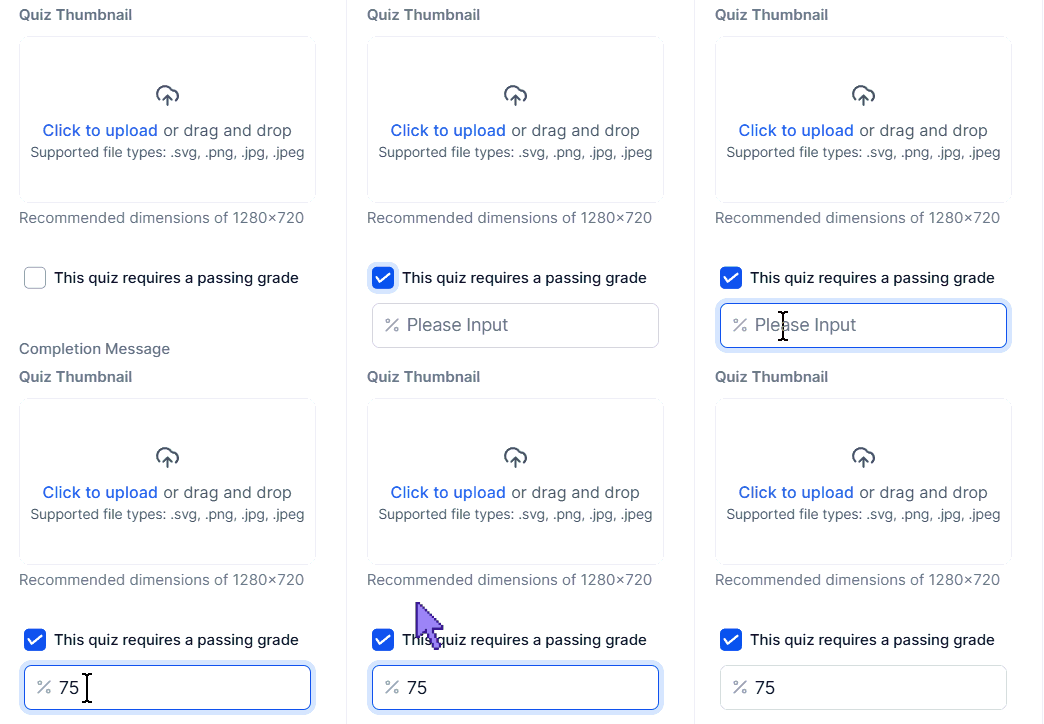
Quiz Thumbnail
Add a thumbnail to attract viewers and provide a quick, visually engaging snapshot of the content. Thumbnails are essential for increasing engagement, providing context, summarizing content, and reinforcing branding, ultimately driving higher visibility and click-through rates.
📌Note: The recommended dimensions for the thumbnail are 1280 x 720 pixels.
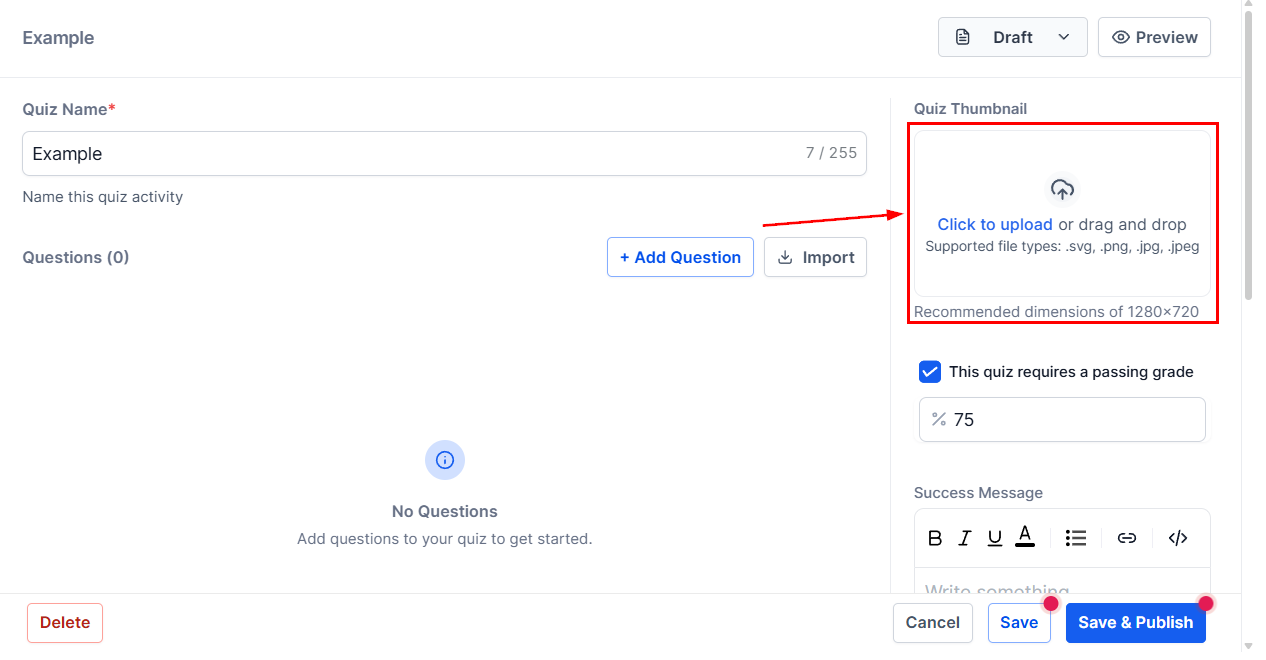
Custom Messages
Create tailored messages to congratulate students who pass or inform those who fail about their results.
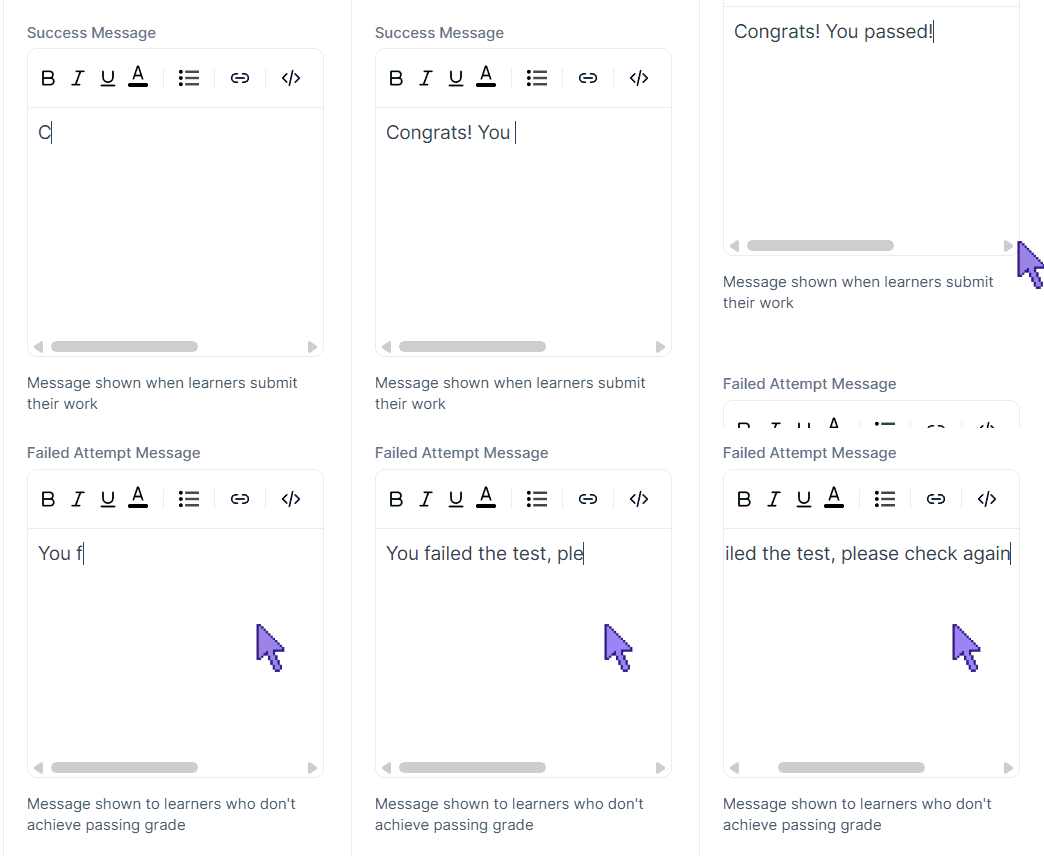
Adding Questions
Click on “Add Question” to insert the questions you wish to ask.
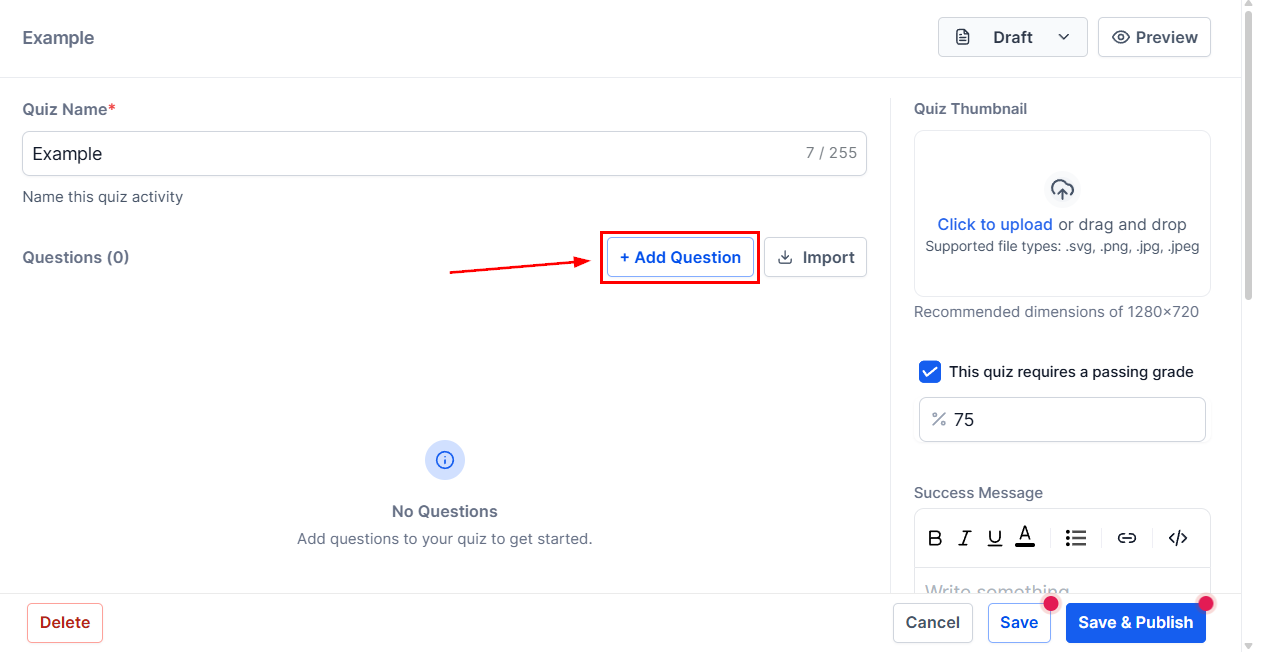
You can choose between single-choice and multiple-choice questions. For each option, you can:
- Specify the correct answer.
- Remove any unwanted options.
- Add explanations to give more context about the choices.
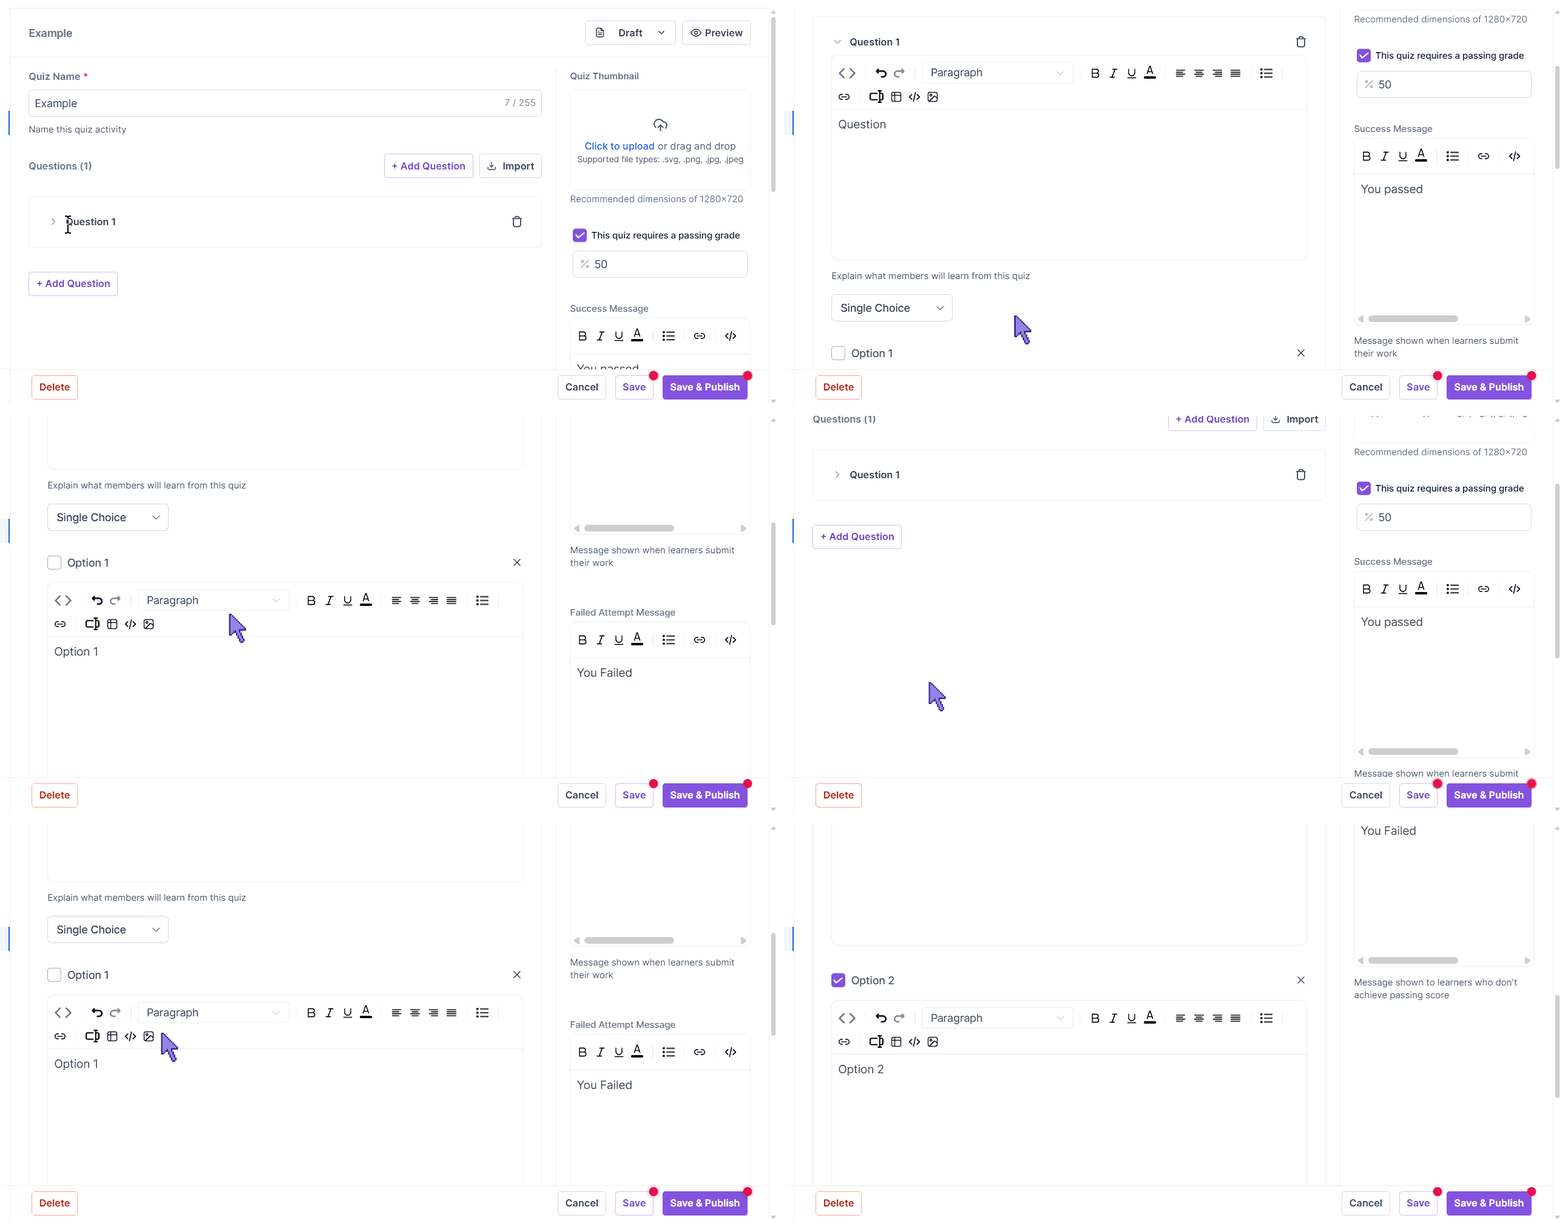
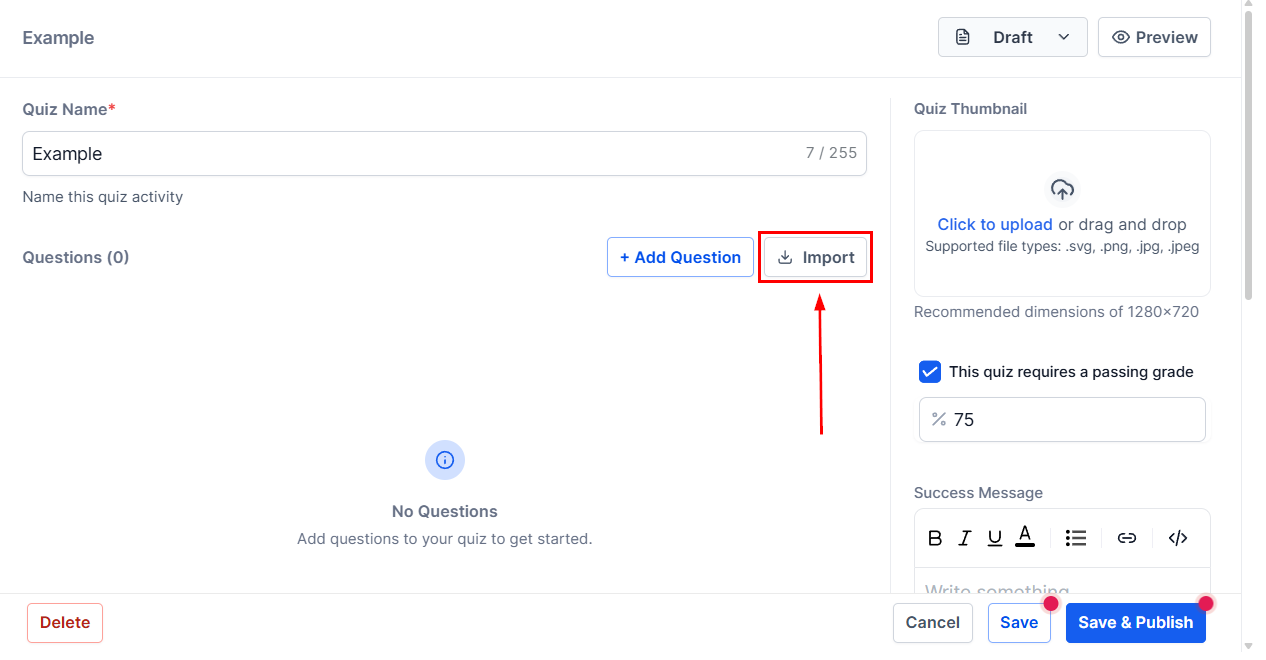
Alternatively, you may upload quiz questions via CSV by clicking the Import Questions button.
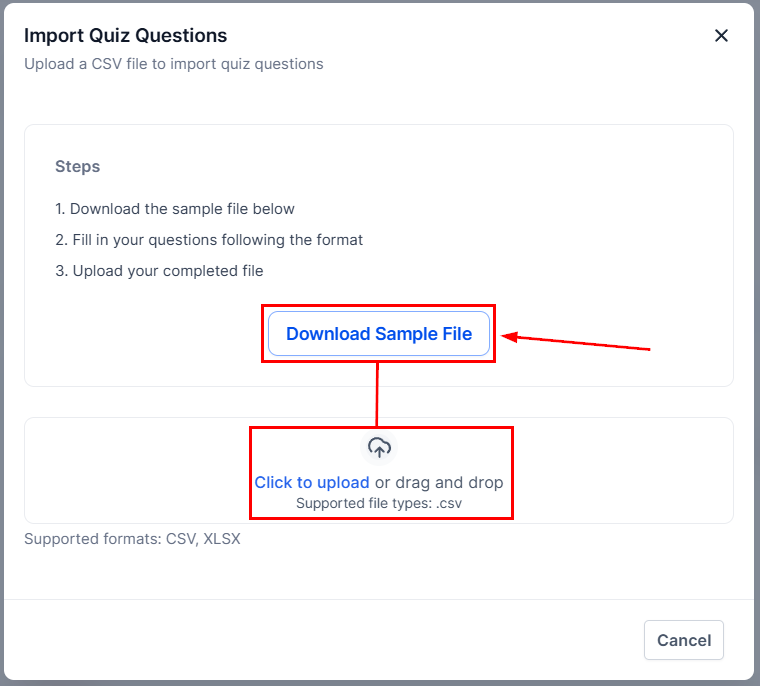
Next, download the provided sample file and populate it with your quiz data, ensuring that the template structure is followed precisely. Be sure to enter a value in every cell of each mandatory column. Once completed, upload the CSV file to the system for processing. The questions will be loaded within seconds, reducing manual effort.
Remember to save your changes to preserve any modifications you make to the assessment!
Enhancing Your Questions
To make your quiz more engaging and informative, consider the following enhancements:
Formatting Options
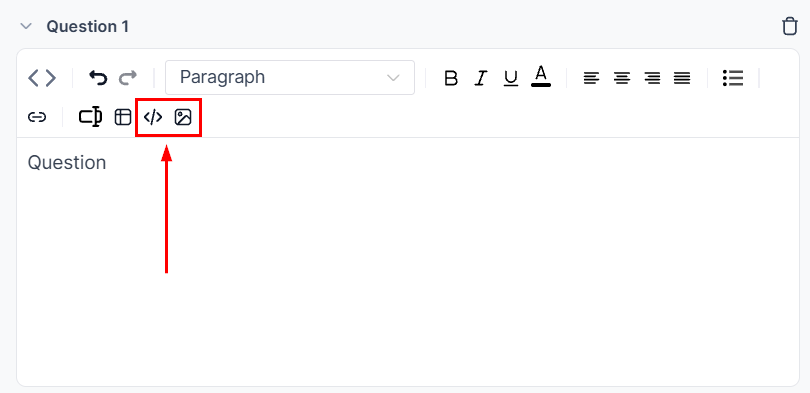
- Adjust the font style, size, and color. You can also format text, insert code, and align content as needed.
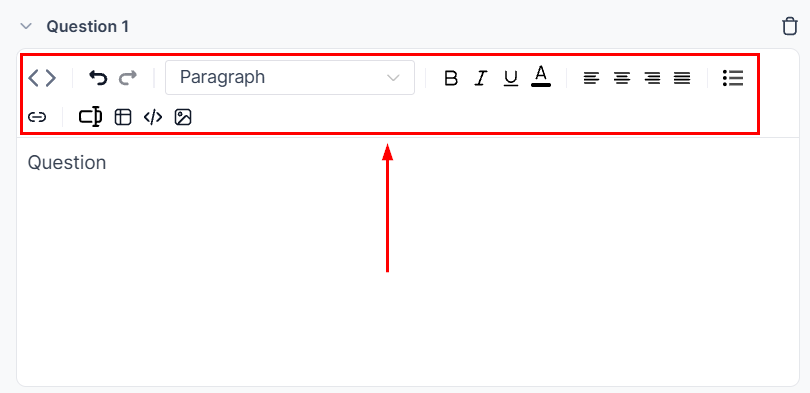
- Use Custom Values to personalize quiz content dynamically, such as inserting student names or course details. Tables allow you to present structured data in an easy-to-read format within your quiz.
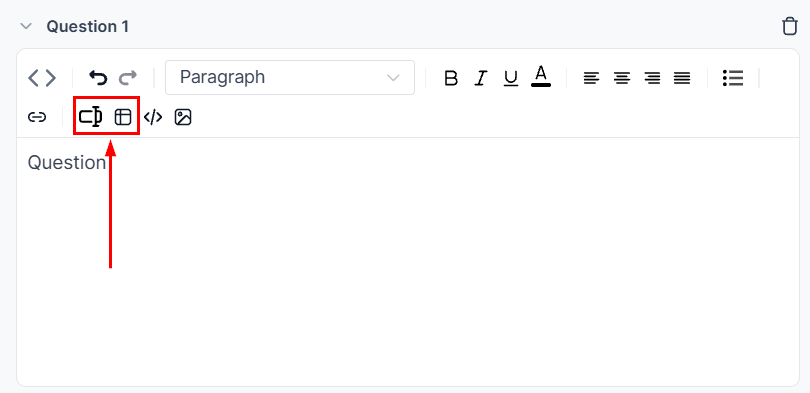
- Upload images to questions from your media library or by using a source link. You can adjust the size and aspect ratio of the images.
Finalizing Your Quiz
Before making your quiz available to students, you have two visibility options:
- Draft: Choose this option if your quiz is not ready to be attempted by students.
- Publish: Select this when your quiz is complete and ready for student participation.
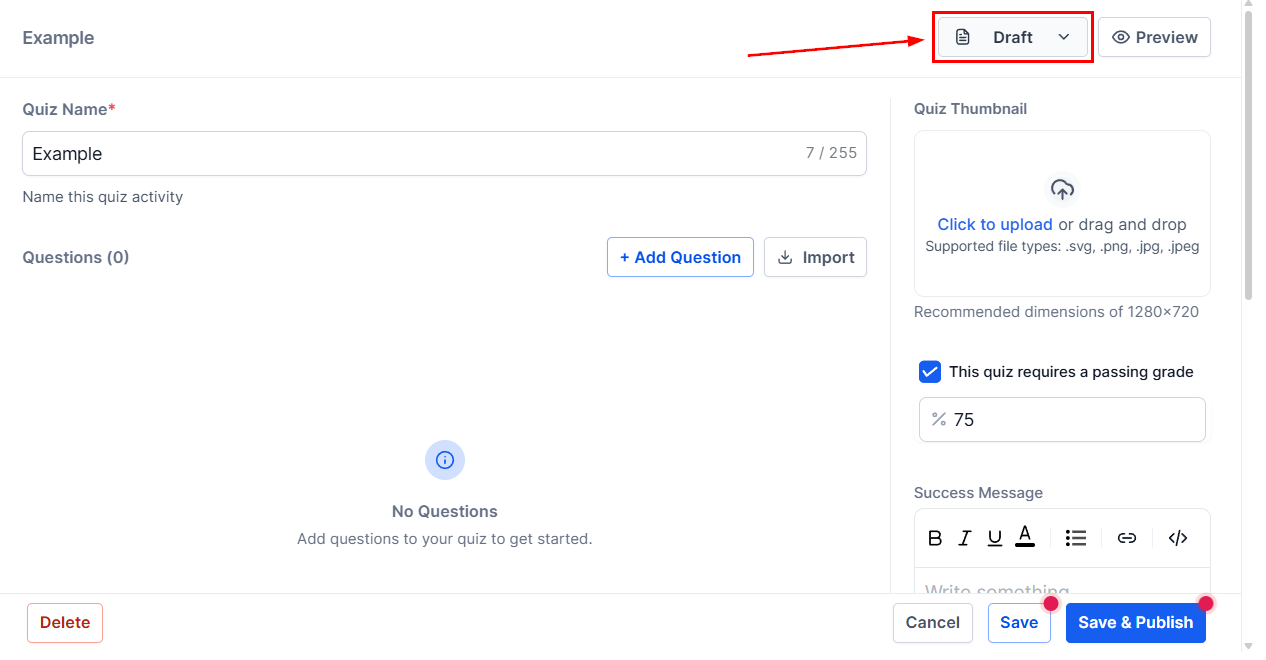
The Draft/ Publish field indicates the current visibility setting of your assessment. Select the button to adjust the visibility.
Previewing and Publishing
Once you’re satisfied with your quiz, preview it to ensure everything appears as intended. Keep in mind that the preview mode does not allow for answer submissions; this functionality is only available when students access the quiz through an actual domain.
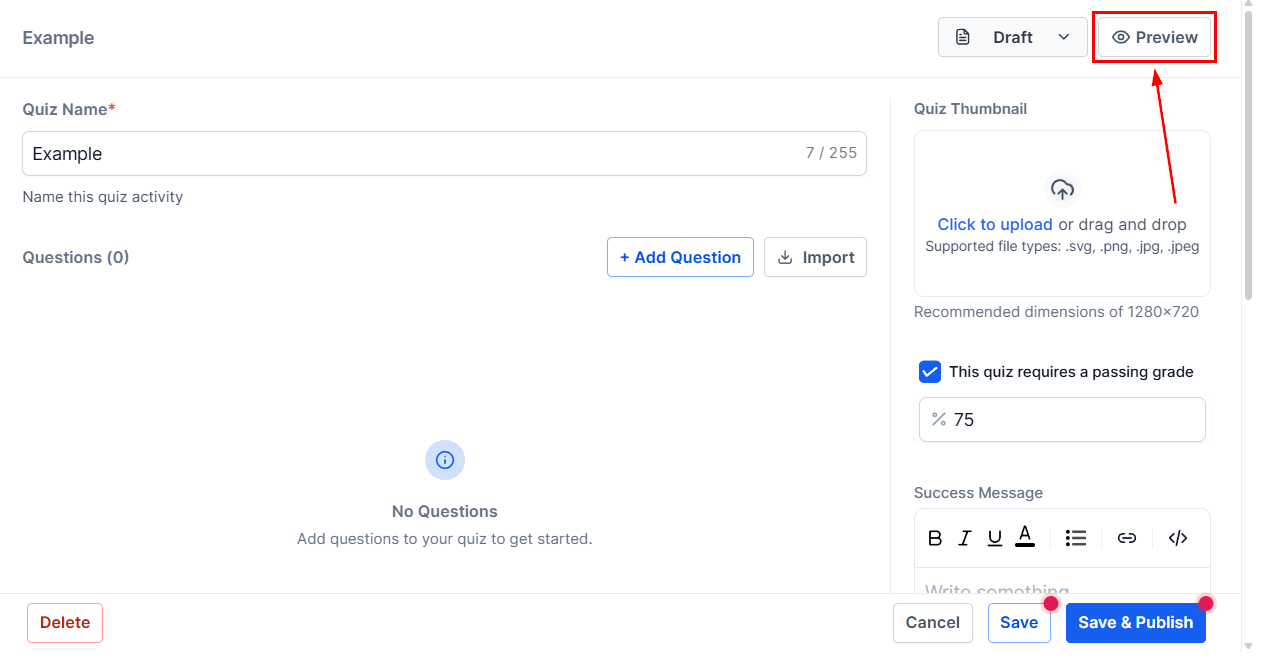
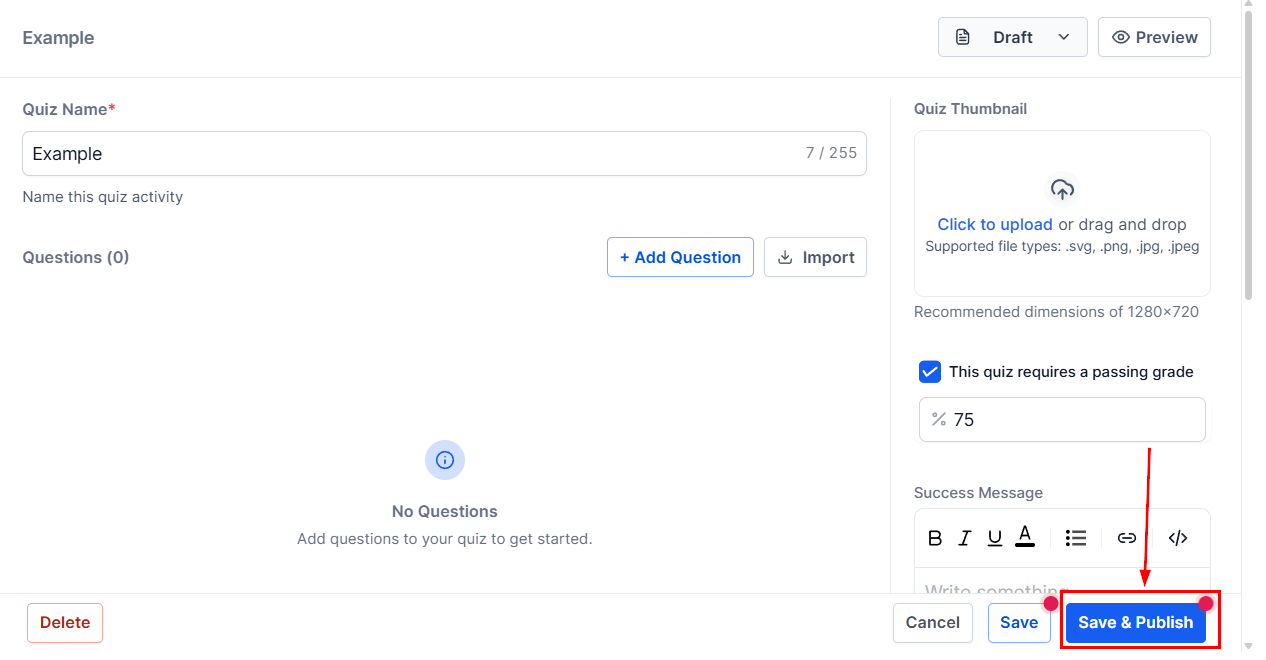
Lastly, click Save & Publish to add the quiz to your product and start testing your learners.
By following the steps above, you can develop a comprehensive and interactive assessment system. Remember to review your quiz through the preview function before publishing it to ensure it is fully prepared for student engagement. With these tools and techniques, you are well-equipped to create effective assessments that contribute to successful learning outcomes.
Troubleshooting Tips
- Question Content Disappears When Reordering: If you notice that the content inside a question vanishes temporarily when reordering, simply close and reopen the question to refresh the view.
- Saving Changes: Always remember to save your changes after making any modifications to ensure they are applied.
Not a Funnelbud customer yet?
Try our all-in-one CRM for sales and marketing — free for 7 days, no commitment.