How to Preview Custom Fields in Your Emails
This guide is designed for users of our CRM who wish to ensure the accuracy and personalization of their email communications by previewing custom fields within emails before they are sent. This feature is particularly useful in avoiding common mistakes such as addressing all recipients by the wrong name. By following the steps outlined in this article, you will learn how to leverage the preview feature to enhance your email marketing efforts. This guide is intended for marketers, sales professionals, and anyone who regularly communicates with clients or prospects through the CRM.
Using the Preview Feature
To begin, select the Templates option inside the Emails tab of the Marketing section.
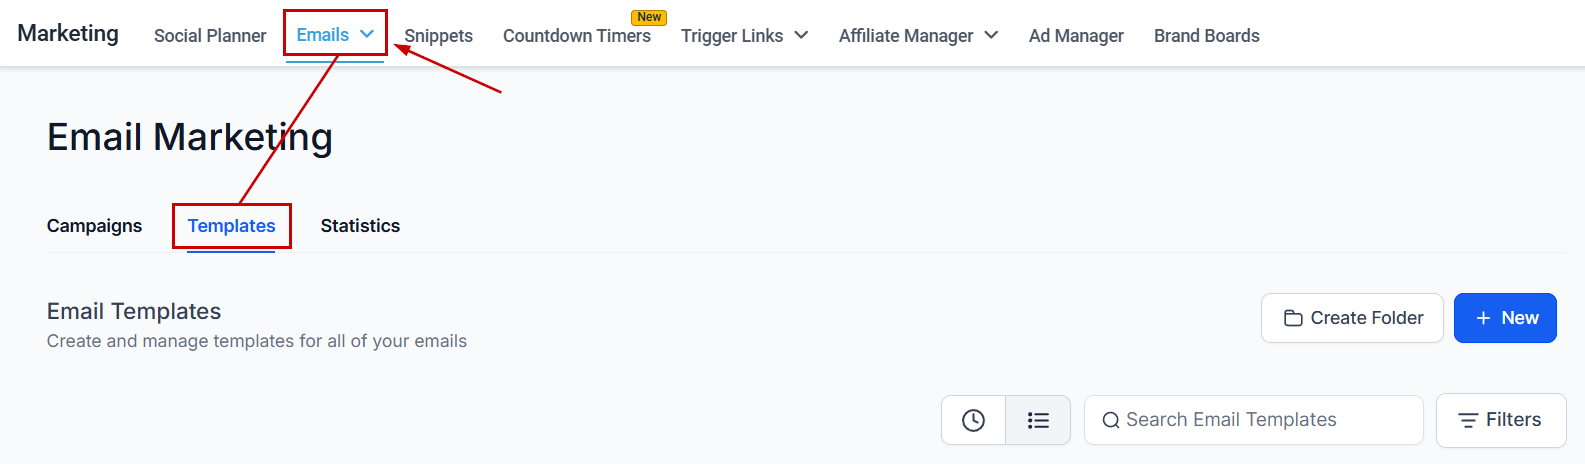
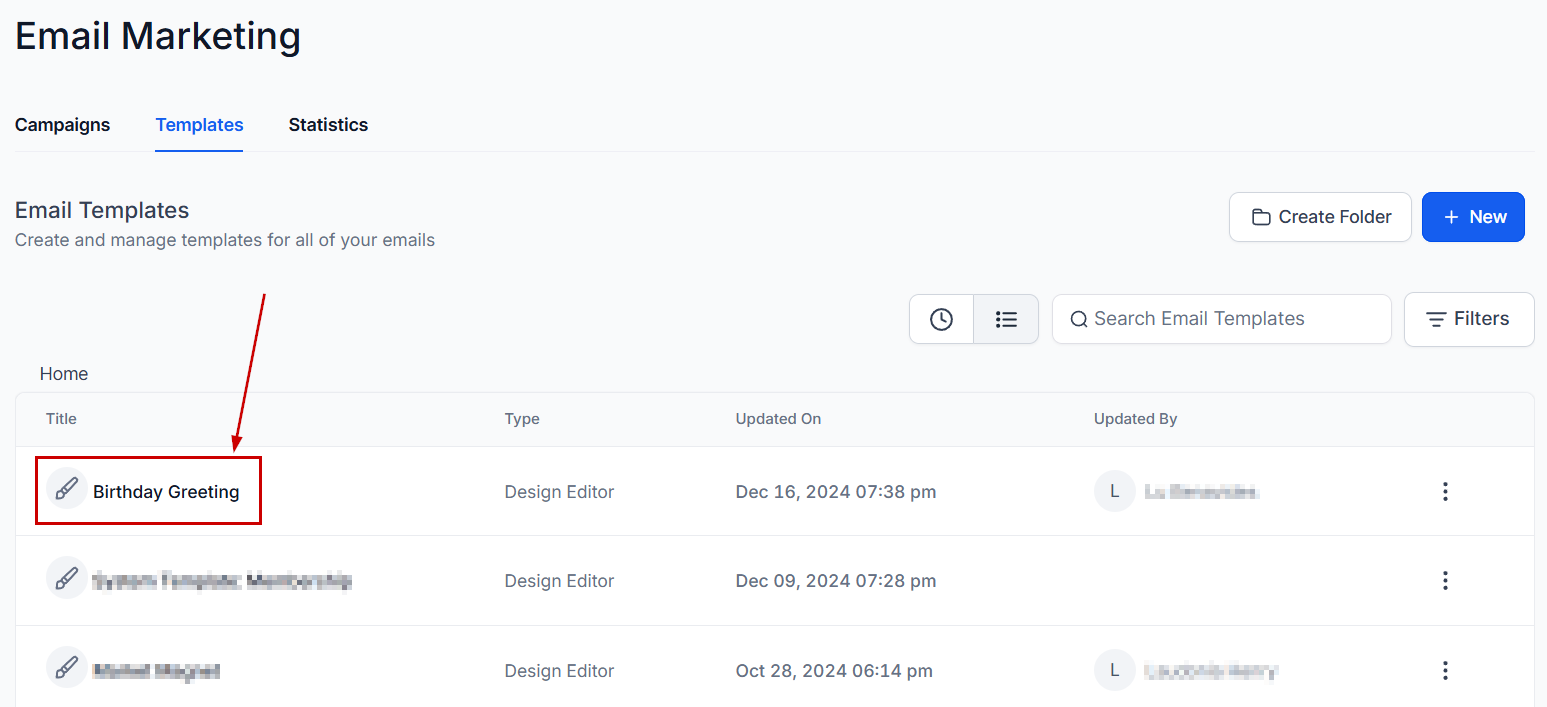
Choose an email template you wish to preview, such as a birthday greeting template.
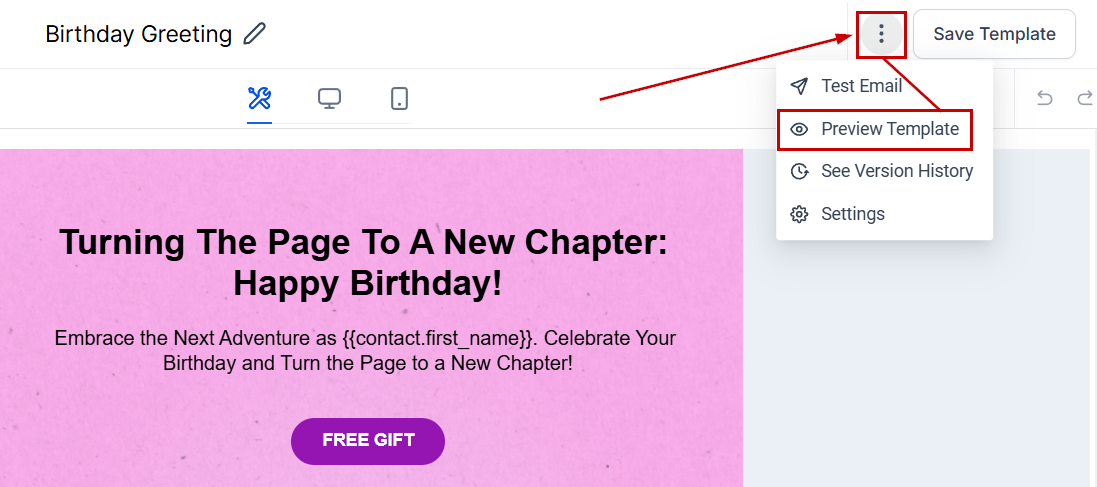
Click the three-dot icon on the top right-hand side and click “Preview Template” to see how the email will appear to recipients.
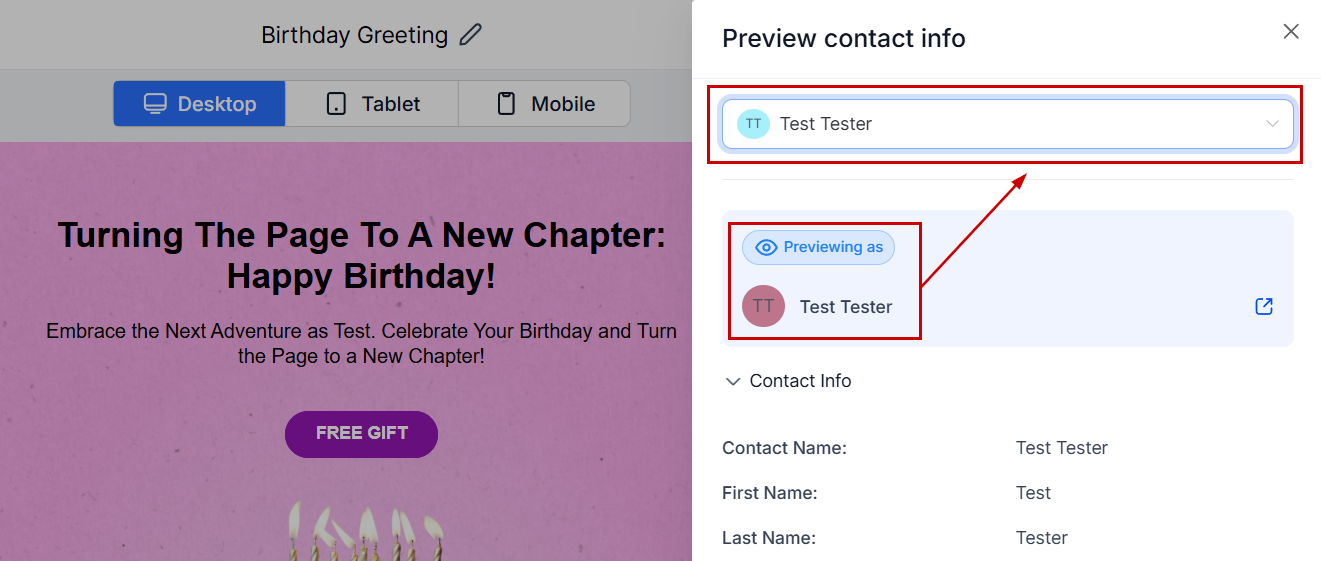
In preview mode, click Preview Contact Info to select a specific contact from your CRM to see how custom fields (e.g., first name, phone number, address) will populate the email.
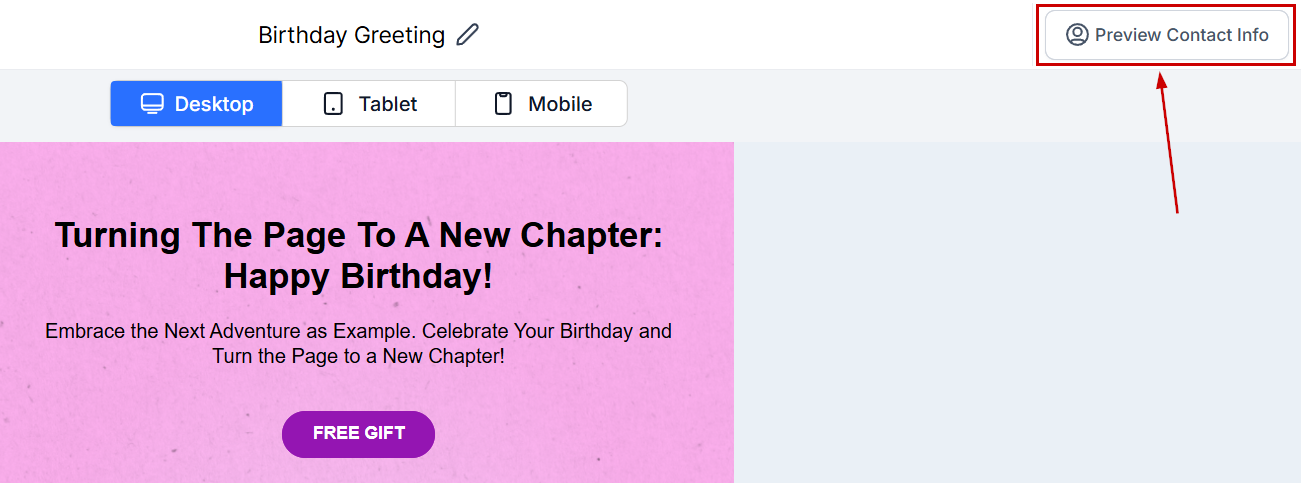
You can select the contact from the drop-down menu inside the Preview contact info bar that will open to your right.
Understanding Custom Values and Fields
It’s important to differentiate between custom values and custom fields:
- Custom Values: These are associated with your account level and will not show in the contact-level preview since they are not specific to individual contacts.
- Custom Fields: These are contact-level details that will populate in the preview, allowing you to see exactly how personalized information will appear in the email.
Troubleshooting Tips
- If custom fields are not populating as expected, ensure that the selected contact has the necessary information filled out in their contact profile.
- Remember that custom values will not appear in the preview since they are not contact-specific.
Frequently Asked Questions
Can I preview emails with multiple custom fields?
- Yes, you can preview emails with any number of custom fields, as long as the selected contact has those fields filled out in their profile.
What should I do if the wrong information appears in the preview?
- Double-check the selected contact’s information in the CRM to ensure it is correct and up to date. If the issue persists, contact support for further assistance.
Not a Funnelbud customer yet?
Try our all-in-one CRM for sales and marketing — free for 7 days, no commitment.