How to Automate Your Appointment Management
Before diving into appointment management, it’s essential to understand what opportunities and pipelines are within the CRM. Opportunities represent potential revenue or conversions from leads, while pipelines help organize these opportunities into different stages of your sales or service process.
Creating an Appointment Pipeline
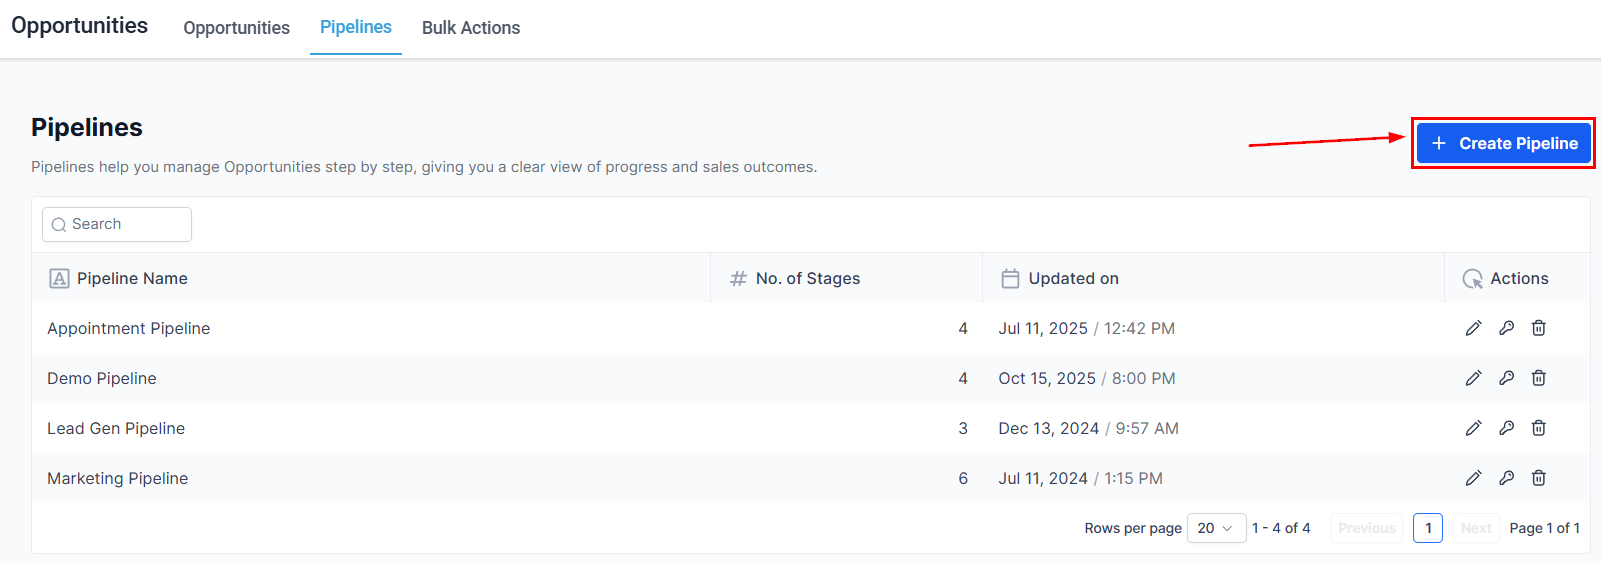
Navigate to the Pipelines tab inside the Opportunities section and create a new pipeline. This is where you’ll manage different stages of interaction with your leads.
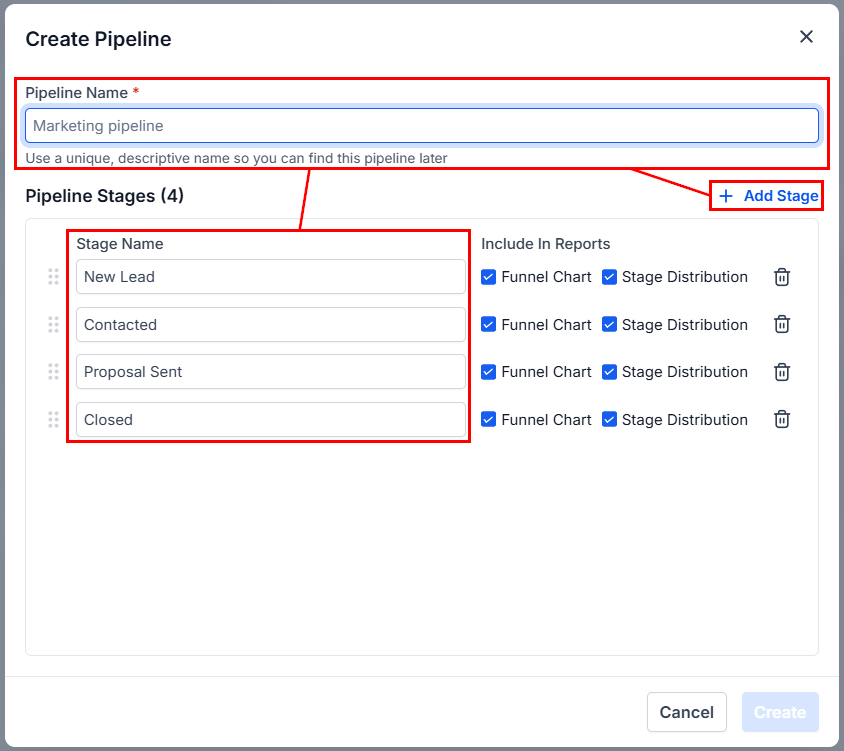
In the pop-up, name the new pipeline something relevant, like “Appointment Pipeline,” and review you have enough stages. If not, click “Add Stage.”
Define Stages
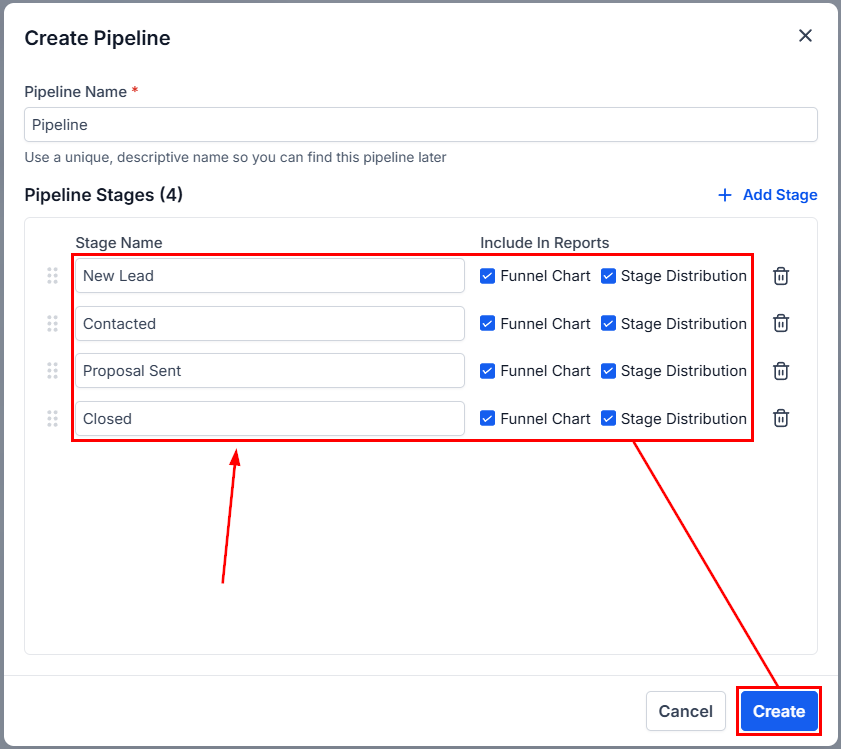
Include stages such as “Confirmed”, “Rescheduled”, “Canceled”, and “No Show” to track each appointment’s status. Additionally, you can make each pipeline stage visible on either or both the Funnel and Pie charts by enabling each toggle. Remember to click Create to save the newly created pipeline.
Managing Confirmed Appointments with Automation
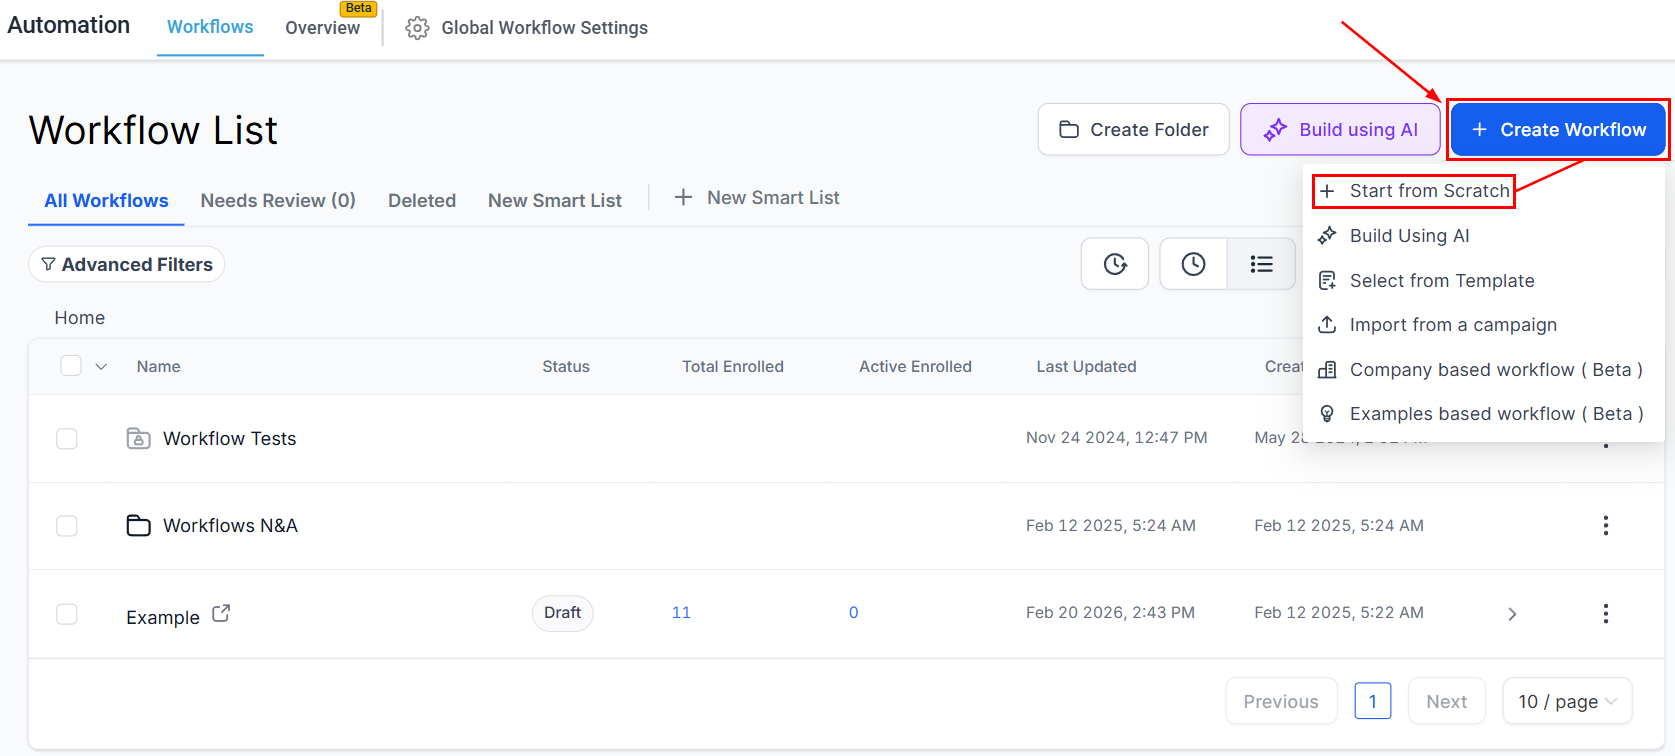
Go to the Workflows tab inside the Automation section, and click + Create Workflow, then select + Start from Scratch.
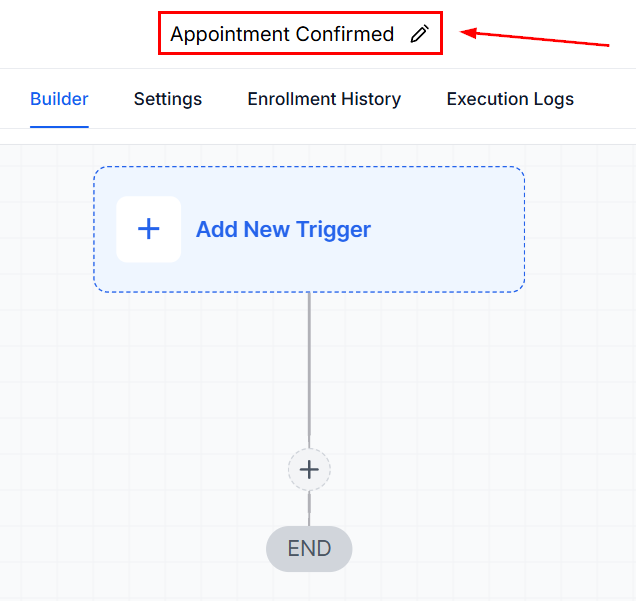
You can name the workflow “Appointment Confirmed” for easy identification.
Choose a Trigger
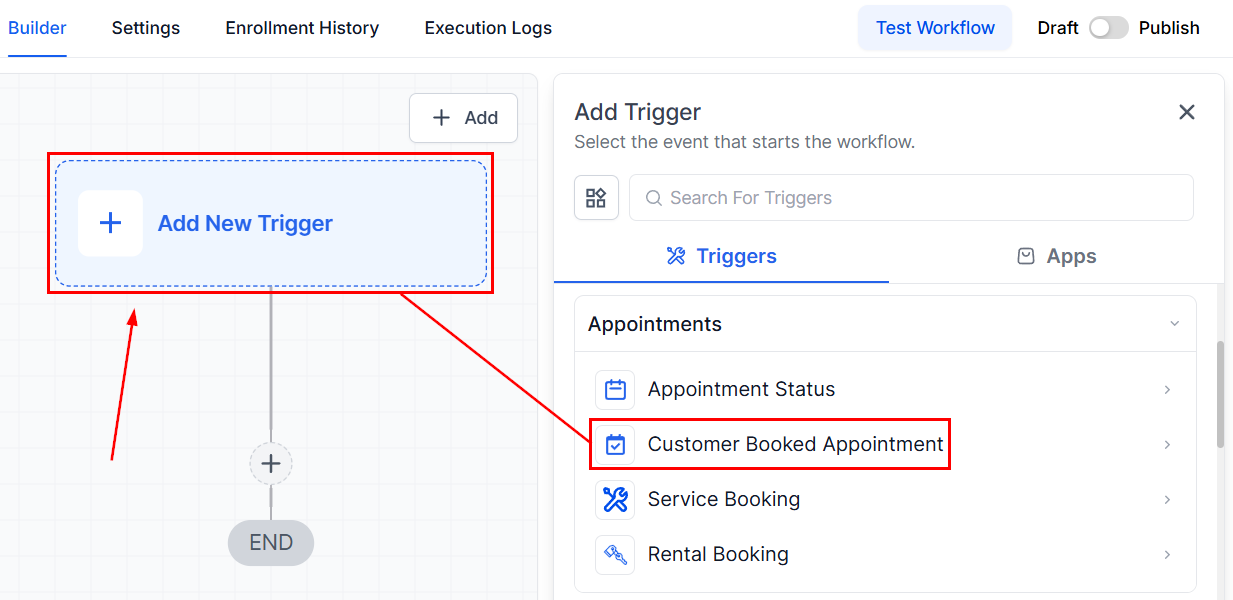
Then, for the Workflow Trigger, select “Customer Booked Appointment” in the relevant calendar group.
Action
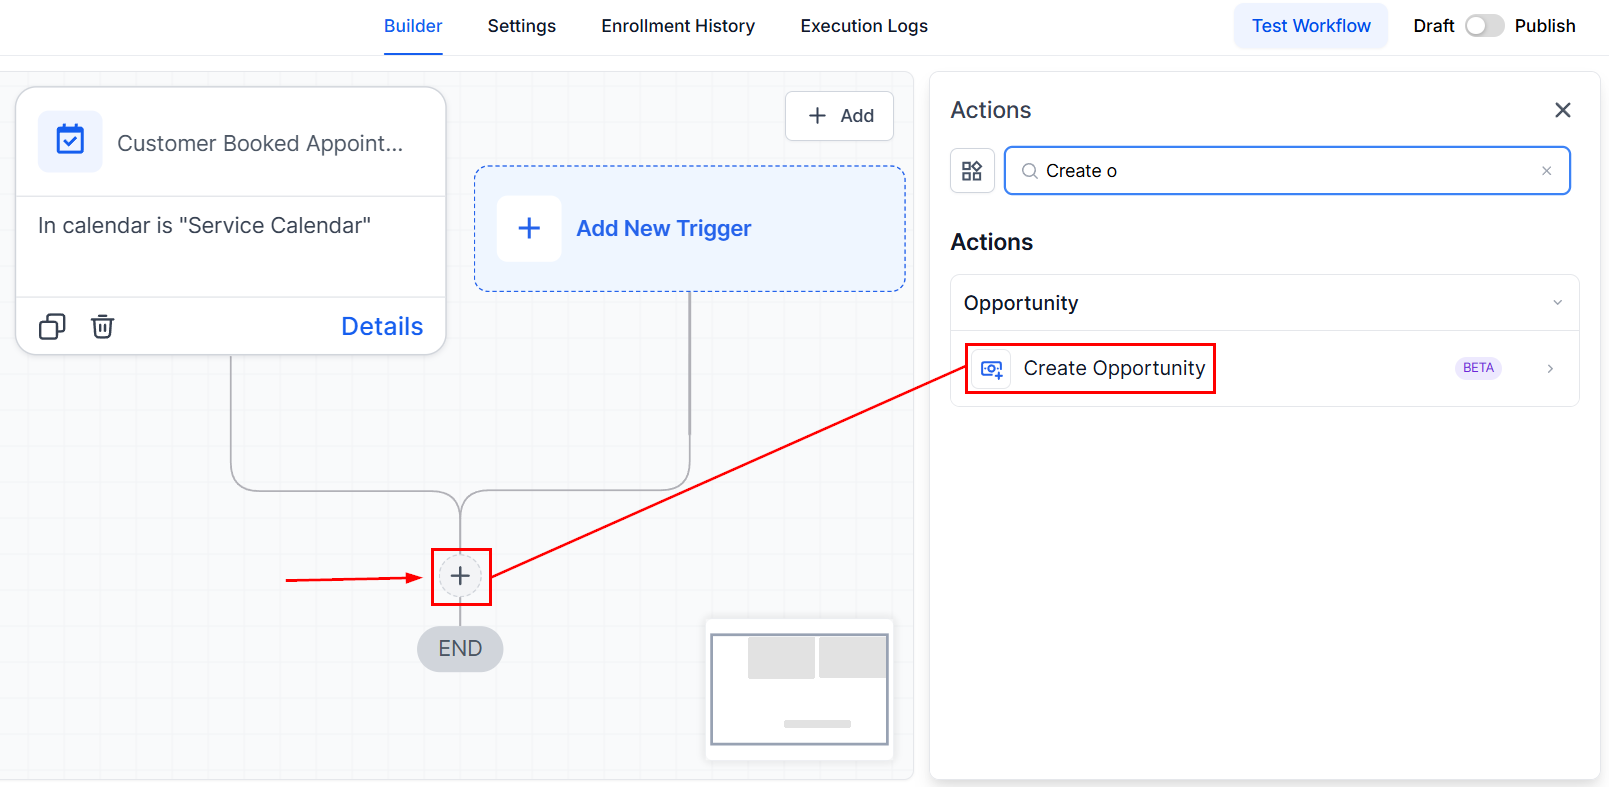
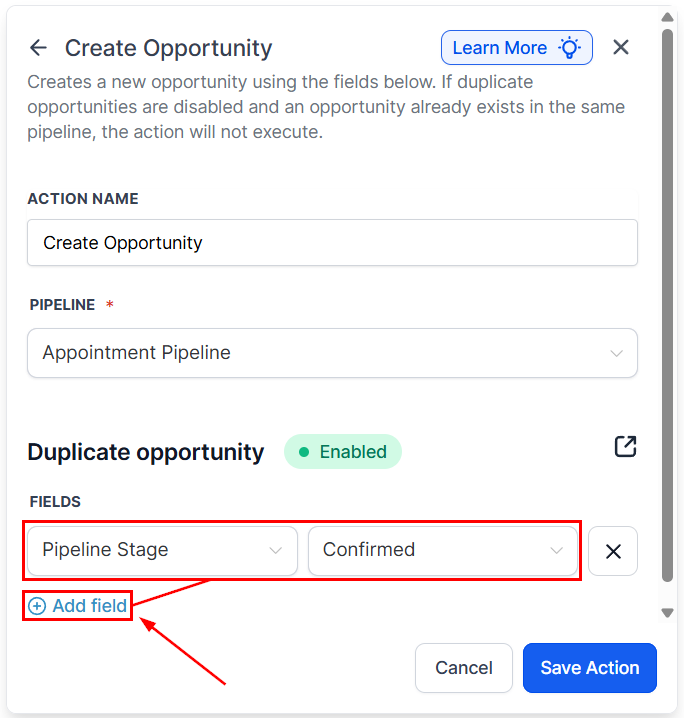
Select the Create Opportunity action.
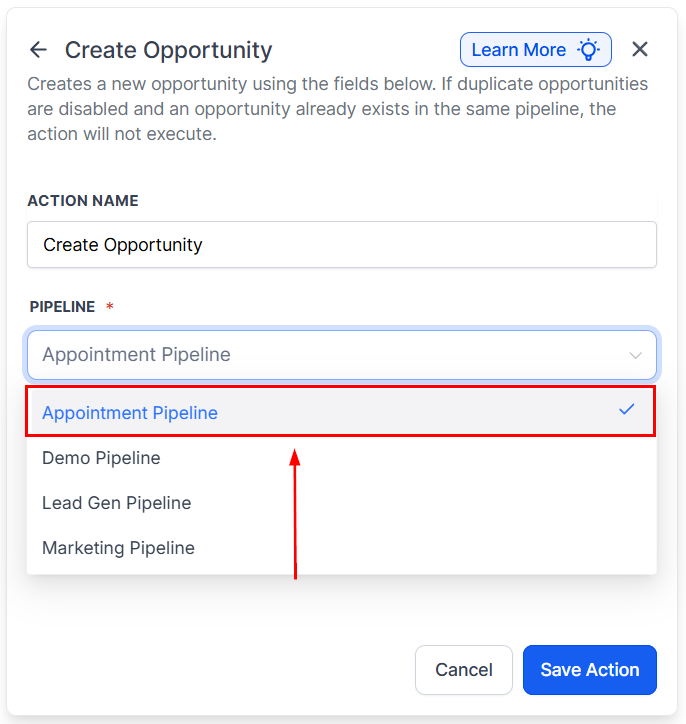
Choose the “Appointment pipeline” option.
Click “Add field” and set the Pipeline Stage as Confirmed.
Handling Cancellations and No-Shows
Since the CRM cannot automatically detect no-shows, a combination of automation and manual intervention is required.
For Cancellations
Create another Workflow, which we’ll name “Appointment Canceled”. Add the Appointment Status Trigger to activate when an appointment status is changed to canceled.
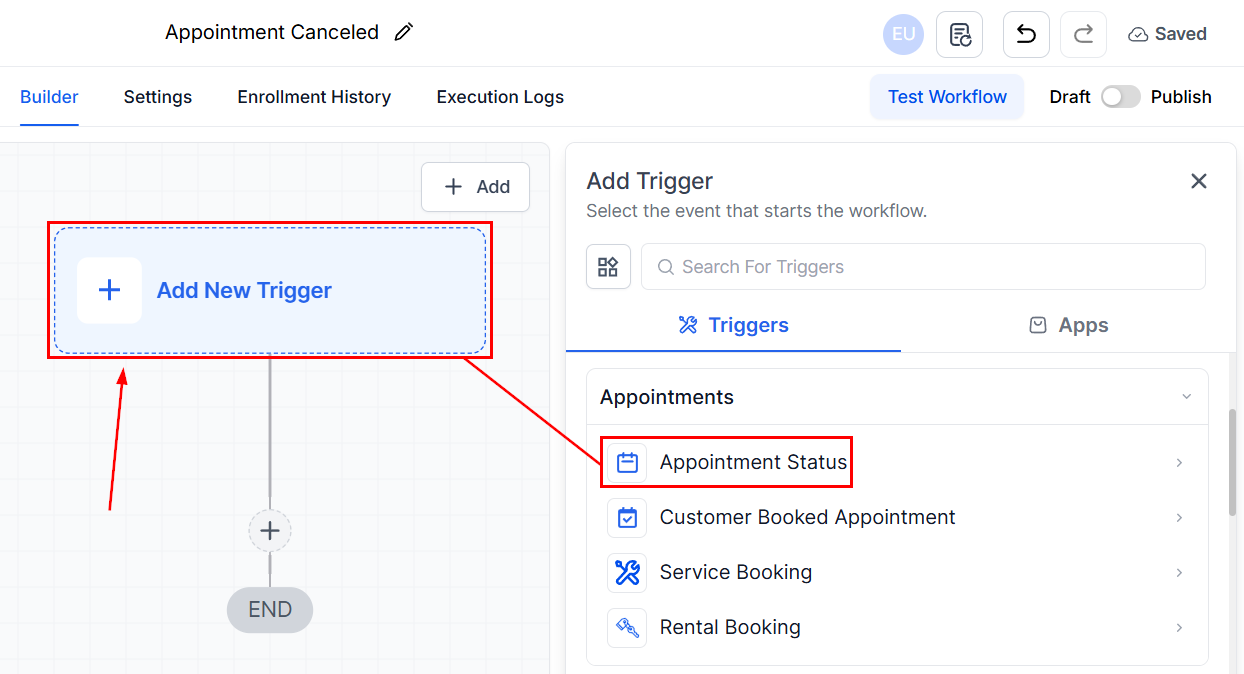
Trigger
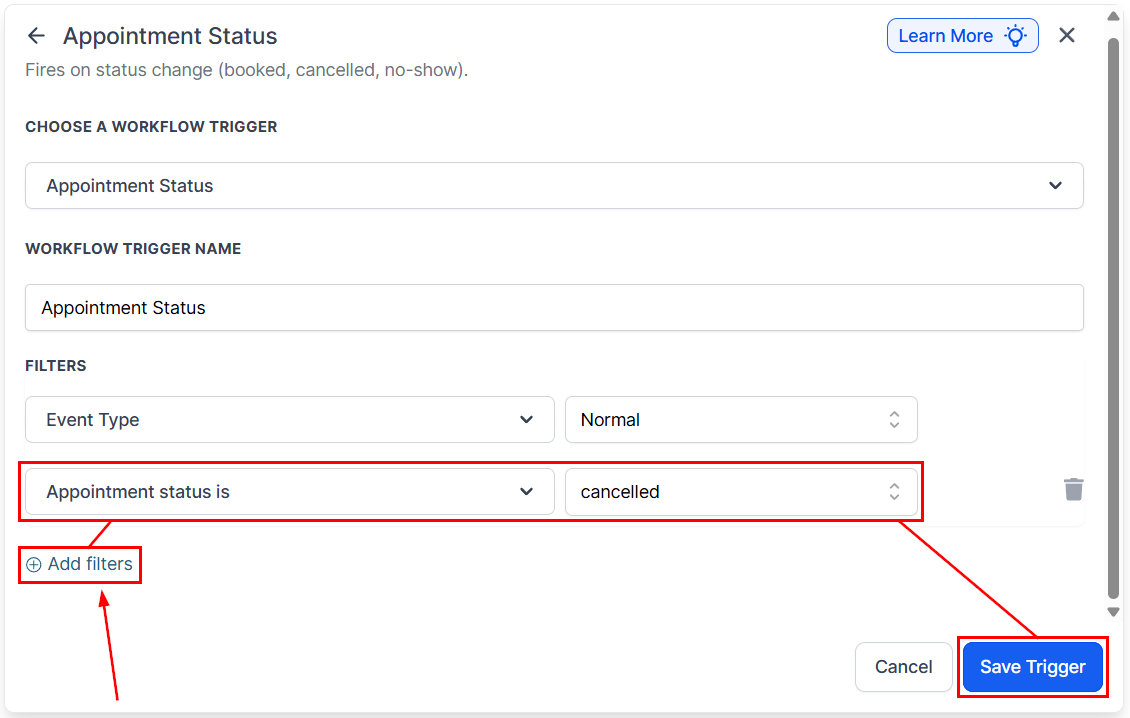
In the filter, add the filter “Appointment status is” and set it to “Cancelled.” Remember to Save the Trigger.
Action
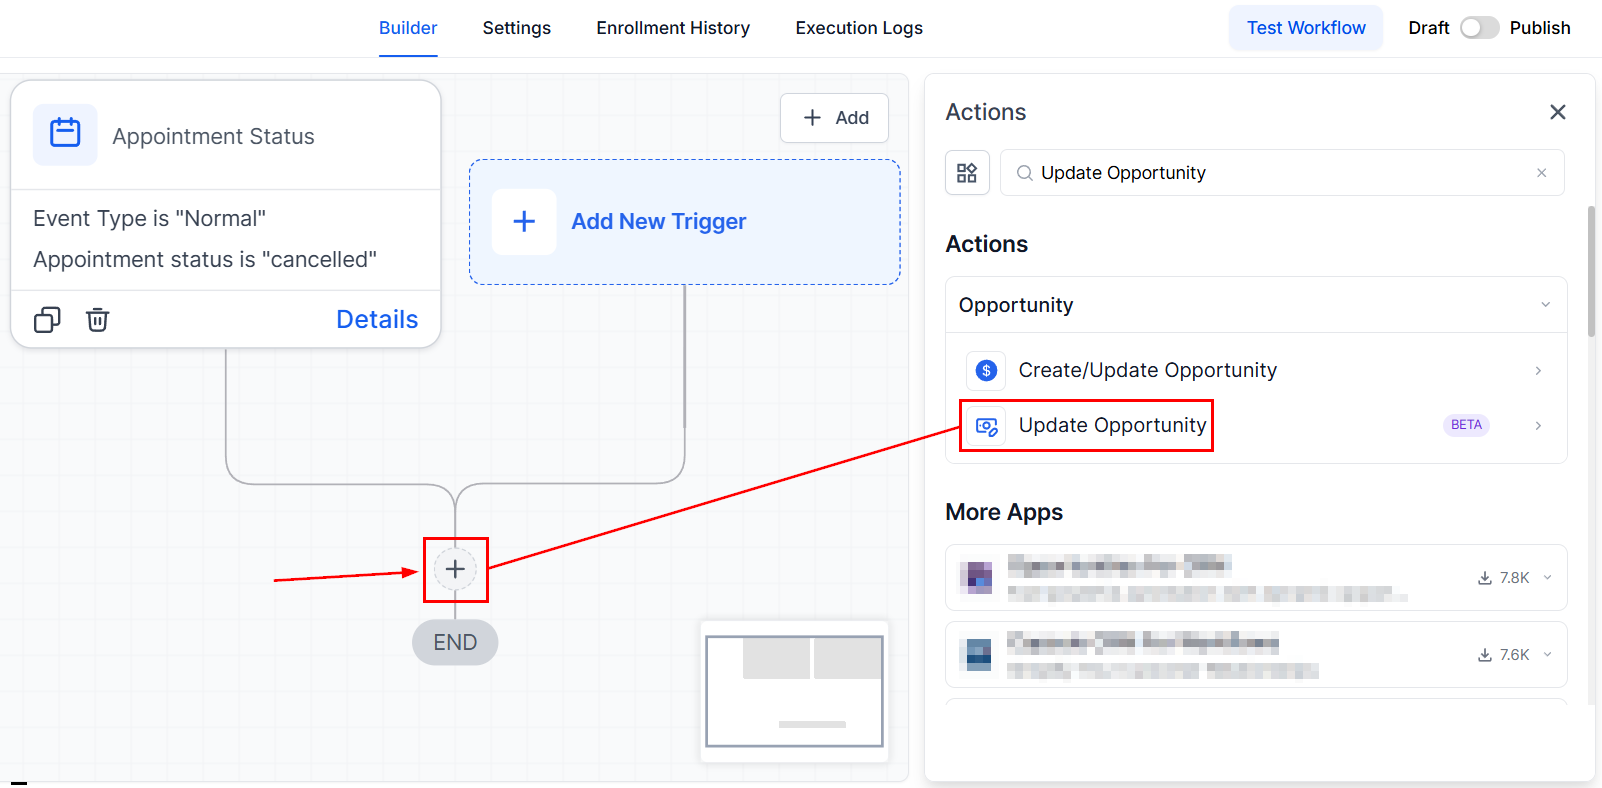
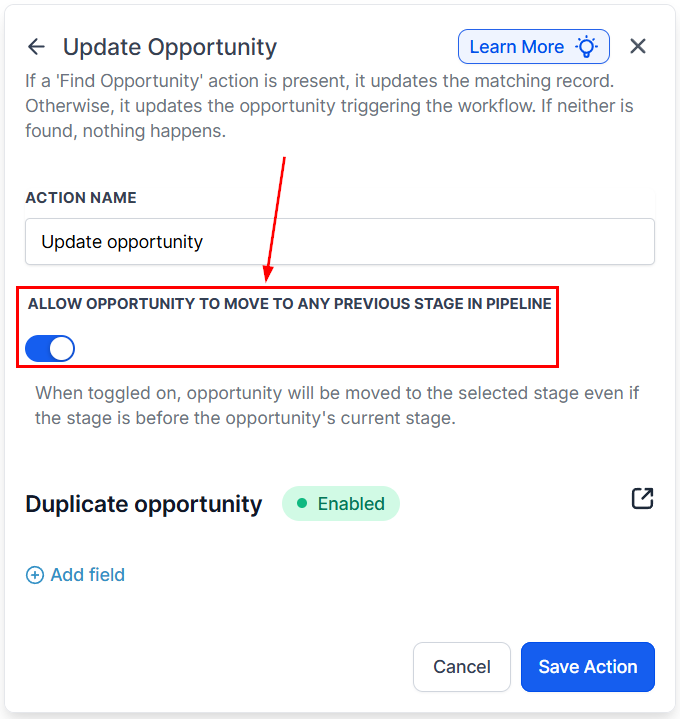
Search and select the “Update Opportunity” action.
Toggle on “Allow opportunity to move to any previous stage in pipeline” to signal the system when an opportunity is required to move to a stage they have previously been on.
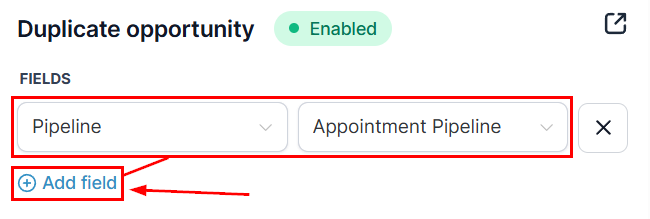
For this workflow, add the Pipeline field and set it as “Appointment Pipeline.”
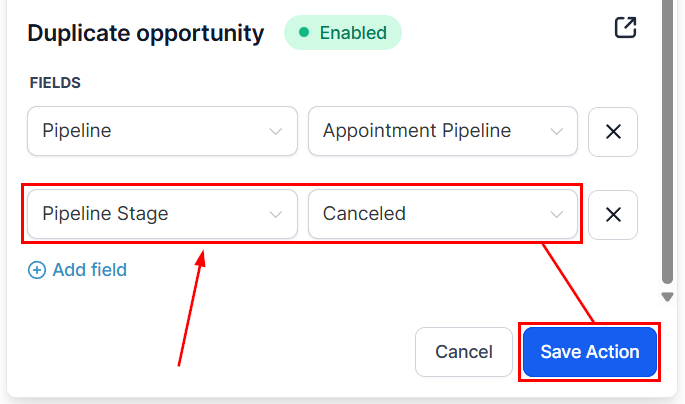
Add the “Pipeline” Stage field and set it as “Canceled,” then save the action.
For No-Shows
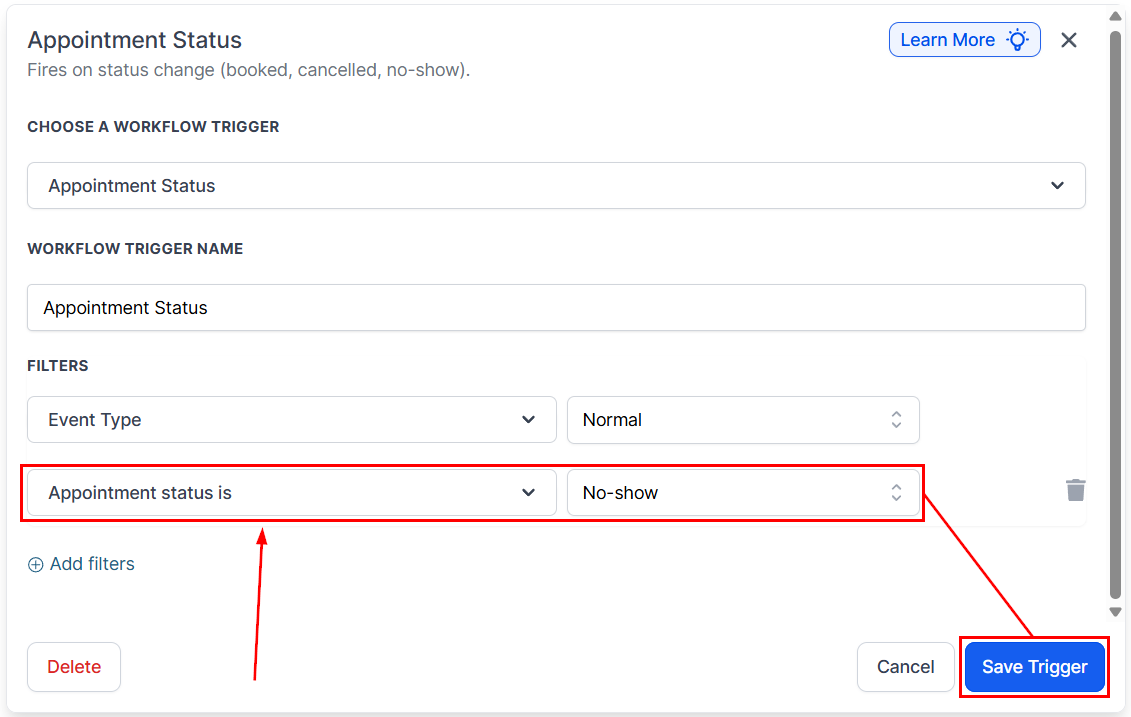
In a new workflow, use the Appointment Status Trigger, set the filter to “Appointment status is No-show,” then save the Trigger.
Action
Search and select the “Update Opportunity” action.
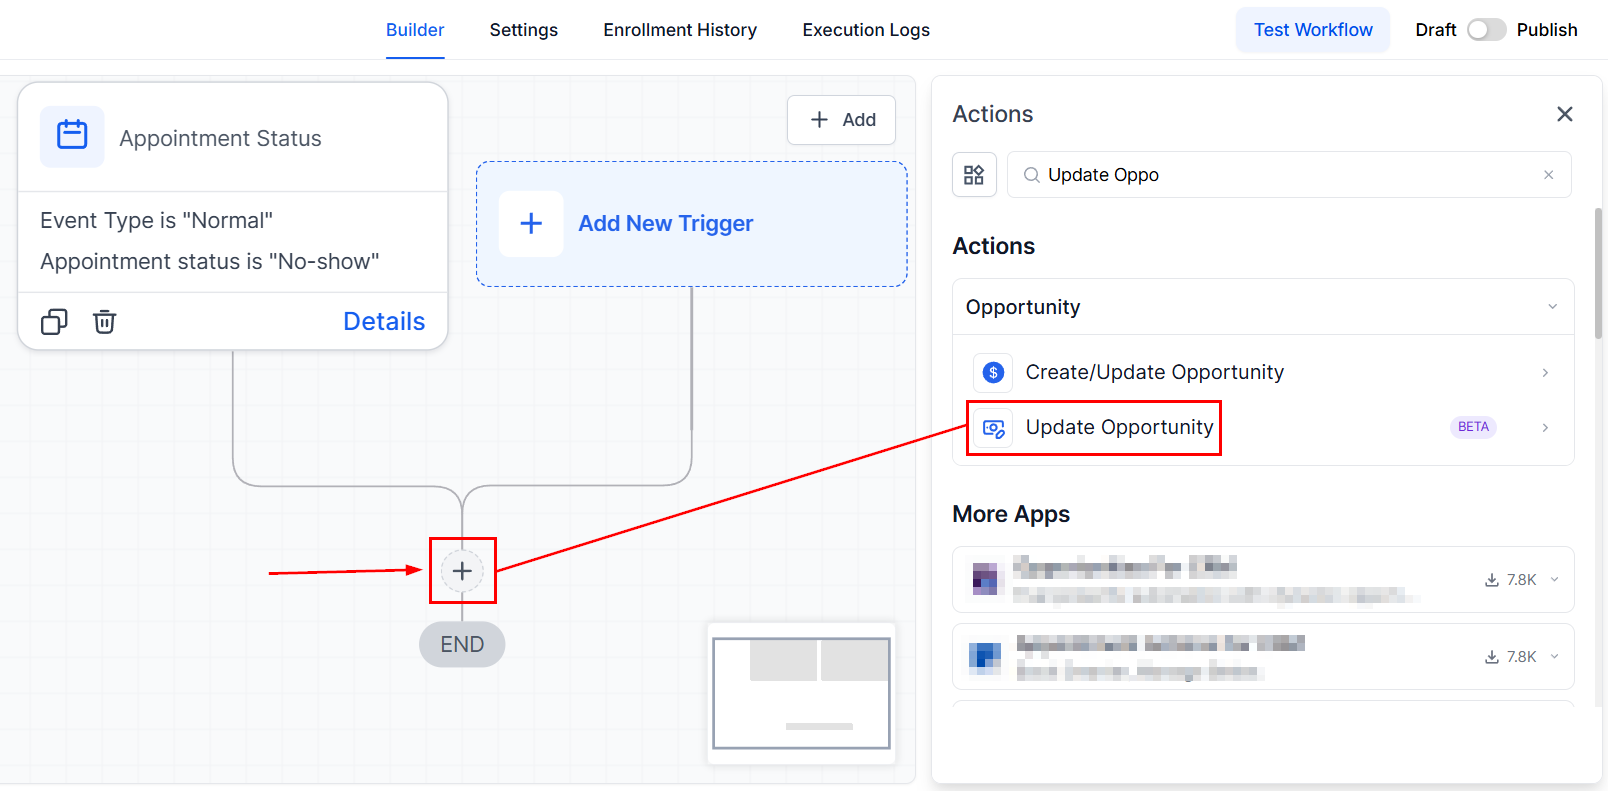
Toggle on “Allow opportunity to move to any previous stage in pipeline” to signal the system when an opportunity is required to move to a stage they have previously been on.
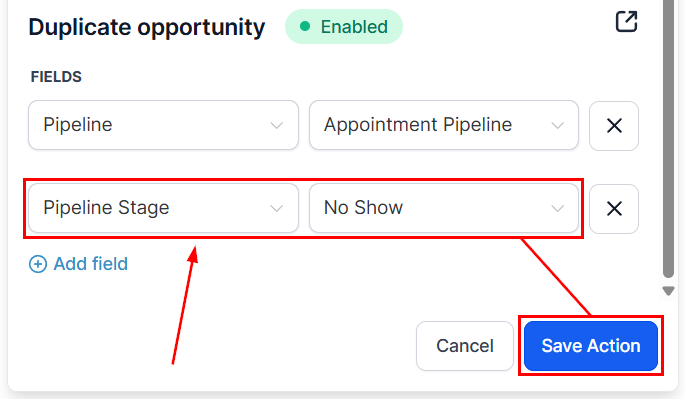
For this workflow, add the Pipeline field and set it as “Appointment Pipeline.”
Add the “Pipeline” Stage field and set it as “No Show,” then save the action.
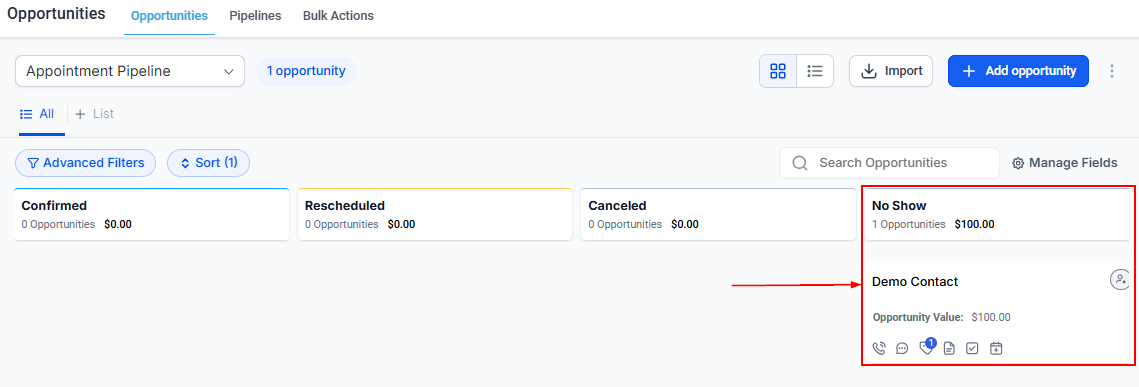
📌NOTE: In the opportunities section, you can also manually move each customer through the pipeline as you see fit.
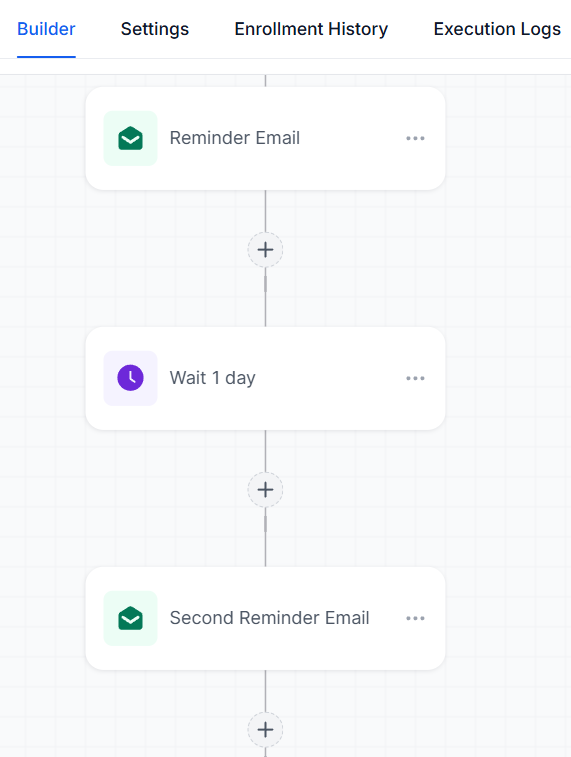
Add Message Reminders
Make sure to add more steps to the Workflow like SMS or Email Reminders. This gives you an edge in following up with busy clients, and these reminders might prompt them to reschedule.
Use Case
Let’s walk through a scenario where a lead books an appointment, and we manage its outcome:
- Lead Books an Appointment: This triggers the “Appointment Confirmed” workflow, automatically placing the lead in the “Confirmed” stage.
- Cancellation or No-Show: If the lead cancels (via a link in an email) or doesn’t show up, you’ll update the opportunity to the respective stage. For no-shows, this involves manually changing the appointment status.
Managing appointments efficiently starts with a clear pipeline and smart automation. Use workflows to handle confirmations and cancellations, and manually update no-shows to keep everything organized. This process helps you stay on track and build stronger client relationships.
Troubleshooting Tips and FAQs
Q: What if an appointment doesn’t automatically move to the confirmed stage?
- A: Check your automation trigger and ensure it’s correctly set to the action of booking an appointment.
Q: How do I manually mark an appointment as a no-show?
- A: Navigate to the lead’s appointment details and change the status to “No Show”.
Not a Funnelbud customer yet?
Try our all-in-one CRM for sales and marketing — free for 7 days, no commitment.