How To Send & Schedule Emails With Email Campaigns
Sending an email campaign is an important way to engage your audience, and this section will help you understand the different ways to do so. We’ll walk through each step together and discuss how you can set up and customize your audience information and select the most appropriate sending options.
Accessing Campaigns
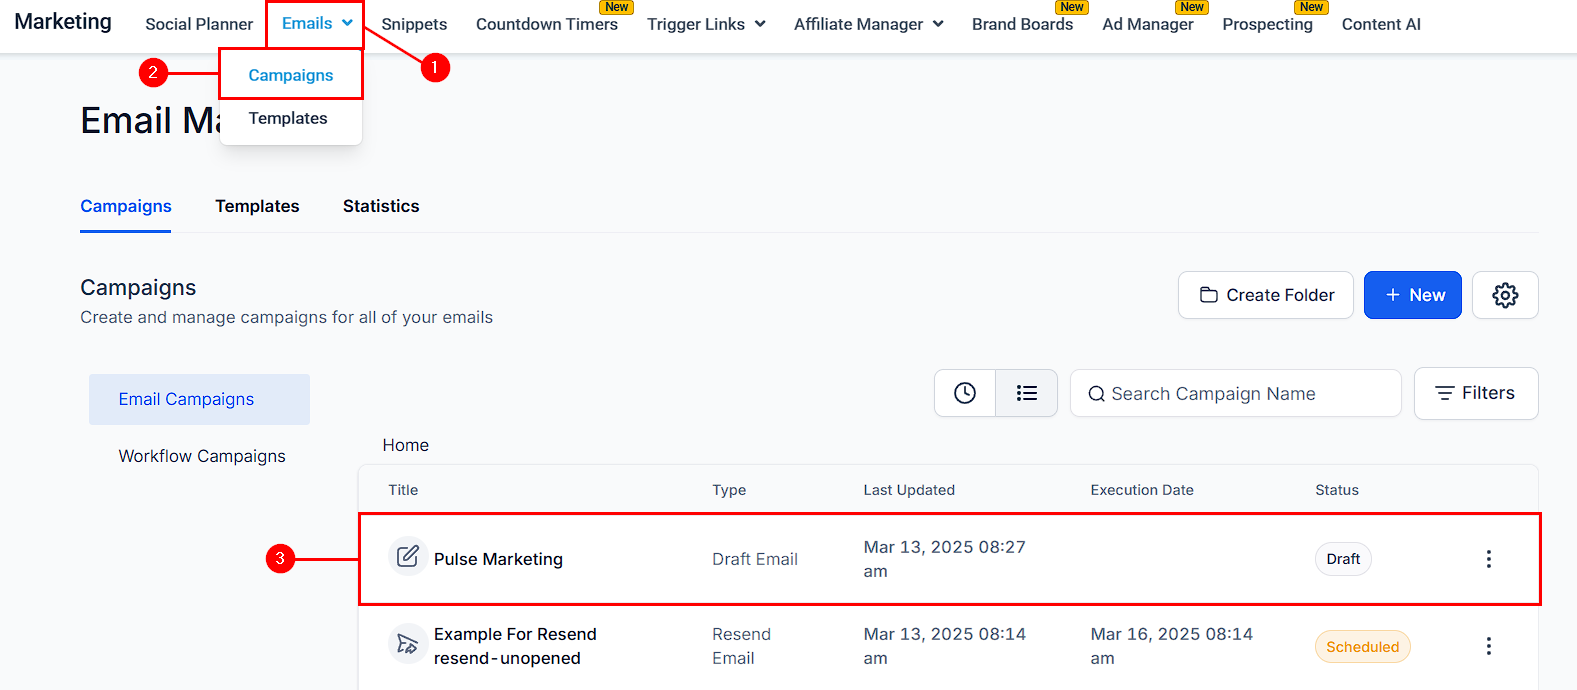
Navigate to Marketing > Emails > Campaigns section, select a drafted campaign from the list, or create a new email campaign.
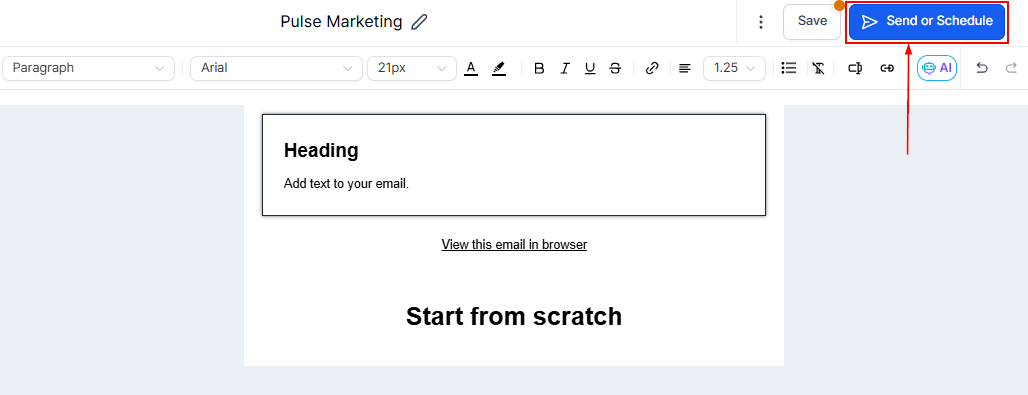
Send or Schedule Email Campaign
In the email editor, choose the option to either send or schedule your campaign. Here, you will configure your audience settings and specify the delivery options.
Attach Files
To attach files, click the Attach Files button. This option enables you to include documents, images, or other relevant files, helping to enrich the campaign content for your audience.

Sending Options
Here, you can decide when and how your message should be sent to recipients – whether that’s right away, in batches, at a later date and time, or using RSS scheduling so your communications get sent out in the best way possible!

Sending Details
To send your email, some details are needed. Let’s first view the details that apply to all sending modes. These will be:
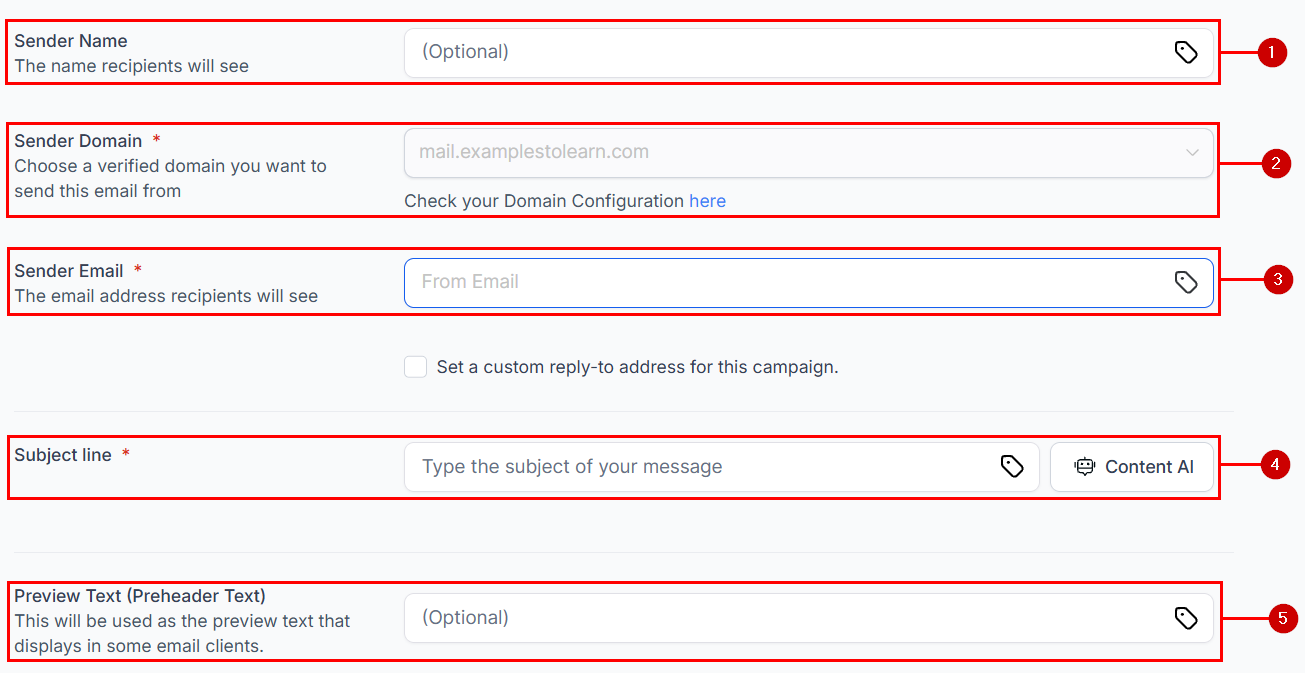
- Sender Name: Enter the name to be associated with your email campaign.
- Sender Domain: Select the Email Domain you’ll be using for this campaign. This also allows you to troubleshoot the domain if needed.
- Sender Email: Enter the email address and name that will appear as the sender in the recipient’s inbox. This step is crucial for establishing a clear point of contact and maintaining a professional appearance in your email communications.
- Subject Line: Craft an engaging subject line related to the content of your email campaign.
- Preview Text: Include a summary or teaser of the email’s content. It appears alongside the email subject line in recipients’ inboxes and aims to grab their attention, encourage them to open the email, and give them a glimpse of what they can expect inside.
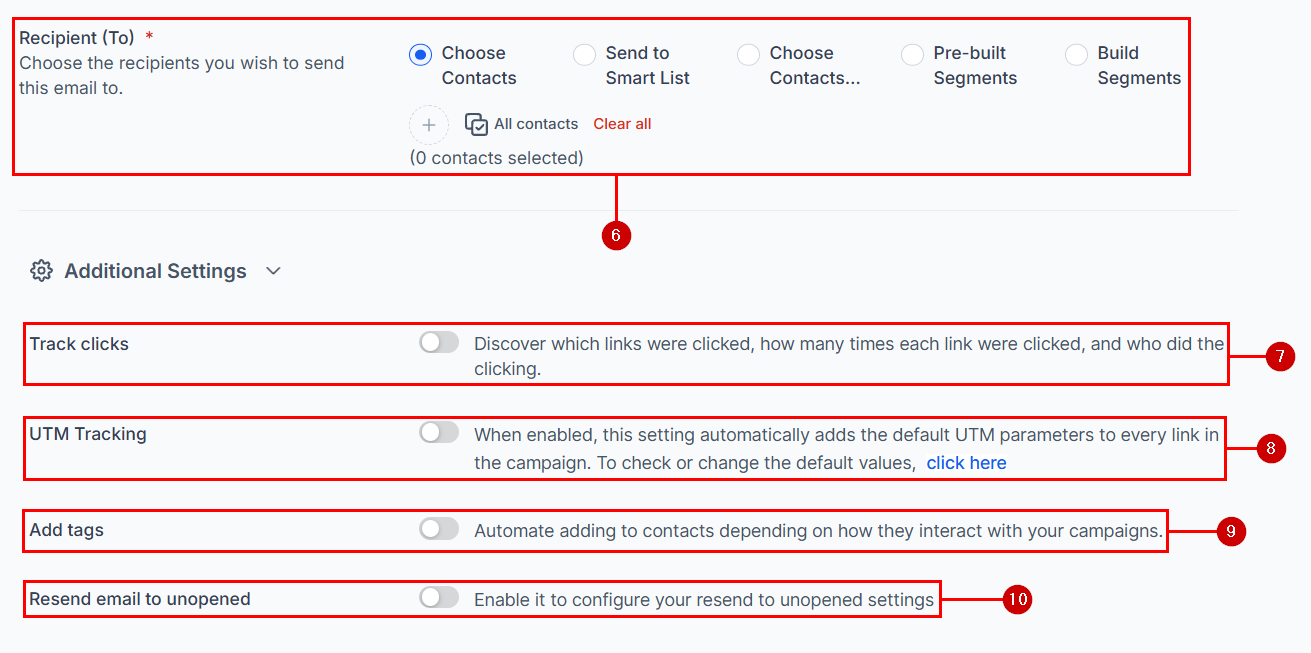
- Recipient (To): Select the contacts you want to reach with your email here. You can select them individually with Choose Contacts, or add contacts from a Smart List, tag, or segment.
- Track Clicks: Enable this feature to gather data on which links are most popular or engaging to recipients, helping to optimize future campaigns.
- UTM Tracking: Enable this feature to automatically add the default UTM parameters to every link in the campaign.
- Add Tag: Toggle on “Add Tags” in the Send Now screen to automatically tag users based on interactions such as link clicks and email opens, configuring specific triggers and tags to enhance personalization and streamline segmentation.
- Resend Email to Unopened: Easily resend unopened emails with built-in scheduling. Track pending resends, adjust timing, or cancel as needed to improve engagement and simplify follow-ups.
Send Now
The Send Now option will send the campaign to your recipients right away. with no added details

Schedule
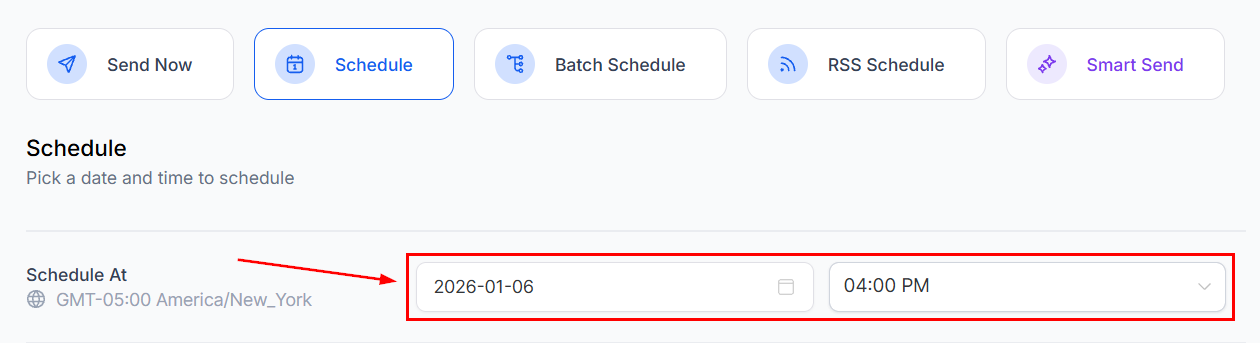
The Schedule option will allow you to postpone the delivery of your campaign. Besides the general settings, you must select the date and time you would like your campaign to be sent.
Batch Schedule
The Batch Schedule feature enables you to split your audience list into batches, giving you control over the number of emails sent per day or week as per your requirements.

When using this feature, you’ll need to provide:
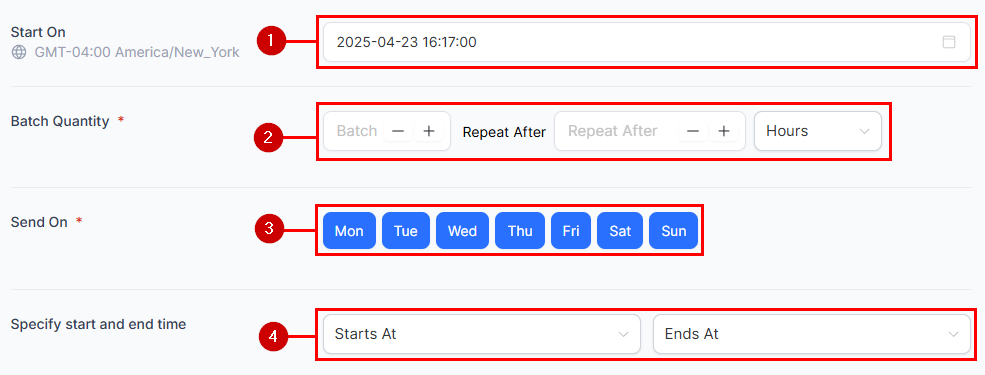
- Start On: Add the start date and time of the campaign.
- Batch Quantity: Specify the batch quantity and set the frequency by adding the repeat interval (days, hours, minutes, seconds).
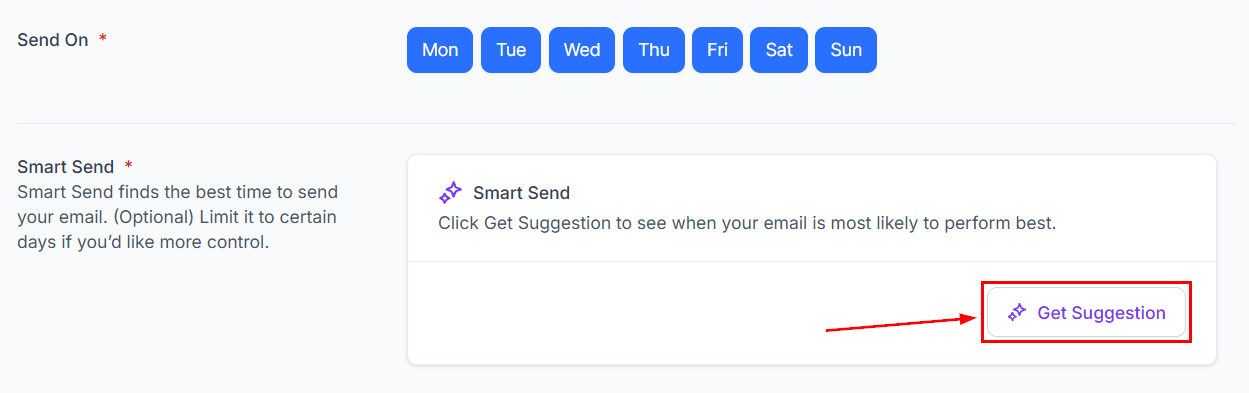
- Send On: Specify the days the email campaign should be sent. Uncheck the days when you don’t want to send the batch delivery email campaign.
- Specify Start and End Time: You can decide the exact start time and end time of each day you have chosen.
RSS Schedule
The RSS Schedule feature allows you to create a schedule for your blog posts or updates that you want to send to your email list.

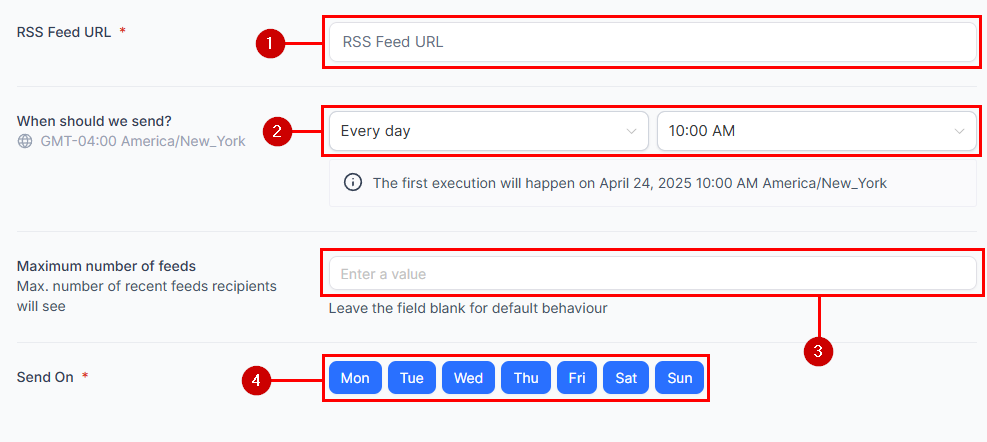
- RSS Feed URL: Add your RSS Feed URL.
- When Should We Send It?: Set the frequency and time for the RSS email campaign
- Maximum Number of Feeds: This sets the number of feeds recipients will see at a time.
- Send On: Select the days on which the campaign should be sent. Uncheck days when you don’t want to send the RSS Email Campaign.
Smart Send
The Smart Send option uses the power of AI to find the best time to instantly crunch the numbers and schedule your email for the time slot with the highest predicted engagement.

After entering the general details, select which weekdays you want to consider for sending.
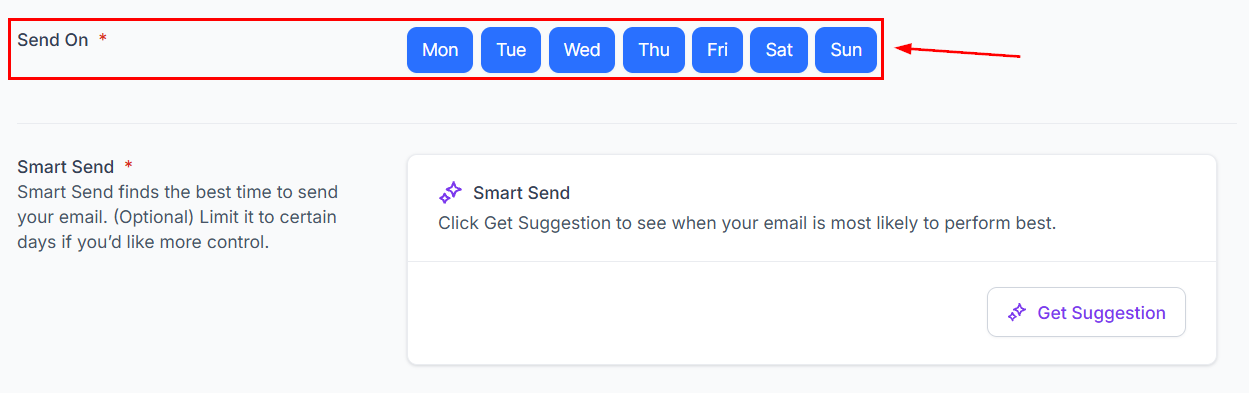
Click “Get Suggestion” to calculate your sending time.
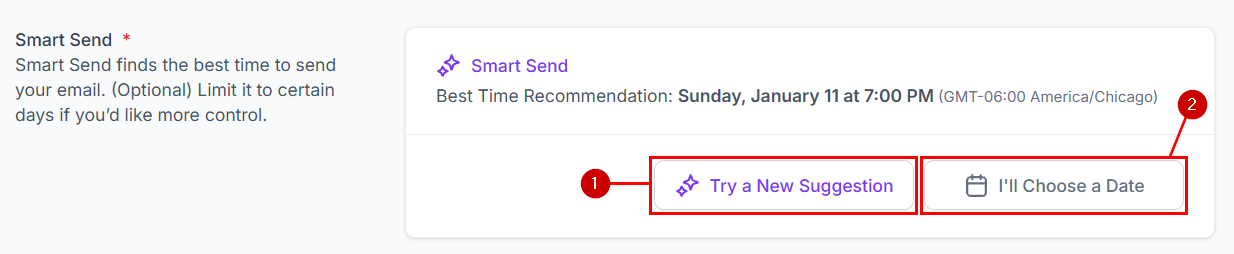
You can generate a new suggestion if not pleased (1) or select a specific date to recalculate for only the time of day to send (2), or if satisfied, send your email.
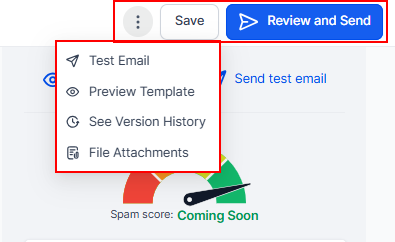
Action Menu
During the email campaign creation process, you will come across these three options: Cancel, Save, and Send/ Schedule.
- Test Email: This allows you to test the campaign to see how it appears.
- Preview Template: Preview the current template.
- See Version History: View past versions of your campaign.
- File Attachments: Attach relevant files to your email.
- Save: Use this to save the changes you have made for your sending options, scheduling, and audience targeting.
- Review and Send: Use this when you have already designed your email campaign and configured all other options, and you want to send your campaign right away.
- Review and Schedule: Select this button when you are content with the design and configurations of your email campaign, and you want to schedule your campaign to be sent in the future.
Campaign Summary
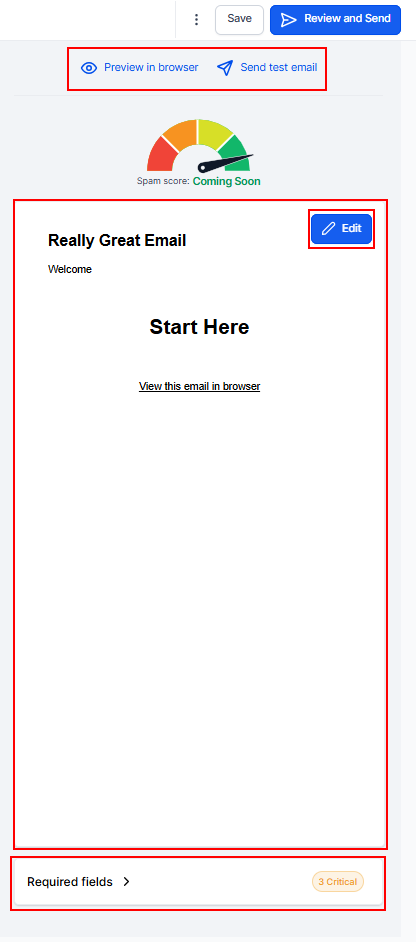
The Campaign Summary section helps you finalize your email campaign with tools for checks and adjustments to ensure it looks and works perfectly across devices and email clients. Here’s a breakdown of its features:
- Preview in Browser: This option shows your email in a web browser so you can check the layout, design, and formatting before sending.
- Send Test Email: This option sends a sample email to yourself or others to check how it looks and works in real email clients.
- Real-time Preview: The preview of your email on the right side of the screen allows you to view your email design, subject line, and preview text, all within a single view.
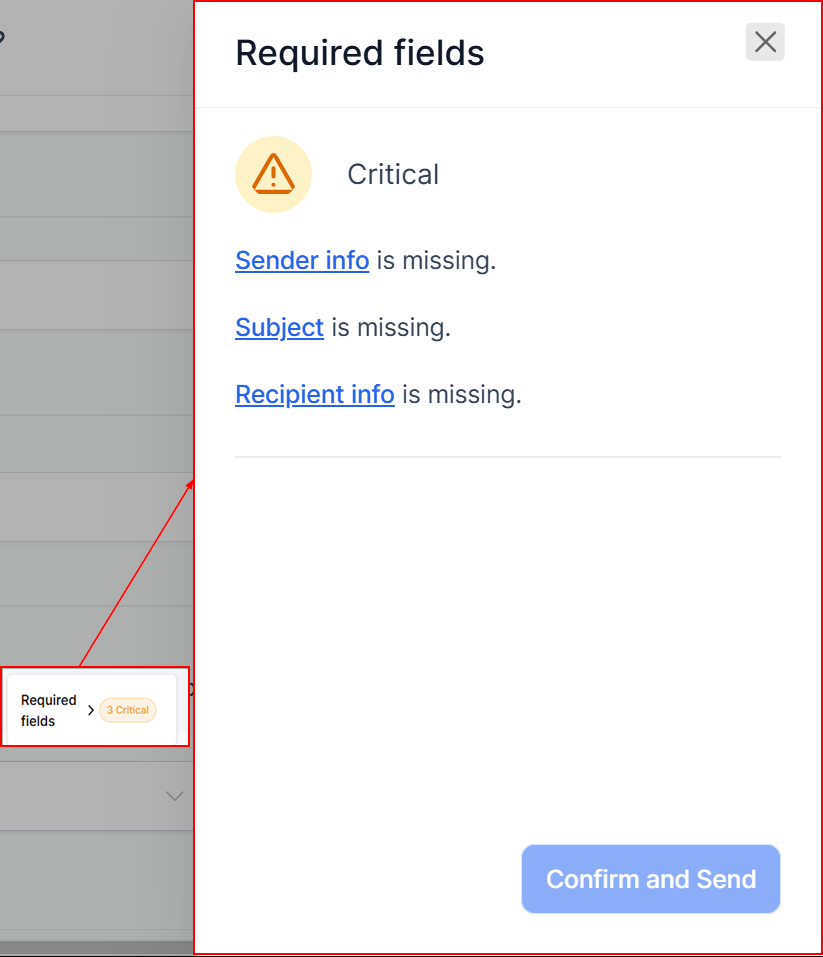
- Required Fields and warnings will guide you through completing the necessary elements, making it easier to identify and fix any missing information before confirming and sending the campaign.
Checklist for Required Fields
A checklist for required fields and custom errors is now available within the campaign settings, allowing you to resolve any issues quickly. This checklist highlights mandatory fields, such as Sender info, Subject Line, and Recipient info, ensuring all essential details are completed before sending. You can view this checklist in the Required Fields section of the campaign summary page.
By carefully selecting the appropriate sending options, you can tailor your approach to fit your strategy and audience. Utilize the various features to refine your campaign’s reach and impact, ensuring each email resonates with your recipients.
FAQ
Q: How can I resolve issues with missing or incorrect fields before sending a campaign?
- A: You can use the Checklist on the campaign summary page to review and resolve any missing or incorrect fields. This checklist highlights required fields so you can address any issues before sending your campaign. If any mandatory information is missing, you’ll receive a warning, allowing you to correct it before confirming the send.
Q: Can I see my email design while entering the subject and previewing the text?
- A: The send or schedule screen now provides a real-time view of your email design alongside the Subject Line and Preview Text fields. This layout lets you preview how your email will appear as you enter these details, ensuring a smoother workflow.
Q: What is the Recipient (To) section?
- A: The Recipient (To) section is where you specify the audience for your email campaign. You can choose from all contacts and select individual contacts, smart lists, tags, or pre-built segments to ensure your campaign reaches the right audience.
Q: How do I choose specific contacts for my email campaign?
- A: Use the Choose Contacts feature to manually select recipients from your system’s contact list. You can streamline this process by searching for contacts using the search bar, ensuring quick and precise selection.
Q: What is the Send to Smart List feature?
- A: This feature lets you send your email campaign to a smart list you’ve created in your CRM. Smart lists automatically update based on defined criteria, ensuring your emails always reach the most relevant recipients.
Q: Can I send campaigns to contacts based on tags?
- A: Yes! With the Choose Contacts from Tags feature, you can target contacts assigned specific tags in your CRM. Simply select a tag from the drop-down menu, and all contacts associated with that tag will be included in your campaign.
Q: What are pre-built segments, and how do I use them?
- A: Pre-built segments are ready-made recipient groups available in the Send or Schedule screen. Examples include:
-
- Contacts engaged in the last 7, 30, or 60 days.
- Contacts who interacted with your last 5 campaigns.
- Contacts who didn’t engage with your last 5 campaigns. Select a segment to efficiently target specific behavior-based groups.
Not a Funnelbud customer yet?
Try our all-in-one CRM for sales and marketing — free for 7 days, no commitment.