How to use Custom Fields for Opportunities
The Custom Fields for Opportunities feature allows you to tailor and manage data within the Opportunity Modal, offering a highly flexible and dynamic approach to tracking potential sales, tasks, or projects. This tool empowers users to customize the data they capture, ensuring more relevant and organized information handling.
Key Highlights
- Flexibility and Precision: Customize and categorize custom fields in the Opportunity Modal, similar to the flexibility available for contact fields.
- Enhanced Data Customization: Add specific data points related to your sales processes, such as project deadlines, product details, client preferences, and more.
- Organized Data View: Group custom fields into folders for a more streamlined experience. You can also hide empty fields for a cleaner, more efficient display of opportunity cards.
Using Custom Fields for Opportunities
Create Custom Fields
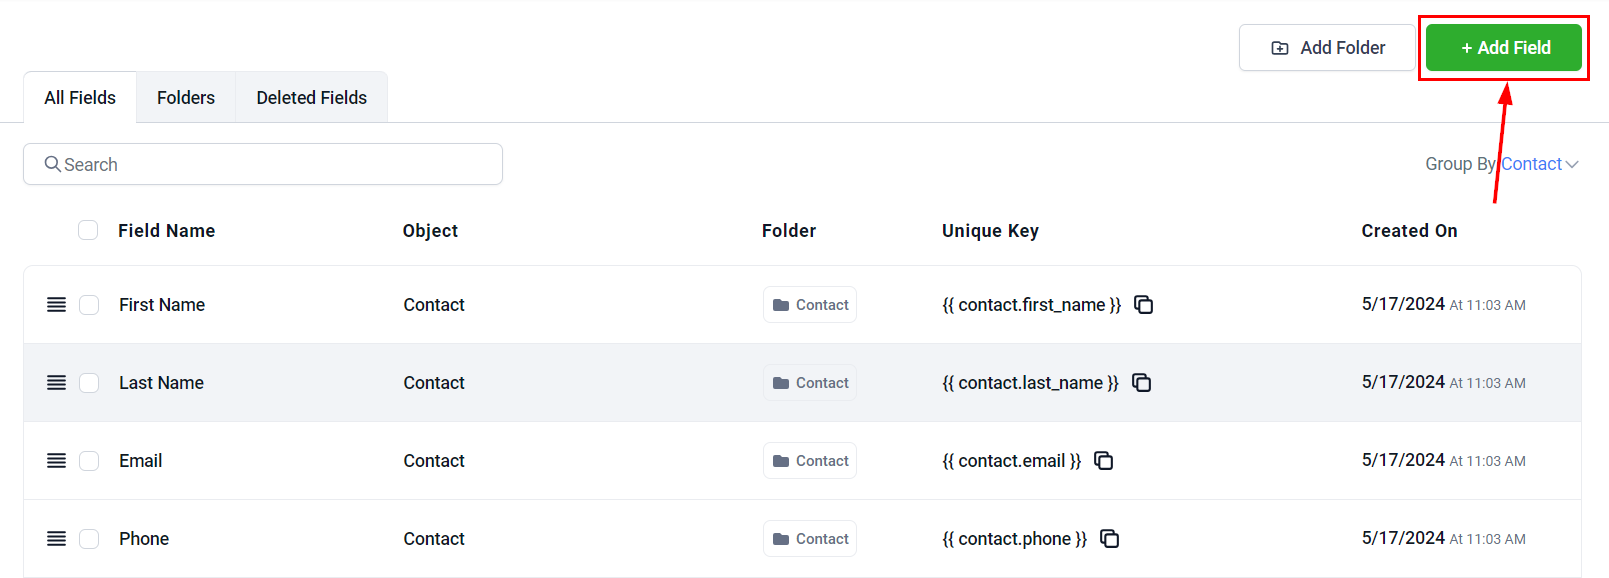
Go to your account settings to access the Custom Fields section. Under the “Custom Fields” tab, click Add Field to begin.
Choose Opportunity
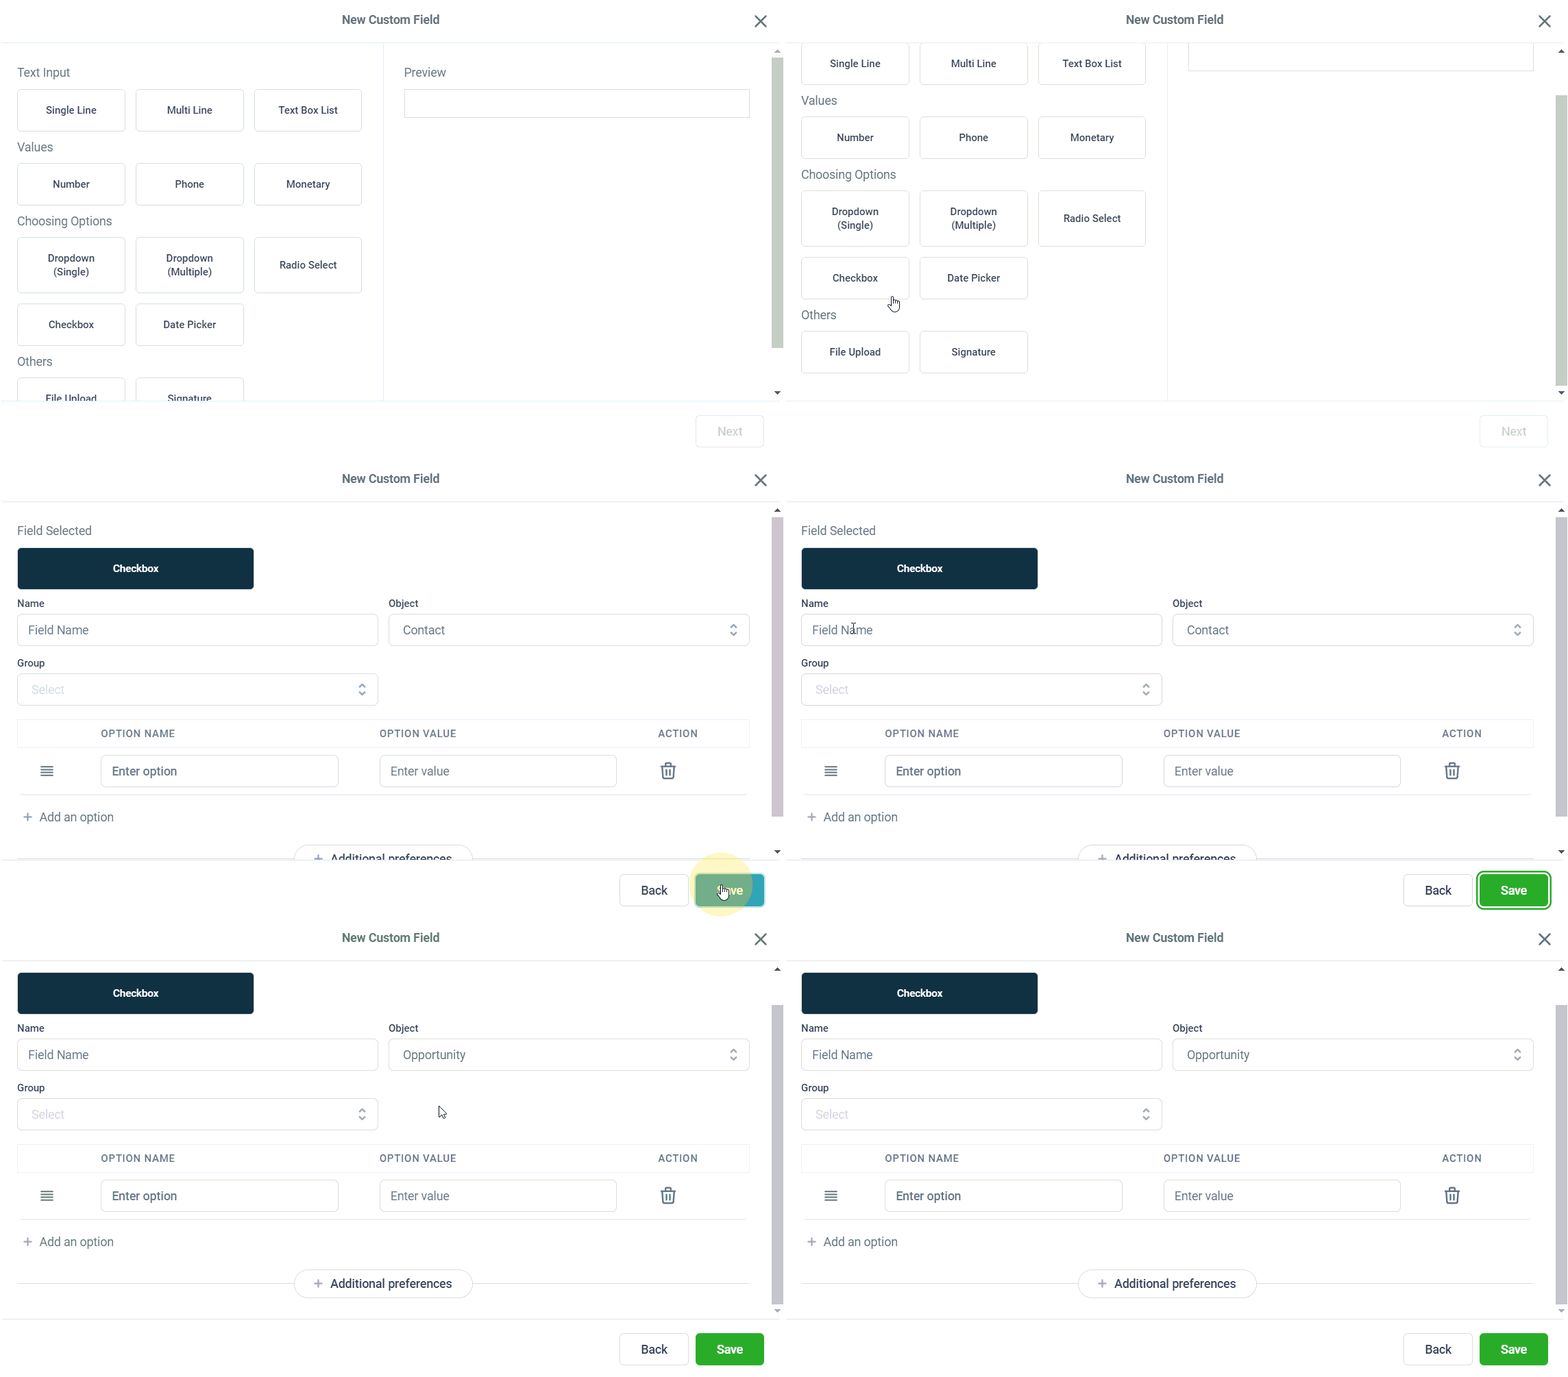
Choose from a range of field types such as text input, number fields, dropdowns, and more to capture the required data, and name the field accordingly. Ensure that you select “Opportunity” as the object.
Grouping Fields
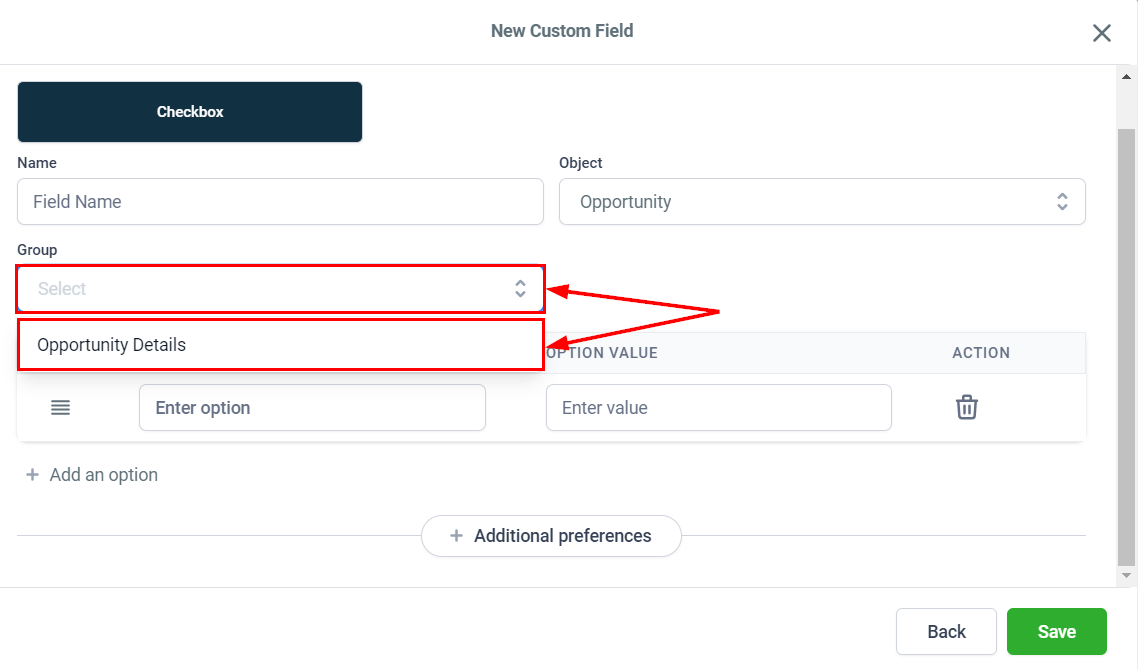
Group related fields into folders for better organization by selecting a group from the dropdown. If no groups appear, ensure that you select “Opportunity” as the object when creating the folder.
Fill out all the required fields, then click Save.
Utilizing the Custom Field
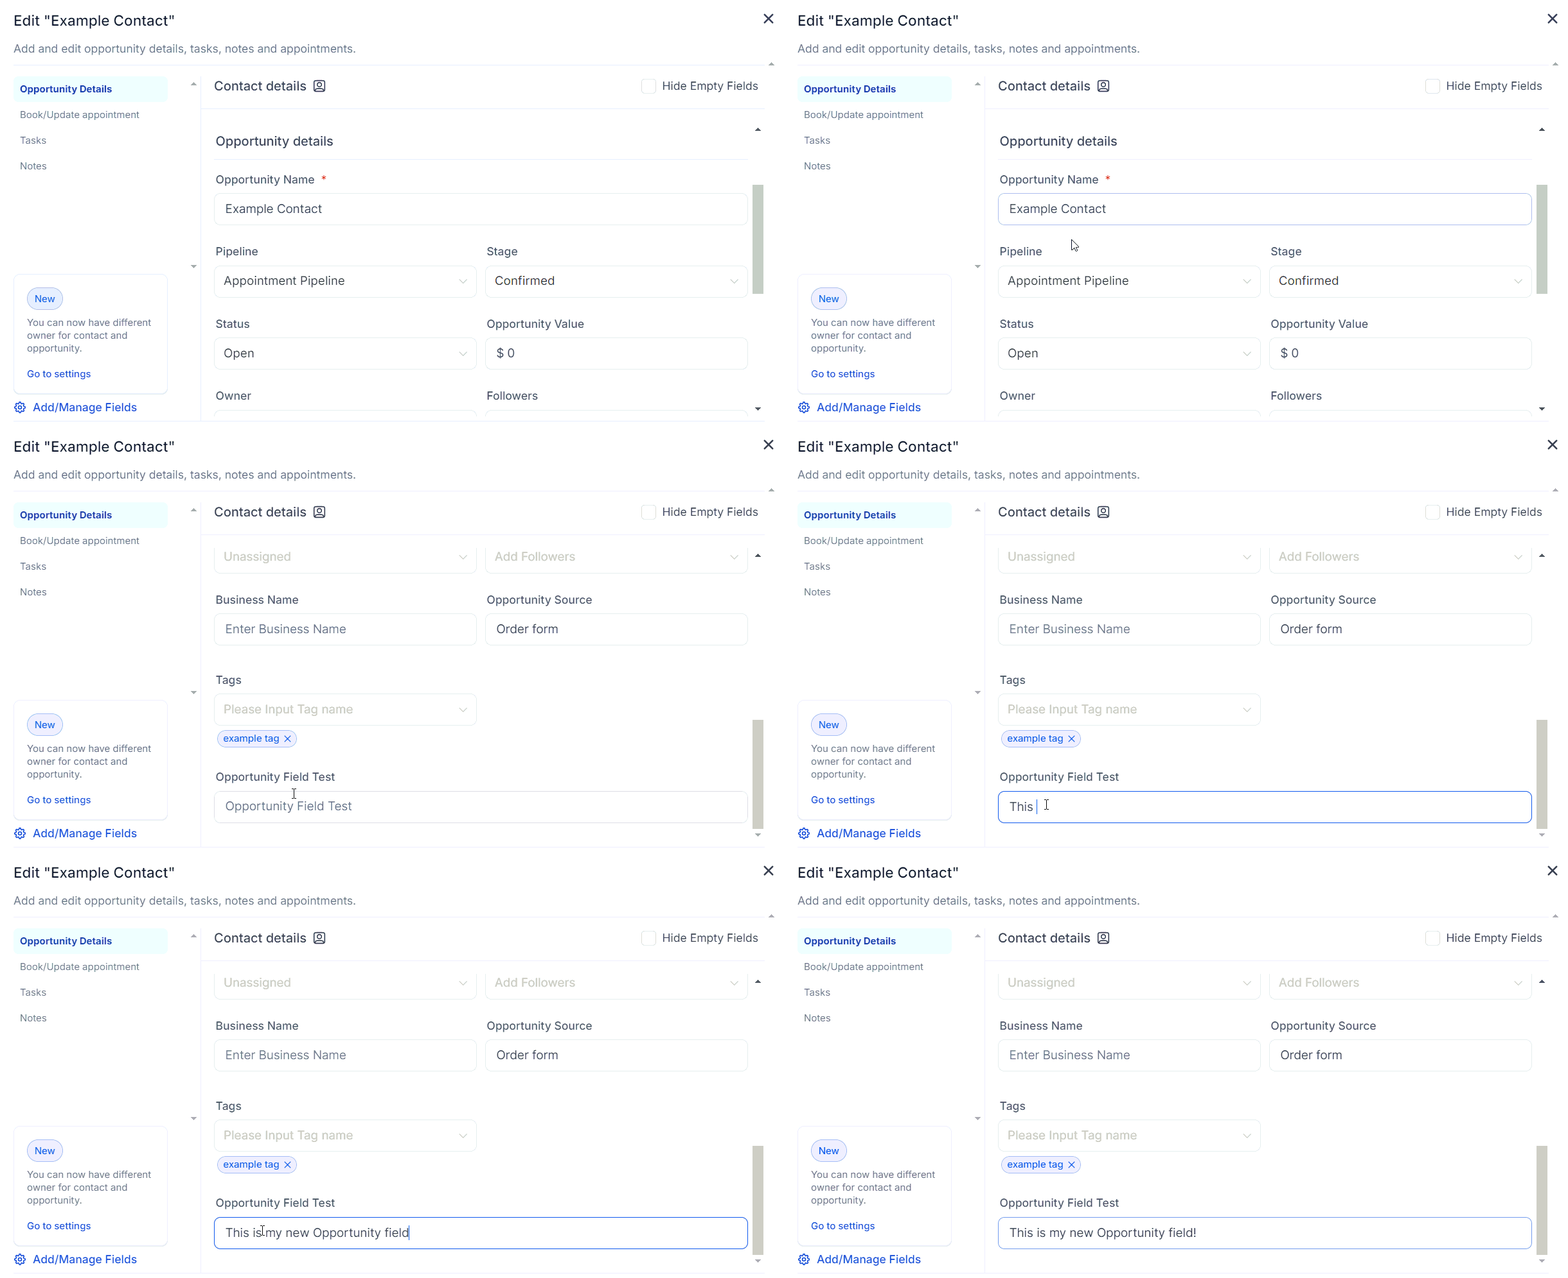
When creating or editing an opportunity, fill in the newly created custom fields for better data management.
Hide Empty Fields
Enable the Hide Empty Fields option to maintain a cleaner, more streamlined view, especially if multiple custom fields are being used.
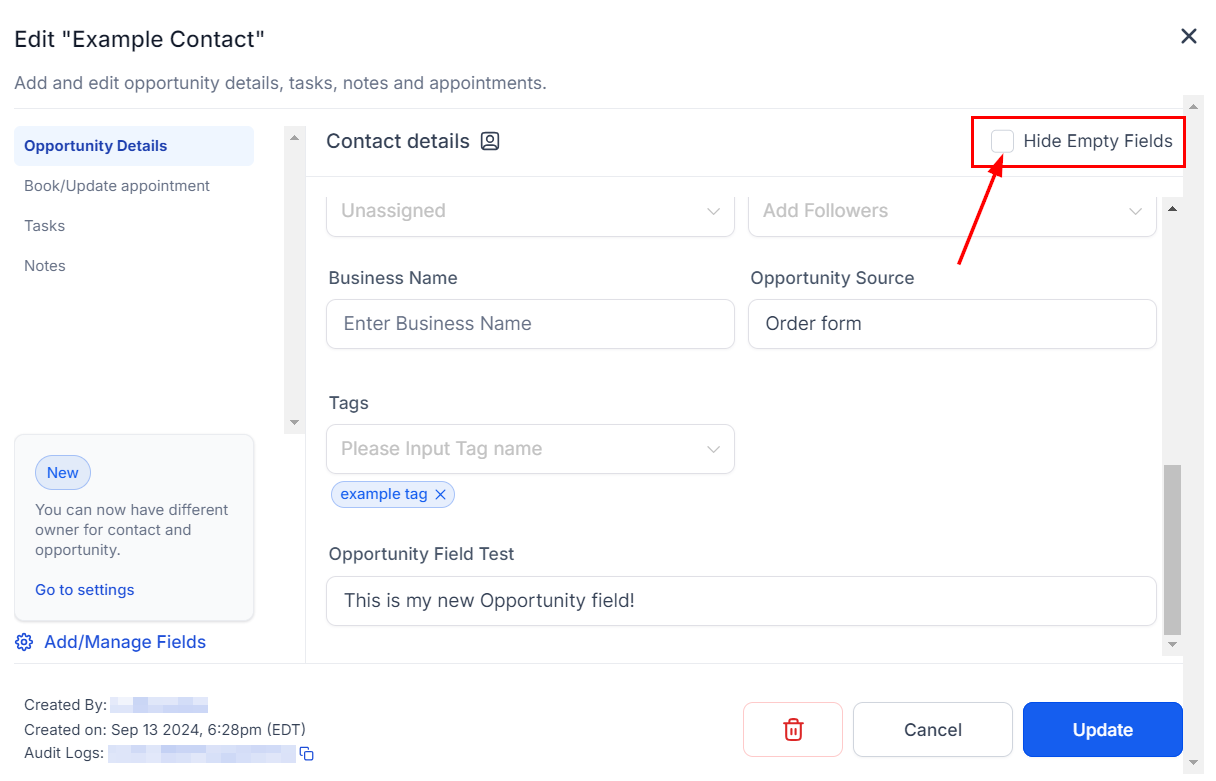
Click the Update button to retain your changes!
By leveraging the Custom Fields for Opportunities feature, you can enhance your team’s ability to track, manage, and customize data, making your process more tailored and efficient.
Use Cases
- Client Preferences: Capture client-specific needs and preferences to facilitate more personalized interactions.
- Customer’s Budget: Include a field to track the client’s budget to offer more tailored proposals.
- Conversion Likelihood: Indicate the probability of conversion to help prioritize opportunities and allocate resources more effectively.
Not a Funnelbud customer yet?
Try our all-in-one CRM for sales and marketing — free for 7 days, no commitment.