How to Create Service Locations
Service locations define where your customers will receive your services, making them a critical part of your booking setup. Whether you operate from a single office or multiple branches, creating accurate and well-structured service locations ensures a smooth scheduling experience and clear communication with your clients. This guide focuses specifically on how to create service locations and configure them properly.
Before You Begin
When your account is first set up, a default location is automatically created using your business address. If you operate from only one place, you may not need to create a new location.
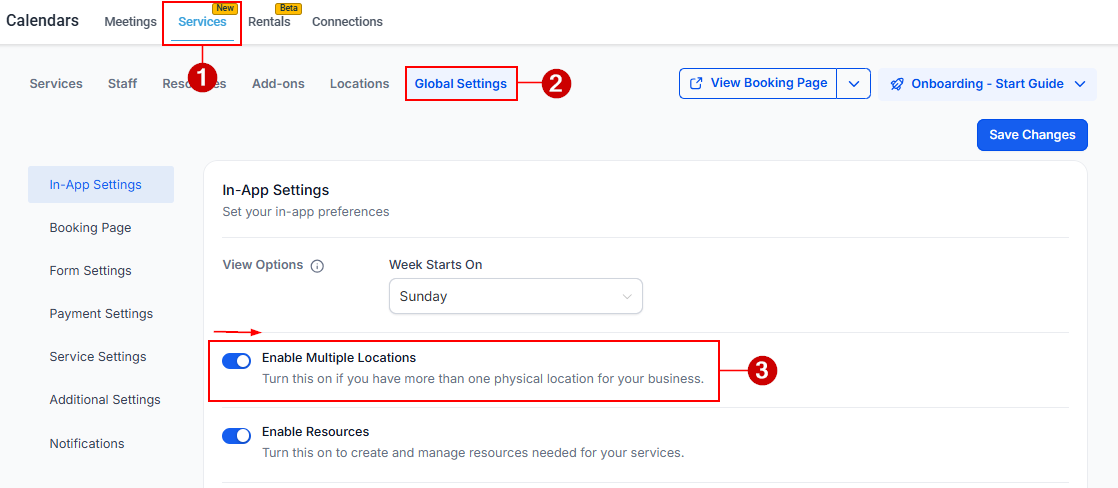
However, if you need to add additional service locations, you must first enable the Multiple Locations feature. To do so, go to Calendar Settings → Services. Under Global Settings, toggle on Enable Multiple Locations.
Once enabled, you can begin creating new locations.
How to Create a Service Location
Creating a service location involves defining key details that customers will see during booking. Follow these steps:
Access the Locations Tab
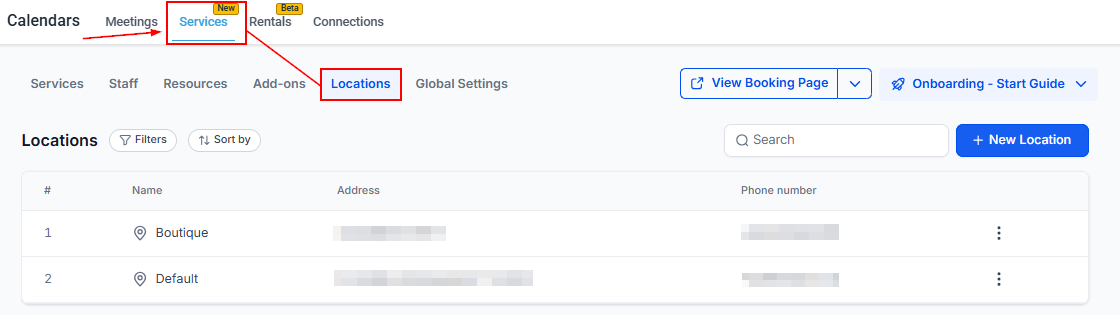
Navigate to Calendar Settings → Services → Locations.
Add a New Location
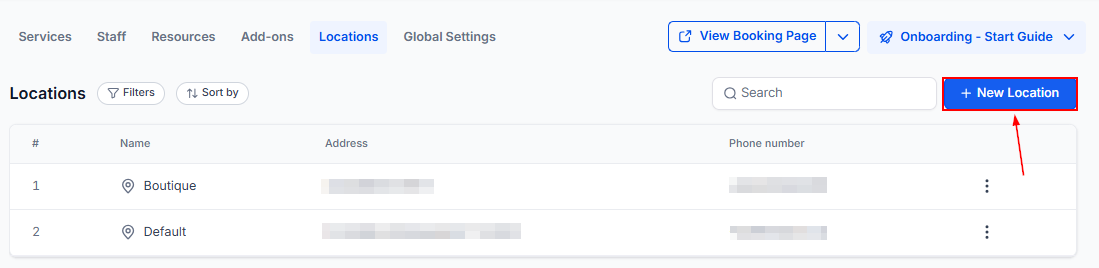
Click “+ New Location” to open the location setup window.
Upload a Location Image
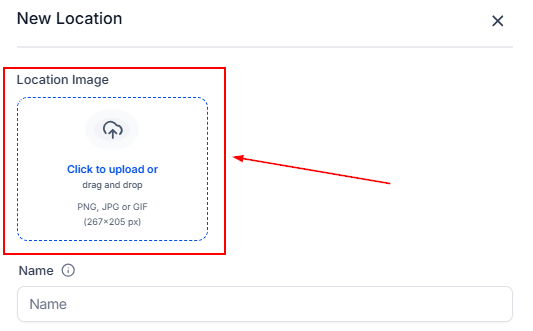
Add an image that represents the location. Use a clear and professional visual (e.g., storefront, office interior, or logo) since it will appear on the booking page.
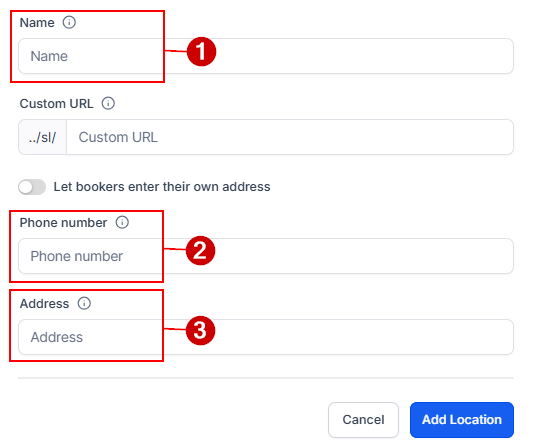
Enter Location Details
Fill in the required fields:
- Location Name: Use a clear and recognizable name.
- Phone Number: Provide a direct contact number for that specific location.
- Address: Enter the full physical address where the service will take place.
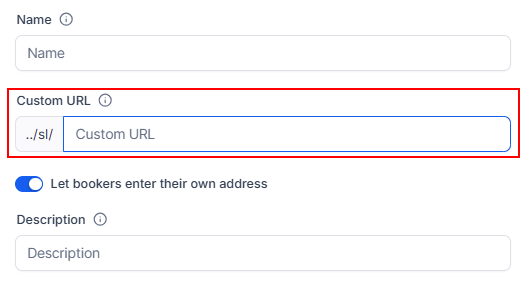
Custom URL
Enter the unique link where customers can book the service.
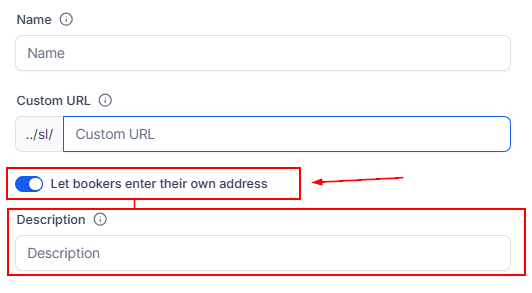
Ask the Booker Location
Instead of entering location details, you can toggle the switch to allow bookers to enter an address of their choosing. When enabled, you must enter a description to prompt the user to complete the field appropriately.
Ensure all details are accurate, as this information will be visible to customers during booking and in confirmations.
Save the Location
Once finalized, click Add Location to save the setup.
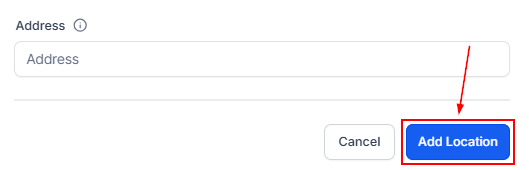
Your new service location will now appear in the Locations list.
Best Practices for Creating Service Locations
To ensure your locations are effective and user-friendly:
- Use clear naming conventions: Avoid vague names. Instead, use identifiers like city, branch, or function
- Keep contact details location-specific: This helps customers reach the correct branch directly
- Use high-quality images: A good visual improves trust and recognition on the booking page
- Verify address accuracy: Incorrect addresses can lead to missed or delayed appointments
✍Important Note
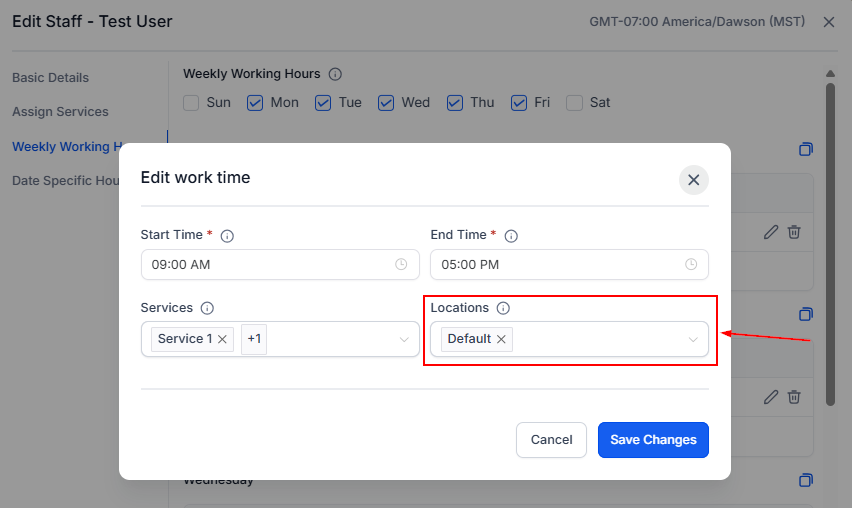
Creating a location alone is not enough for it to appear during booking. You must assign staff availability to that location for it to be selectable by customers. You can do this in Services > Staff > Edit User Configuration (pencil icon) > Weekly Working Hours > Edit work time (pencil icon).
Creating service locations is a foundational step in building an efficient booking system. By accurately defining each location’s details and presenting them clearly, you ensure customers know exactly where to go and what to expect. Take the time to set up each location thoughtfully, as it directly impacts both your operational flow and the customer experience.
Not a Funnelbud customer yet?
Try our all-in-one CRM for sales and marketing — free for 7 days, no commitment.