How to Add Taxes Overview
Handling taxes is an unavoidable part of running a business. You want your business to comply with the law and have your finances in order. Being accurate and efficient with your taxes benefits all aspects of your business, so to make this process easier you can handle it directly on your CRM.
Tax Settings allows you to add, manage, and apply taxes effectively. This powerful tool saves time, reduces mistakes, and smooths financial operations.
Tax Settings
You can manage your taxes by adding them to products or invoices directly, keeping a record to follow with every sale. How to add them depends on the type of Tax you need to add, but to start go to the Settings tab inside the Payments section and select the Taxes option to your left.
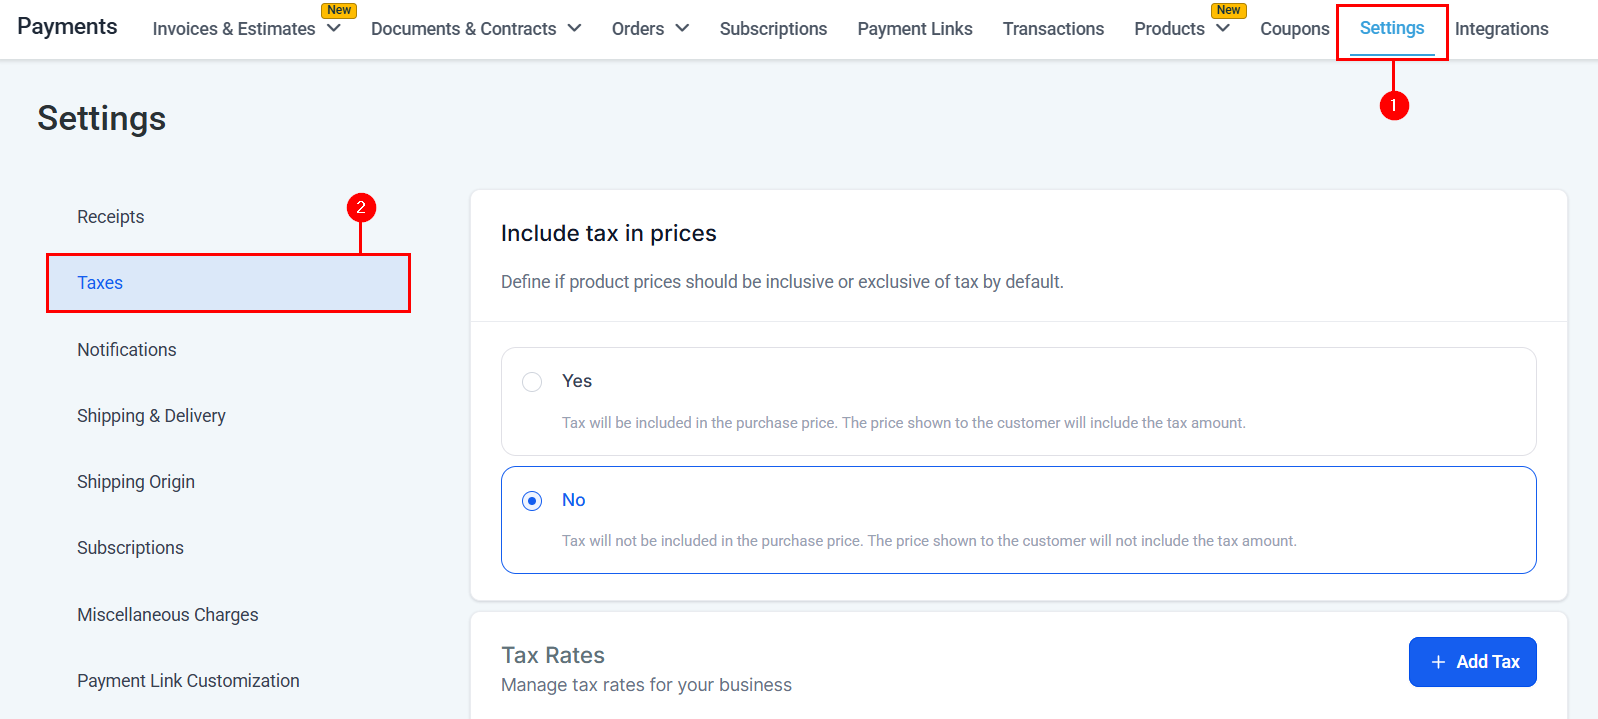
Including Tax in Prices
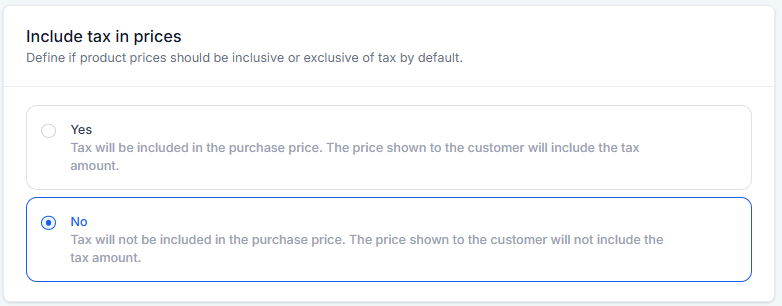
In your tax settings, you have the option to define whether product prices should include tax by default.
Clicking on YES includes tax in the listed purchase price, so the customer sees the full amount, including tax, upfront, while choosing NO excludes tax from the displayed price. The tax is added only at checkout, showing customers the price without tax initially.
Choosing the right option depends on whether you want customers to see the total price (with tax) immediately or only at checkout.
Adding Tax
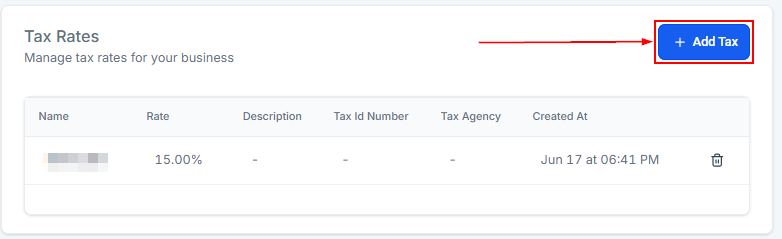
By clicking the +Add Tax button you can manually create a new tax that applies to the product you are selling.
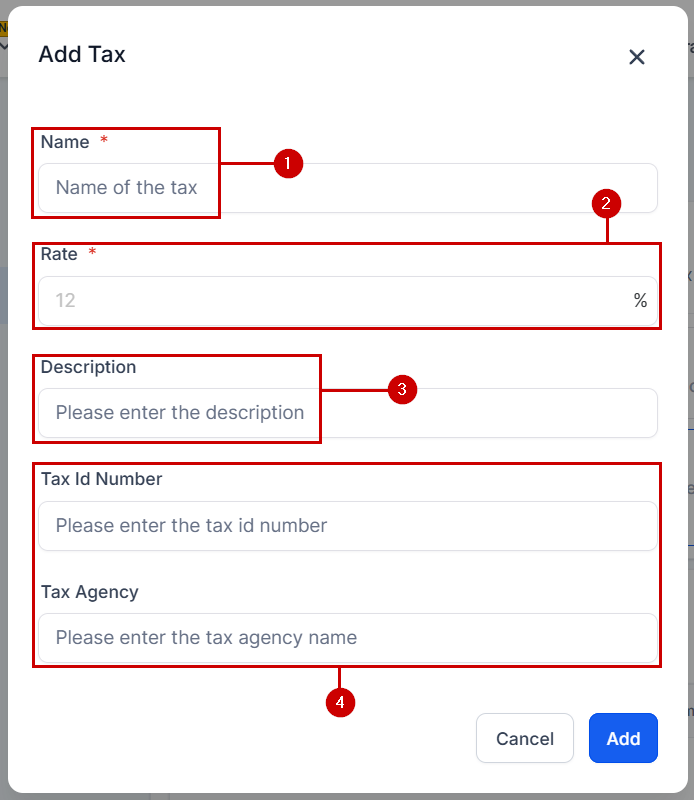
To do so, follow these steps:
- Set the name of the tax for easy identification in the system.
- Add a percentual rate for your tax. For example 5% or 12%.
- Enter a short description as needed, this will be shown to customers.
- Enter the Tax ID and Agency information, this will serve your internal purposes.
Deleting Tax
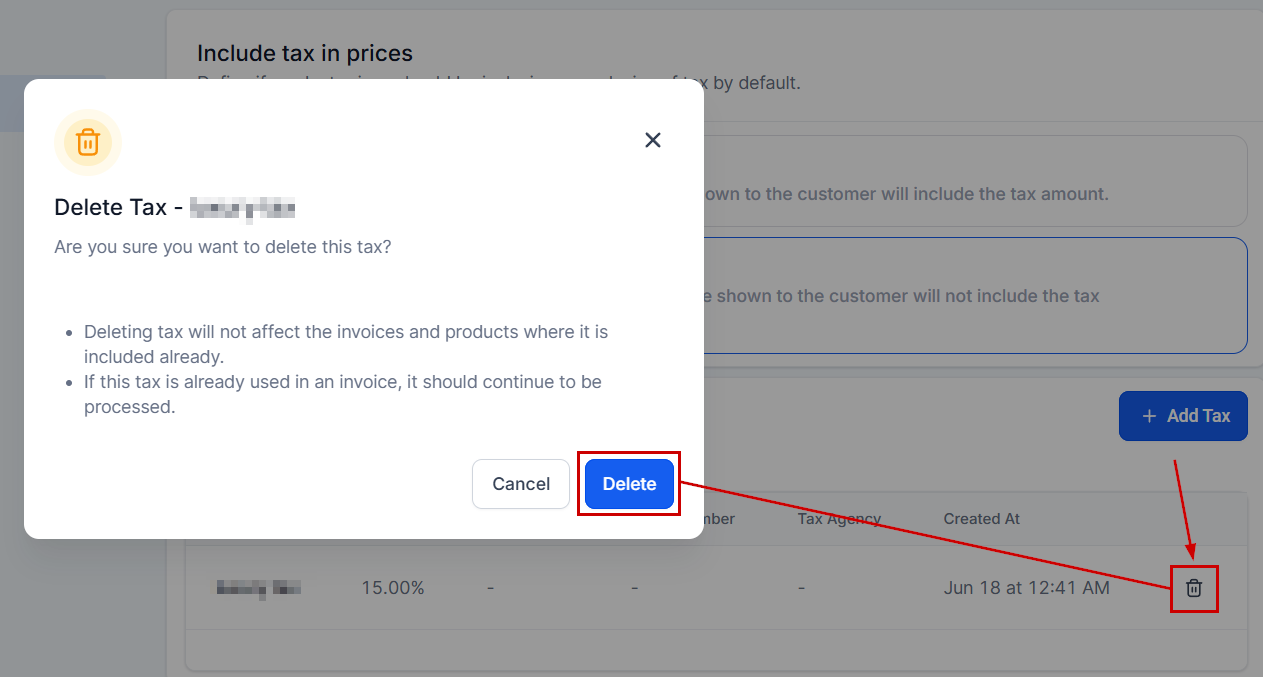
You can delete a tax by clicking the bin icon on the right of the tax you want to delete.
Automatic Taxes
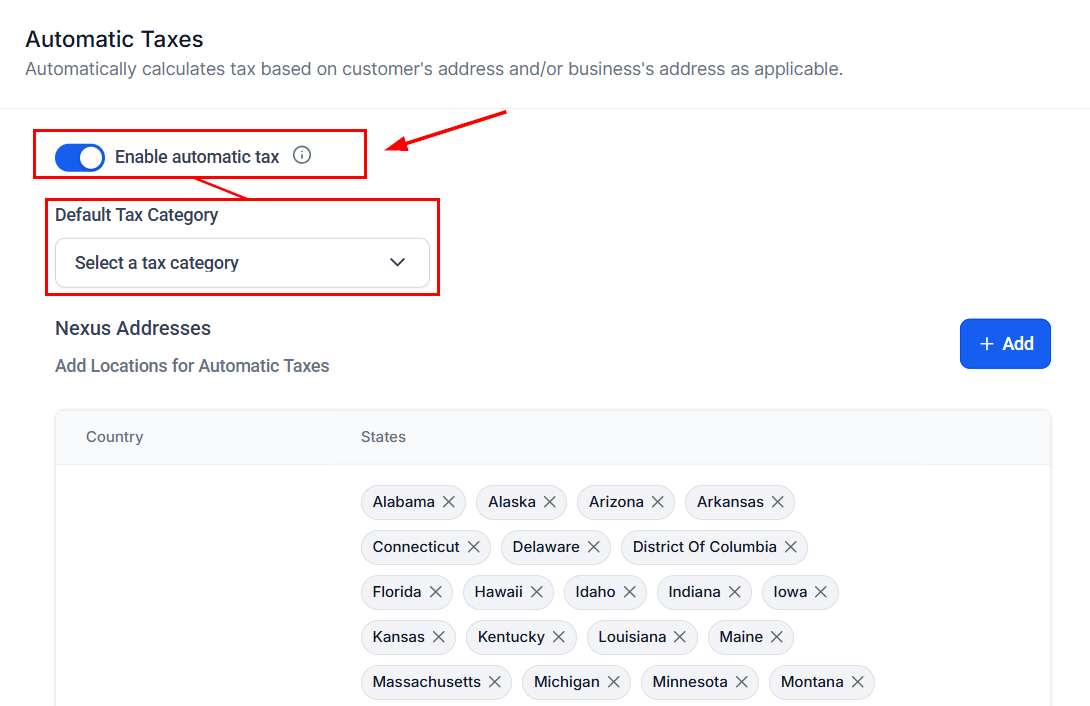
Enable the Automatic Taxes feature to seamlessly calculate taxes based on the customer’s address. Taxes will be automatically applied during checkouts and invoice payments across all checkout types — including Funnels, Payment Links, Invoices, Estimates, and Ecommerce Stores — and are compatible with all supported payment providers.
Once this feature is activated, you will be required to select your default tax category from the dropdown menu.
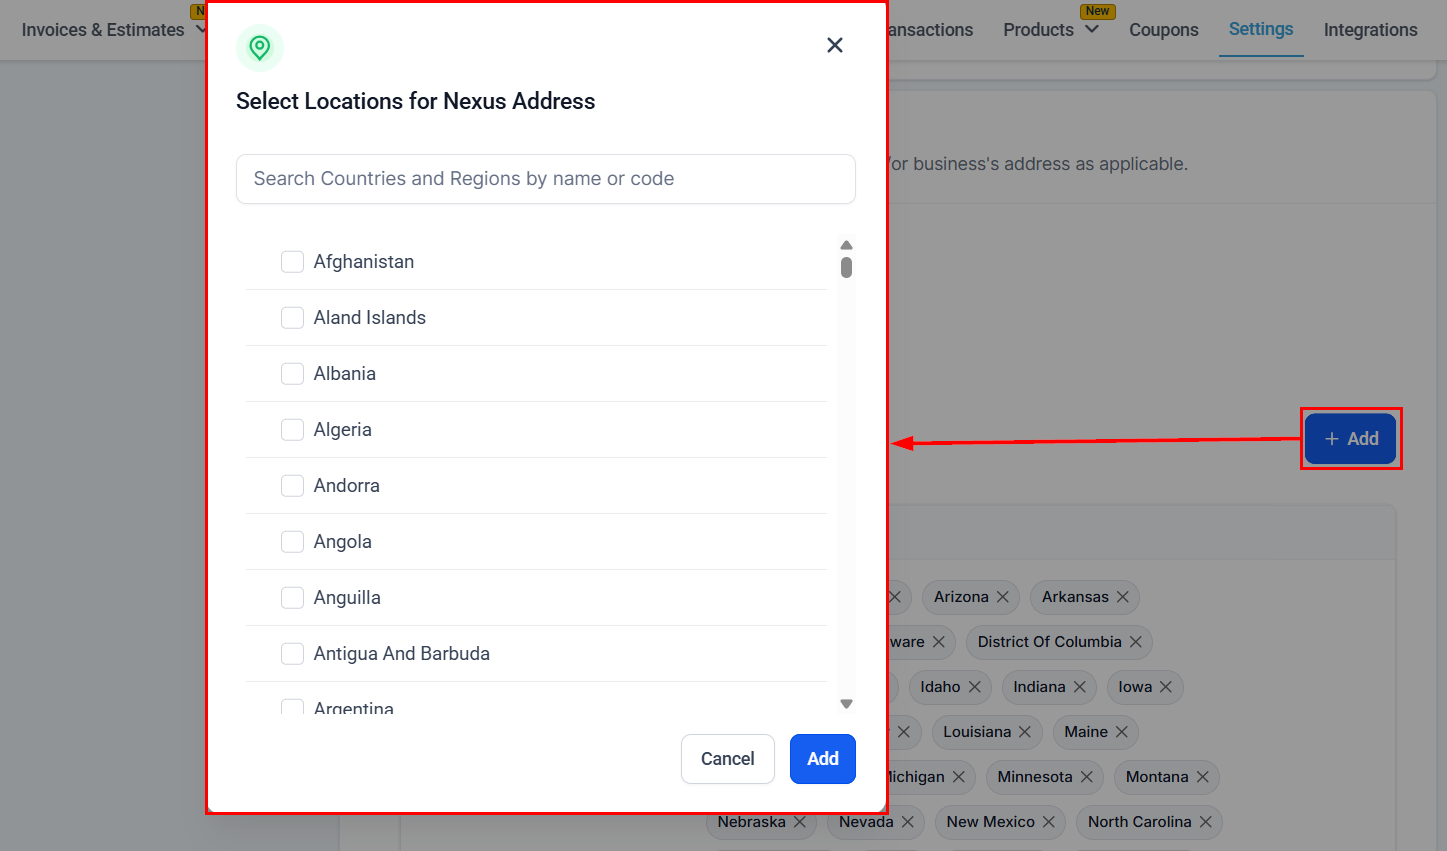
Next, select your Nexus Address locations. These locations define your tax obligations across different regions and ensure accurate, compliant tax calculations for global checkouts. Be sure to add all countries where your business is required to collect taxes.
For businesses operating in the United States and Canada, you must also specify the states or provinces where tax collection is applicable.
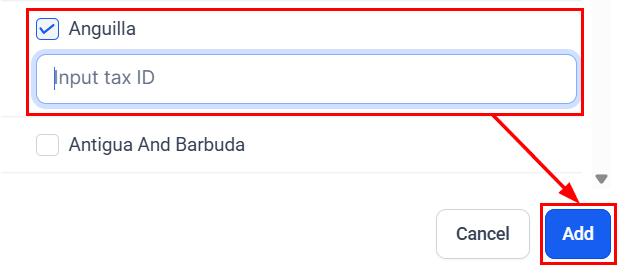
When adding a Nexus Address for a country, you can also enter the business’ Tax ID. If the provided Tax ID qualifies for any additional tax benefits or special tax applications, these will be automatically factored into the tax calculations at checkout.
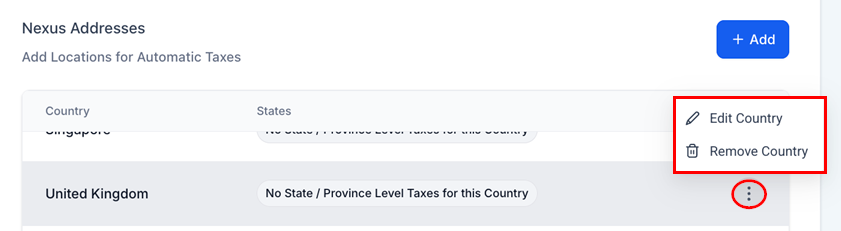
Click the three dots to edit the business Tax ID for a particular country or remove the country from your list completely.
By following these steps, you can efficiently manage taxes for your business and make sure you’re following the rules in your region. It’s like having a helpful tool that simplifies things and keeps your financial operations running smoothly.
Frequently Asked Questions
Q: How do I handle tax exemptions for specific customers using the CRM Tax Settings feature?
- A: For the CRM Tax Settings feature, create a tax with a 0% rate and apply it to the exempt customer’s invoice.
Q: Can I apply taxes to one-time purchases?
- A: By adding taxes to an invoice, you can apply taxes to one-time purchases using the CRM Tax Settings feature.
Q: Can I generate tax reports?
- A: This feature is not available, but you can export invoice data, including tax information, and use third-party tools or accounting software to generate tax reports.
Not a Funnelbud customer yet?
Try our all-in-one CRM for sales and marketing — free for 7 days, no commitment.