How to Customize Contact Detail Page
Contact Detail Page customization allows admins to control how contact records are displayed, making it easier for teams to access and manage information. By tailoring layouts for different roles, you can create a more focused and efficient workspace for users.
Why Customization Matters
Not every team works the same way, so a one-size-fits-all layout can slow things down. Customizing the Contact Detail Page helps ensure that each user sees only what they need.
Key advantages include:
- Role-based views: Create different layouts for different teams
- Better organization: Arrange fields and modules based on workflow priorities
- Less clutter: Hide unnecessary information
- Improved efficiency: Highlight frequently used tools
- Greater control: Manage access and prevent accidental actions
How to Customize the Contact Detail Page
A well-structured layout makes daily tasks faster and more intuitive. Here’s how to set it up:
Access the Customization Area
Navigate to the Contacts > Smart Lists Settings.
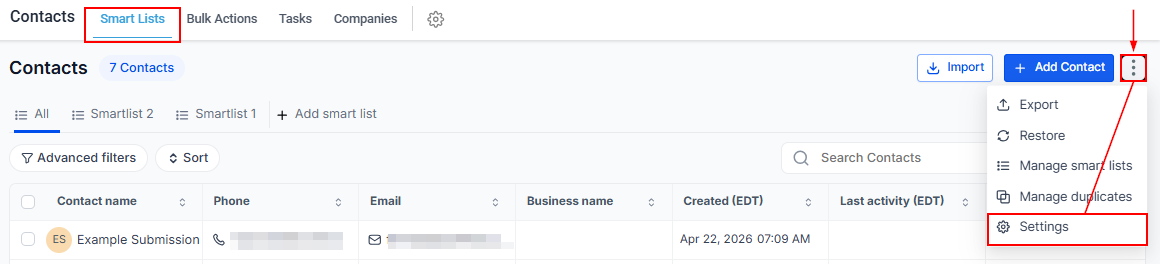
Open the option to customize the Contact Detail View.
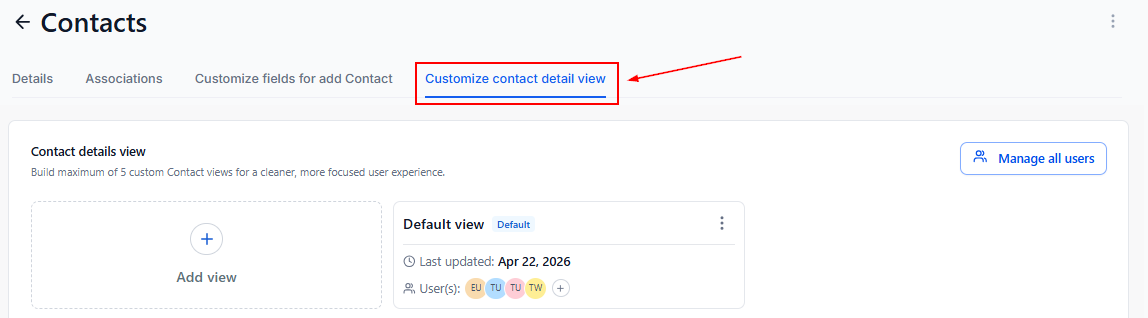
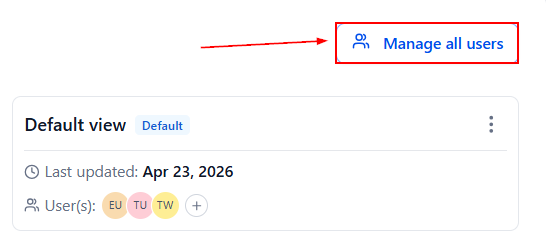
A default view is always available, which displays the date of the last update and the users assigned to it.

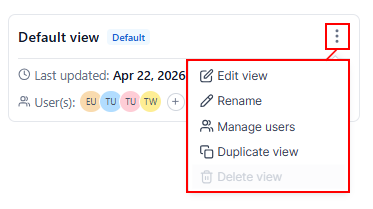
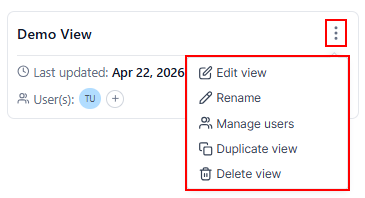
Clicking the three dots associated with the default view will allow you to edit or rename it, manage the users assigned to it, or duplicate it. Note that default views cannot be removed.
Create and Manage Views
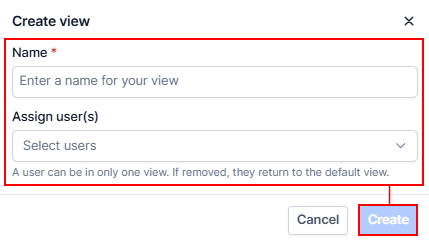
Click the “+ Add View” button to create a new view.

Enter a name for the view and assign users, then save your changes.
📌Note: Once a user is assigned to a view, they are automatically removed from any previously assigned view. If no view is assigned, the user will revert to the default view.
Like the default view, you can edit, rename, or duplicate views, as well as manage user assignments at any time. You also get the option to delete the view.
Customize the Layout
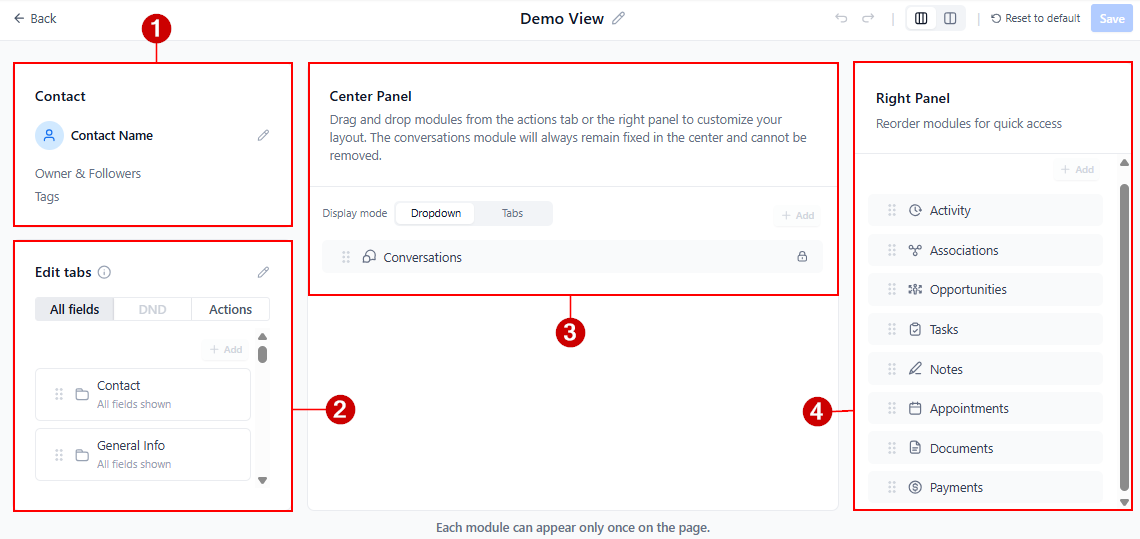
Clicking the Edit button allows you to customize the layout of the detail page:
- Contact Card: Keep essential details visible at the top, such as phone number, email, address, owner, and tags. You can reorder or hide items, but only the primary phone and email fields are displayed. You can also disable the delete option to protect contact data.
- Left Panel: Use this section to organize fields and folders. Rearrange items, rename folders, and hide anything that isn’t relevant. Hidden fields can be added back later if needed.
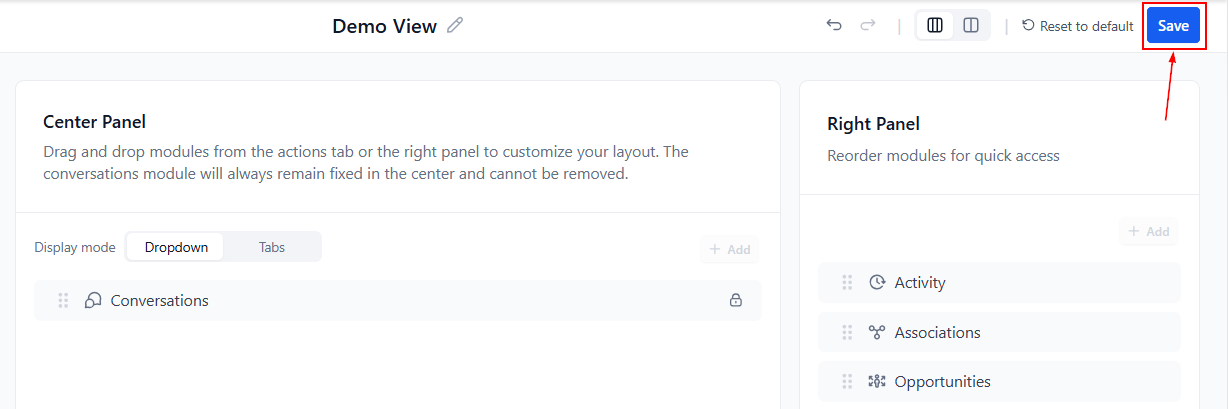
- Center Panel: This is the main workspace. You can drag and drop modules here for better visibility. Choose between a tabbed layout or a dropdown style depending on how much information you want displayed at once.
- Right Panel: Use this area for secondary modules and reorder them based on importance.
📌Note: The Conversations module is fixed in the center panel and cannot be moved.
Dynamic Tab
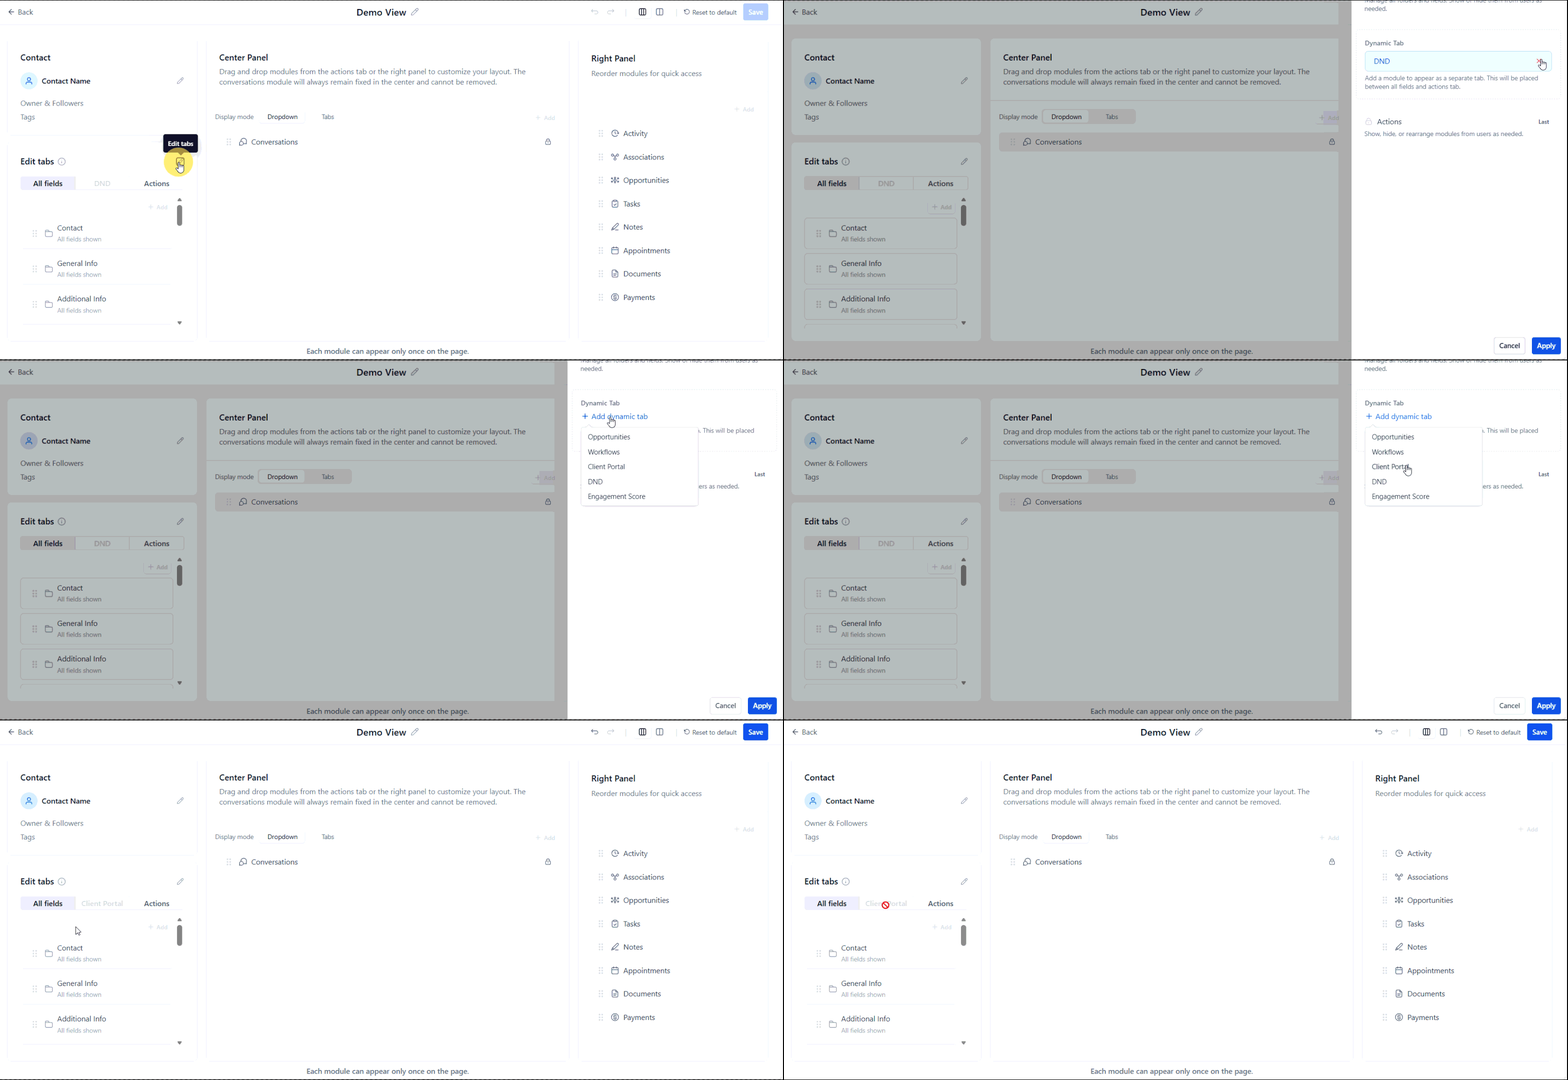
The Dynamic Tab allows you to highlight a high-priority module for quick access. When added, the module moves from its original location into this dedicated tab.
Panel Layout Options
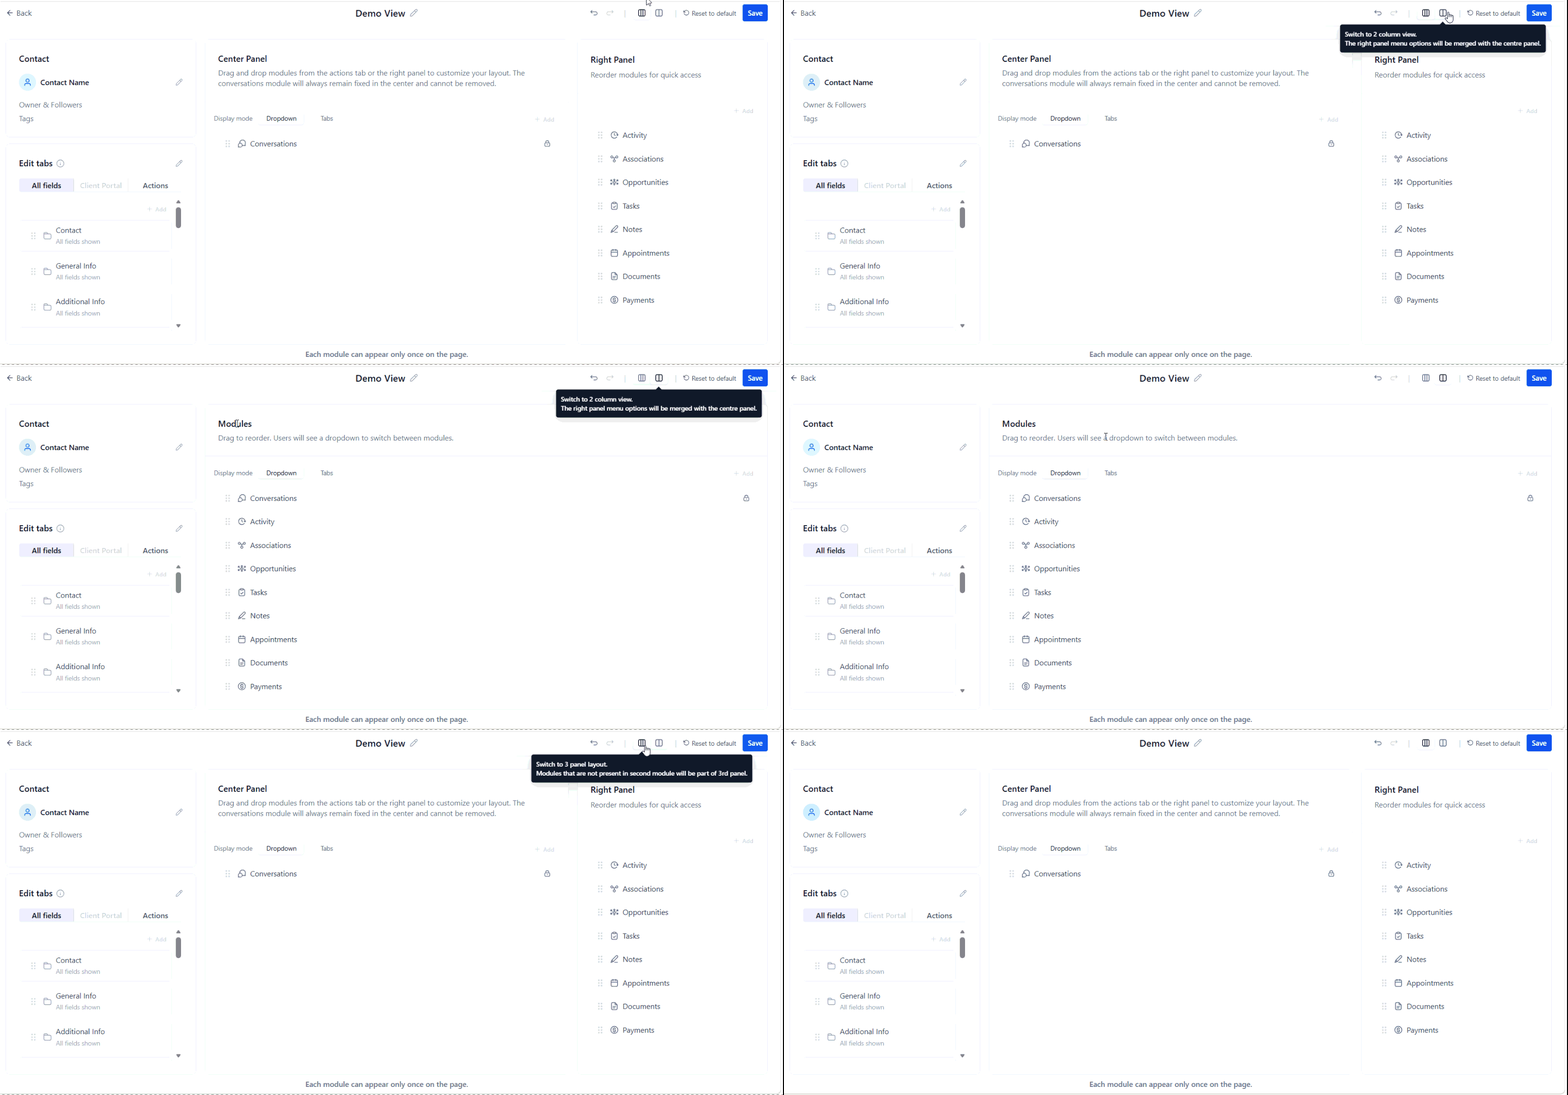
- Three-panel view: Displays all sections (default)
- Two-panel view: Merges the right panel into the center for a more compact layout
Switching between layouts is flexible, and previous arrangements are preserved.
Review and Save
Preview the layout to ensure everything is in the right place, then save your changes.
Understanding Views and Access
Once you have created and customized up to 5 views in your account, you can view and manage the users that are assigned to each view by clicking the “Manage all users” button.
Here, admins can easily review which users are assigned to each view and update assignments as needed, noting that each user can be added to only one view at a time.
Customizing the Contact Detail Page helps teams work smarter by putting the right information in the right place. With clear layouts and role-based views, users can focus on what matters most and complete tasks more efficiently.
Best Practices
To get the most out of customization:
- Create separate views for different teams
- Keep high-priority modules in the center panel
- Hide unused fields to reduce clutter
- Use the Dynamic Tab for frequently accessed tools
- Disable delete options if data protection is important
Frequently Asked Questions
Q: Who can manage views?
- Only admins have permission to create and edit views.
Q: How many views can be created?
- Up to five views per account.
Can users have different views?
- Yes, each user can be assigned a specific view.
Can the Conversations module be moved?
- No, it always remains in the center panel.
Can hidden items be restored?
- Yes, both fields and modules can be added back at any time.
Not a Funnelbud customer yet?
Try our all-in-one CRM for sales and marketing — free for 7 days, no commitment.