How to Make Outbound Calls Using an Existing Phone Number
Instead of purchasing a new phone number before making calls, you can use a phone number you already own as your caller ID. This allows you to start making calls quickly while keeping a familiar number for your contacts. This guide will teach you how to verify your existing phone number, make your first outbound call, and manage your verified caller ID settings.
How It Works
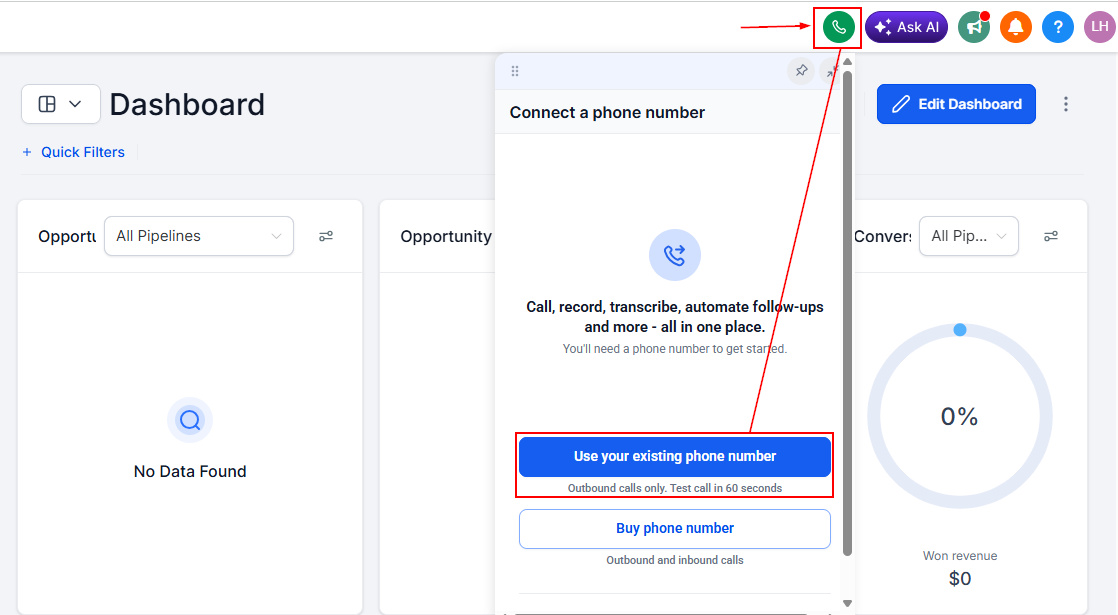
When you open the dialer without purchasing a phone number, you’ll see an option to use an existing phone number.
Choose “Use Your Existing Phone Number”
Open the dialer and select Use your existing phone number.
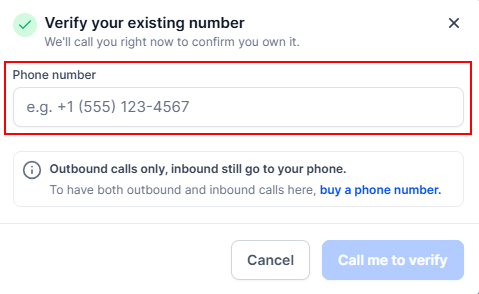
Enter Your Phone Number
Enter the phone number you want to use as the caller ID for outbound calls.
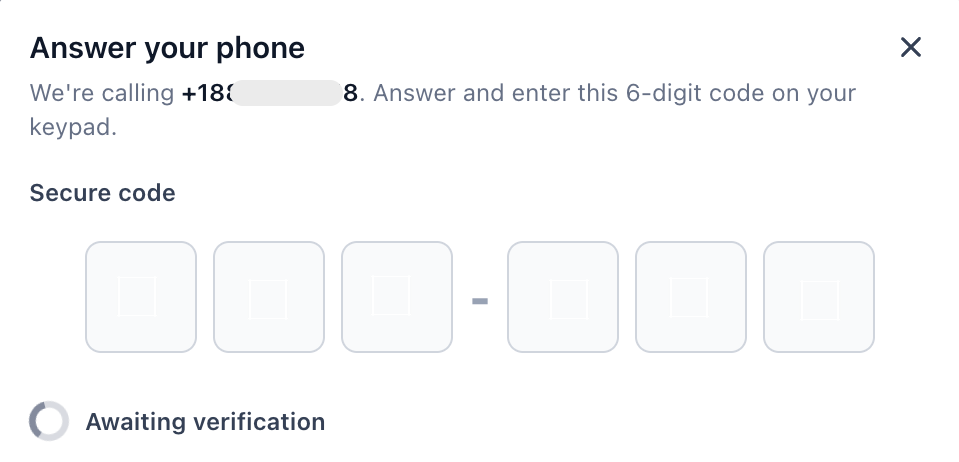
Verify Your Number
You’ll receive an automated call on the number you entered. Answer the call and enter the 6-digit verification code to confirm that you own the number.
Once verified, your number will be connected and ready to use.
Make Your First Call
After verification, you can place a test call to your own number right away to confirm everything is working properly.
To start calling other contacts, you’ll need to complete a one-time identity verification process.
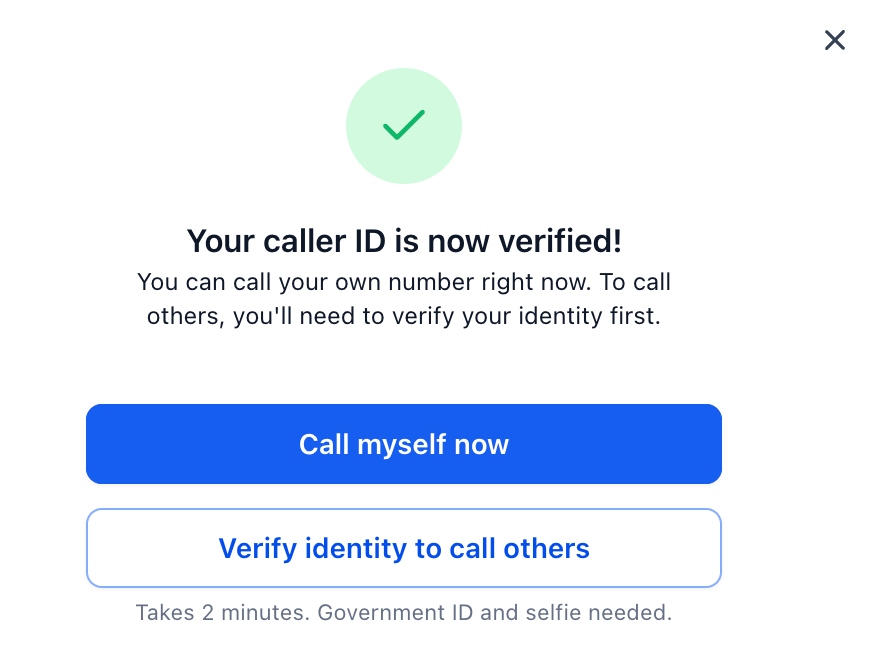
Complete Identity Verification
Before making outbound calls to contacts, you’ll be asked to complete an ID check using:
- A government-issued ID
- A selfie for verification
This security step helps confirm account ownership and allows outbound calling to contacts.
Managing Your Verified Caller ID
To manage your verified phone number settings:
Go to your account settings and select Phone System. Next, open Phone Numbers and click Verified Caller ID.
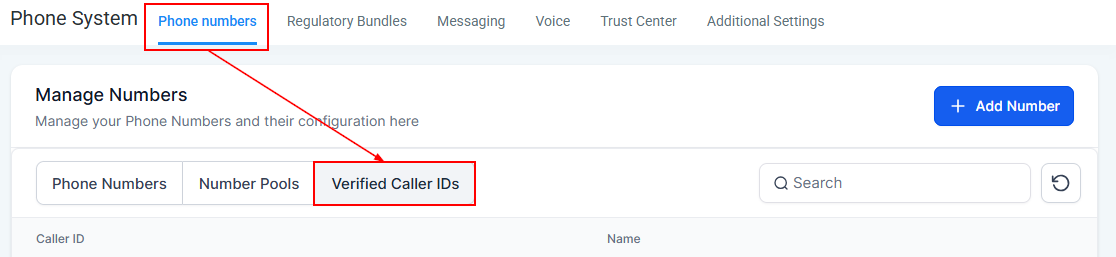
From the three-dot menu, you can also enable call recording for your verified number.
Using an existing phone number for outbound calls makes it much faster and easier to get started with voice calling. With a quick verification process and no need to purchase a new number upfront, you can begin making calls in minutes while continuing to use a number you already know and trust.
✍Important Notes
- Outbound call pricing is the same as regular outbound calling
- Incoming calls will ring on your existing phone number
- You can continue using your phone number outside the platform as usual
- You can purchase a dedicated business phone number at any time
- Identity verification only needs to be completed once per account
Not a Funnelbud customer yet?
Try our all-in-one CRM for sales and marketing — free for 7 days, no commitment.