How to Integrate WhatsApp
Connecting WhatsApp to your account allows you to manage customer conversations from a single platform while maintaining a professional communication channel for your business. Depending on your current setup, you can either connect an existing WhatsApp Business App, create a brand-new WhatsApp Business account, or migrate from another WhatsApp Business Solution Provider (BSP).
This guide walks you through each option step-by-step so you can choose the setup method that best fits your business needs.
Before You Begin
When setting up WhatsApp, you’ll need to choose one of the following connection methods:
- Connect an Existing WhatsApp Business App: Choose this option if you already use the WhatsApp Business App and want to continue using it while also managing conversations within the platform.
📌_Note_: The coexistence feature for connecting an existing WhatsApp Business App is currently unavailable for phone numbers from Nigeria and South Africa. - Create a New WhatsApp Business Account: Choose this option if you want to set up a new WhatsApp Business number from scratch.
- Migrate from an Existing Business Solution Provider (BSP): Choose this option if your WhatsApp Business account is currently managed through another provider and you want to move it to the platform.
Option 1: Connect an Existing WhatsApp Business App
This method allows you to keep using your current WhatsApp Business App while syncing conversations and contacts to your account.
Open WhatsApp Settings
Start by navigating to the WhatsApp Settings in your account and clicking “Connect your WhatsApp”.
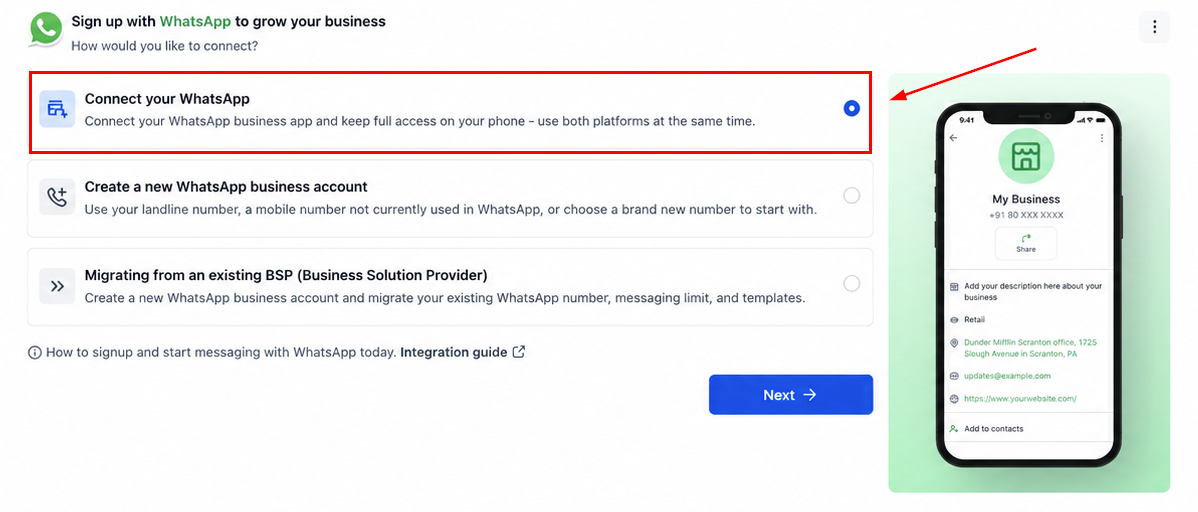
Start the Signup Process
Follow the prompts displayed on-screen to begin the WhatsApp connection process.
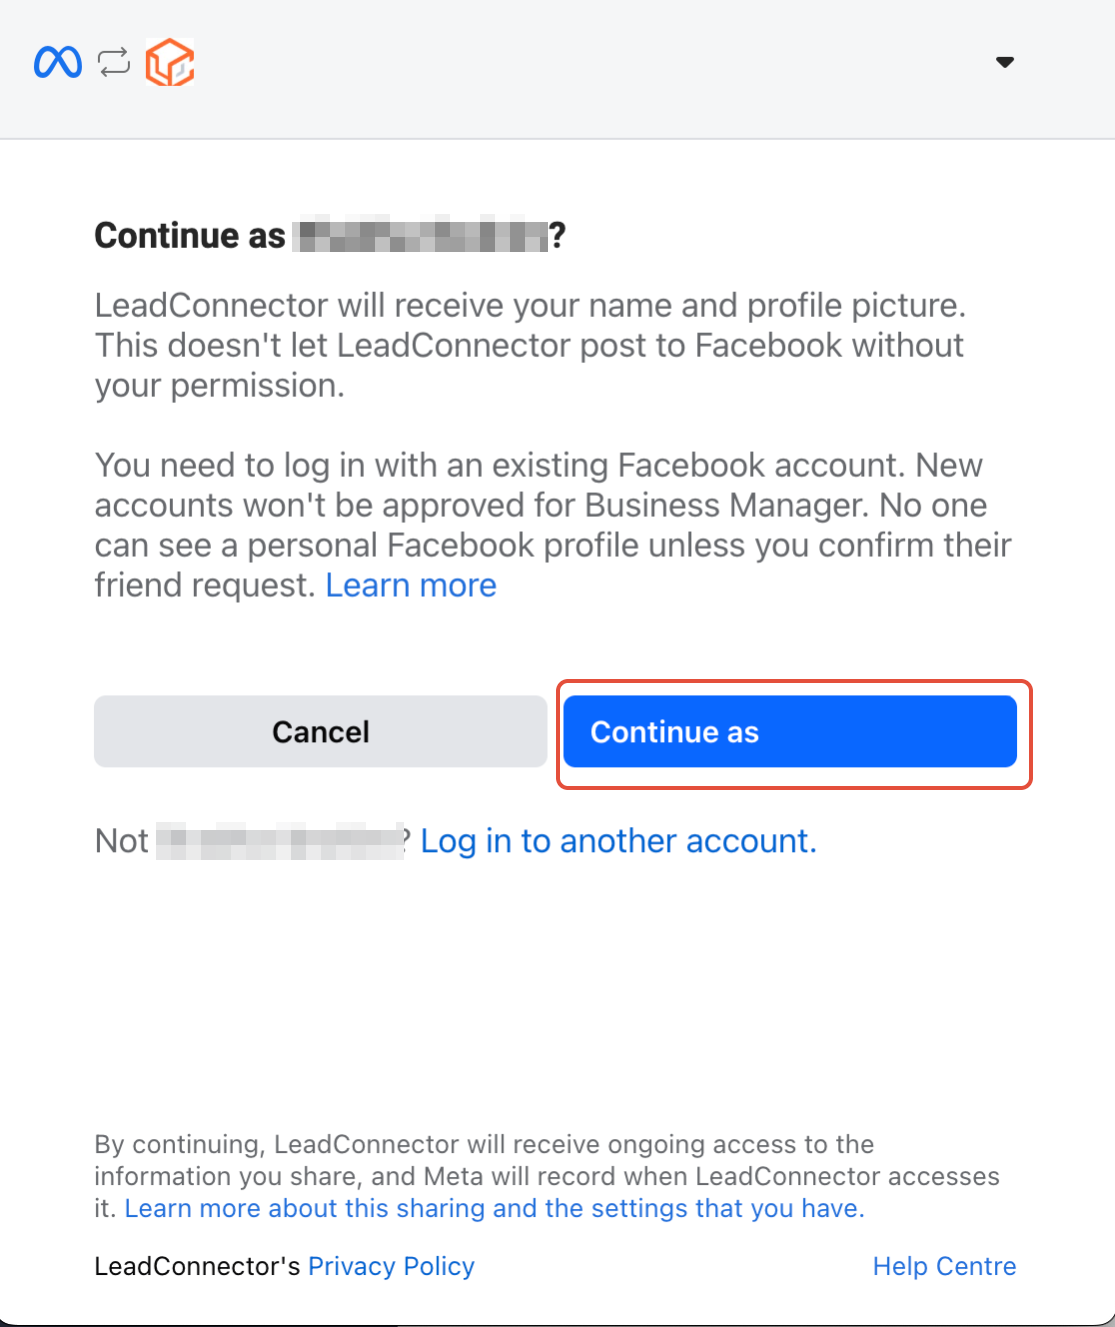
Authorize the Connection
Click Continue to proceed with the setup and grant the required permissions.
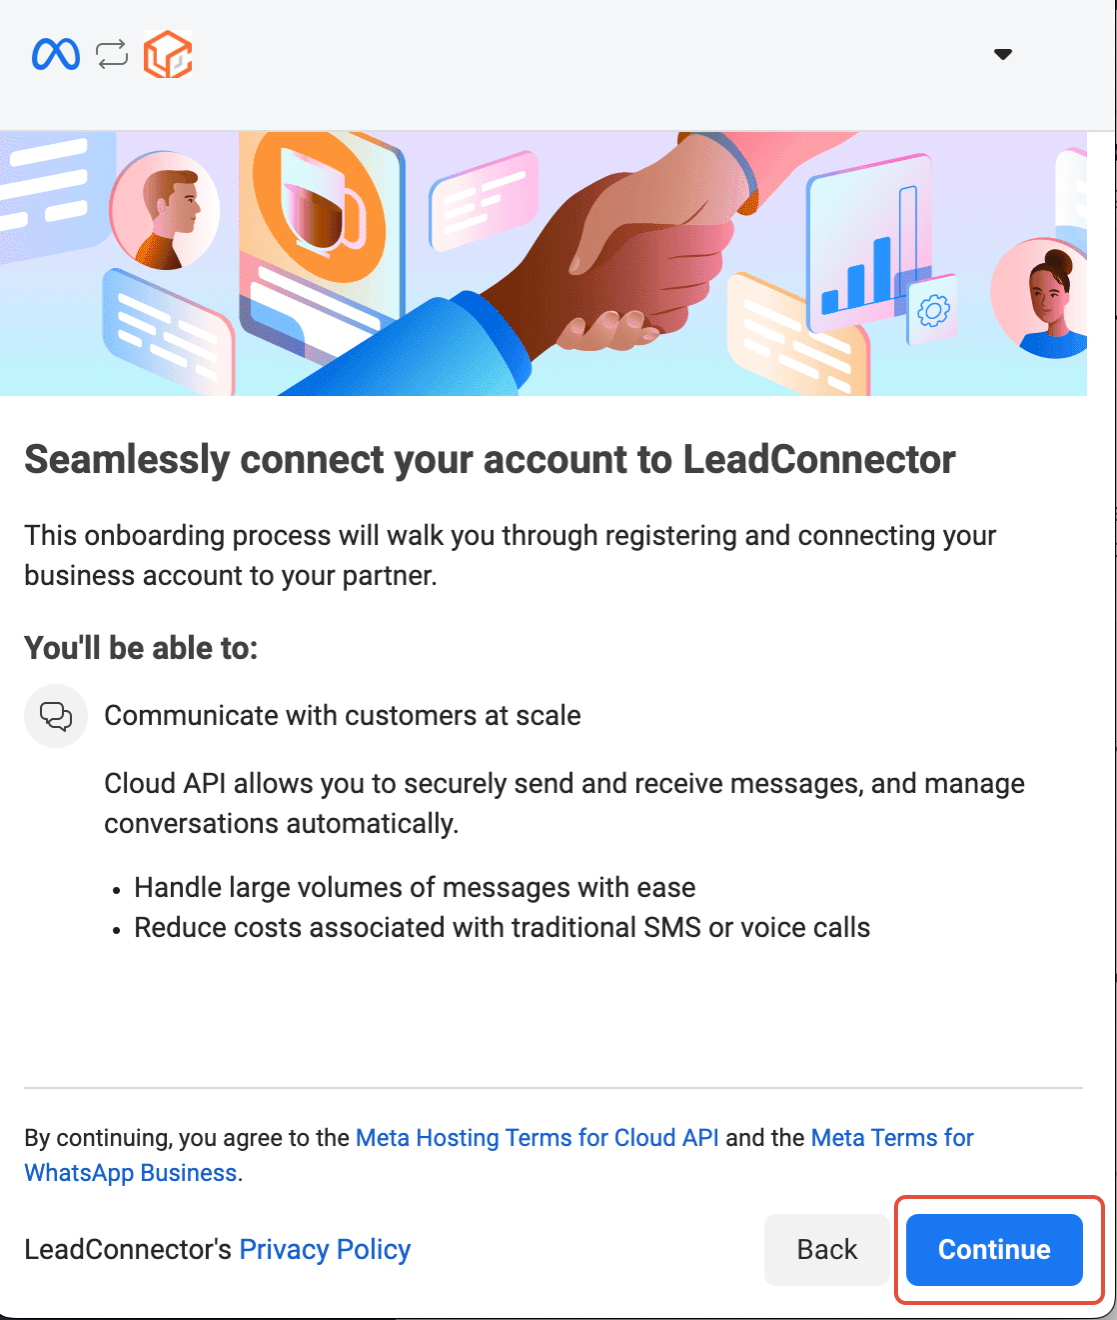
Select WhatsApp Business App
Choose Connect a WhatsApp Business App and click Next.
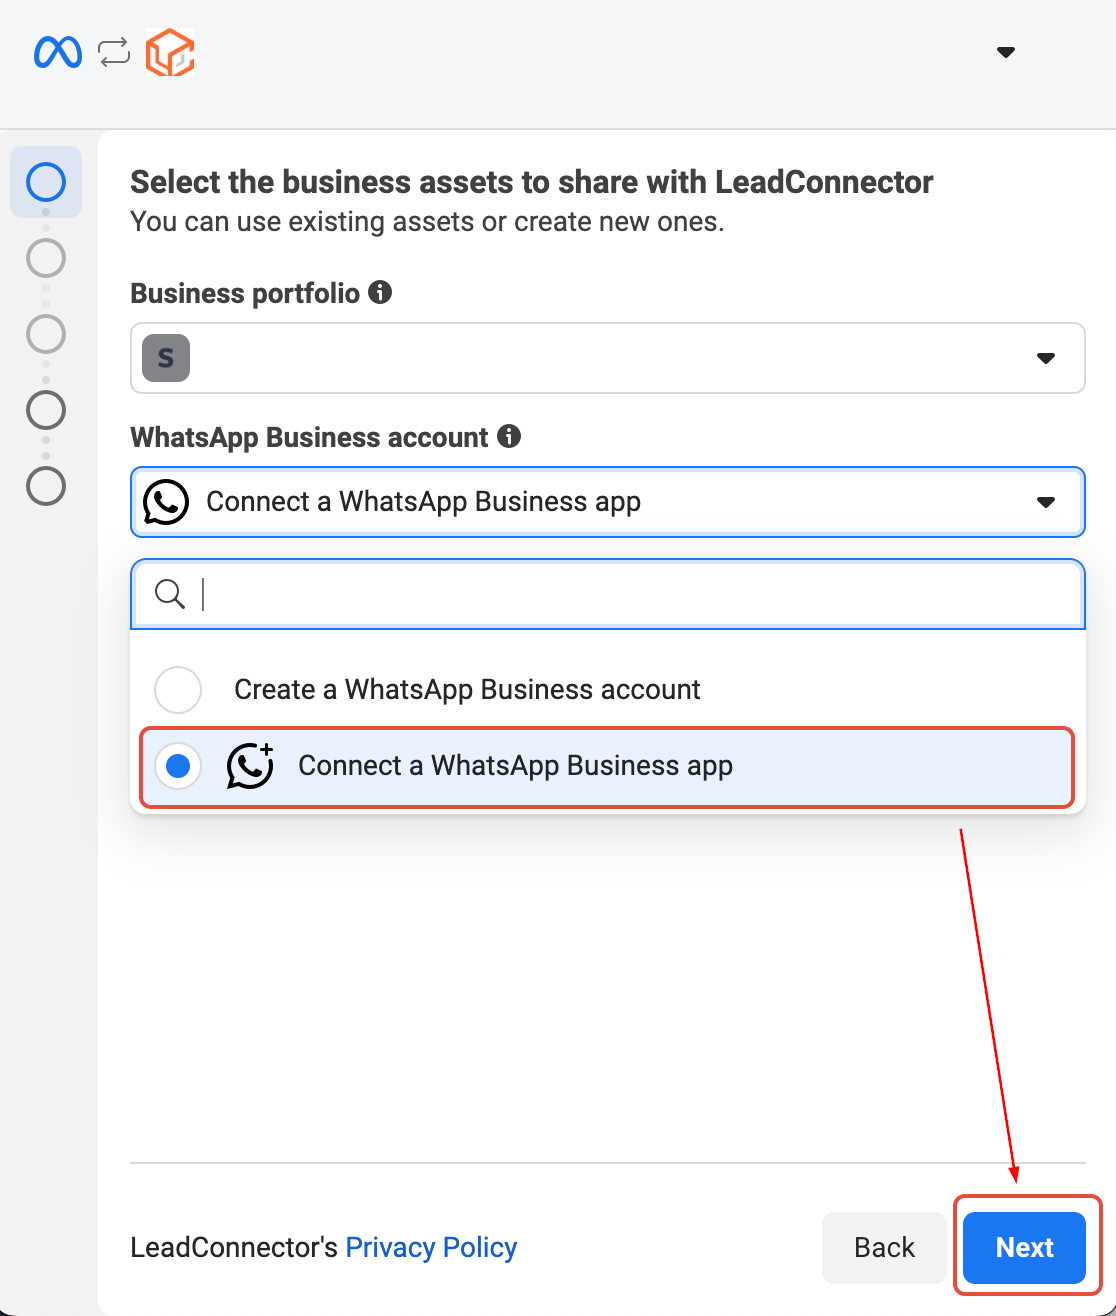
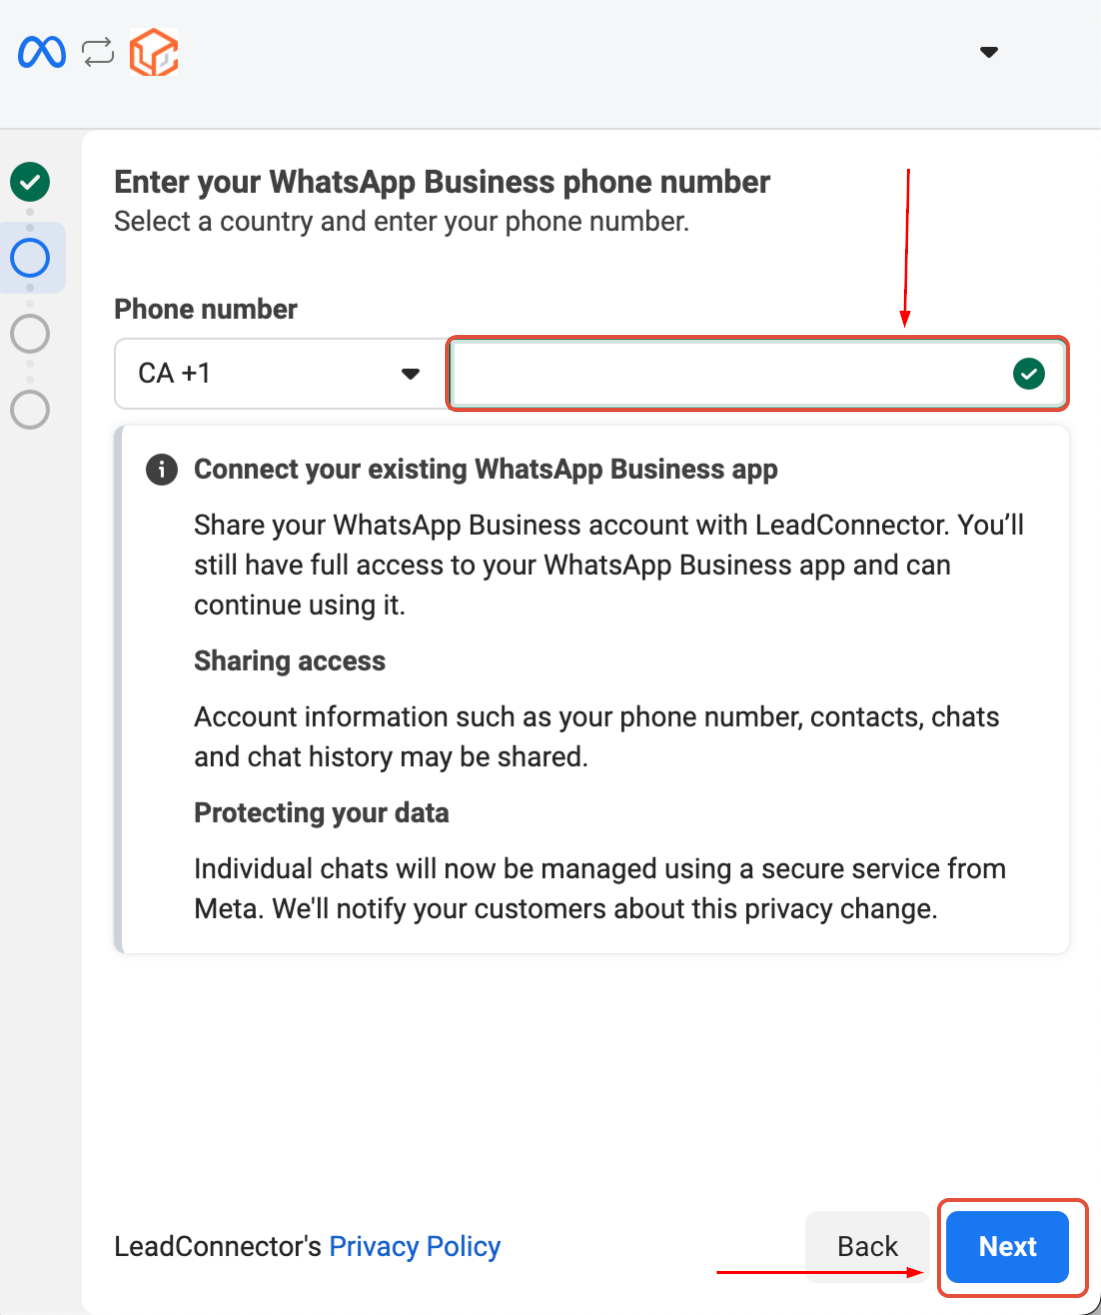
Enter Your Phone Number
Provide the phone number currently associated with your WhatsApp Business App and click Next.
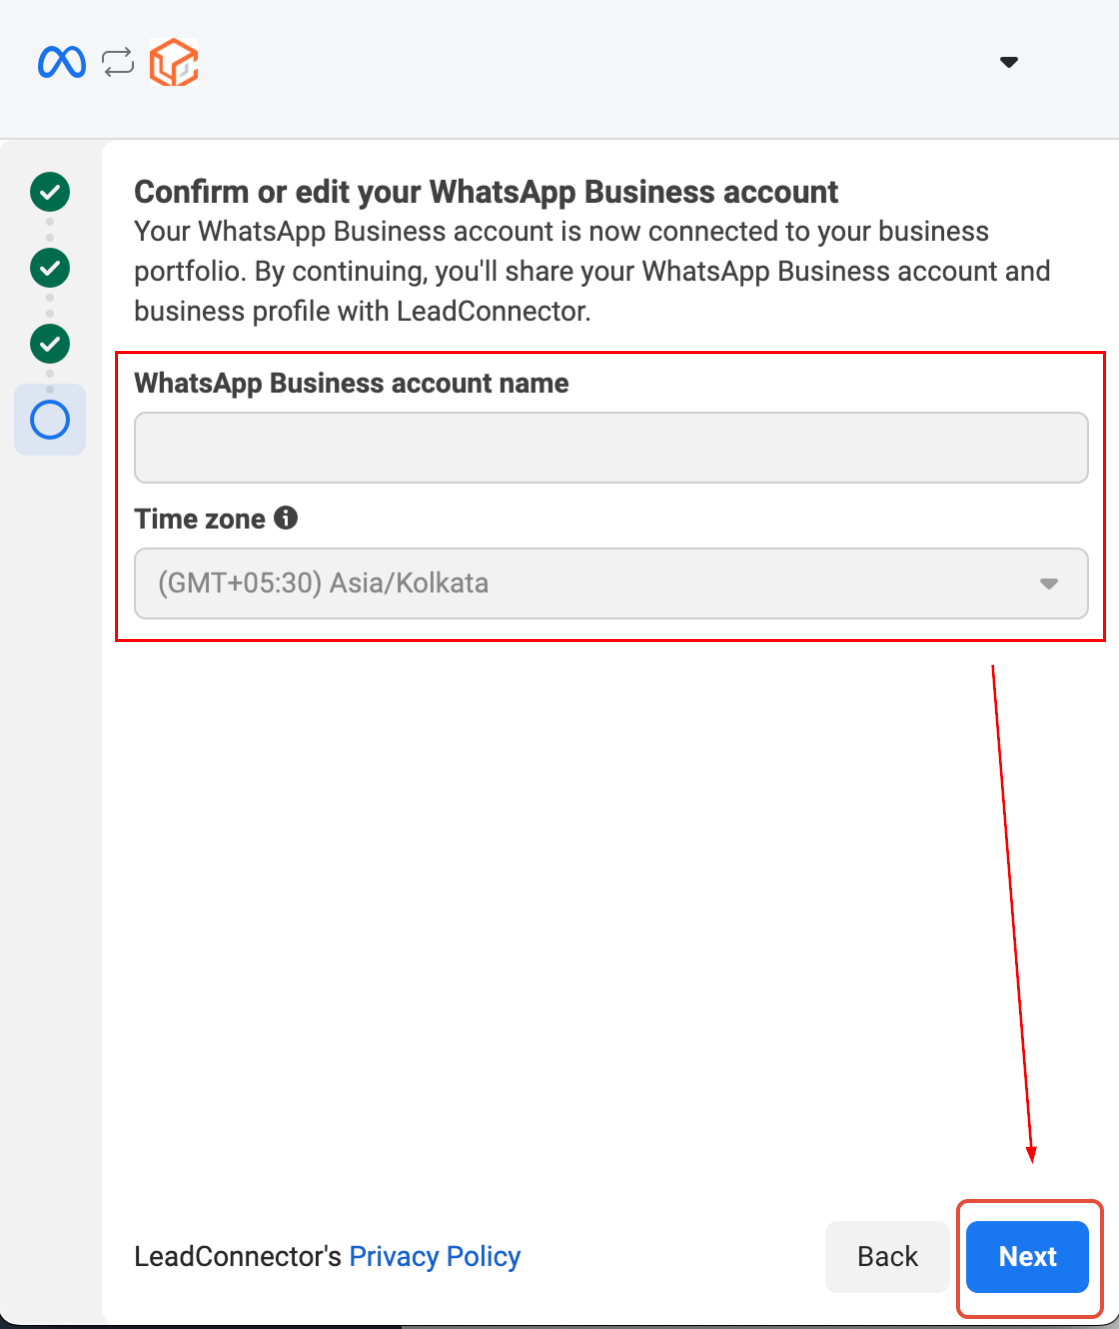
Verify Your Business Information
Review the WhatsApp Business Account details that appear on screen. Confirm that the business name is correct, verify the phone number, and update any incorrect information if necessary.
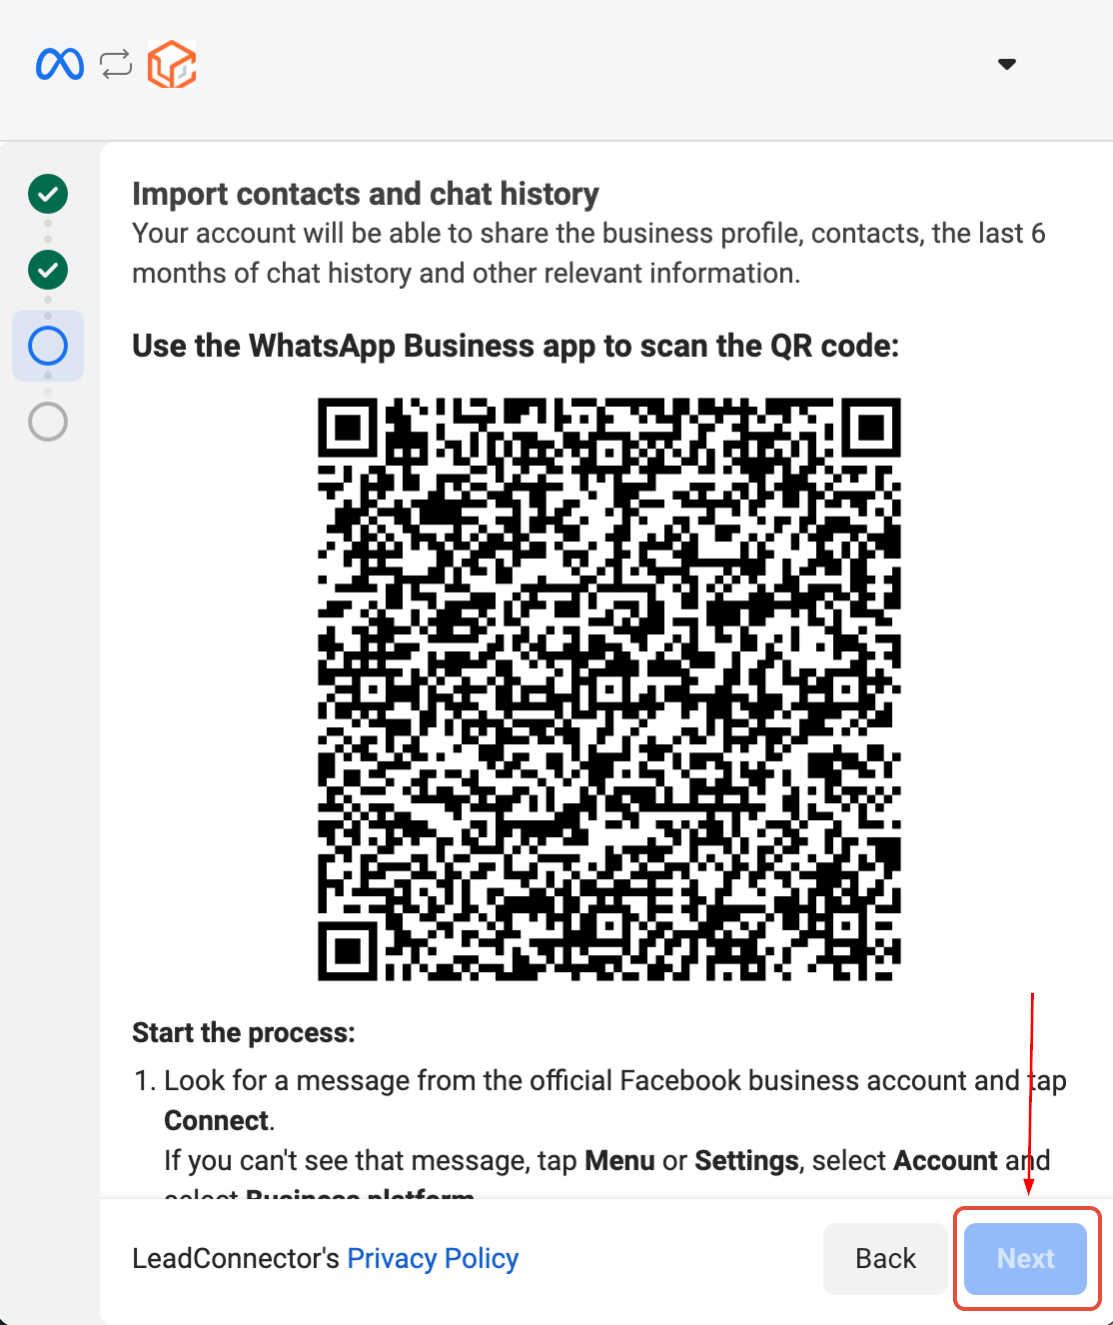
Import Contacts and Chat History
You will have the option to import existing contacts and up to six months of chat history. Before proceeding, update your WhatsApp Business App to the latest version, and watch for a message from the official Facebook Business account. Scan the QR code when prompted.
This step helps preserve your existing conversations and customer data.
Once connected, you can continue using the WhatsApp Business App while also managing conversations through the platform.
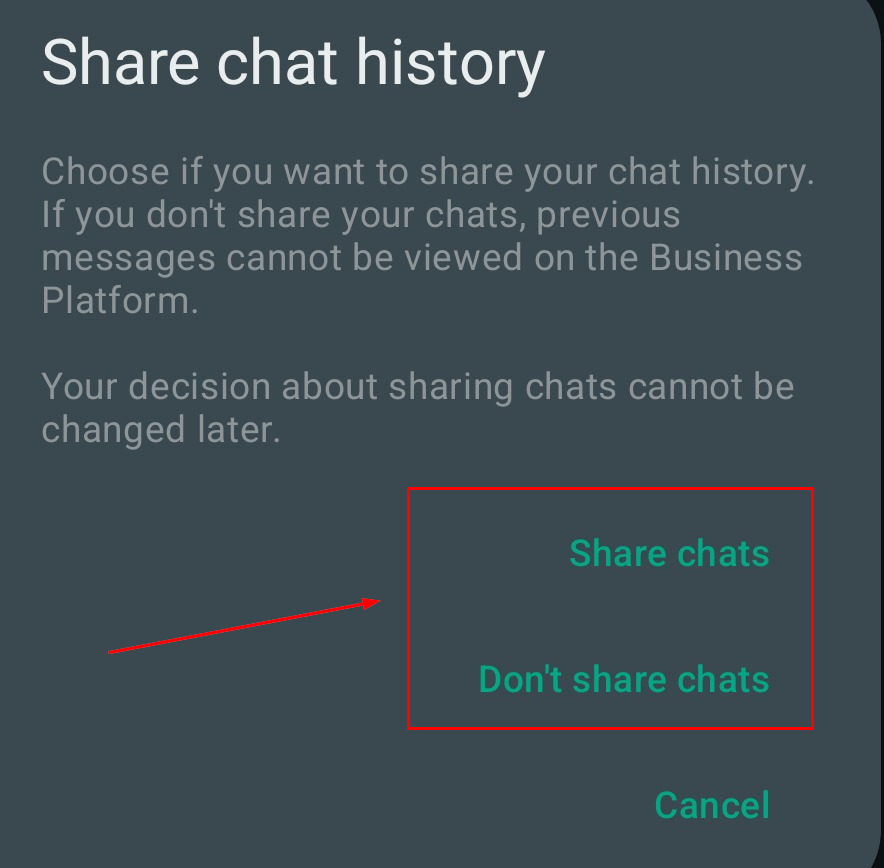
Sync Contacts and Conversations
Choose whether to sync your chats. If you opt to share chats, your contacts and conversation history will be securely synchronized. Depending on the amount of data being imported, this process may take a few minutes.
Review and Confirm
Carefully review all setup information before proceeding. Click Confirm when everything looks correct, then click Finish to finalize the integration.
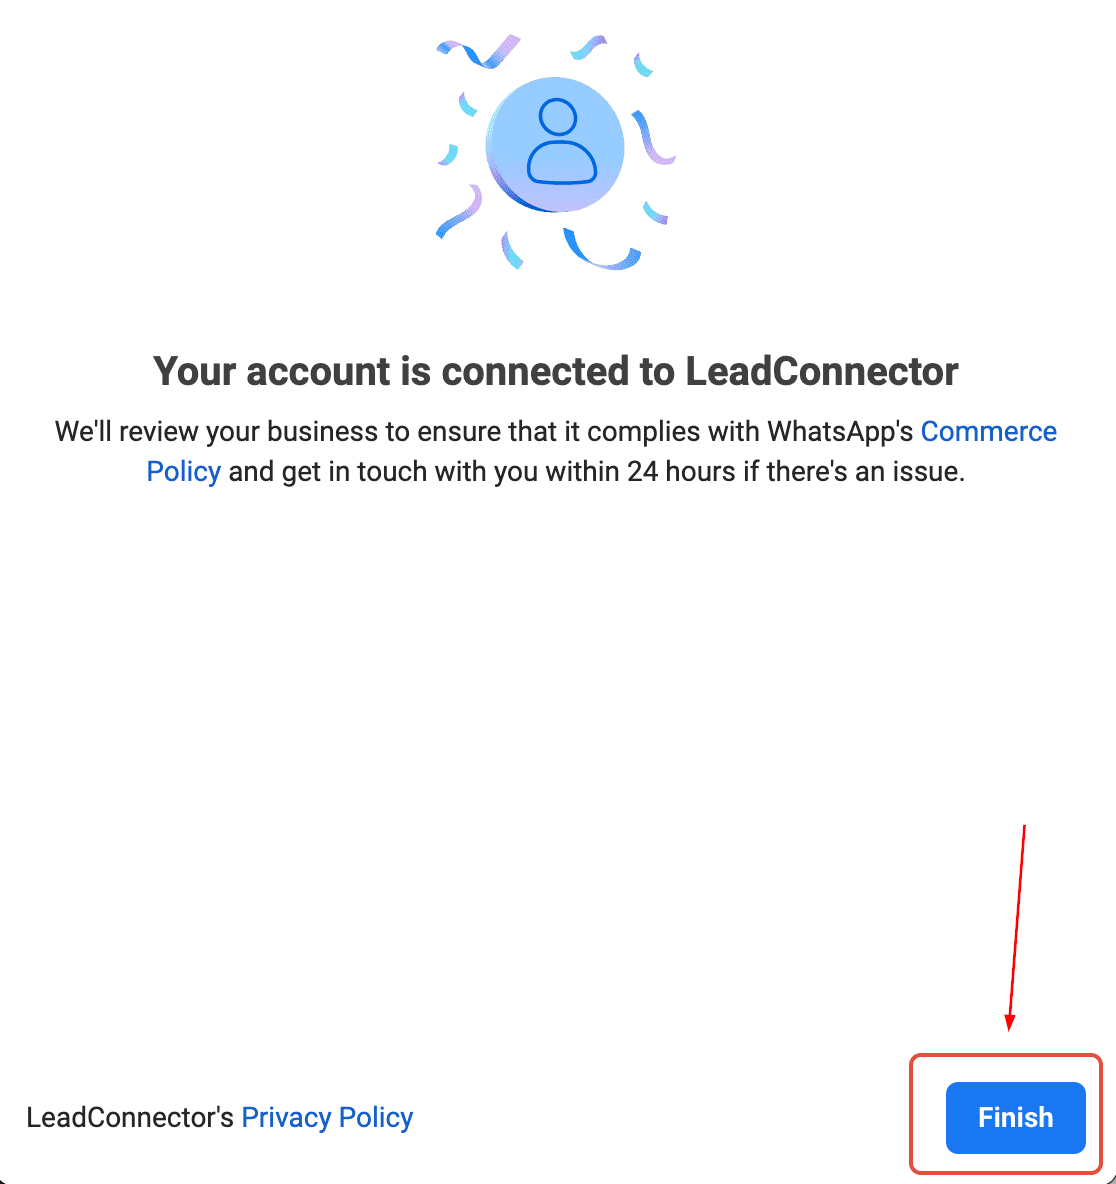
Your WhatsApp Business App is now connected and ready to use.
Create a New WhatsApp Business Account
If you do not already have a WhatsApp Business number, you can create a new account during setup.
Begin Setup
Start by navigating to the WhatsApp Settings in your account and clicking “Create a New WhatsApp Business Account”.
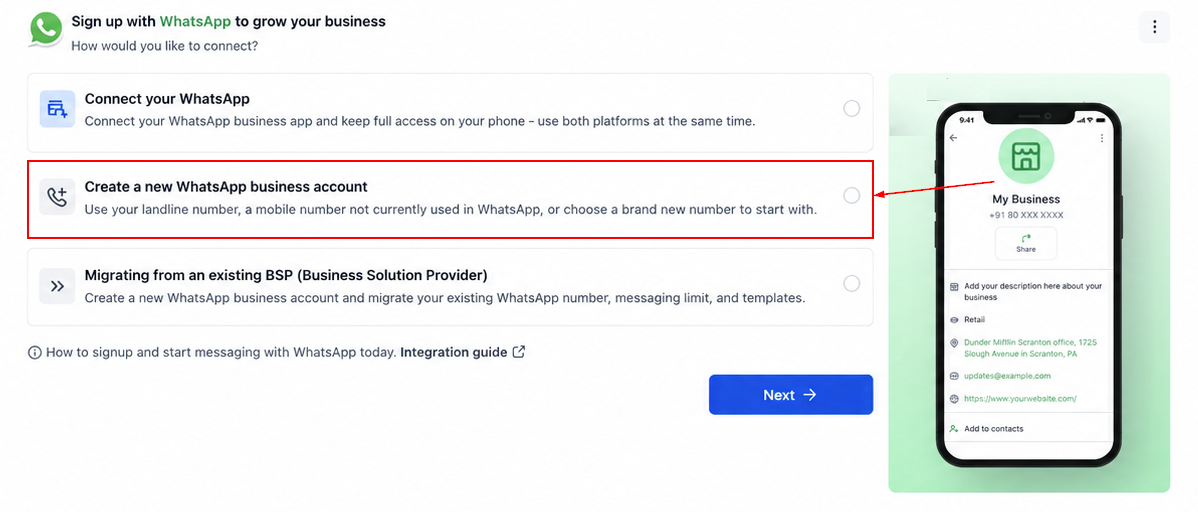
Sign in with Facebook
Select Continue with Facebook and log in using the Facebook account associated with your business.
Start the Registration Process
Click Continue to begin creating your new WhatsApp Business account.
Enter Business Information
Complete all required business details, including:
- Business name
- Business category
- Other requested company information
Once finished, select “Create WhatsApp Business Account” and click Next.
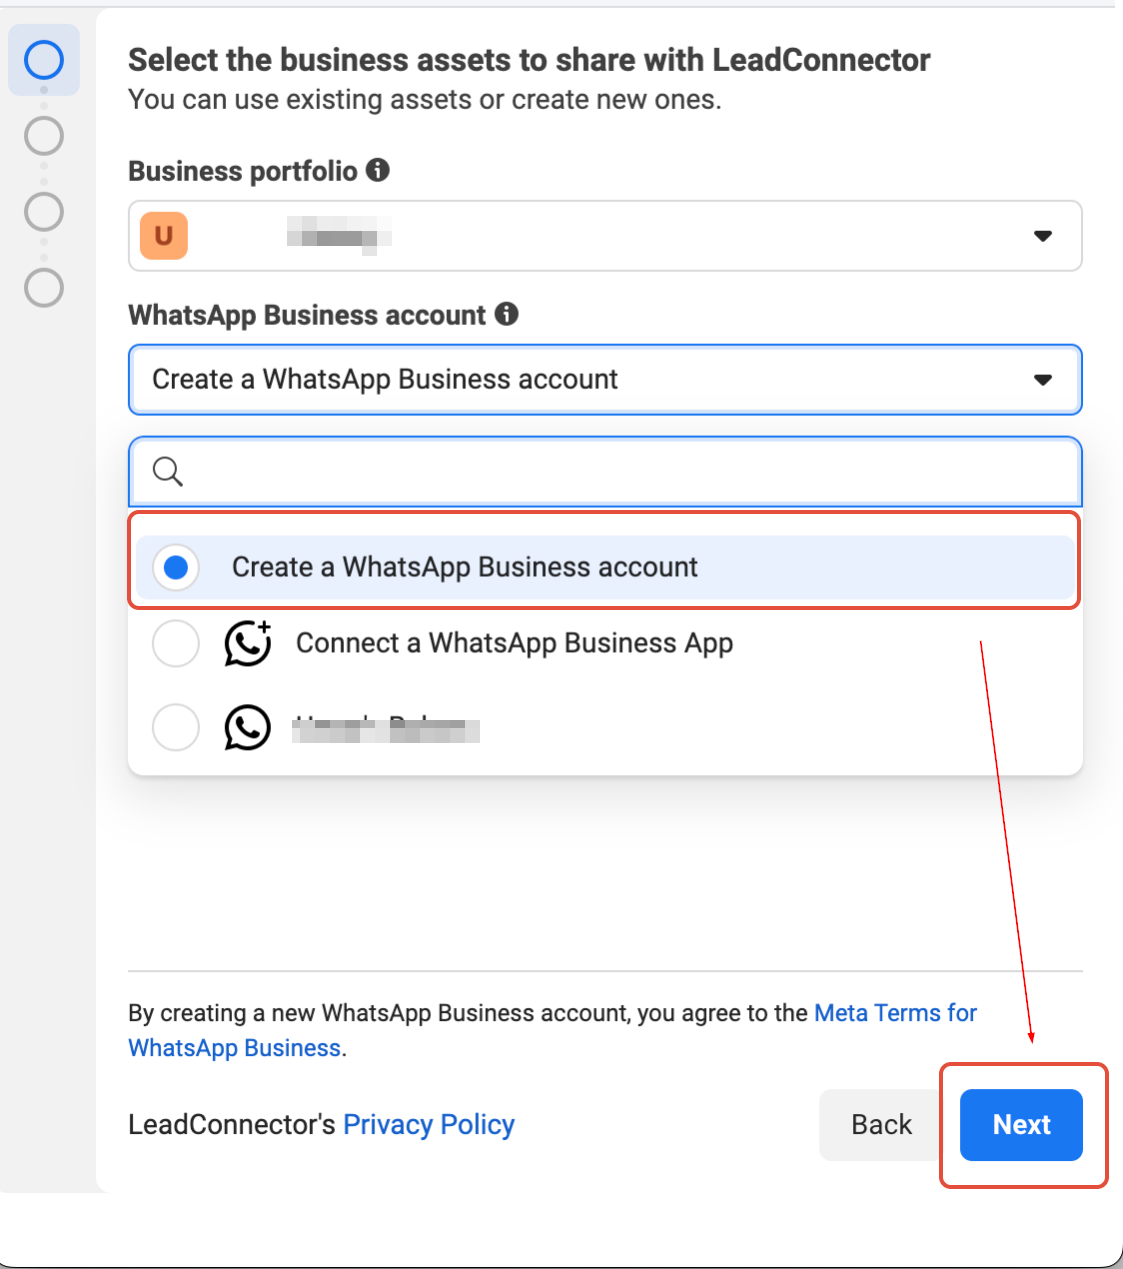
Add Your Phone Number
Enter the phone number you want to use for WhatsApp. Make sure the number is active, can receive SMS messages or phone calls, and is available during verification.
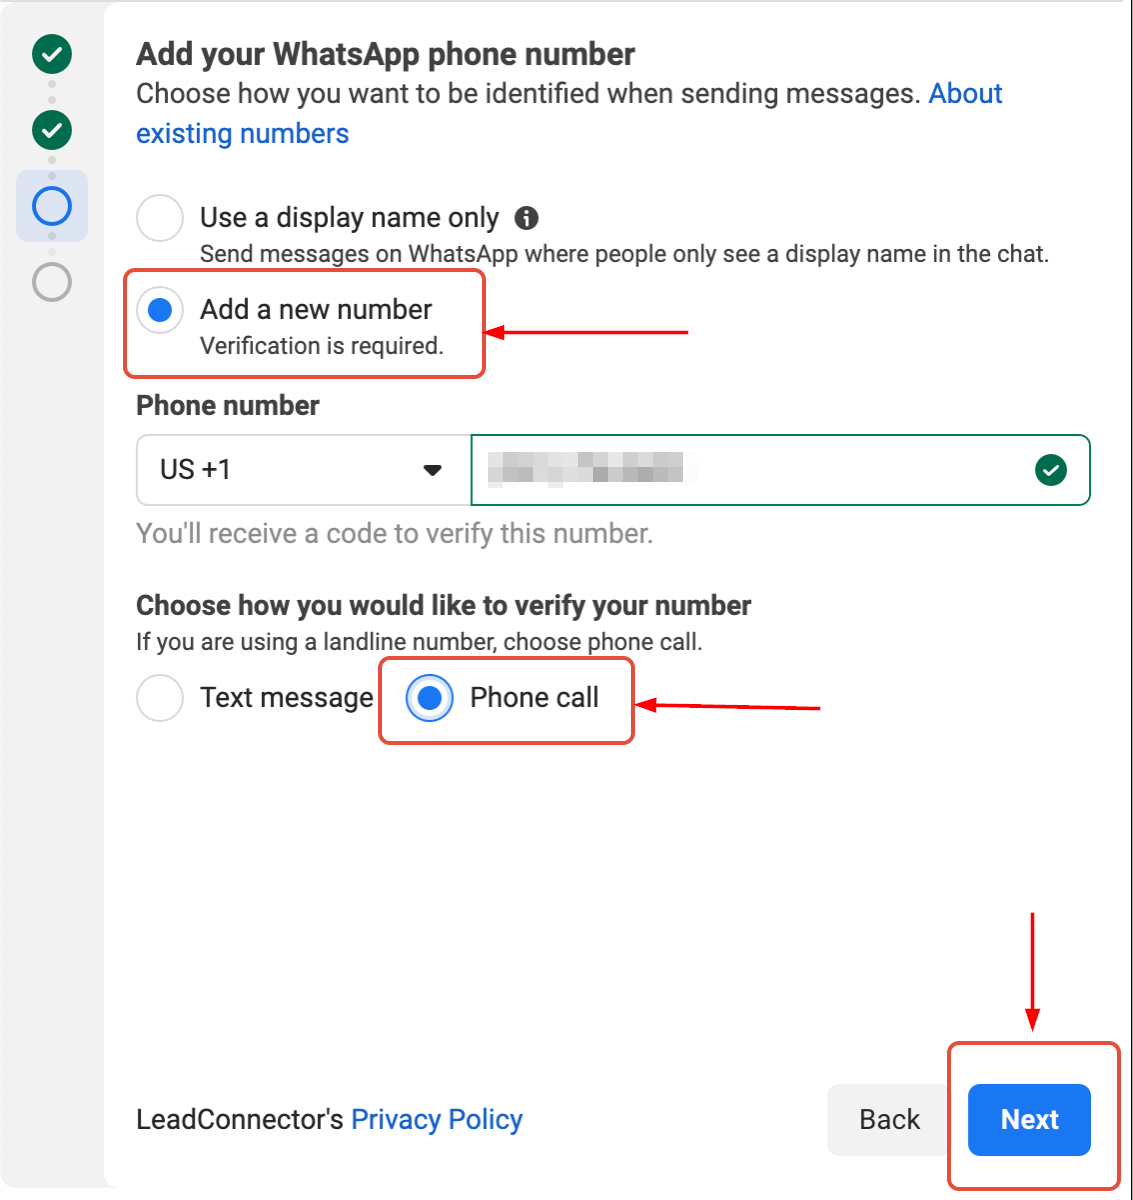
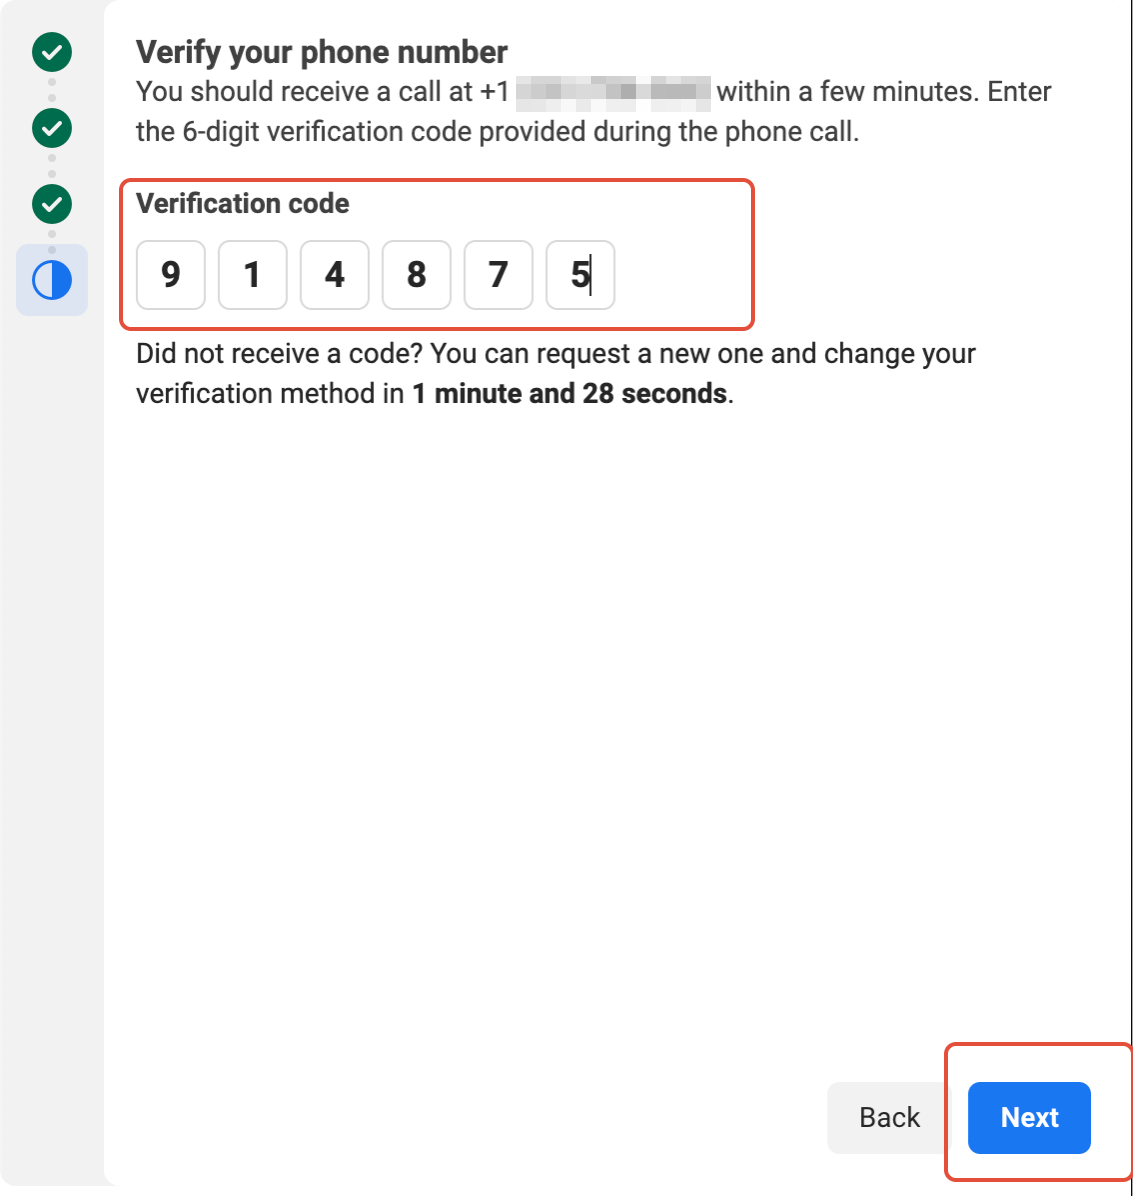
Verify Your Number
Choose your preferred verification method, then enter the one-time password (OTP) you receive.
Click Next.
Review Your Information
Carefully verify all details before finalizing the setup. Click Confirm to continue.
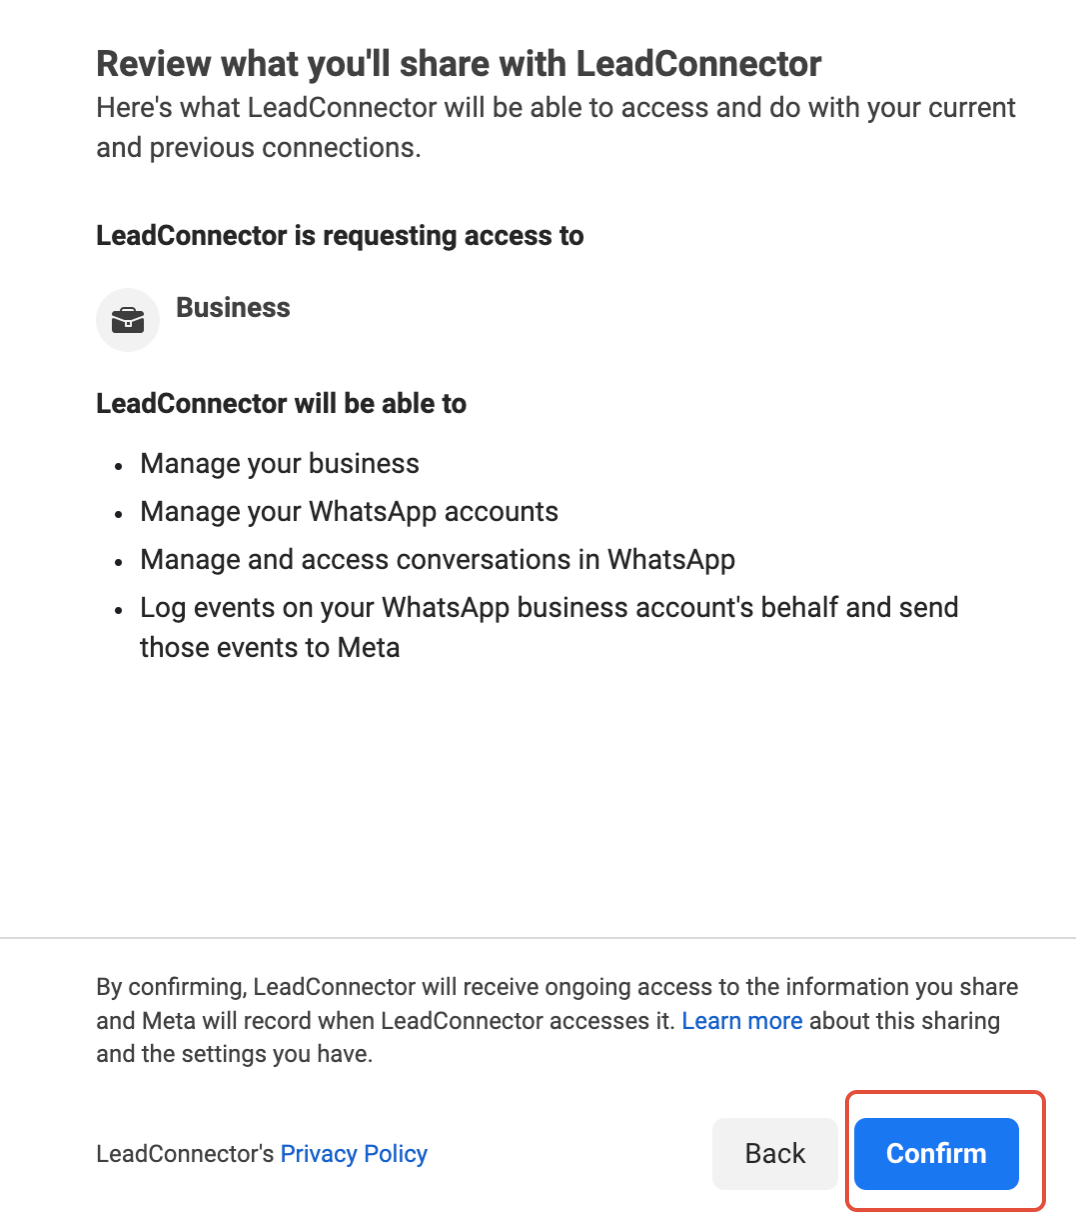
Once confirmation is successful, your new WhatsApp Business account will be connected and ready for messaging.
Option 3: Migrate from an Existing BSP
If your WhatsApp Business account is currently managed by another Business Solution Provider, you can transfer it without creating a new number.
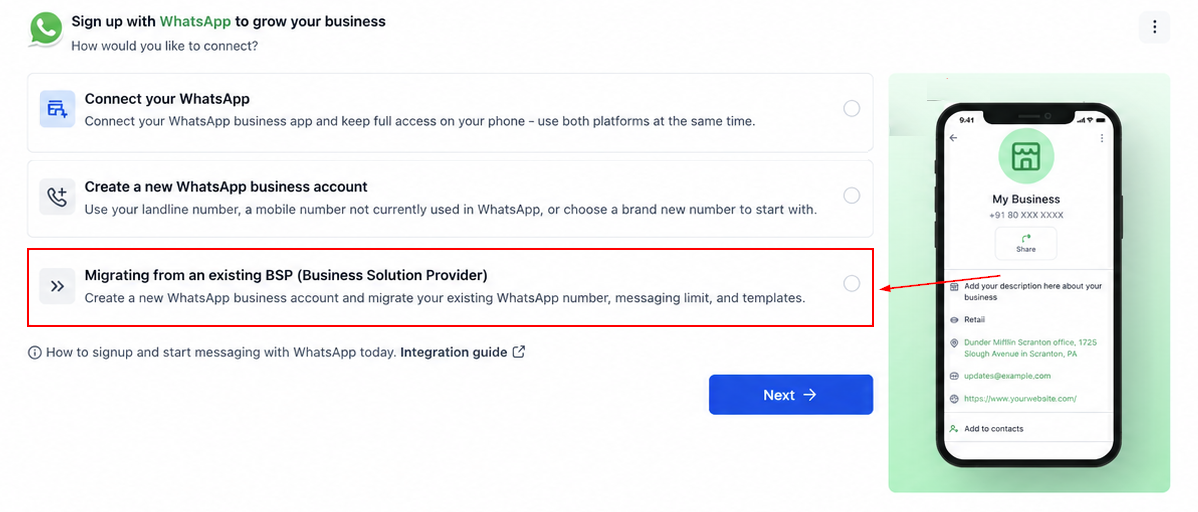
Start the Migration
Start by navigating to the WhatsApp Settings in your account and clicking “Migrating from an Existing BSP”.
Begin the Process
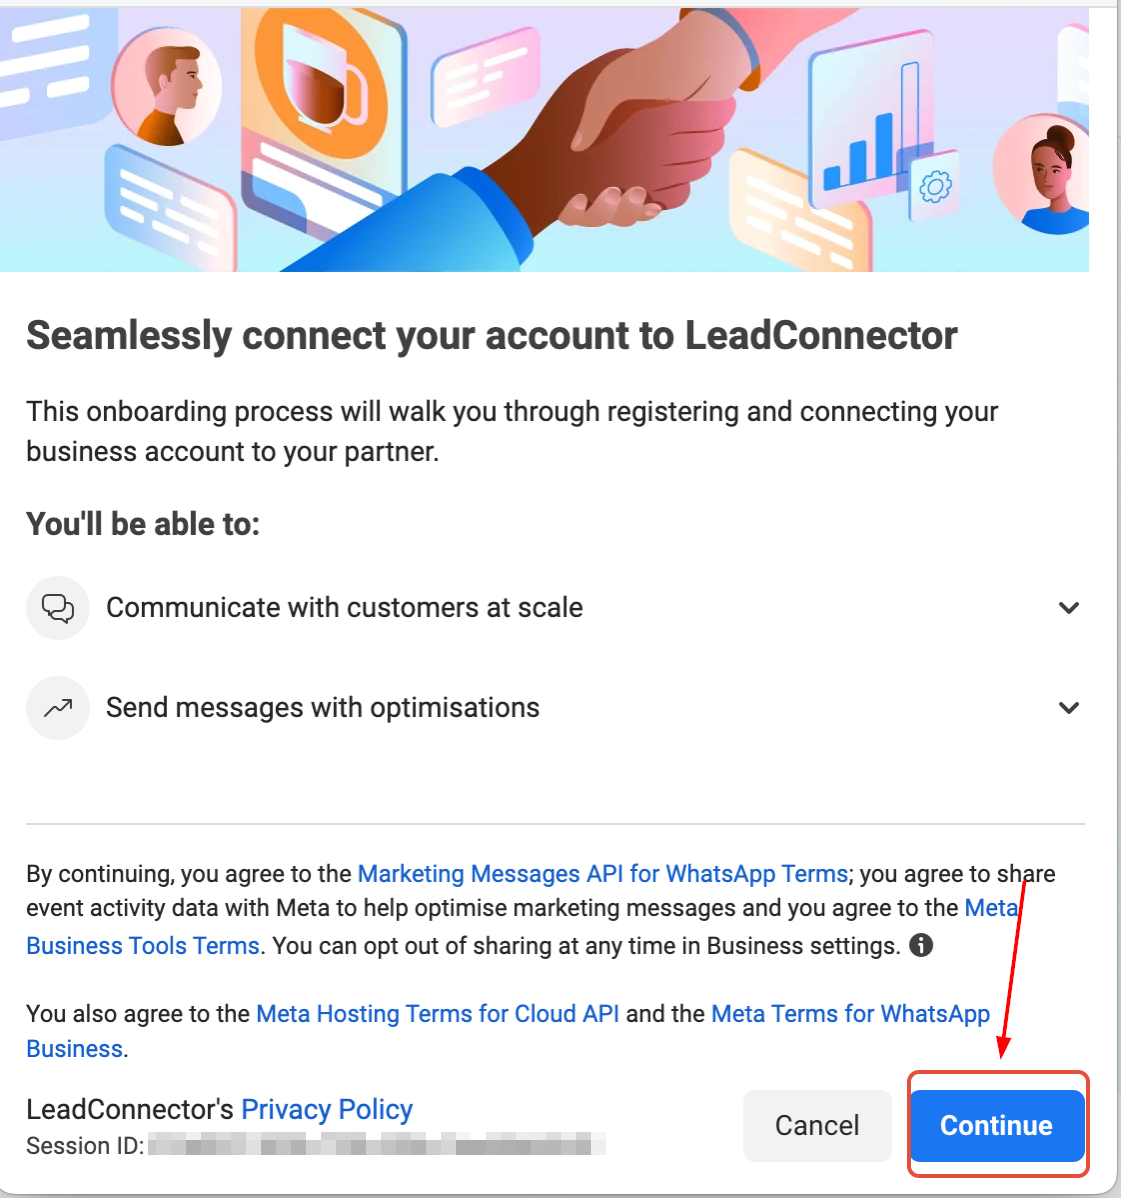
Click Continue to launch the migration workflow.
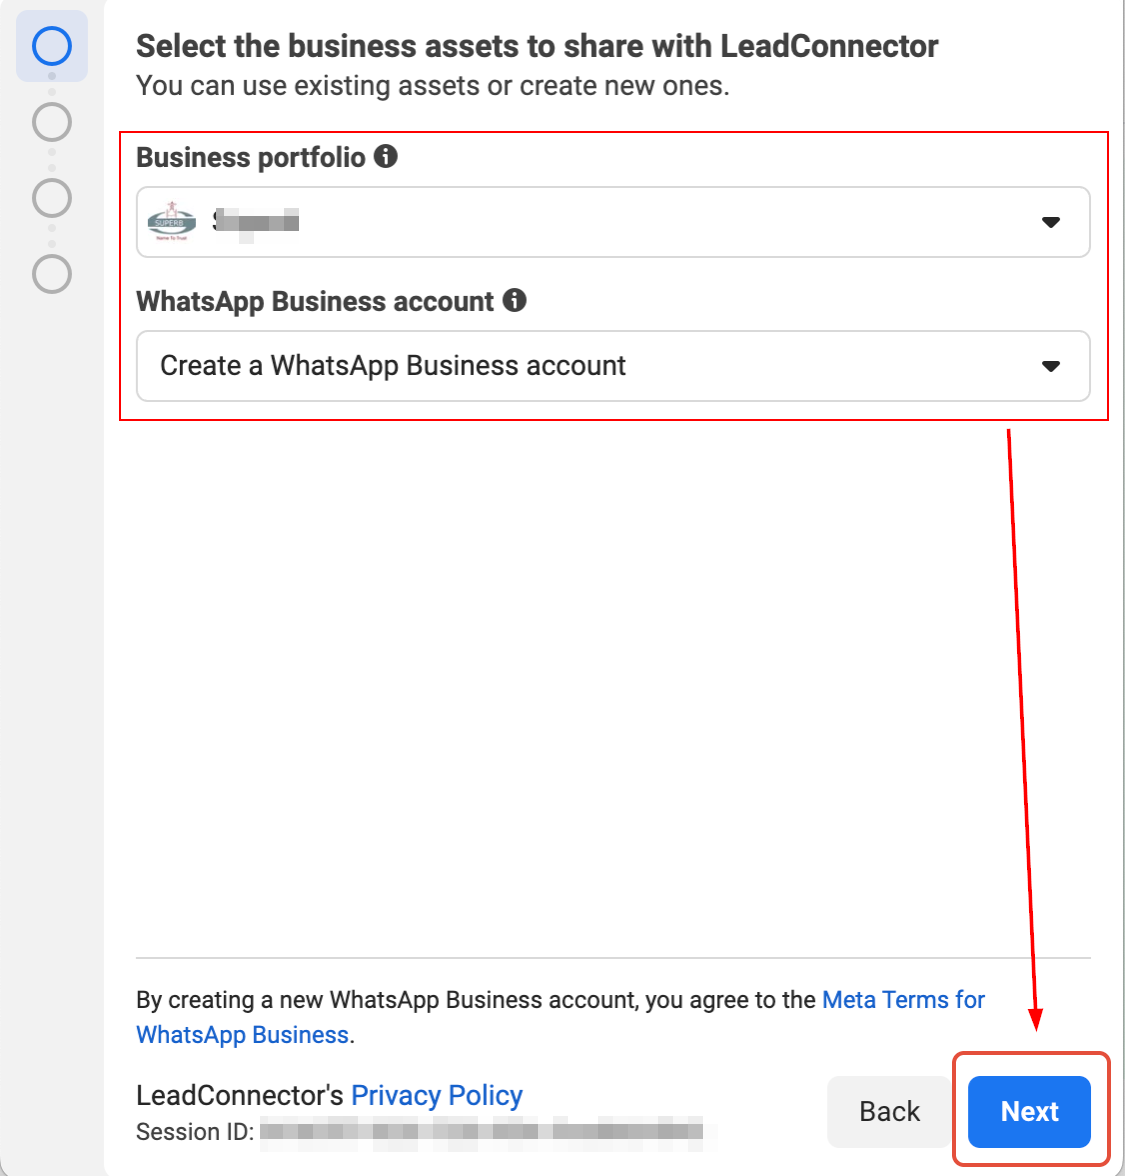
Select Business Assets
Choose the WhatsApp Business Account and associated assets you want to transfer. Take extra care to select the correct assets before moving forward.
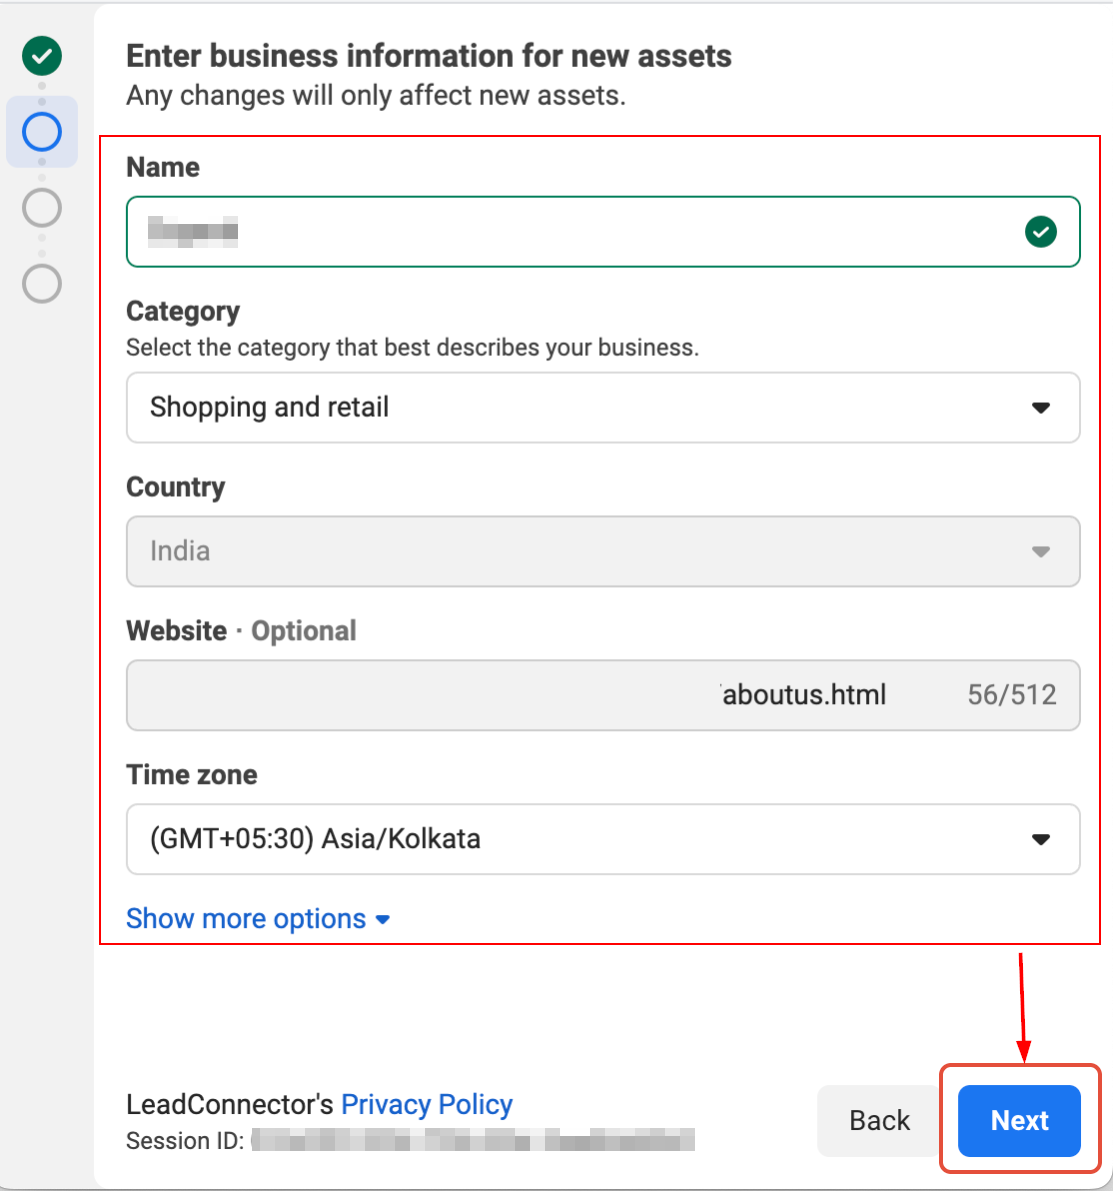
Enter Business Details
Provide the required business information and click Next.
Add Your Existing WhatsApp Number
Enter the phone number currently associated with your WhatsApp Business account. Ensure the number remains active and accessible throughout the migration process.
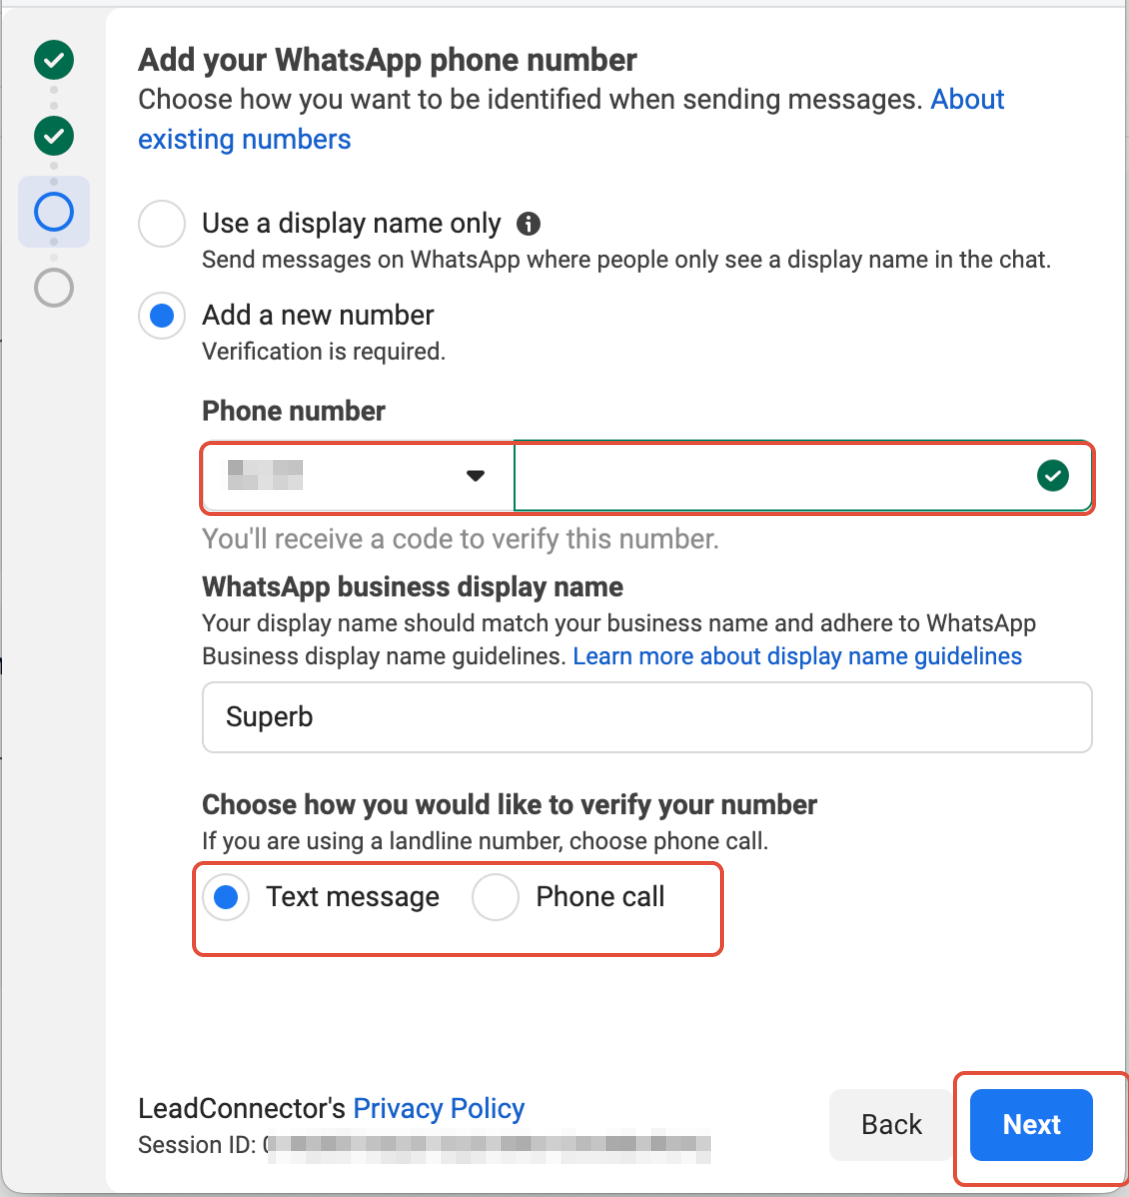
Click Next to request a verification code.
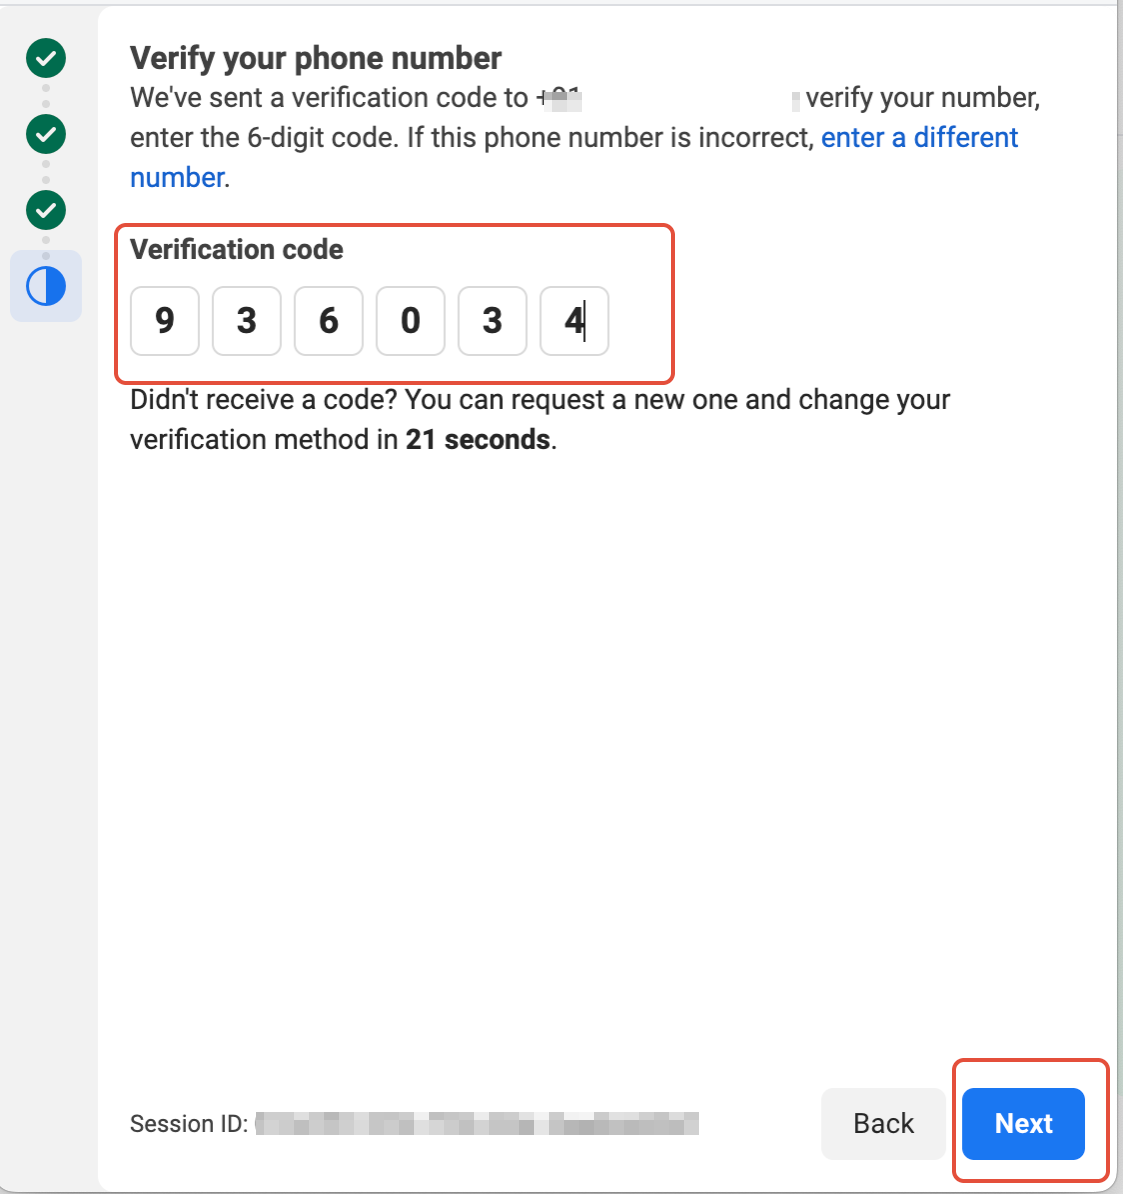
Enter the Verification Code
Enter the OTP received via SMS or voice call.
Click Next.
Review and Confirm
Double-check all information before completing the migration. Click Confirm to finalize the transfer.
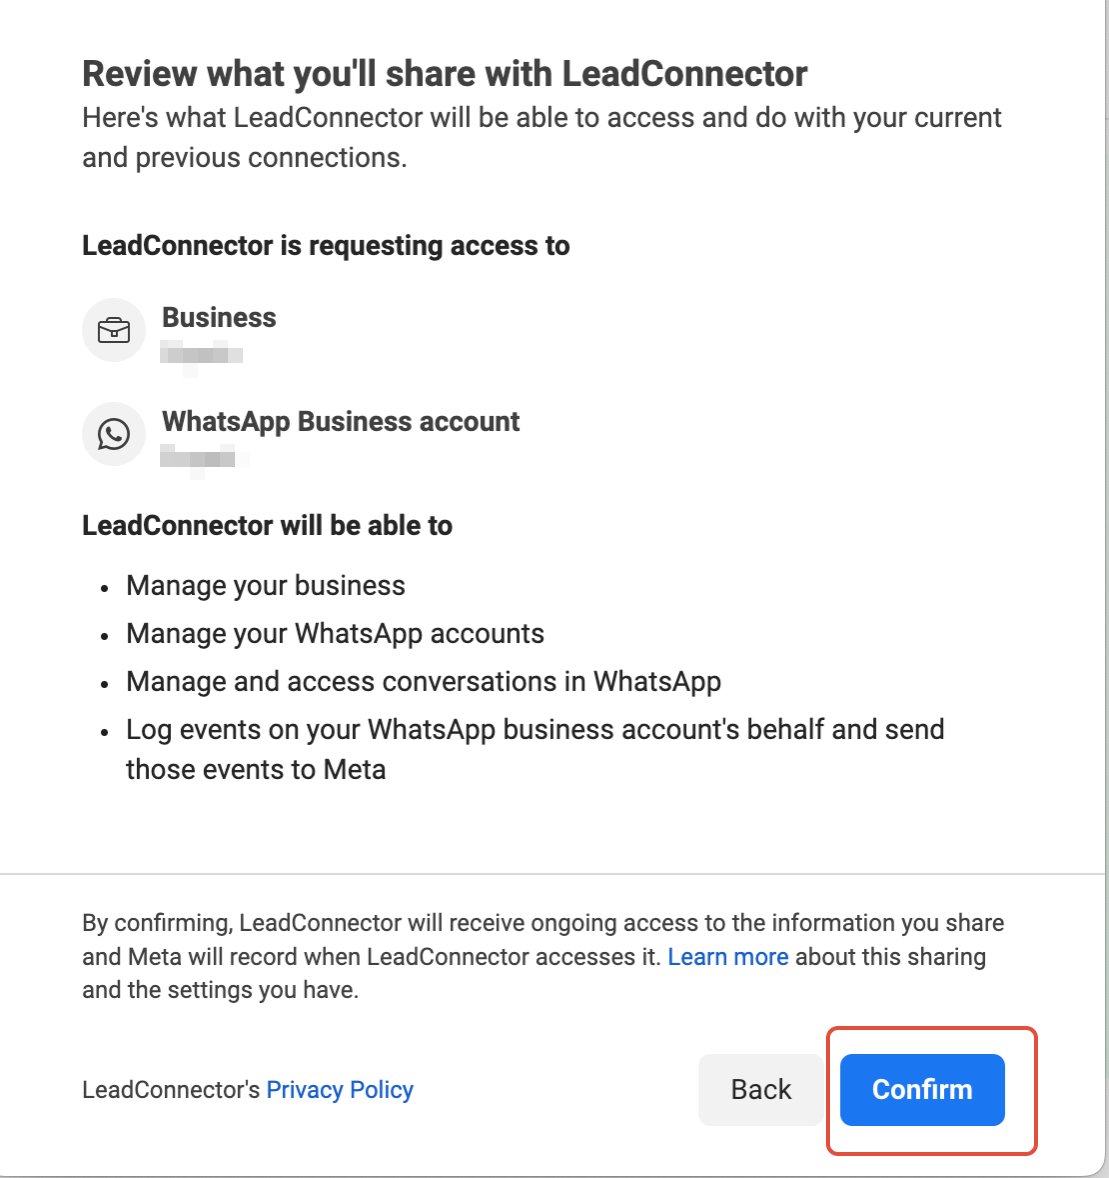
Once the process finishes, your WhatsApp account will be successfully migrated and ready for use.
Connecting WhatsApp gives your business a centralized way to manage customer conversations while maintaining the convenience of WhatsApp communication. Whether you’re connecting an existing WhatsApp Business App, creating a new business number, or migrating from another provider, following the steps in this guide will help ensure a smooth setup process and get you ready to engage with customers quickly and efficiently.
Troubleshooting Tips
If you encounter issues during setup:
- Confirm that your phone number can receive SMS messages or calls.
- Ensure your WhatsApp Business App is updated to the latest version before connecting an existing account.
- Verify that you are logged into the correct Facebook account during setup.
- Carefully review all business details before confirming the integration.
- If importing chat history, allow additional time for contacts and conversations to sync.
Not a Funnelbud customer yet?
Try our all-in-one CRM for sales and marketing — free for 7 days, no commitment.