Products in Forms & Surveys
Surveys are not just for collecting feedback—they’re also a powerful tool for commerce. With integrated Payments in Surveys, you can easily accept payments, sell products, or charge for services—all within a single, fluid user journey. Follow along as we dive into the Sell Products element. With this, you can add one-time or recurring products directly to your survey, complete with quantity selectors, pricing, and subscription plans.
Key Features
- Product Selection and Customization: Select products, include descriptions and images, and choose from various layout options to enhance the presentation.
- Variant Selection: Select different variants available for specific products.
- Inventory Management: The quantity of the product will be managed and respected according to the inventory system.
- Tax Calculation: Automatic tax calculation is included when a product is purchased, ensuring accurate and compliant transactions.
How It Works
Follow these steps to integrate the Sell Products element and utilize the order confirmation feature:
Add the Payment Element
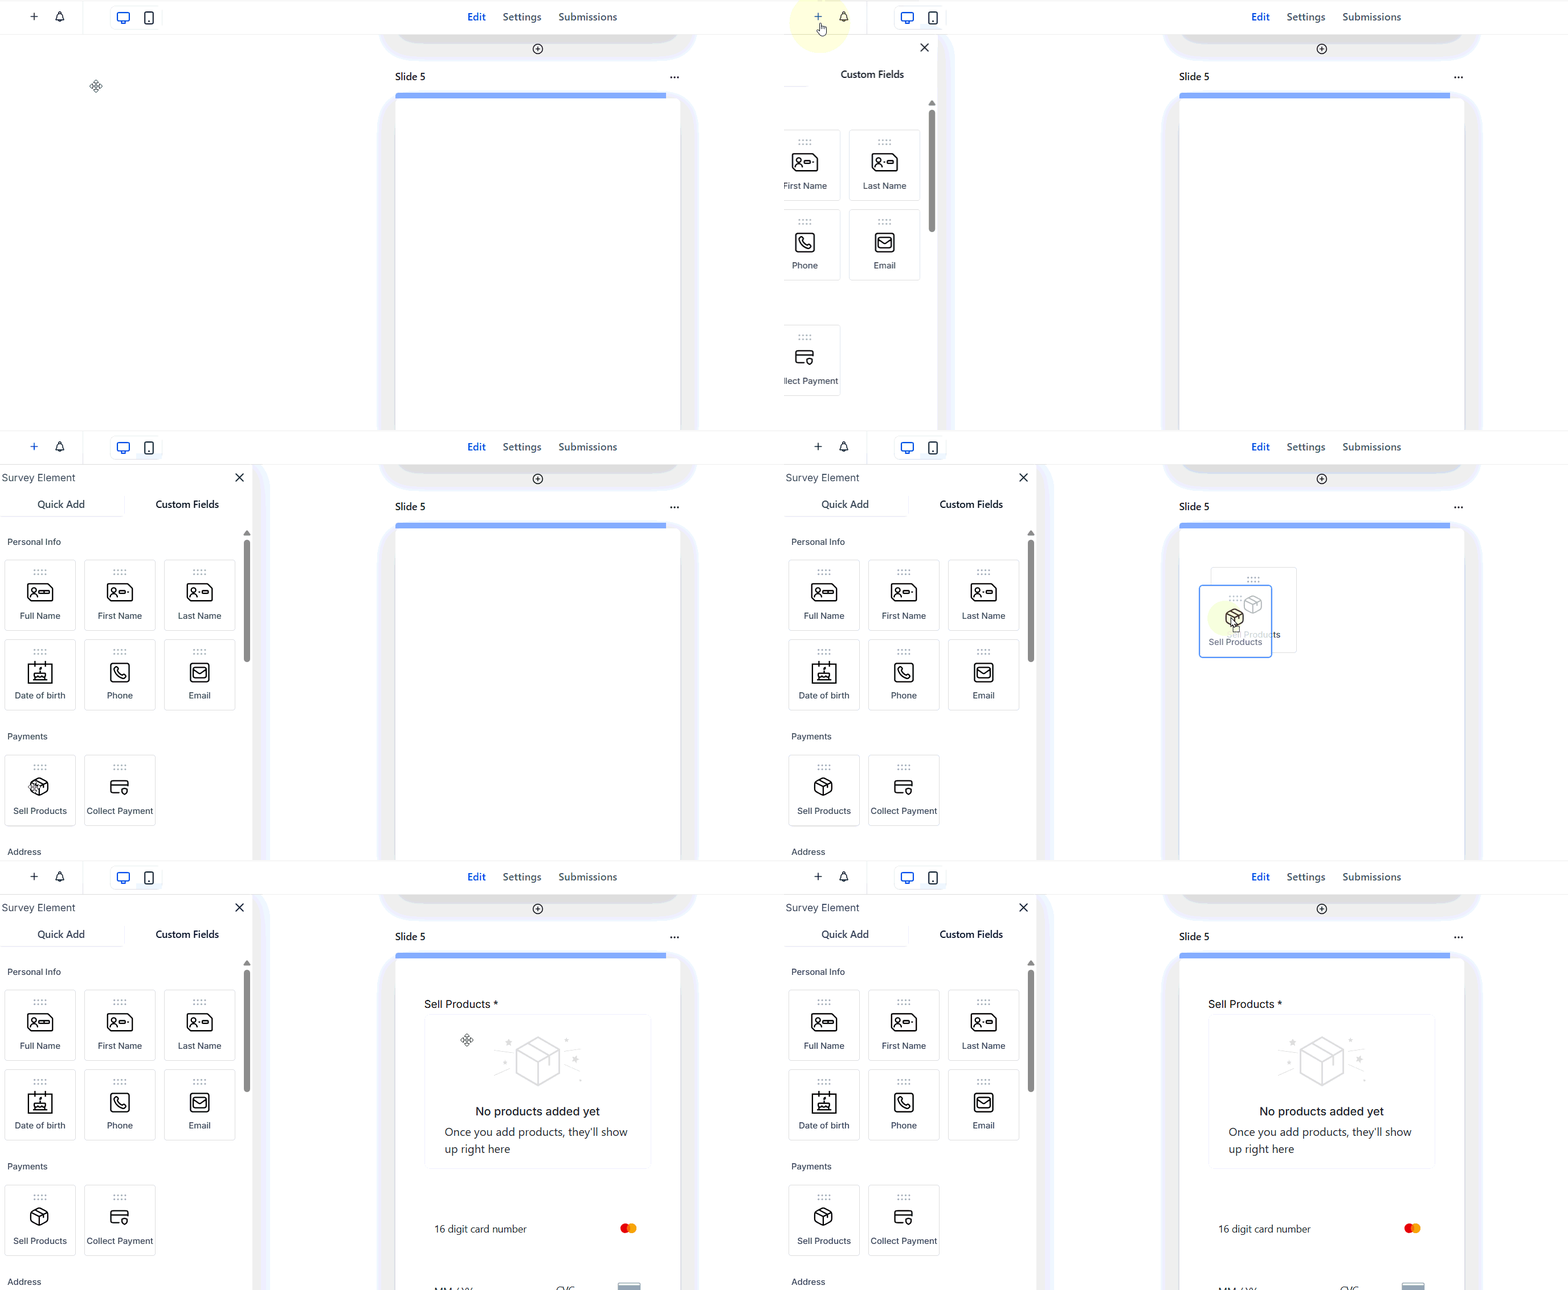
Open the Add Survey Element window, then drag and drop the “Sell Products” element into your survey builder.
Configure Product or Payment Details
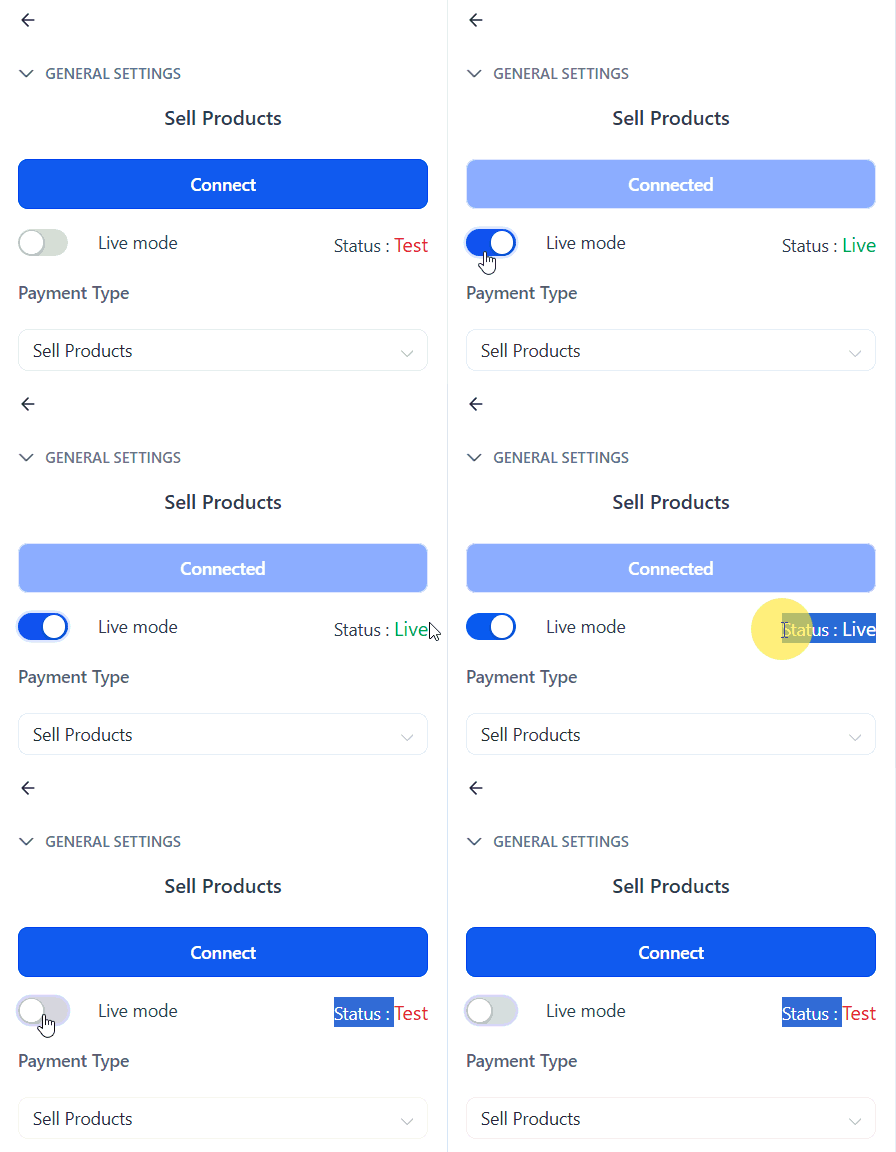
In the General Settings, you can toggle the Payment Status switch to choose between live and test modes. Live mode allows you to process transactions, while test mode is used to simulate the user experience without charging the user.
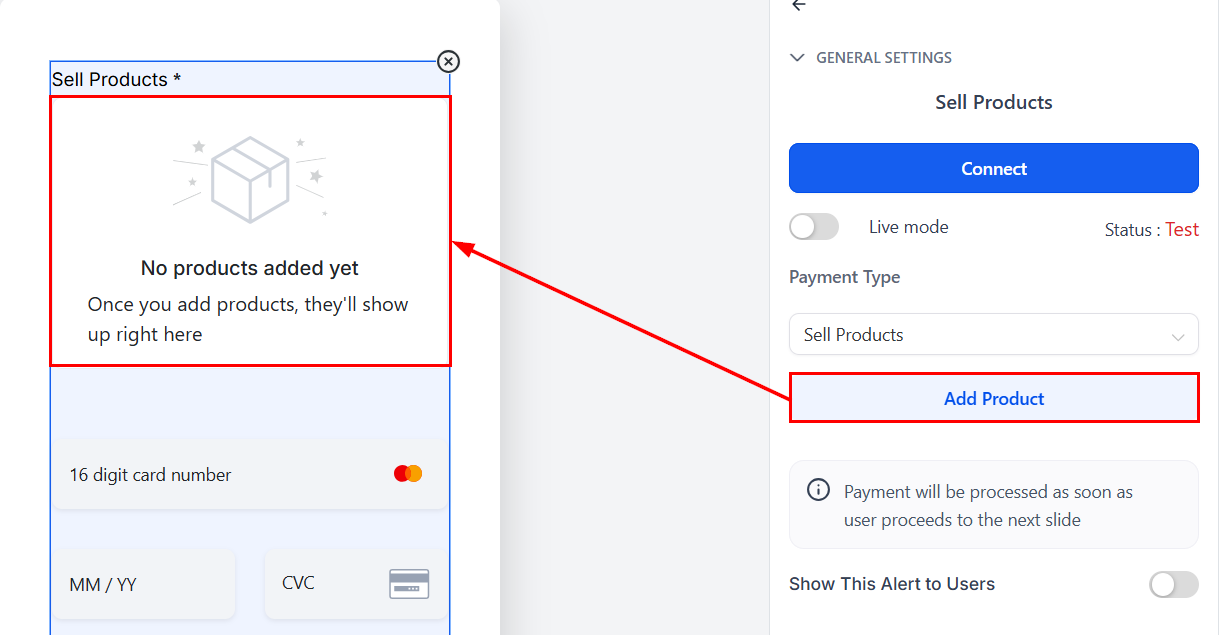
Click the Add Product button to select the main and bump products to be offered. Once selected, they will be displayed in the builder.
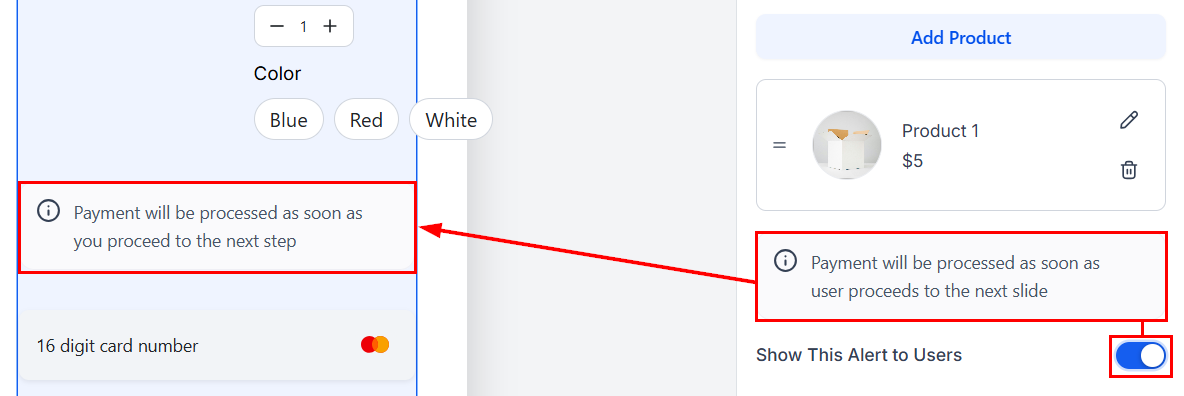
Next, enable or disable the alert message. It is recommended to enable this message or include a warning in a previous slide to set the customer’s expectations.
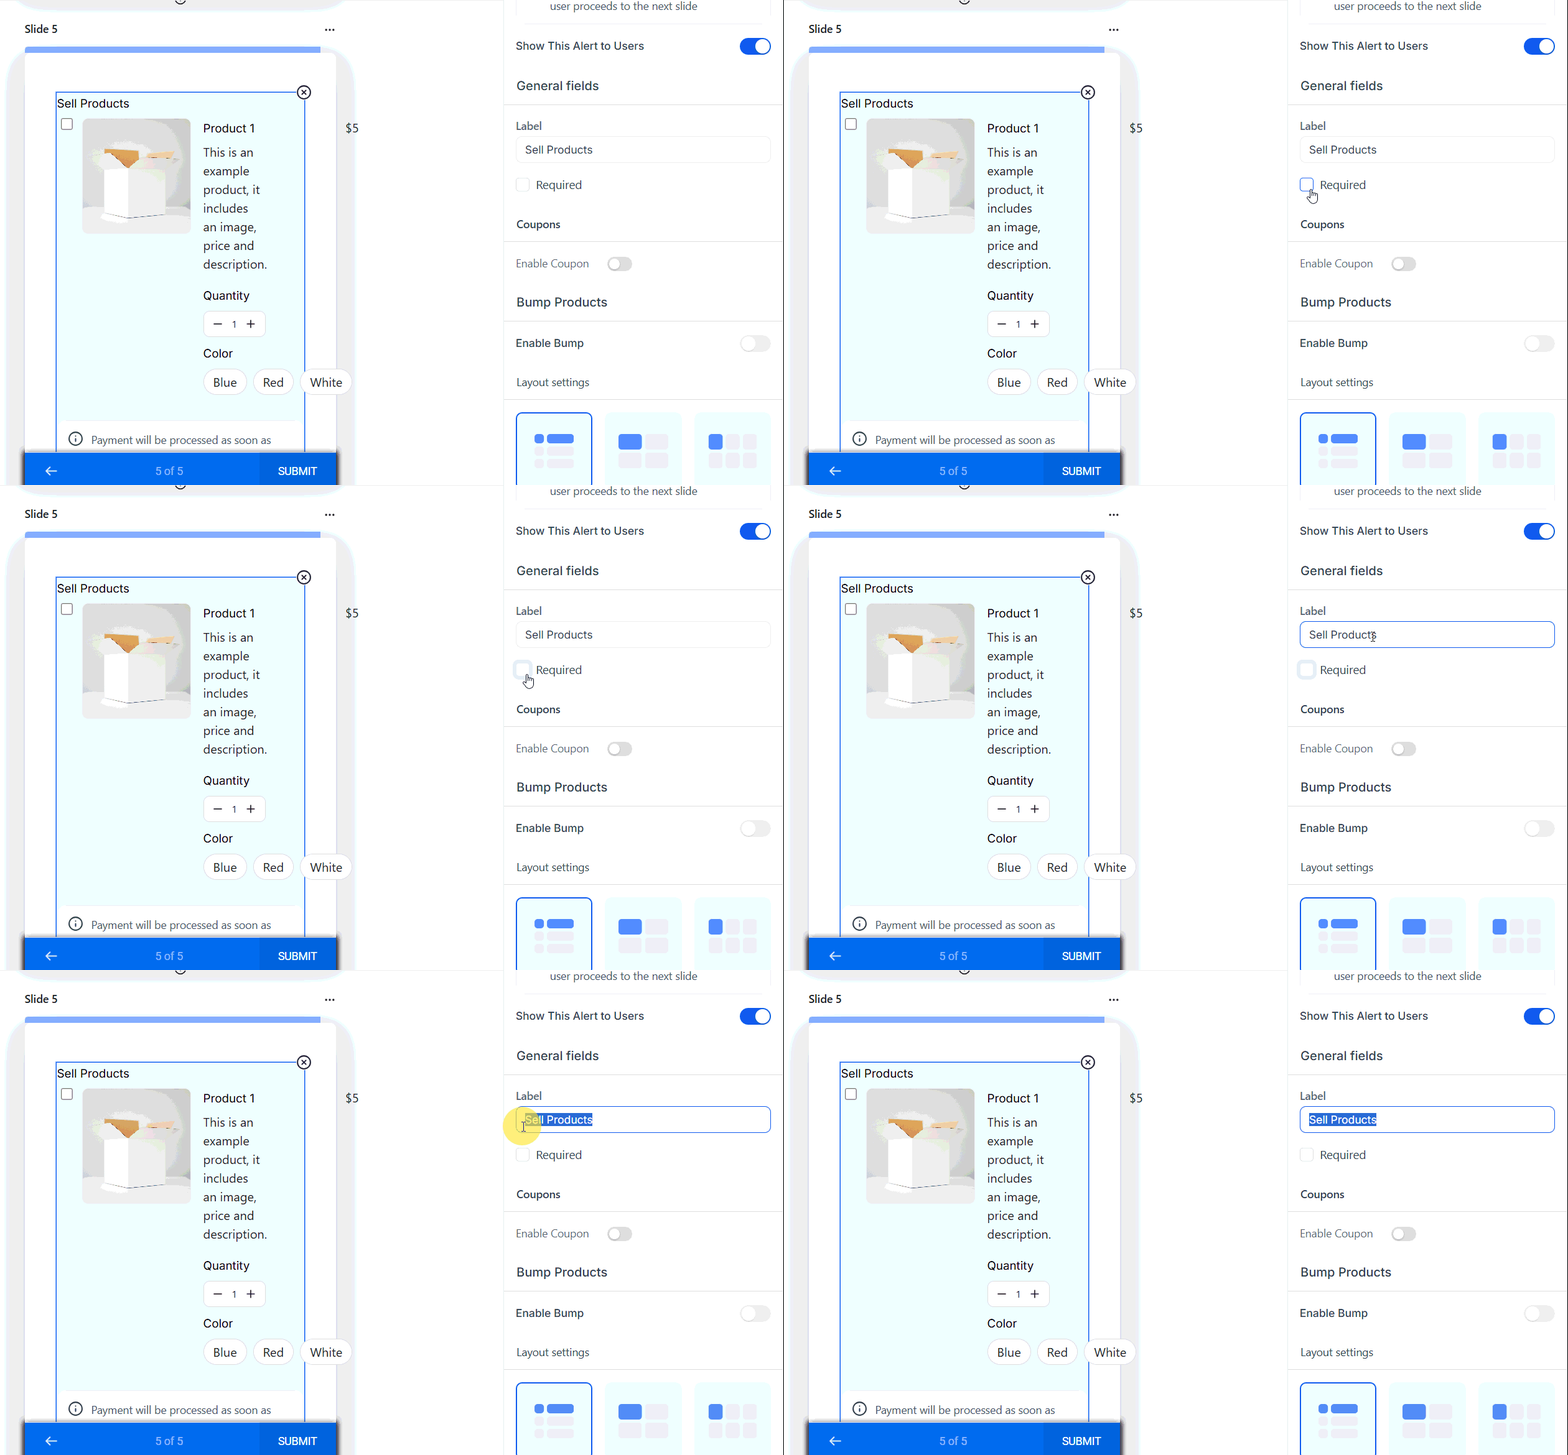
Edit the wording of the Sell Products label to fit your brand voice, then mark this field as required, if necessary.
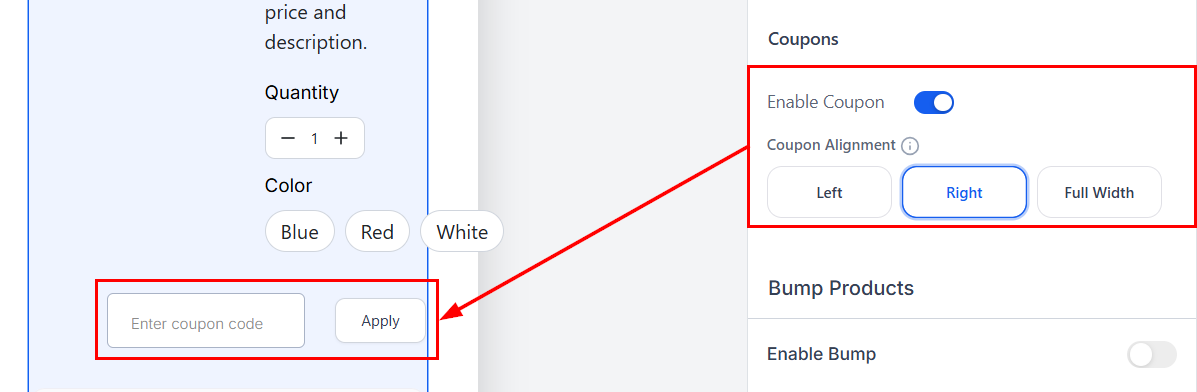
Integrate coupons by toggling the switch to the ON position, then setting the position of the coupon input from the available options.
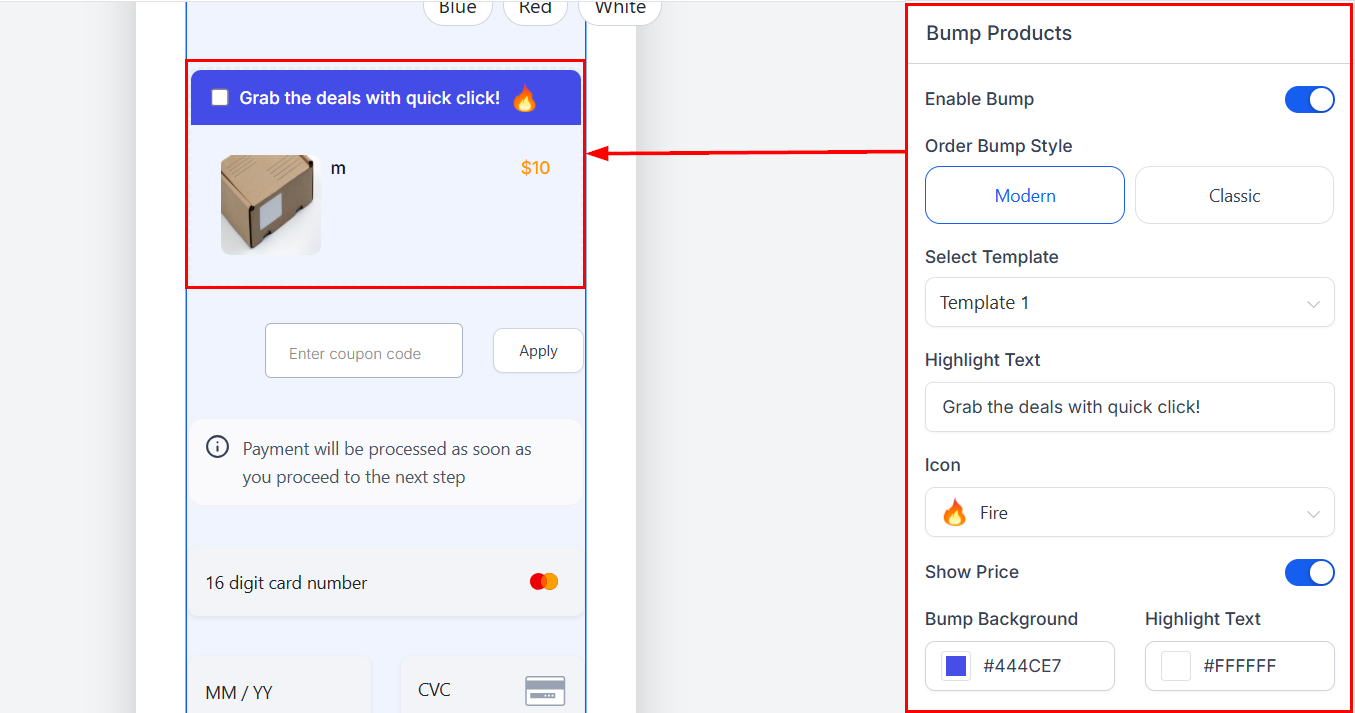
If an order bump was added in the products section, you can configure it here by selecting a style, entering a headline text, choosing an icon, and more!
By changing the Layout, you can modify the appearance of the products in the survey.
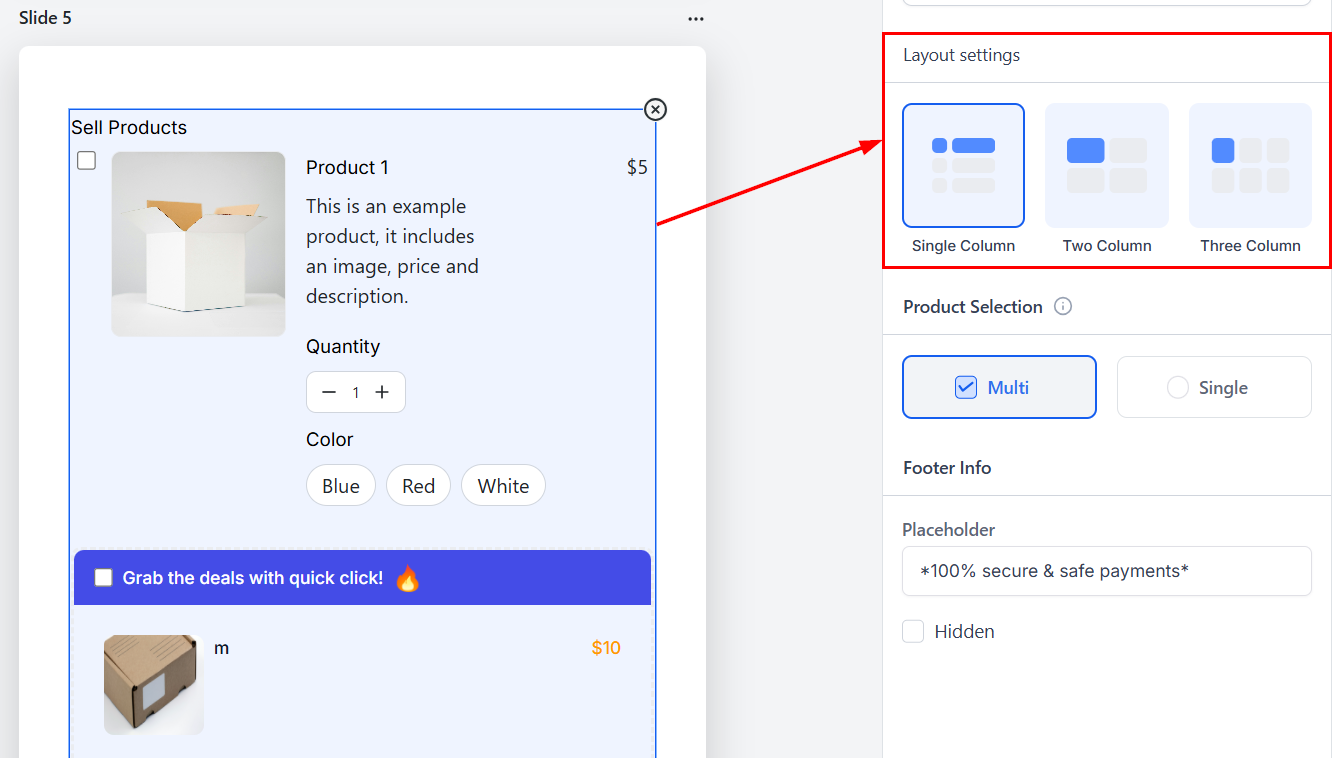
Next, allow single or multi-product selection based on your sales strategy.
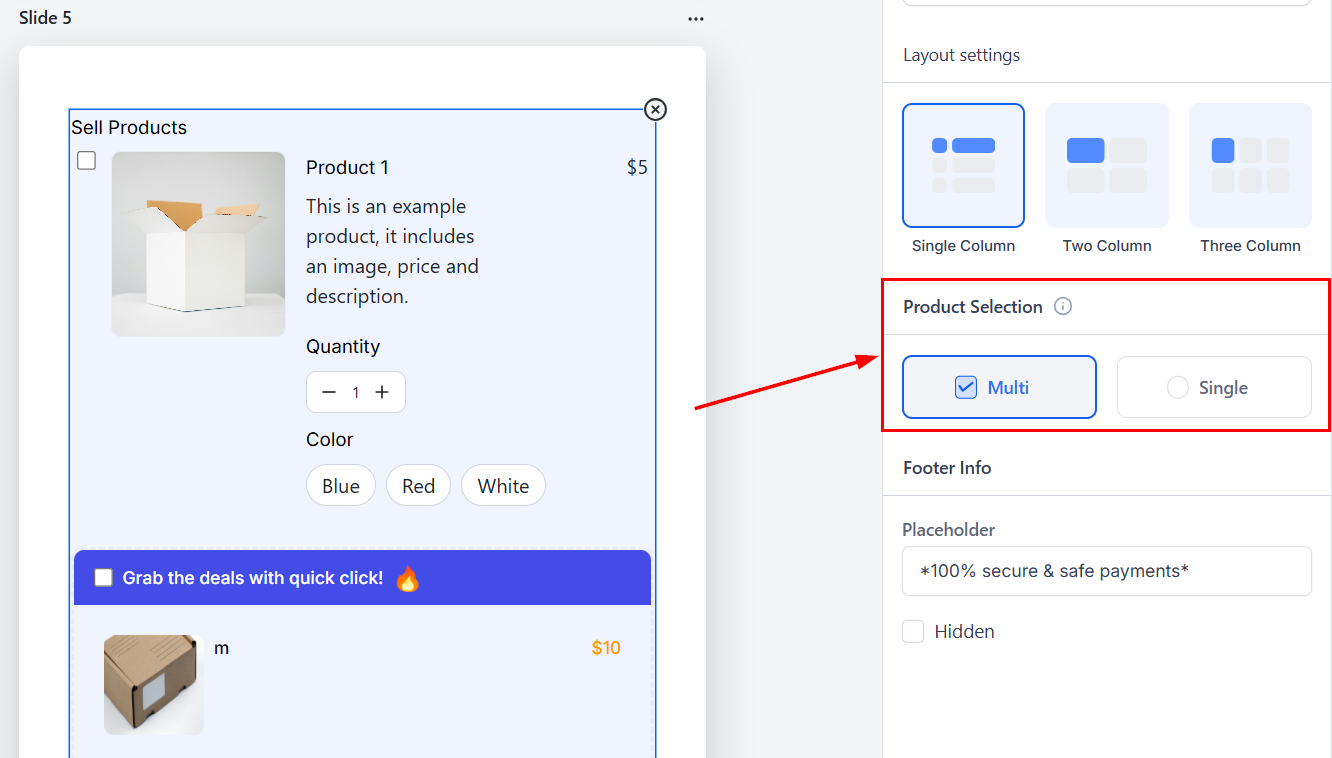
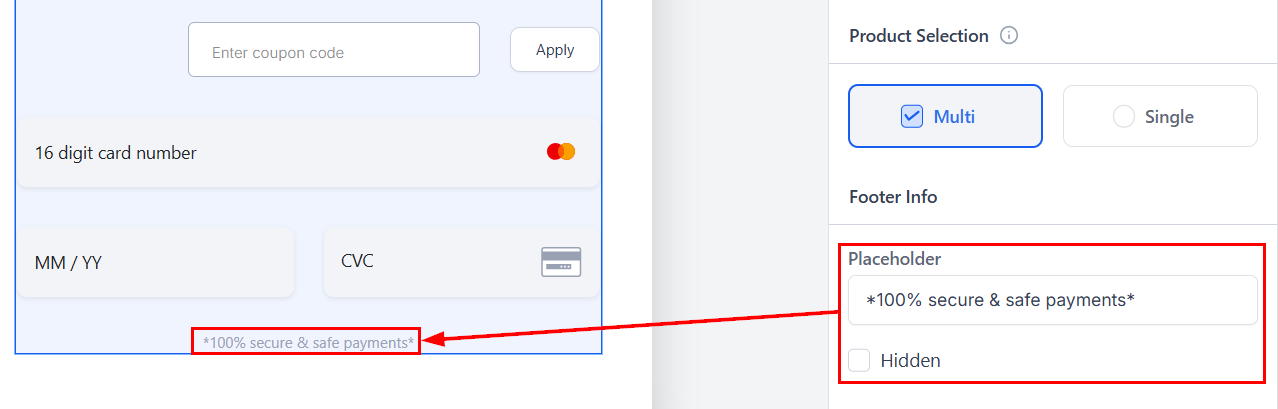
Finally, enter the desired text to be displayed below the card information fields or hide the footer completely.
Set Up Order Confirmation
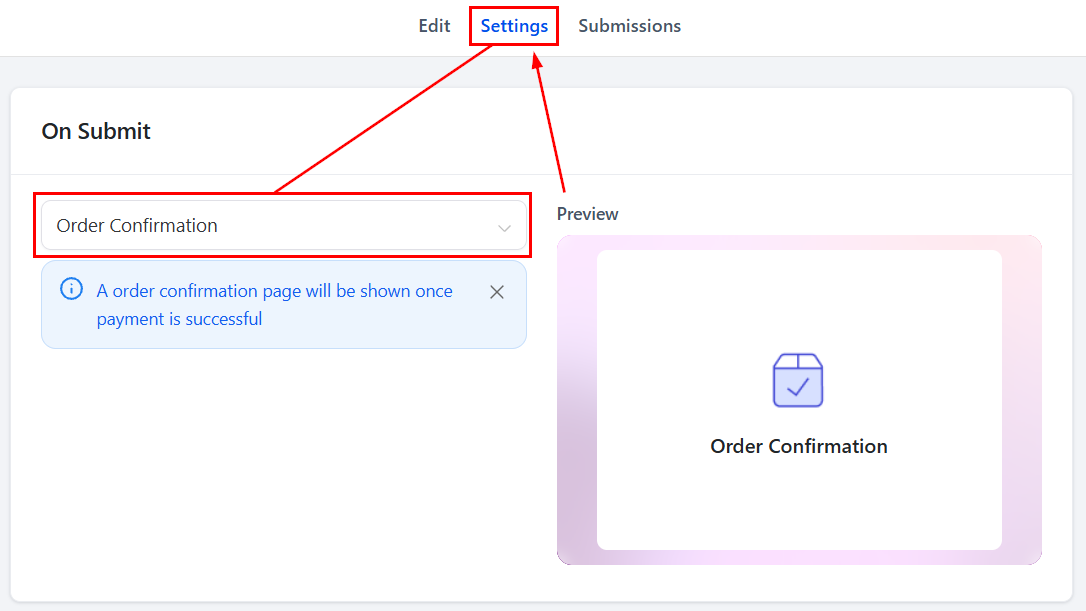
To set up order confirmation, head to the Settings section, then from the “On Submit” dropdown, choose the option to display the order confirmation page upon successful payment.
The Sell Products element in surveys opens up new ways to engage, convert, and monetize—all without disrupting the user journey. By embedding product sales directly into your surveys, you streamline the checkout experience and reduce friction at every step.
About the Order Confirmation Feature
- Order Confirmation Support for Forms with Products: After a successful payment, an order confirmation page displaying the basic details of the customers will be shown.
- Automatic Theme Application: The theme of the order confirmation page will automatically match the form theme selected.
- Displayed Details: The order confirmation page will show the customer’s name, email, phone number, address, country, product details, and the total amount paid.
Tracking Payments
Upon form submission, the submission details will include the payment amount, order ID, and payment status. By clicking on the Order ID, users can view comprehensive order details. Additionally, these details can be exported using the available export options.
✍️Notes
- Recurring products are currently not supported.
- NMI and Authorize.net require the First Name field to be mandatory when including the payment element in the form.
- The refund amount is not captured.
- In calendars with custom form payment elements, the payment element will not be displayed.
- Multiple payments with multiple native forms are not yet supported in funnels.
- The undo/redo functionality is not supported for the payment element.
- These forms can be easily added to funnels and can be used as one-step order forms with unlimited customization.
- As the user progresses through your survey, they’ll enter payment details within the form. Upon clicking “Next,” the payment is securely processed.
- A confirmation screen is displayed for successful transactions. Even if a user exits after the payment screen, their partial contact data is securely retained for follow-up.
- All payments are encrypted and compliant with industry-standard security protocols, and are compatible with Stripe, PayPal, and other integrated gateways.
Frequently Asked Questions
Q: How does the order confirmation page theme get selected?
- The order confirmation page automatically adopts the theme of the selected form, ensuring a consistent look and feel.
Q: Can I disable the order confirmation page if I do not need it?
- Yes, you can choose not to enable the order confirmation page under the “On Submit” actions in the Styles and Options section.
Q: What should I do if the order confirmation page does not display correctly?
- Ensure that the “Payment” element and products are correctly integrated into the form.
Troubleshooting Tips
Incorrect customer details on the order confirmation page.
- Check the form fields to ensure accurate data collection. If the problem persists, review the form setup and customer input.
The order confirmation page does not match the form theme.
- Reapply the desired theme to the form and ensure no conflicting settings are affecting the order confirmation page.
Not a Funnelbud customer yet?
Try our all-in-one CRM for sales and marketing — free for 7 days, no commitment.