Lost Reason Filter for Opportunity Widgets
The Lost Reason filter for Opportunity Widgets allows you to analyze your lost opportunities in a centralized location. This filter facilitates precise analysis and offers additional properties for a more detailed breakdown. This article provides an in-depth look at these features, their functionalities, and how to leverage them for better sales performance.
How It Works
Adding the New Widget
- Go to your Dashboard.
- Enter Edit Mode
- Add Widget
- Choose “Lost Opportunities By Reason” under Opportunities.
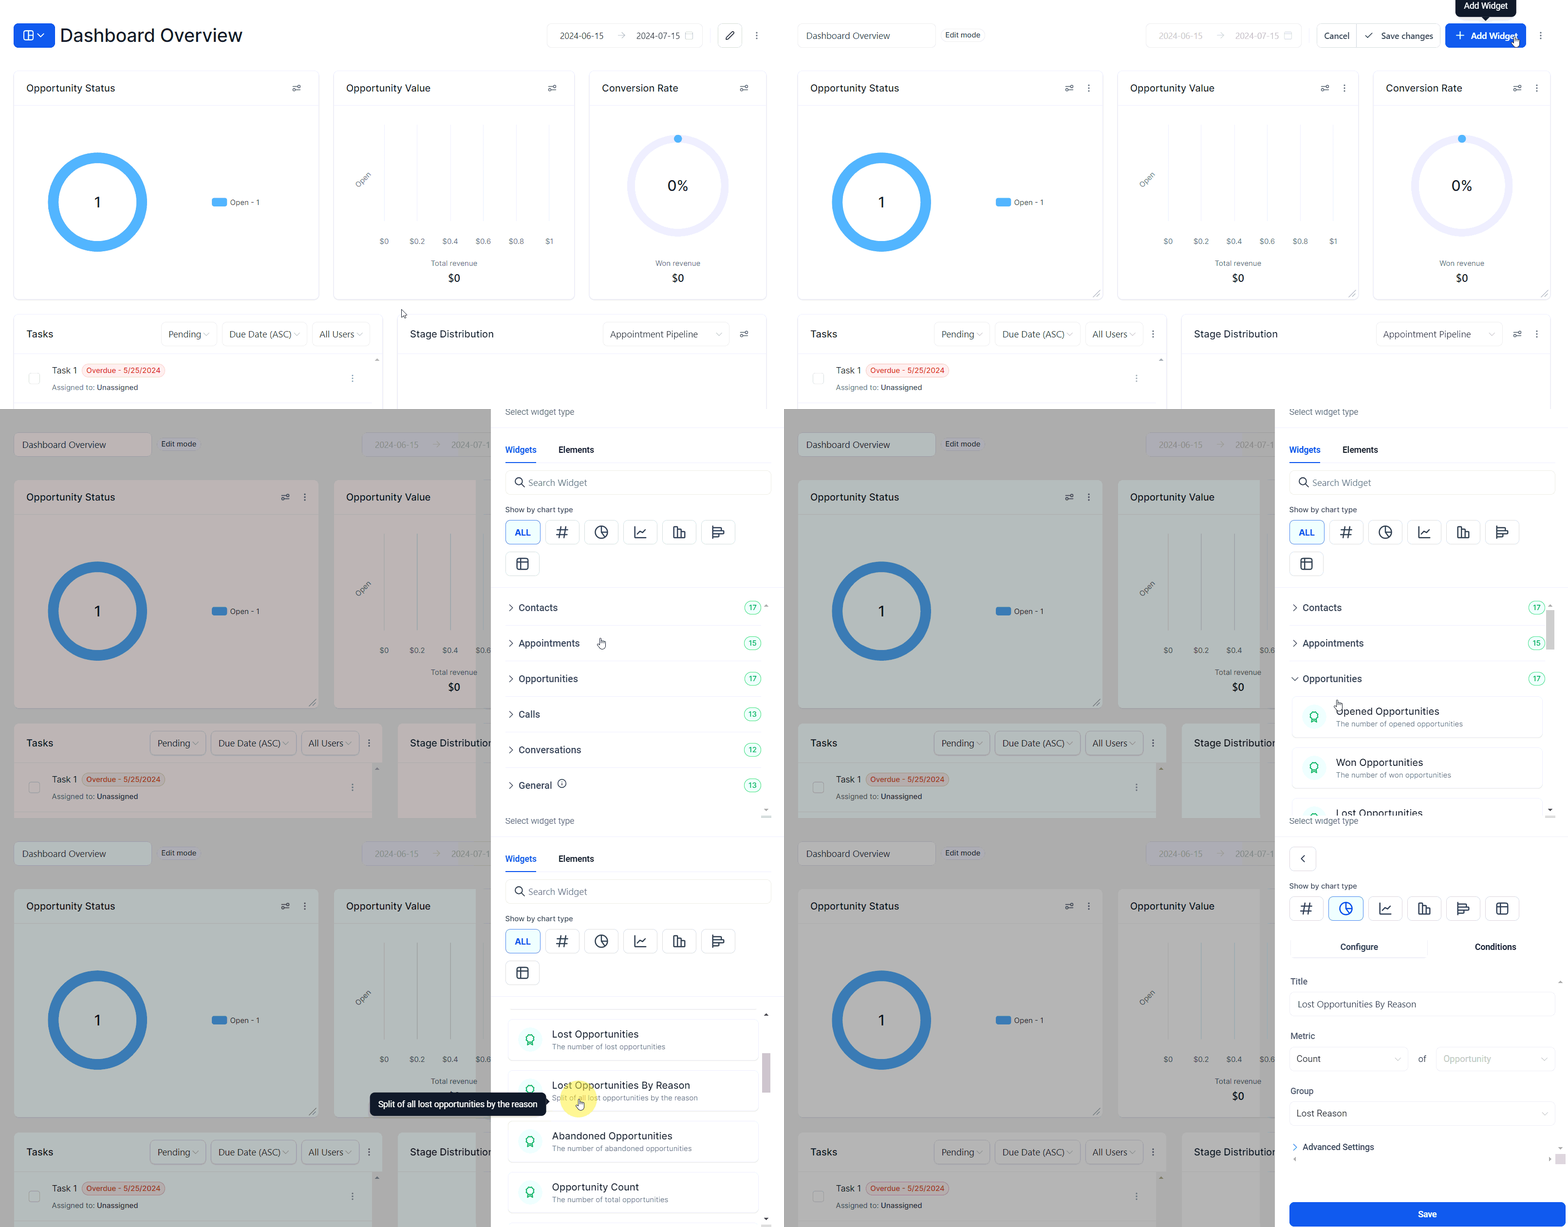
Filtering for a Specific Lost Reason
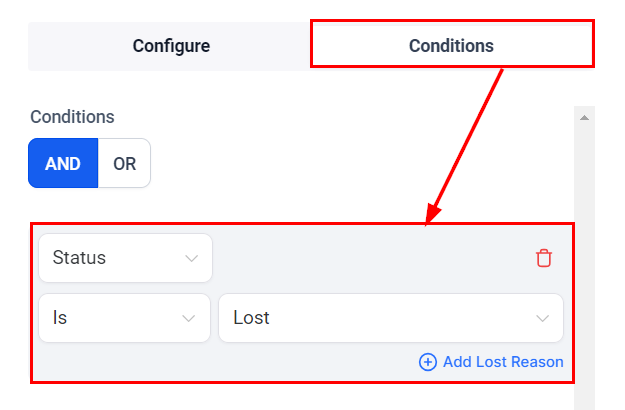
- Set Status to Lost: Add Status IS Lost in the conditions.
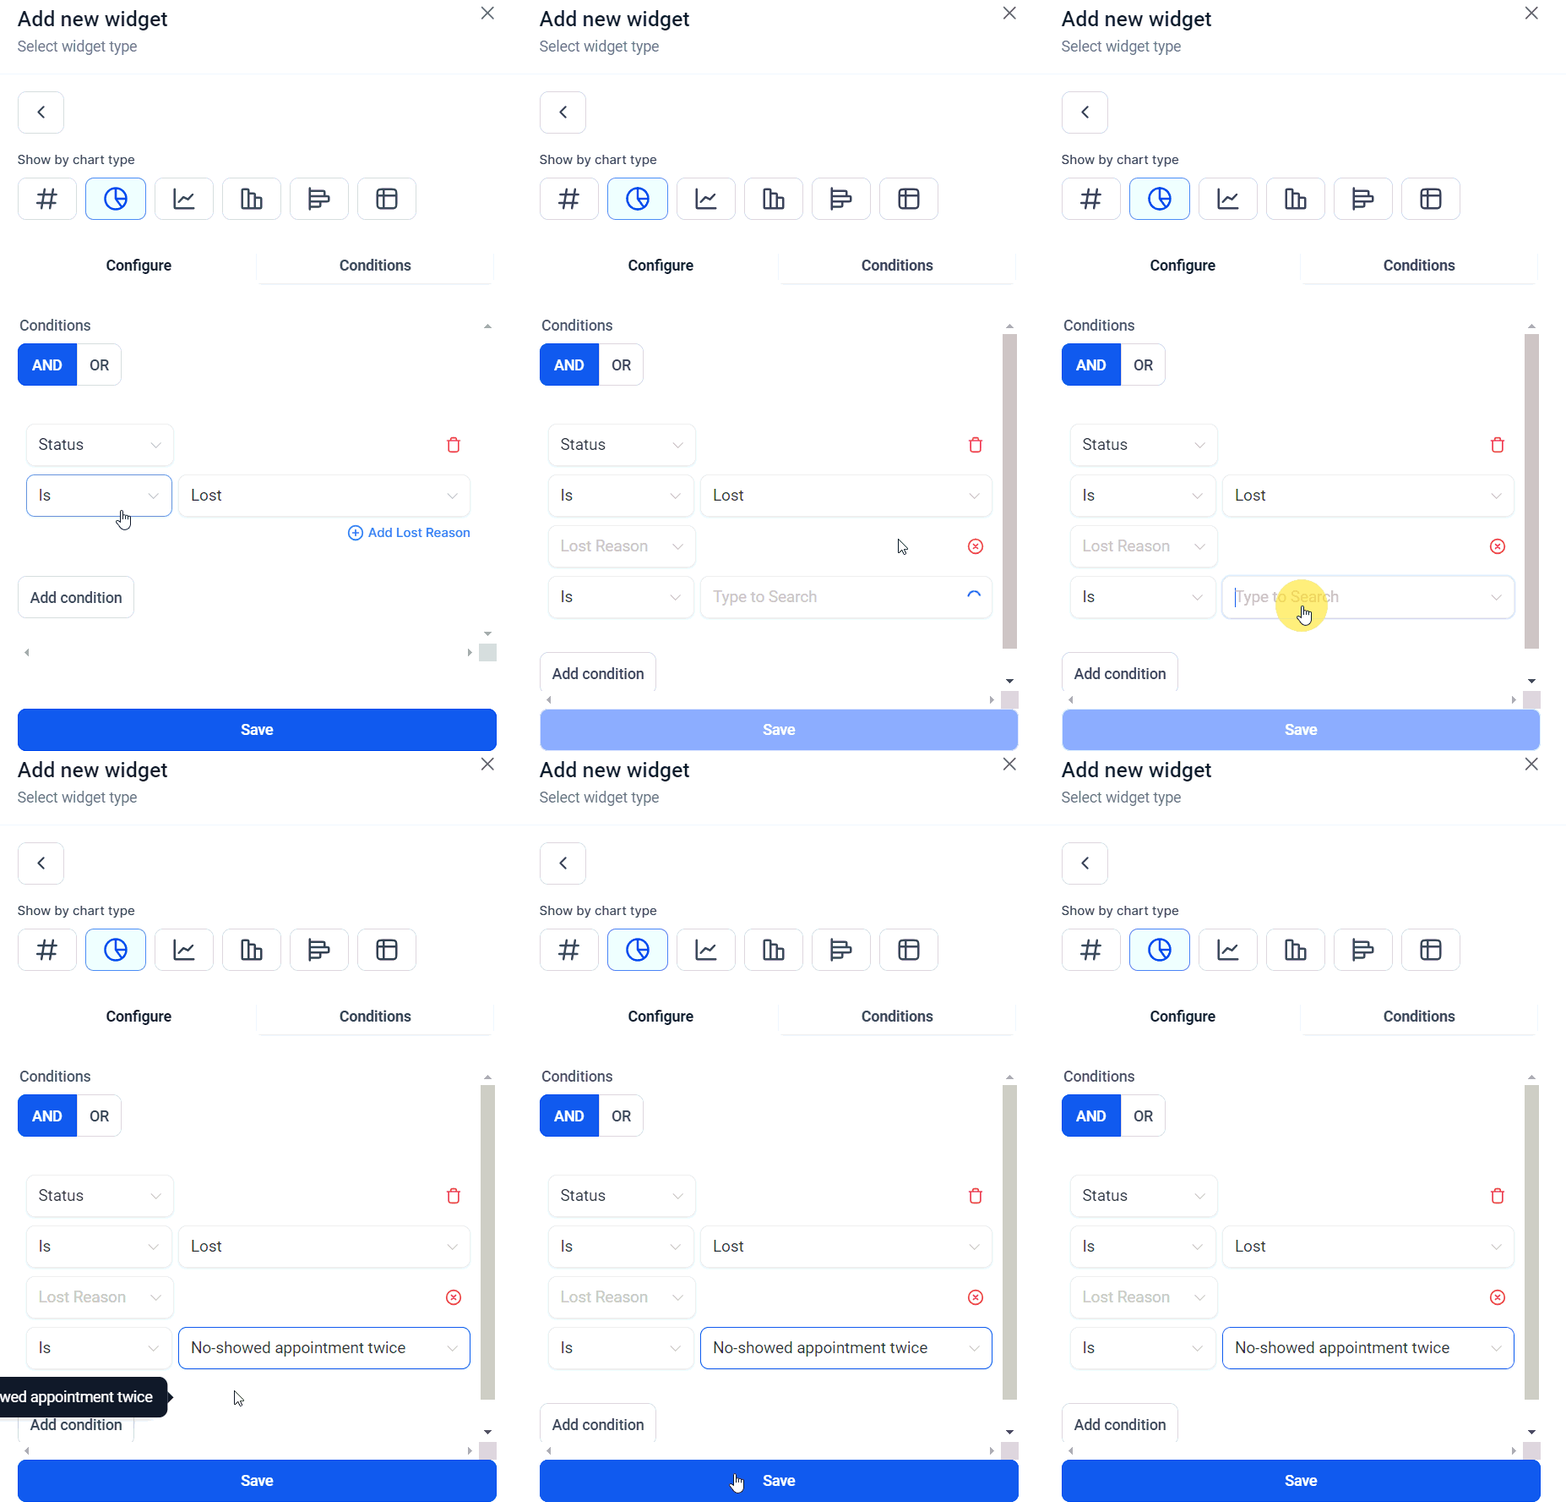
2. Add Specific Lost Reason: Apply a filter to add a specific Lost Reason.
Adding the Lost Reason Column in a Table Widget
- Create a Table Chart: Generate a table chart for opportunities.
- Select Columns: Within the Widget configurations, click on Select columns.
- Choose Lost Reason: Ensure the lost reason option is selected.
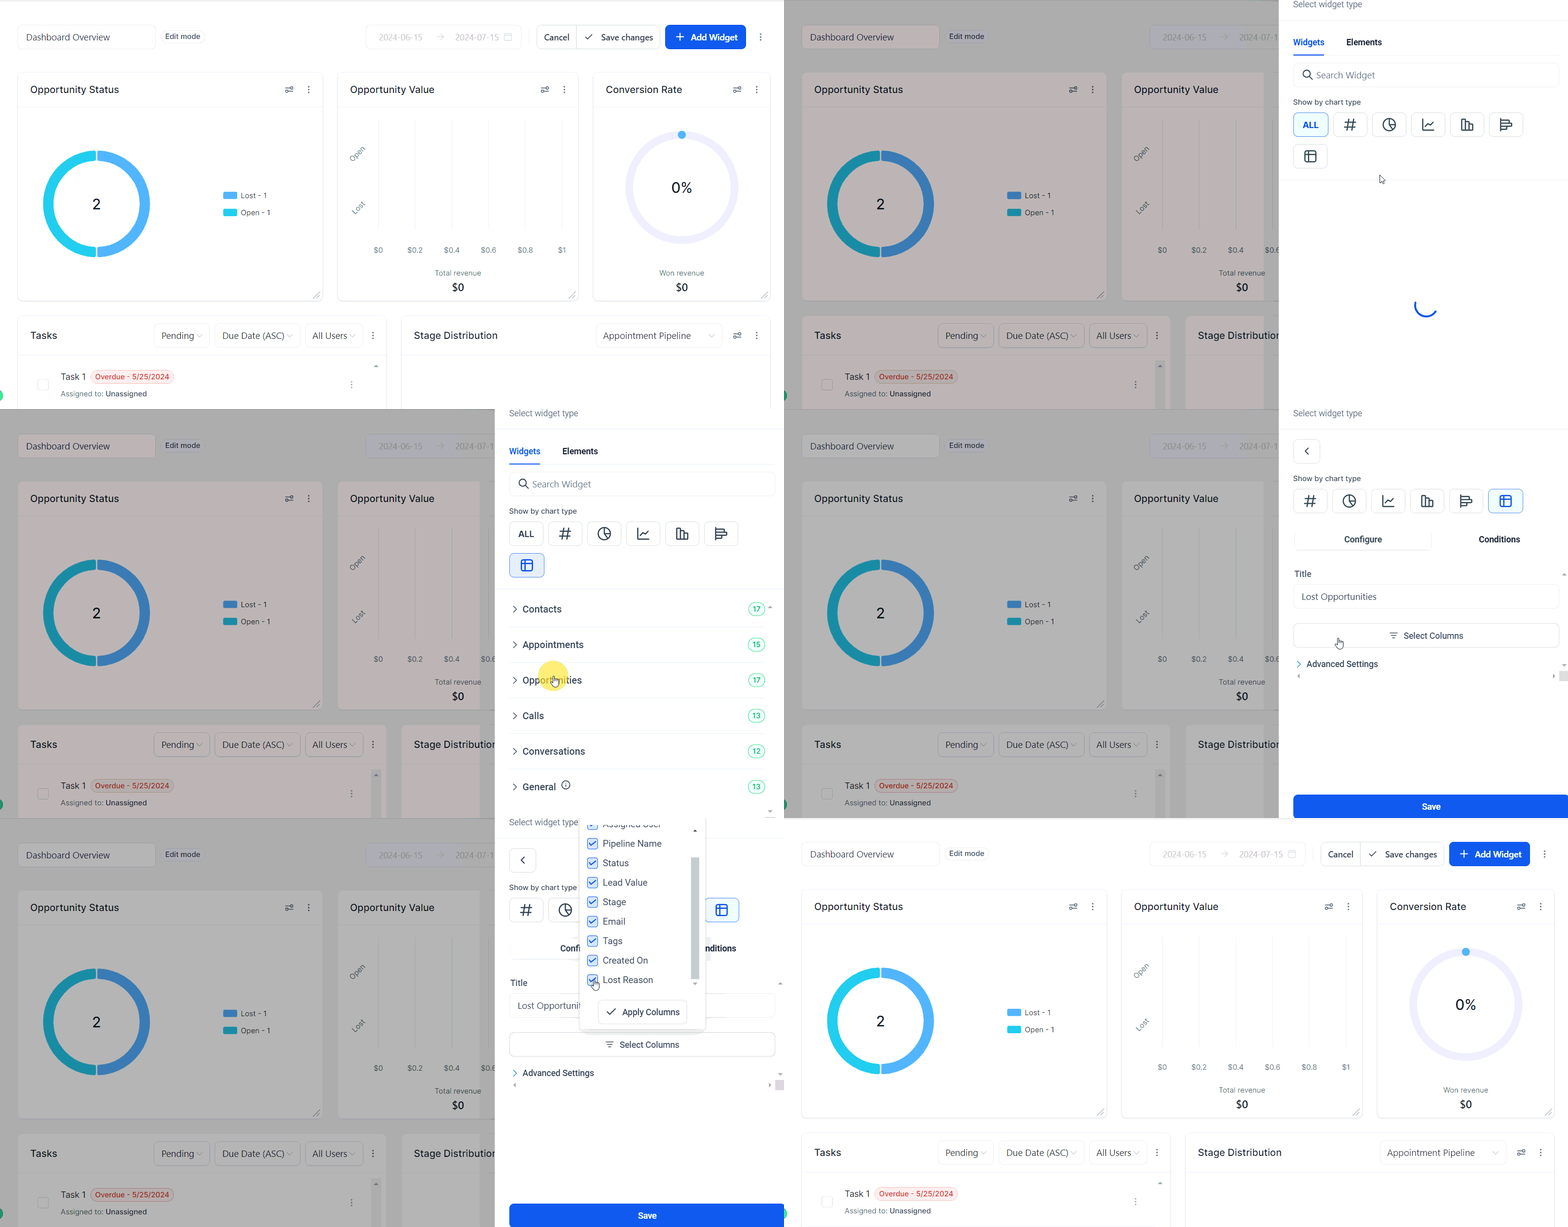
Apply the columns, then save your widget once you are satisfied with the configuration.
By effectively utilizing these features, you can gain valuable insights into why opportunities are lost, enabling you to fine-tune your sales strategies, improve follow-up efforts, and allocate resources more efficiently.
Why It Matters
- Targeted Follow-Up: Personalize follow-up strategies based on specific reasons for opportunity loss, boosting re-engagement success.
- Problem-Solving Precision: Pinpointing reasons for lost opportunities enables targeted solutions, enhancing sales strategies.
- Focused Resource Allocation: Allocate resources to primary loss factors to optimize efficiency and fuel strategic growth.
Frequently Asked Questions
Q: How do I enable the Lost Reason option in the Group and View by properties?
- Ensure that you add Status IS Lost in your conditions. This step is essential to activate the Lost Reason option.
Q: Can I filter lost opportunities by multiple reasons?
- Yes, you can add multiple child filters for different Lost reasons to get a comprehensive view.
Q: How can I use the insights from the Lost Opportunities by Reason widget to improve my sales strategy?
- Use the detailed breakdown to identify common reasons for loss and tailor your follow-up and problem-solving strategies accordingly.
Q: Is it possible to export the data from the table widget including the Lost Reason column?
- Yes, you can export the data from the table widget for further analysis and reporting.
Troubleshooting Tips
1. Lost Reason Not Appearing:
- Ensure that the Status IS Lost condition is added. Without this, the Lost Reason filter will not be available.
2. Widget Not Displaying Correct Data:
- Double-check your filters and conditions. Make sure all relevant criteria are set correctly.
3. Unable to Save Widget:
- Verify that all mandatory fields and selections are completed. Incomplete configurations can prevent saving.
4. Data Discrepancies:
- Refresh your dashboard and ensure that your CRM data is up-to-date. Sync issues can sometimes cause discrepancies.
Not a Funnelbud customer yet?
Try our all-in-one CRM for sales and marketing — free for 7 days, no commitment.