How to Create a Dynamic Timer
A Dynamic Countdown Timer is a personalized feature that adjusts the countdown based on each contact’s interaction with your email. Unlike static timers, which display the same countdown for all recipients, a dynamic timer begins counting down from when a contact opens or receives the email, ensuring a unique experience for each individual.
Example
- Contact A opens the email at 2 PM, and their timer counts down from 2 PM to 12 AM.
- Contact B opens the email at 5 PM, and their timer counts down from 5 PM to 12 AM.
Key Benefits
- Personalization: Unique timers for each contact based on their email interaction.
- Urgency: Encourages immediate action with time-sensitive offers.
- Flexibility: Customizable durations and triggers to suit a variety of campaign strategies.
Creating a Dynamic Countdown Timer
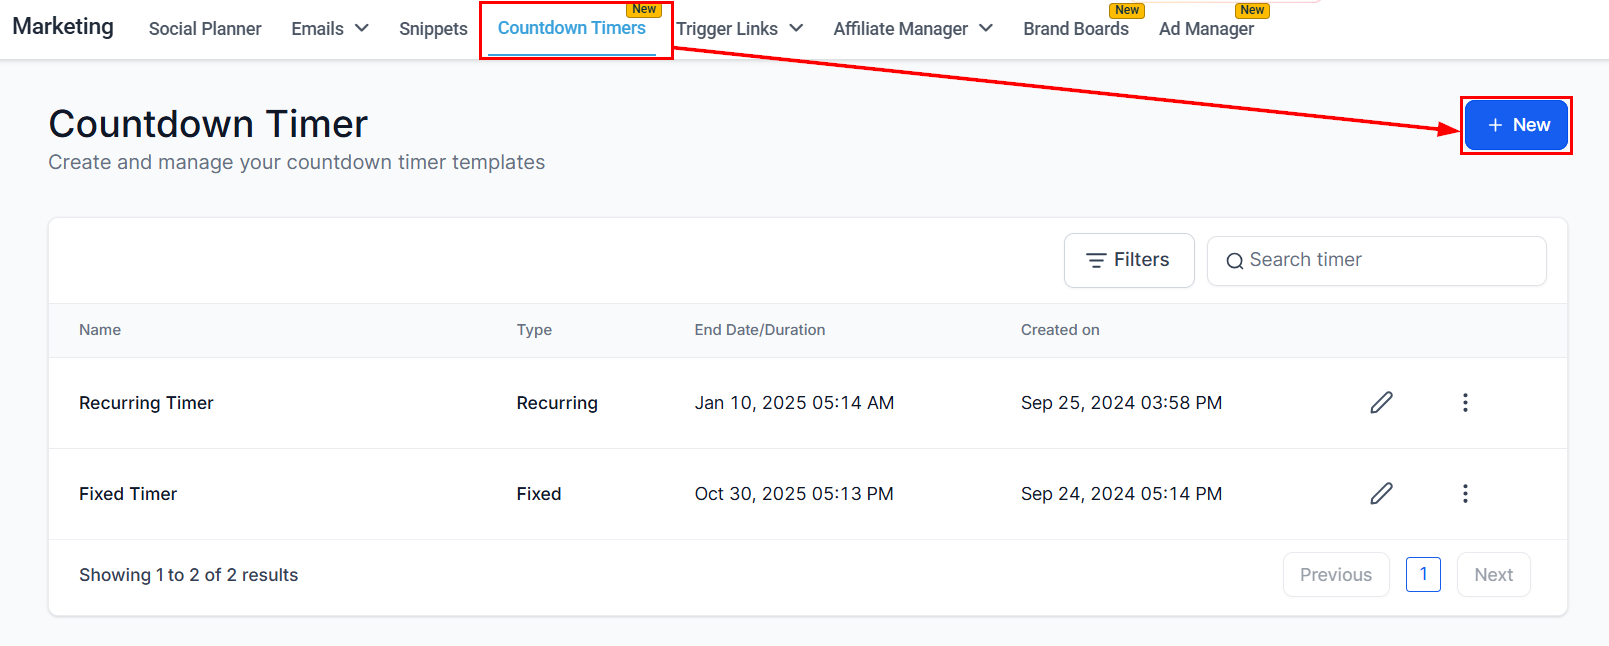
Navigate to Marketing > Countdown Timers and click “New” to begin creating a new timer.
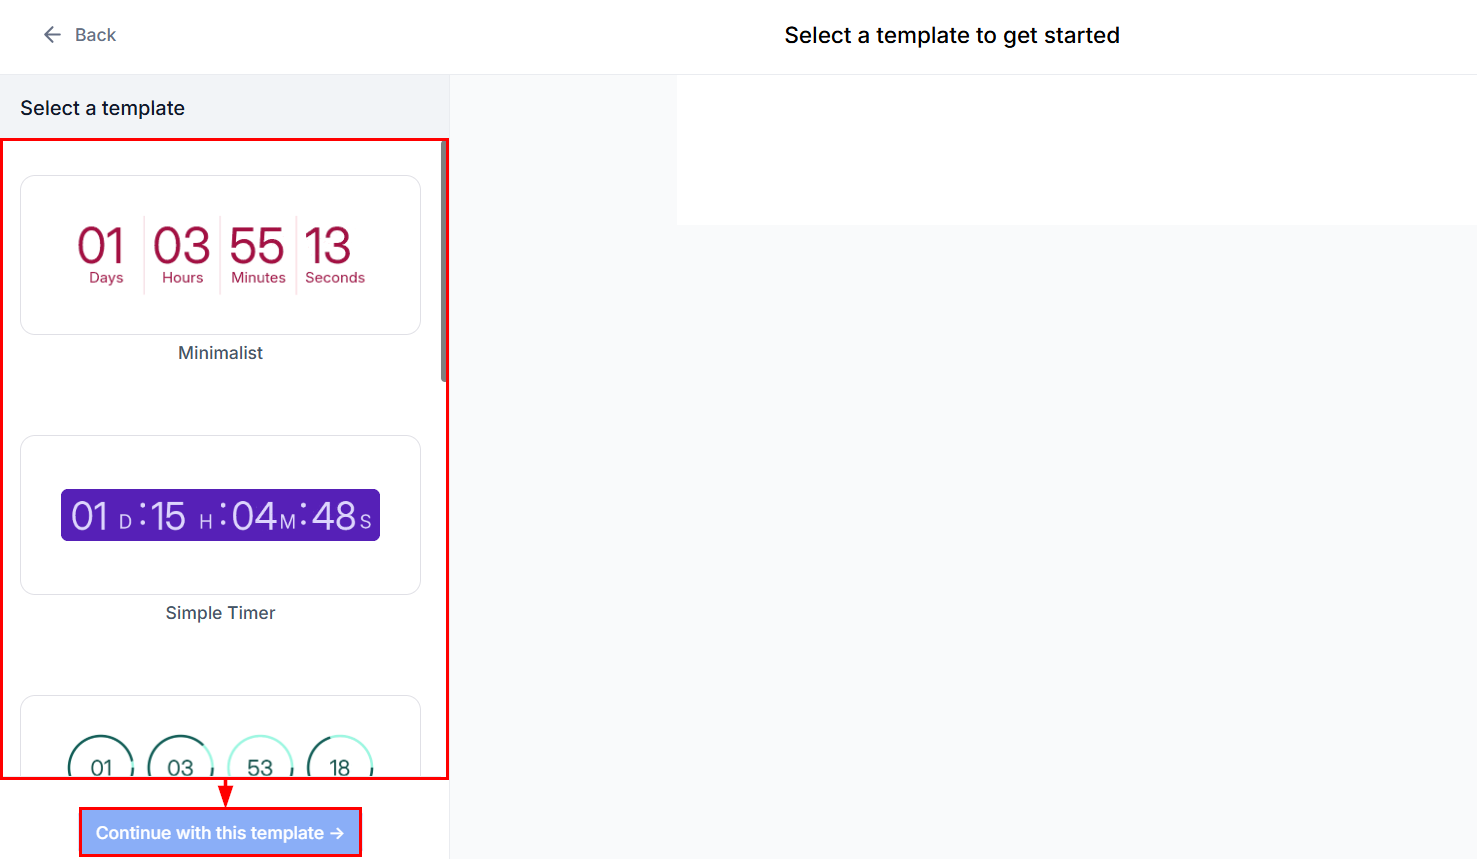
Choose a template for your timer from the available options.
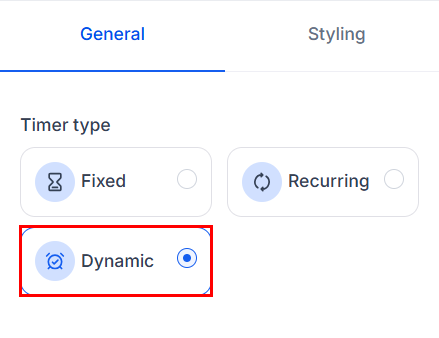
General
Choose “Dynamic” within the Timer type section.
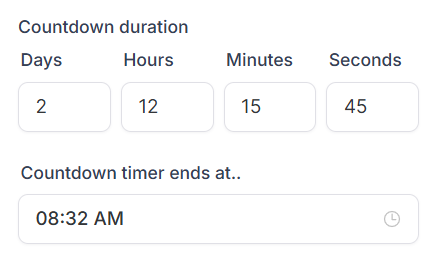
Define the timer’s duration (e.g., 2 hours) and specify the exact end time, if required.
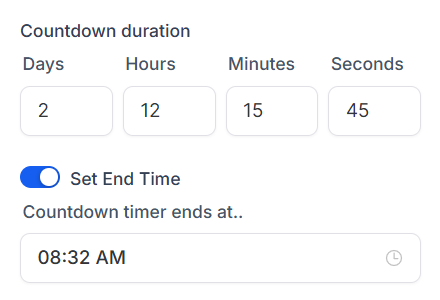
The “Countdown Timer Ends at” option ensures that the timer concludes at a specific, fixed time. This creates a more authentic and consistent time-sensitive experience for your contacts.
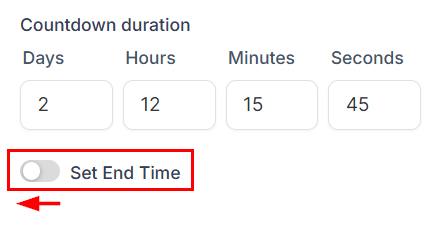
If you prefer having the timer end after a set duration from when the email is opened, disable the “Set End Time” option.
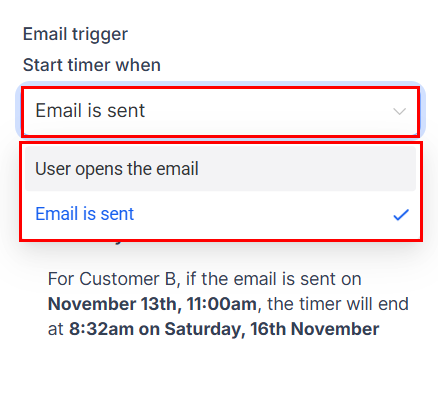
Next, choose whether the timer should begin when the email is sent, or opened from the email trigger dropdown.
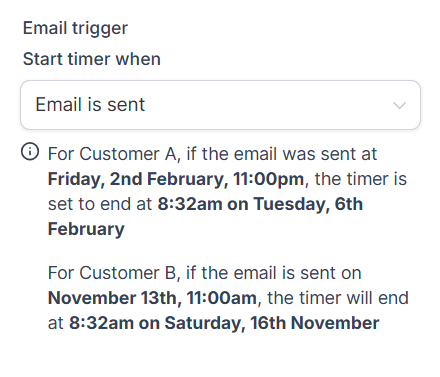
Refer to the dynamic helper text below the email trigger dropdown for confirmation of the timer behavior.
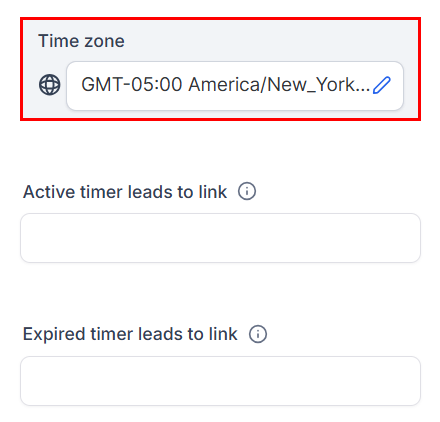
Next, select the time zone the timer should adhere to.
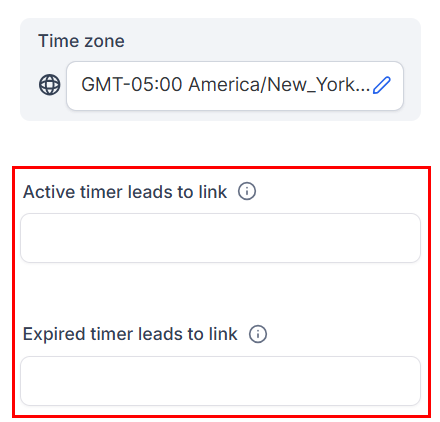
The final step in this section is to add the links users should be redirected to when the timer is active or expired.
Styling
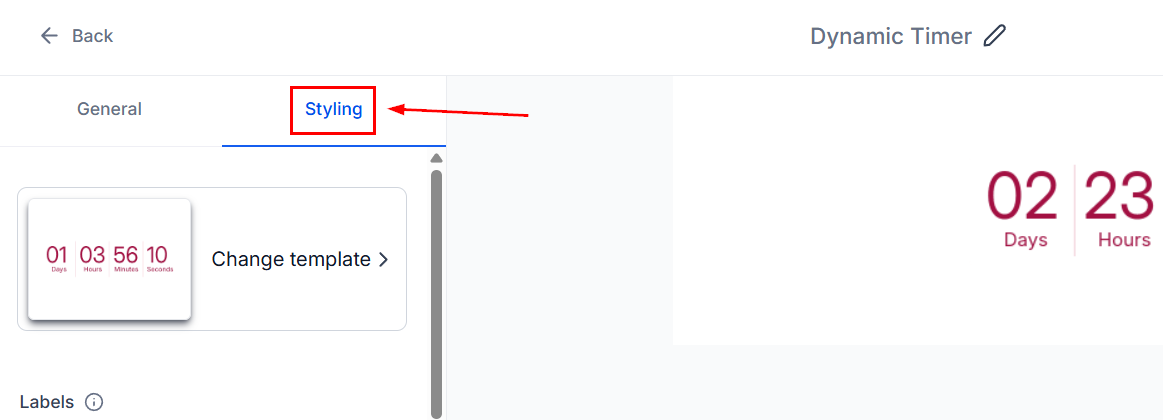
Head to the Styling tab to adjust the timer’s appearance to match your email’s branding and style.
This includes:
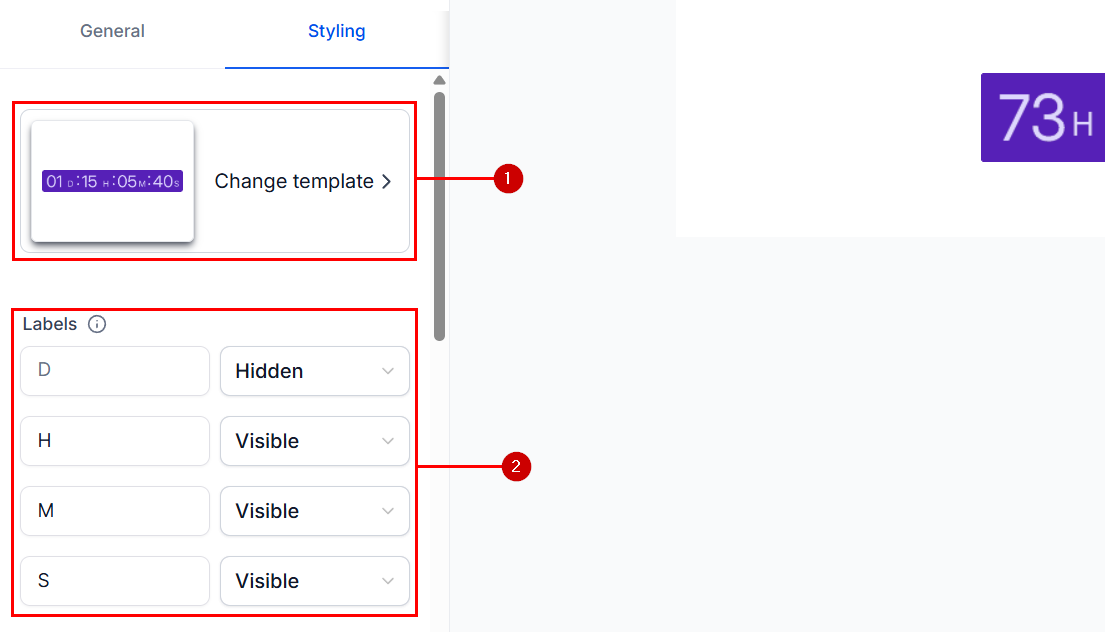
- Adjusting the template used for the timer.
- Choosing which timer labels (seconds, minutes, hours, days) to display.
- Editing the font styles used in the timer.
- Adjusting the corner radius of the timer.
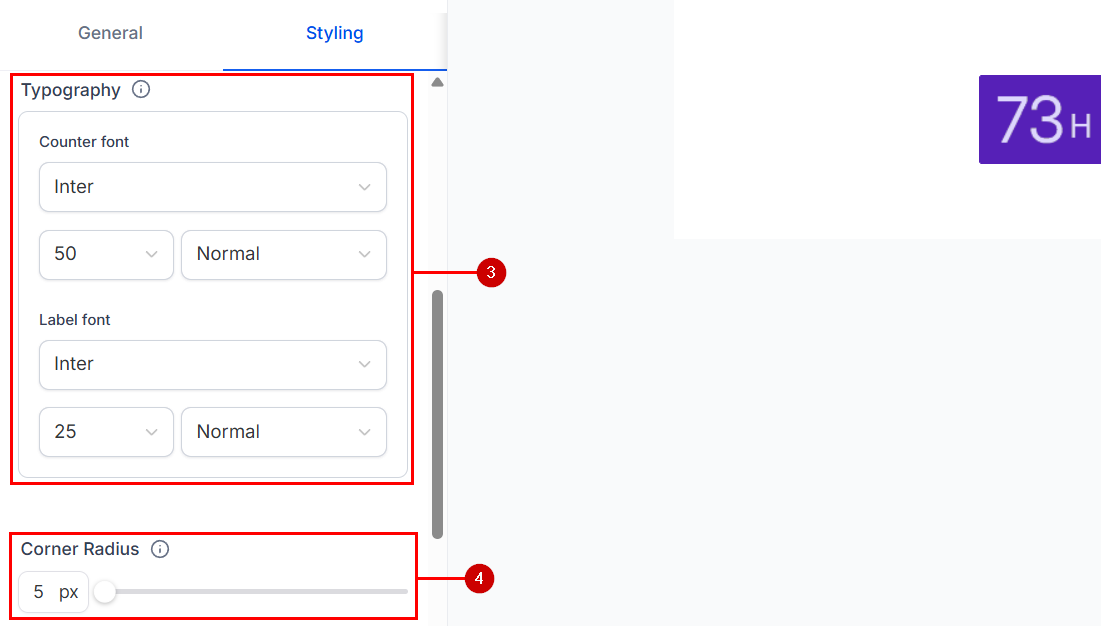
- Editing the colors used in the timer.
- Replace the timer with a chosen image in your emails when it expires.
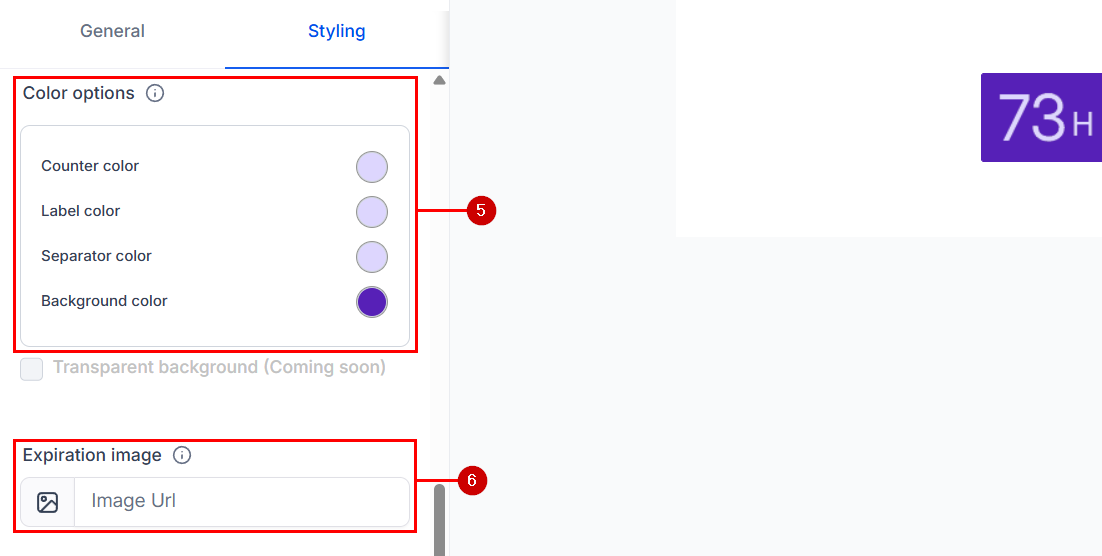
- Adjusting Margin and Padding settings for the timer.
- Check the box to hide the timer in Apple Mail to prevent showing incorrect countdowns.
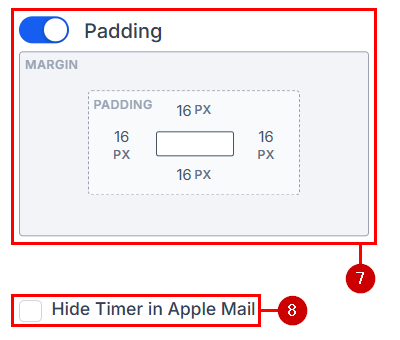
📌Note: You can disable the Padding option if you prefer not to customize the margin and padding.
Give your timer a name for identification, then click “Save” to finalize and activate the countdown timer.
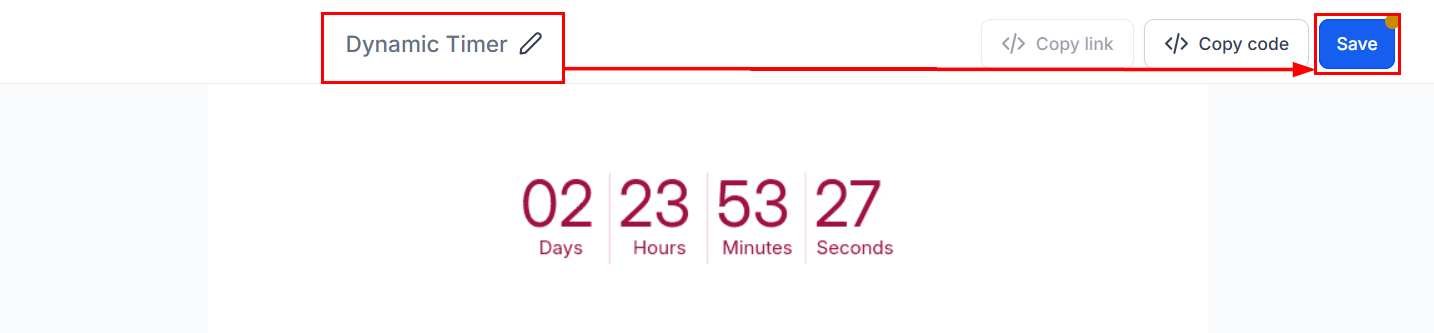
Now you can add this element to your Emails, Websites, and Funnels or click the Copy Code button to copy the custom code of your timer and add it to external sites!
📌Note: A Dynamic Timer can only be used once per contact. It is recommended to clone the timer before using it in multiple tools.
This dynamic feature allows you to create personalized, time-sensitive experiences for each recipient, increasing engagement and driving immediate action based on their specific interaction with your campaign. Start utilizing this feature today to elevate the effectiveness of your time-sensitive promotions and drive better results from your email marketing.
Practical Examples and Use Cases
Birthday Offer (Email Sent Trigger)
Scenario: Send a birthday discount to customers, valid until midnight on their birthday.
How it works:
- Email is sent at 11:59 PM the previous day.
- Timer duration is set to 24 hours, ending at midnight.
Outcome: Each recipient has a full day to redeem their offer from the moment they receive the email.
Black Friday Sale (Email Opened Trigger)
Scenario: Offer a limited-time discount, valid for a minimum of 2 hours after the email is opened.
How it works:
- Email opened triggers the countdown.
- Timer duration: 2 hours minimum, ending at 11 PM the same day.
Outcome:
- Contact A opens at 6 PM—timer ends at 11 PM.
- Contact B opens at 10 PM—timer ends at 11 PM the next day.
Each user has a unique window to claim the offer based on when they engage with the email.
Not a Funnelbud customer yet?
Try our all-in-one CRM for sales and marketing — free for 7 days, no commitment.