How To Import and Export Contacts (Updated)
-
If you’re not an Admin User, you won’t have the ability to import/export contacts.You can adjust your User Settings by visiting__:__ Settings > My Staff > Team Management.
-
Every contact record should have at least one phone number or email address for a successful import. Just listing names won’t work.
-
Each contact needs to have a unique email address. Multiple contacts uploaded under the same email will be treated as duplicates and won’t be imported.
-
FunnelBud accepts comma delimited files only. If you’re using MS Excel from a European country make sure to first change default settings to comma, or just paste everything into Google Sheets instead, before saving as a CSV
-
A .csv file with the contacts you want to import
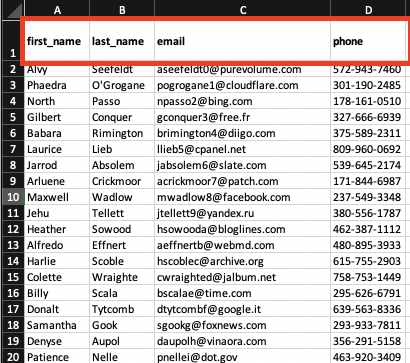
Step 1: Prepare Your .csv File
- Row 1 of the file should have essential headers such as ‘first name’, ‘last name’, ‘email’, ‘phone’, ‘additional phones’, ‘tag’, and so forth.
- When adding multiple phone numbers for a single contact, list them in the “additional phones” column. This feature allows you to manage multiple phone numbers seamlessly.
FunnelBud accepts comma delimited files only. Follow these steps to get a CSV file with commas.
Having trouble uploading a CSV file and mapping the contacts? This may be because your data is separated by semicolons instead of commas.
How to change the delimiter to comma before uploading into FunnelBud
- Open Google Sheets (sheets.new). If you don’t have a Google account, you can use a free Gmail email to sign up.
- Copy and paste everything from your Excel File (.xls) into Google Sheets
- Go to File > Download > Comma Separated Values (CSV). This will download a csv file in the correct format that you can now upload into FunnelBud
Step 2: Import Your Contacts
- Two options exist for adding contacts:
- Manually create a contact by clicking the “+” sign in the top left corner.
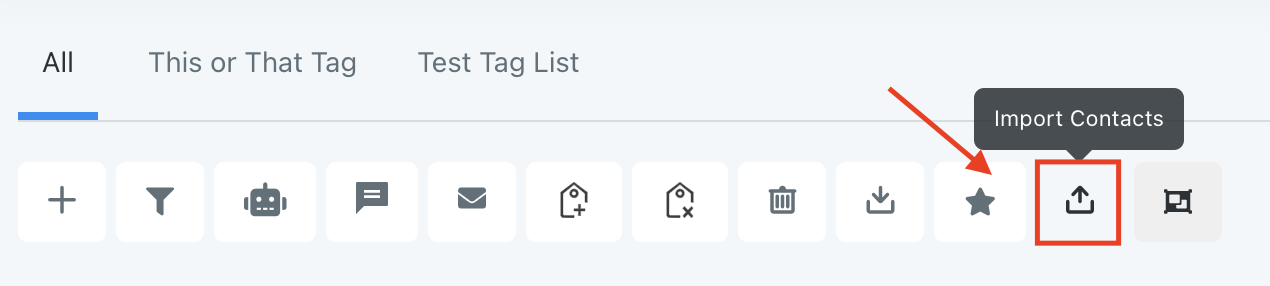
- Or, use the import icon (an upward-pointing arrow) to introduce contacts via your .csv file. Choosing “Import Contacts” lets you batch-import, which is both time-efficient and effective.
-
If the Import/Export icons are not visible, ensure that a user profile has been created under Settings —> Team Management. Need help? Please Contact Support.
-
Upon selecting ‘Import Contacts’:
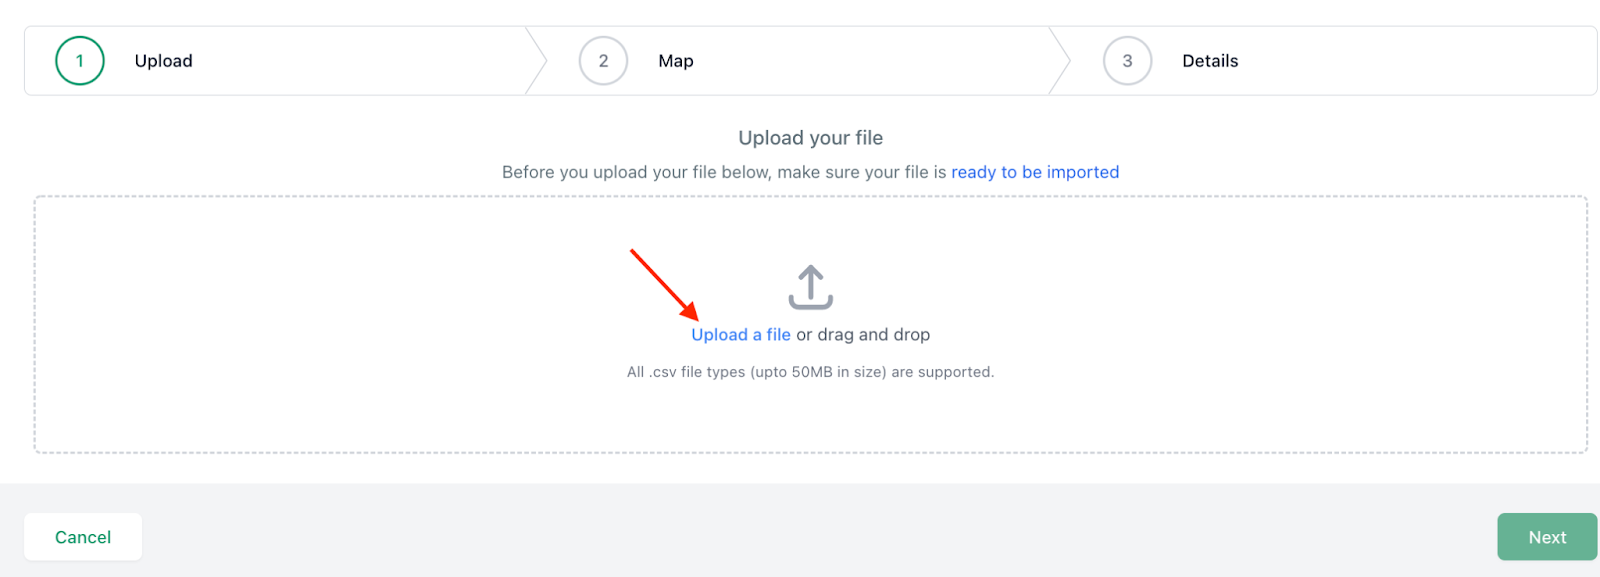
- Click “Upload a file” or use drag-and-drop.
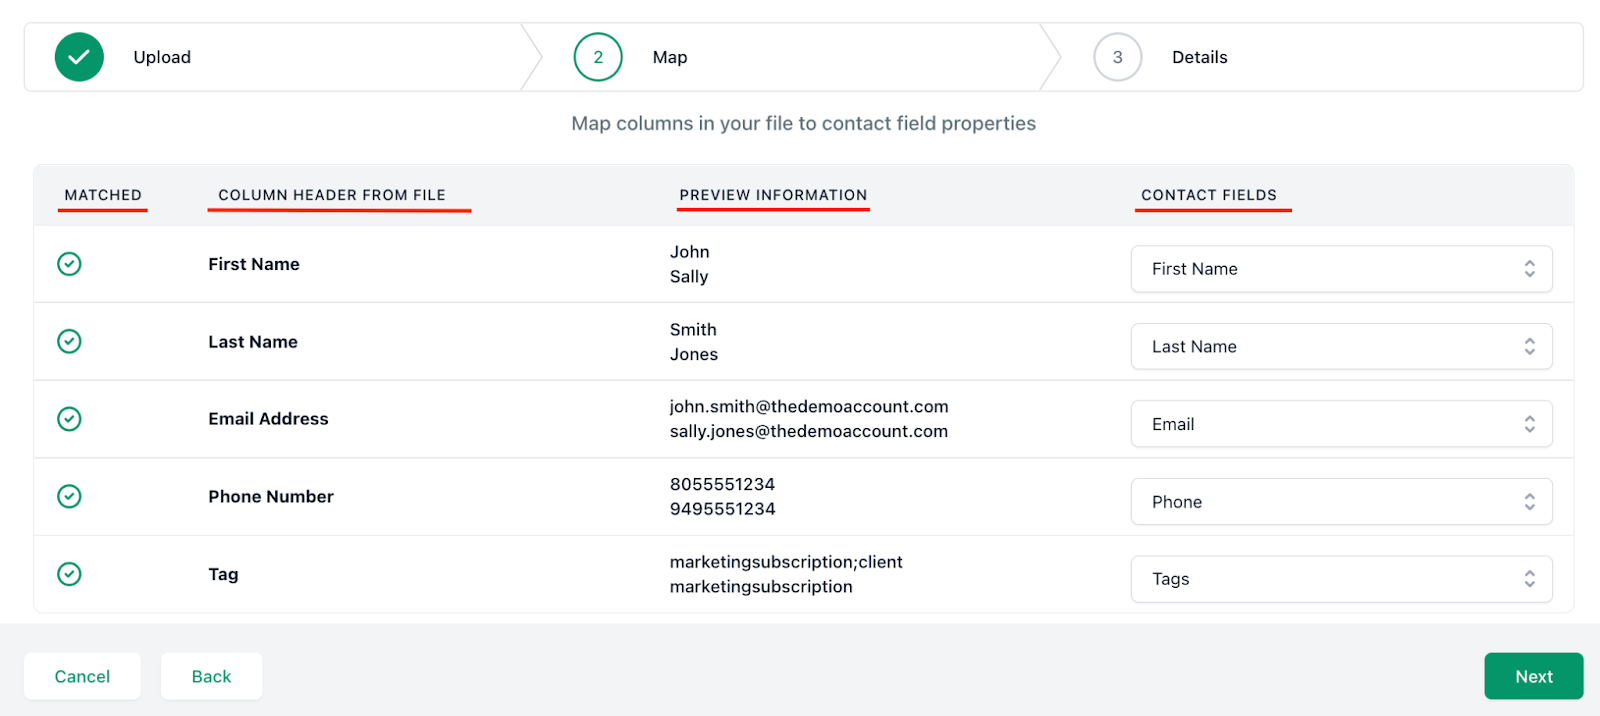
- Map fields to specify how the data will fit into FunnelBud’s fields.A green check indicates a ready-to-import field.”Column Header From File” denotes which .csv column gets imported.”Contact Fields” indicates the target field in FunnelBud. Most general fields are automatically recognized. Manual mapping might be necessary for custom fields or unconventional headers.The “Additional Phones” column can be mapped for importing multiple phone numbers. Separate them using commas, slashes, or semicolons alongside the primary “Phone” number column.For multiple emails, separate them and map them to the “Additional Emails” field.
- A green check indicates a ready-to-import field.
- “Column Header From File” denotes which .csv column gets imported.
- “Contact Fields” indicates the target field in FunnelBud. Most general fields are automatically recognized. Manual mapping might be necessary for custom fields or unconventional headers.
- The “Additional Phones” column can be mapped for importing multiple phone numbers. Separate them using commas, slashes, or semicolons alongside the primary “Phone” number column.
- For multiple emails, separate them and map them to the “Additional Emails” field.
Note: Common Error when Importing Contacts
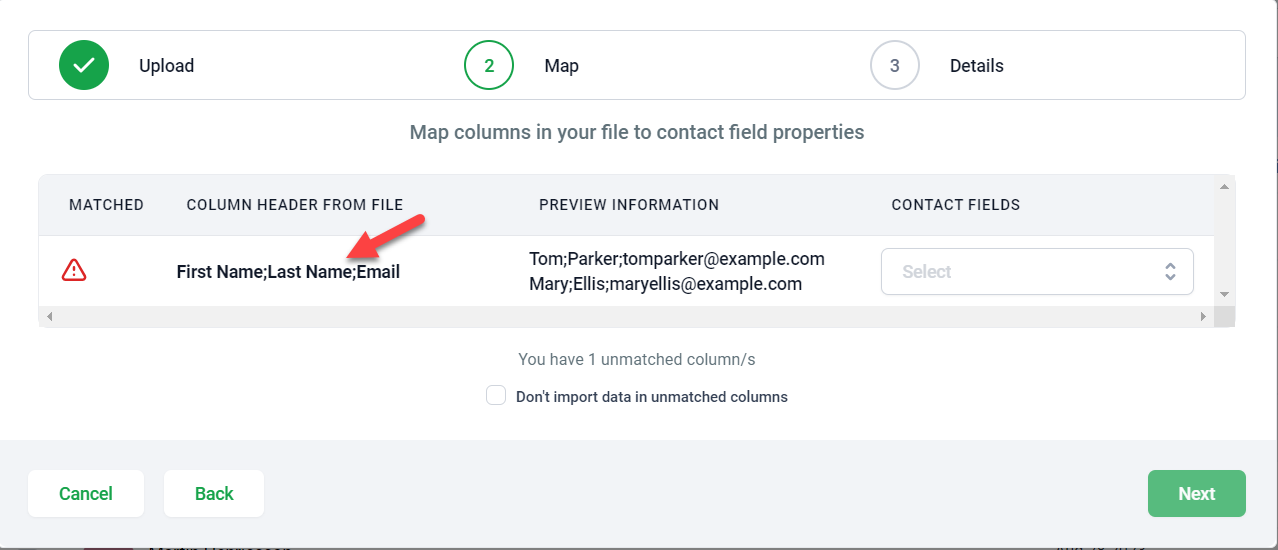
If you’re list gets uploaded as shown in the example below, then it’s likely that there is a formatting issue. For instance, the CSV file was saved using semi-colon delimiters instead of commas. The solution is to use Google Sheets or change your MS Excel settings so that all future CSV files get saved using commas. This article explains how you can do that: How to change Excel CSV delimiter to comma or semicolon
- Proceed to tab 3:
- Assign an import name or let FunnelBud default to a date-time format.
- Opt to create a “Smart List” for these contacts, if desired.
- Under the “Advanced” tab, you can:Decide on a strategy for duplicates.Add tags or decide the criteria for identifying duplicates.Activate the “Add to Workflow/Campaign” option if needed.Validate emails (charges might apply).
- Decide on a strategy for duplicates.
- Add tags or decide the criteria for identifying duplicates.
- Activate the “Add to Workflow/Campaign” option if needed.
- Validate emails (charges might apply).
- Finalize by clicking ‘Submit’.
Step 3: Validate the Import
- Refresh the Contacts page.
- Navigate to Contacts > Bulk Actions to verify the import’s status and details.
- You can click the three dots under Actions, and select “Show Error Log” in case you want to check why some contacts were not imported.
Not a Funnelbud customer yet?
Try our all-in-one CRM for sales and marketing — free for 7 days, no commitment.